Start Usage
Step 1: Create a Bonic.ai Account
To begin using your BonicBot A2, you must create a Bonic.ai account that will later be linked with your robot.If you are registering on behalf of a company or institution, please contact our designated contact person. They will create your account.
Go to Bonic.ai → https://bonic.ai/login Click Sign Up and register using:
- Email and Password, or
- Google Sign-In
After creating your account, send an email to:
Request them to link your BonicBot A2 to your Bonic.ai profile.
Step 2: Verify Your Robot in the Bonic.ai Dashboard
Once the admin links your bot:
- Log in to Bonic.ai
- Open the Dashboard
- Navigate to My Robots Your assigned BonicBot A2 will be visible here.
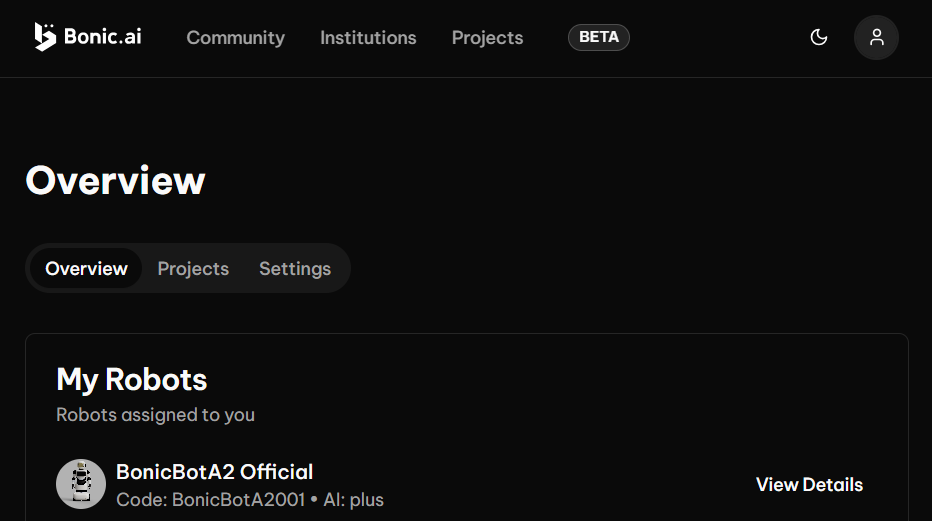
Tap View Details on the corresponding bot to see its full profile.
Add Robot Instructions
Inside the robot profile, open the Instructions tab. This is where you can add and update instructions that define robot behaviour, movement logic, responses, and interaction styles.
Step 3: Install the BonicBot Mobile App
After your Bonic.ai account is active and your robot is linked:
- Go to the Google Play Store (Coming soon on Apple App Store)
- Download and install: BonicBot – Robot Controller
- Log in using the same email ID used on Bonic.ai.
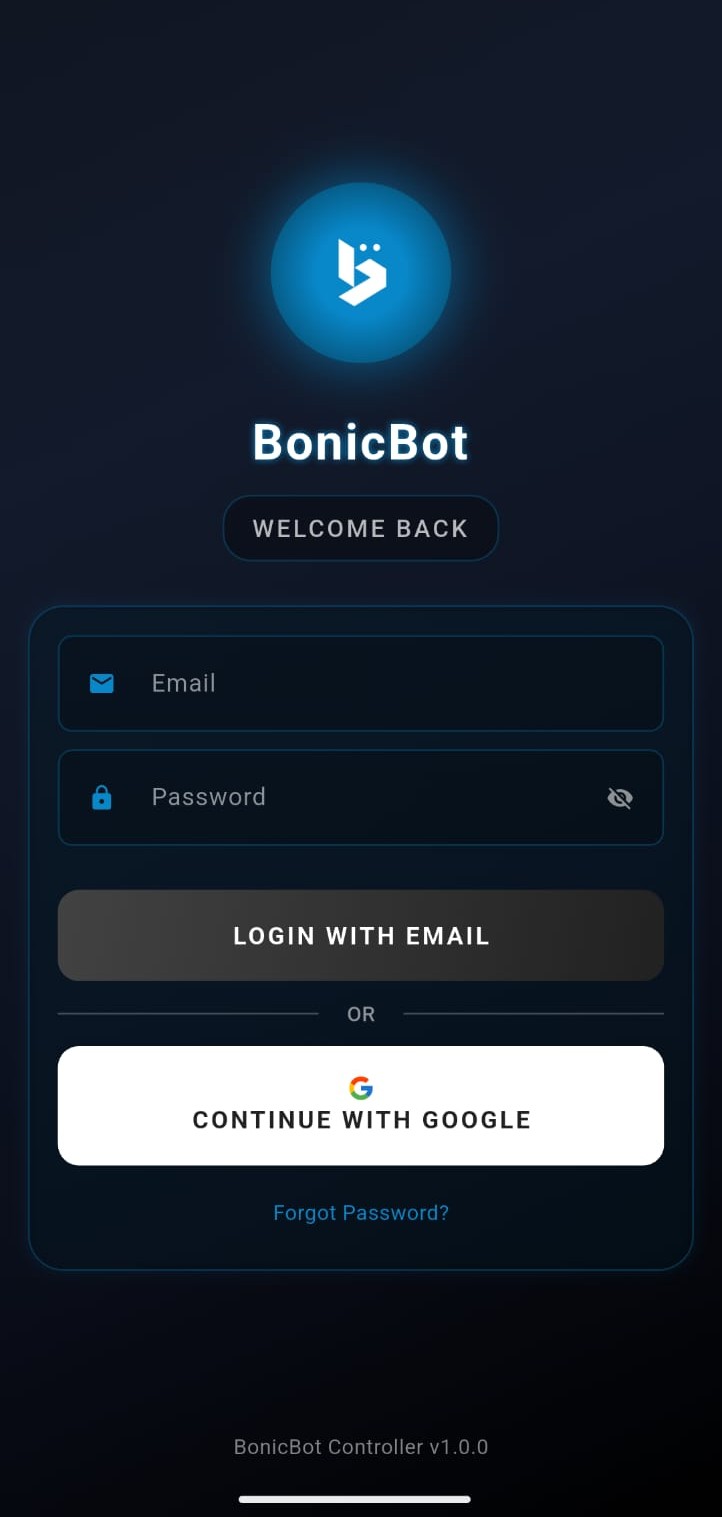
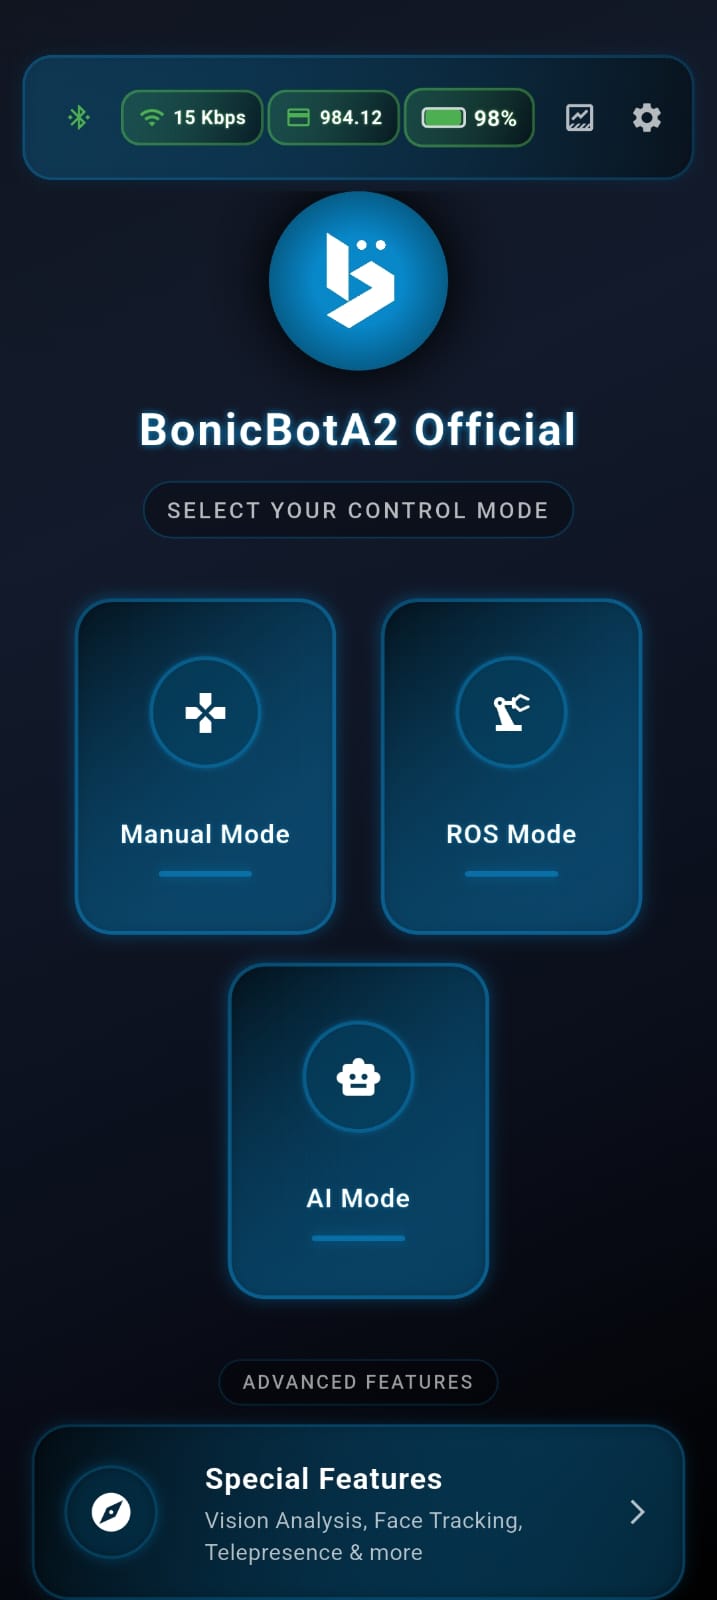
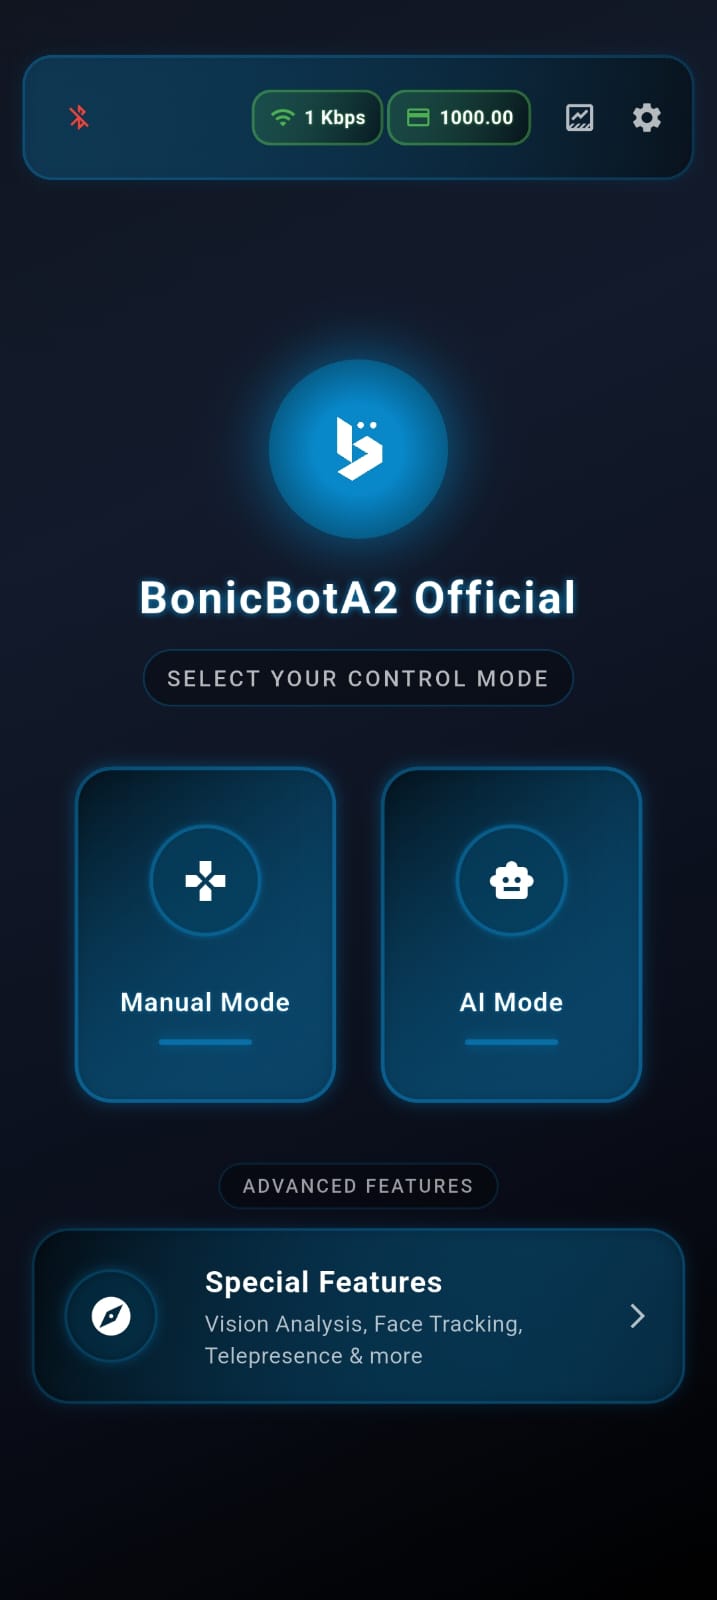
Once logged in, you will see the Robot Selection page.

Then you will be directed to the Home Page, where all robot control features are available.
Step 4: Turning the Robot On and Off
4.1 Turning On the Robot
Follow these steps to power on your BonicBot A2:
- Activate the Emergency Switch Rotate the emergency switch at the bottom of the robot in a clockwise direction until the red button is pulled out (standard emergency switch activation mechanism).
- Power On the Robot Press and hold the push button on the upper side of the back portion of the robot until the ring light turns on.
You will see the display turn on and hear a voice from the speaker confirming that the robot is powered on.
4.2 Turning Off the Robot
Follow these steps to safely power down your BonicBot A2:
- Initiate Shutdown Press and hold the push button until the ring light starts blinking.
- Deactivate Power Press the emergency switch to kill the power.
Important: Do not directly kill the power by pressing the emergency switch unless it is an actual emergency situation. Always follow the proper shutdown sequence to avoid potential damage to the robot’s systems.
Step 5: Connect the Bot to the App
Follow these steps to connect your phone with BonicBot A2:
- Ensure the robot is powered on
- Enable Bluetooth on your smartphone
- In the app, open the Bluetooth section
- Pair your device with the robot
Step 6: Calibrate Your Robot
Calibration ensures that all arm and head servo positions are aligned correctly.
6.1 Power On and Connect
- Turn on your BonicBot A2
- Open the BonicBot Mobile App
6.2 Open Calibration Settings
- Go to Settings -> Calibration -> Calibrate Servos
- Tap Begin Calibration
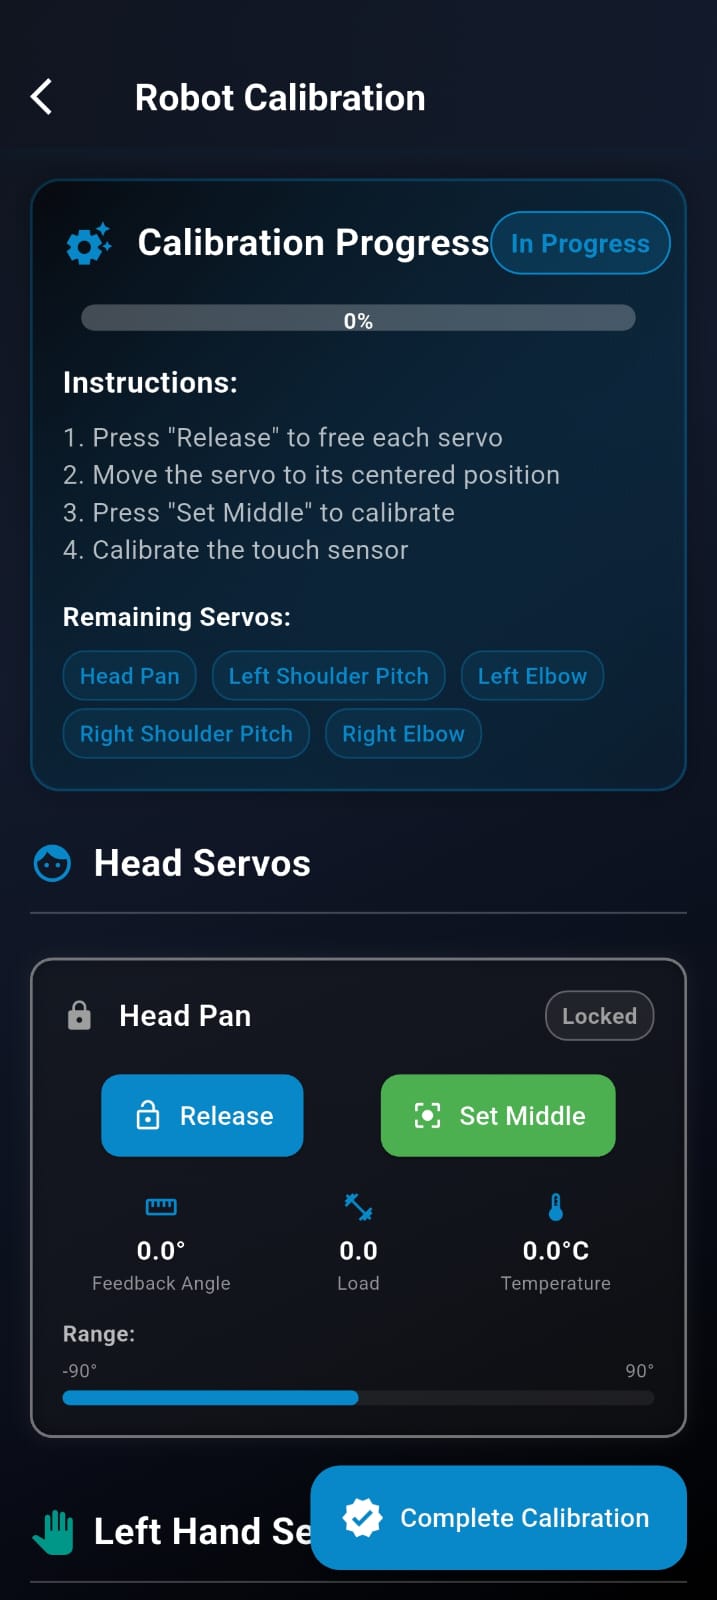
6.3 Release All Servos
- Tap Release so all joints move freely
- Manually adjust all joints to neutral posture
- Keep arms straight and head centered
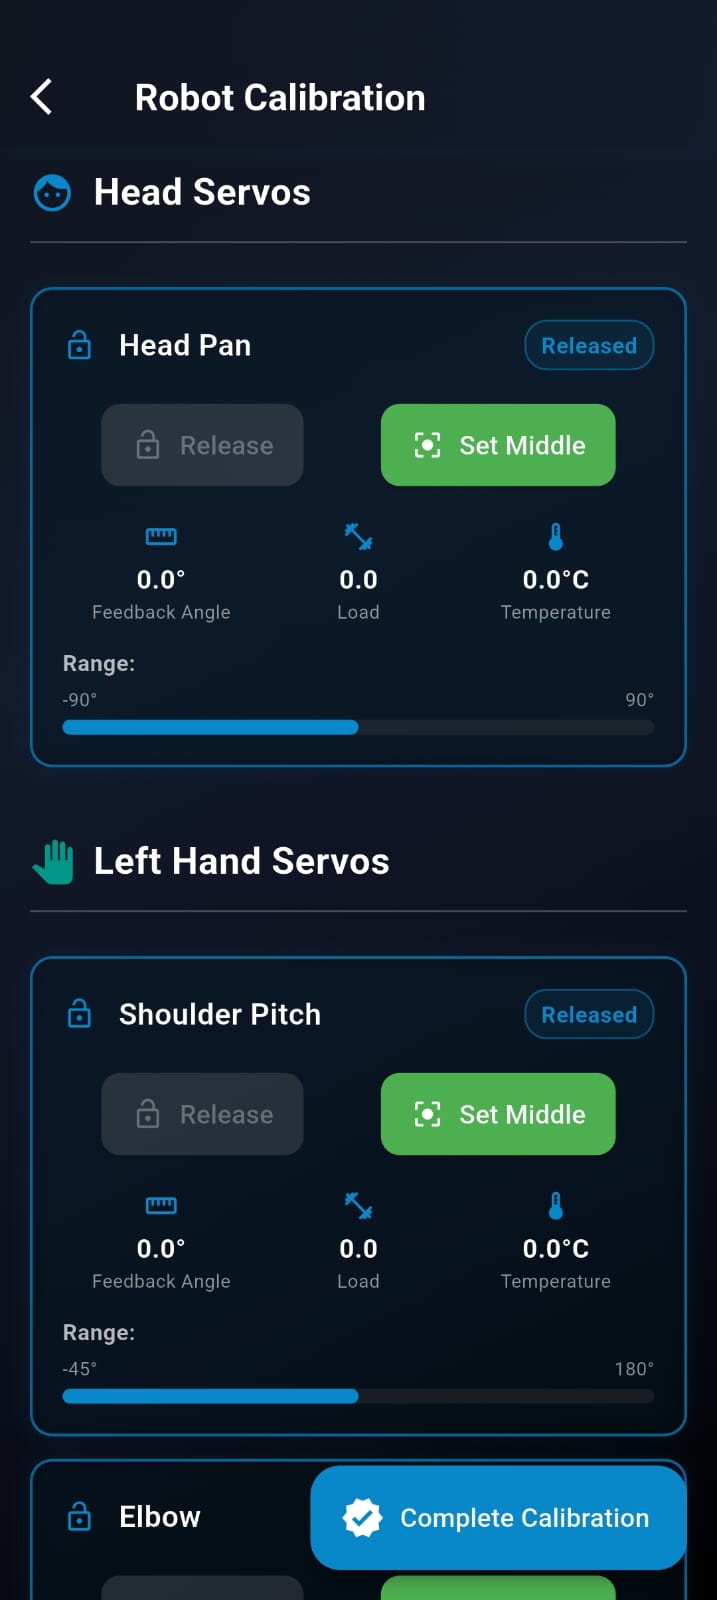
6.4 Final Calibration
- Tap Set Middle to set the reset position of the servo motors
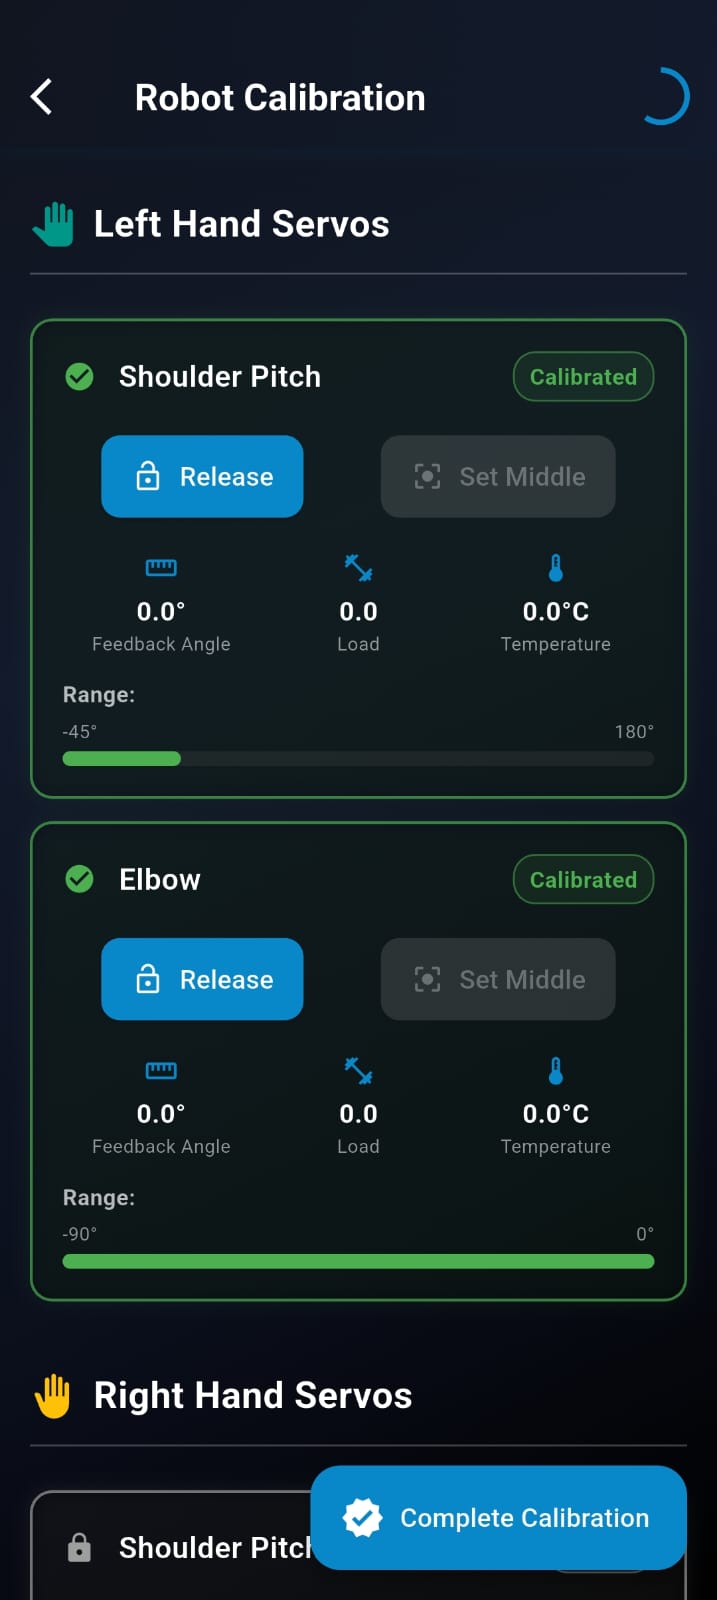
- Tap Complete Calibration to complete the setup process.
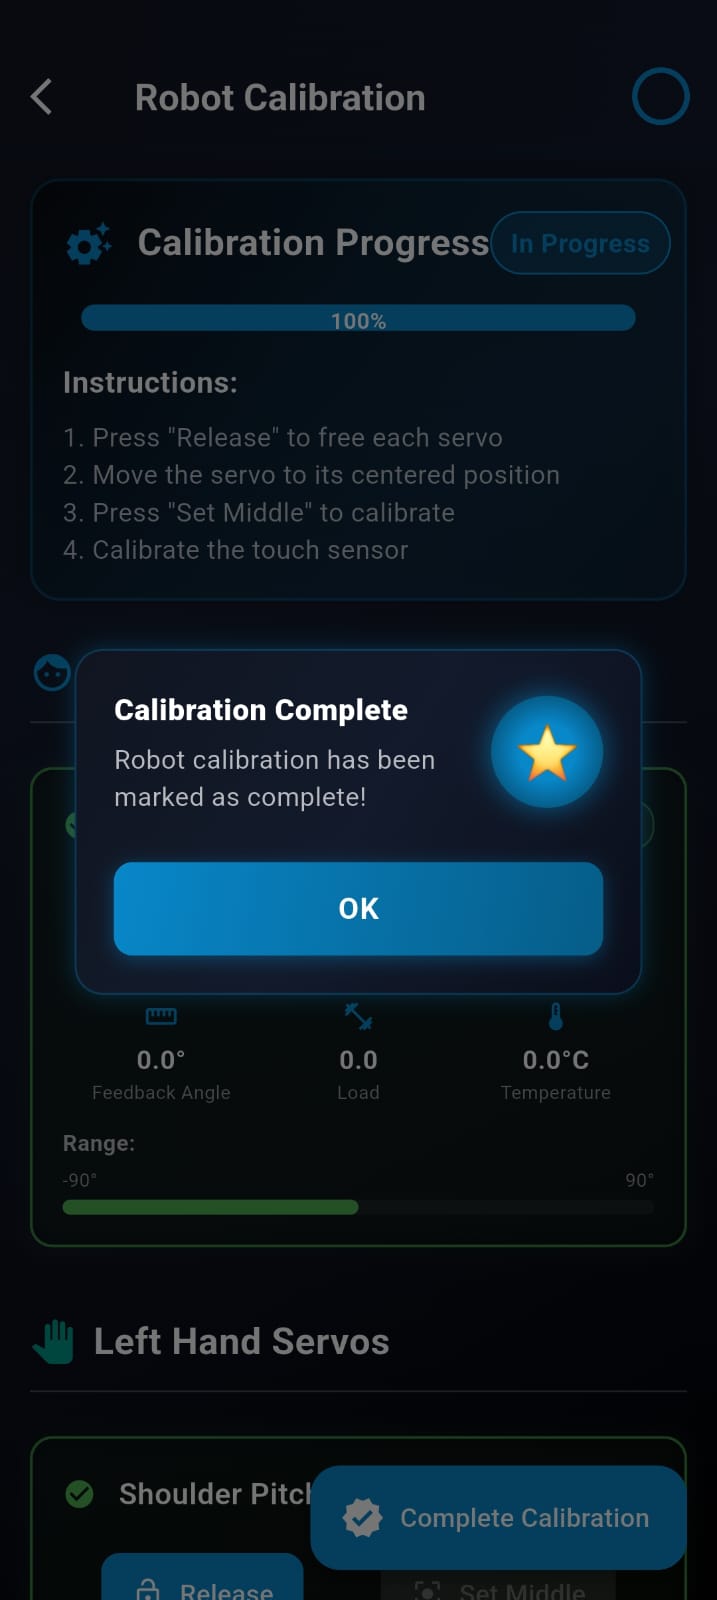
Then the robot will save this as neutral posture.
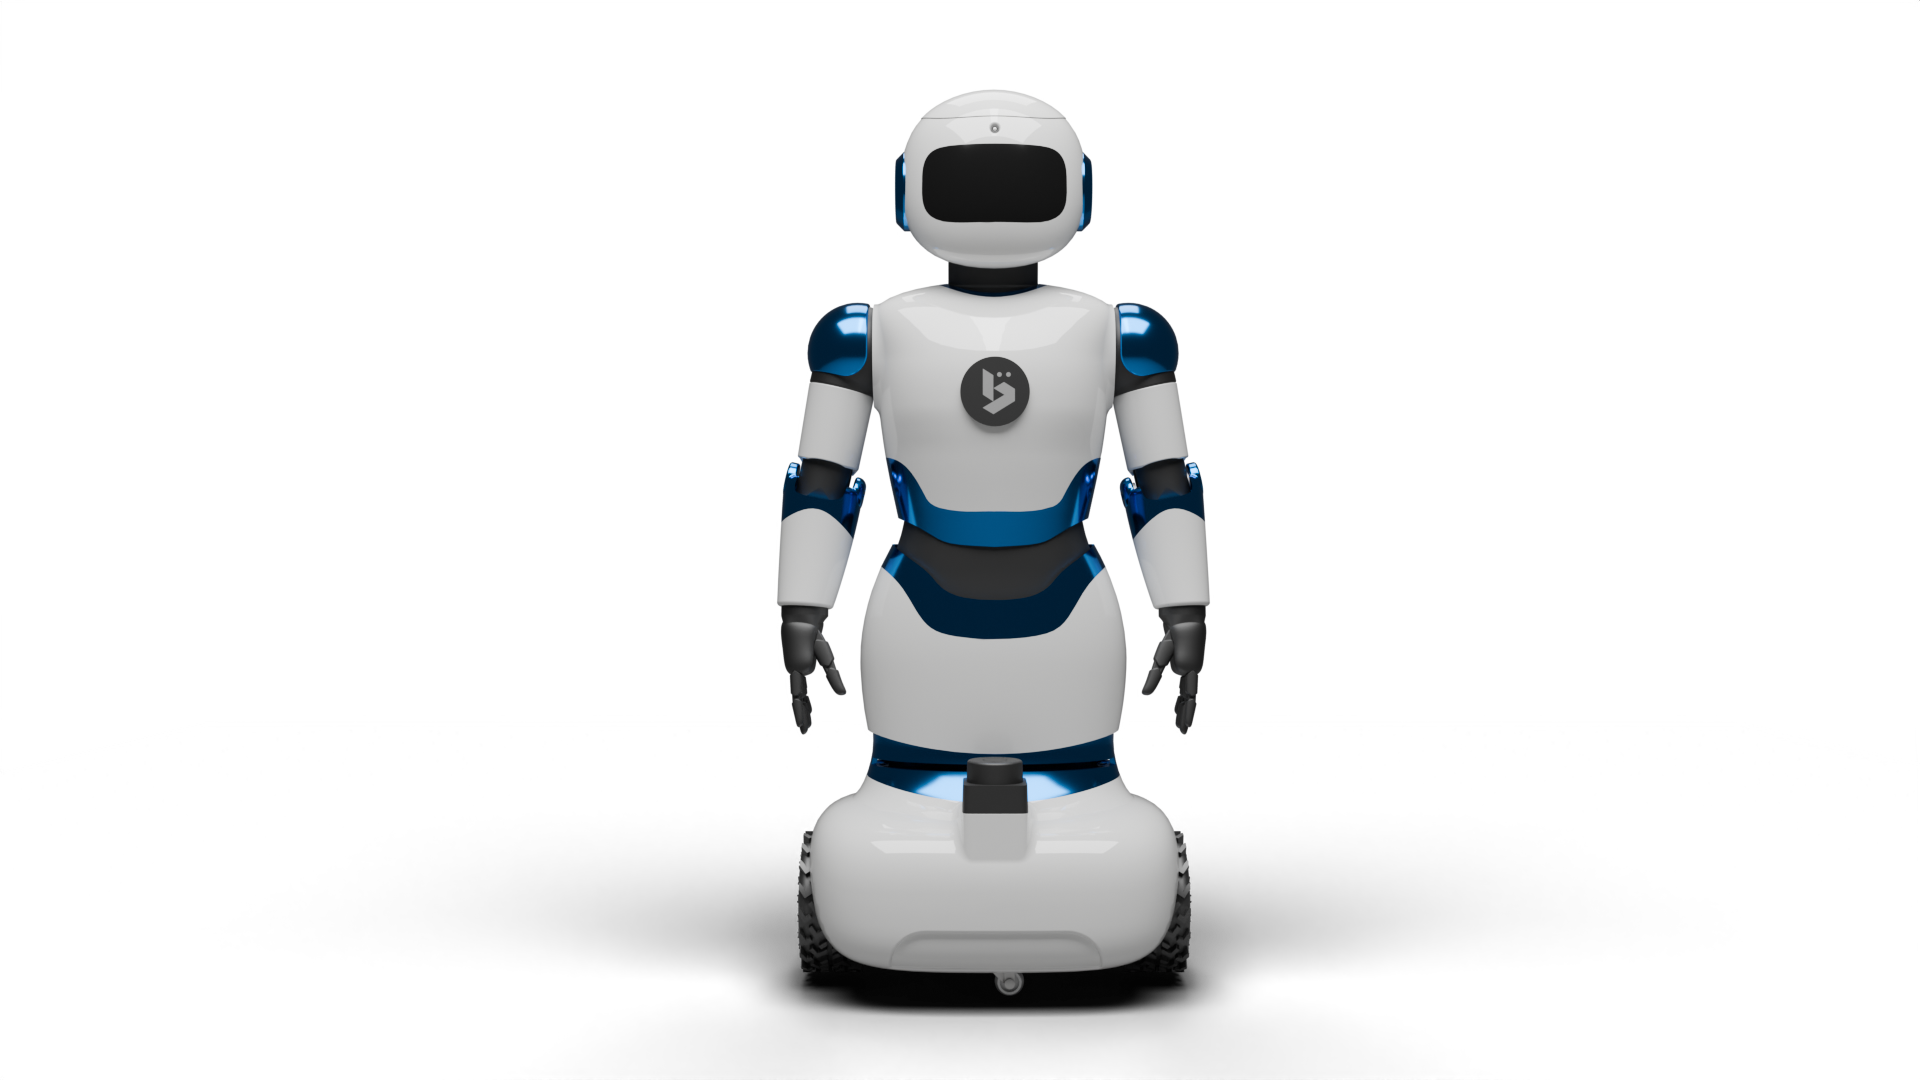
Figure: Calibrated BonicBot A2
Step 7: Test Your Robot
After calibration, verify robot movement and functionality through Manual Mode or AI Mode.
7.1 Manual Mode
Manual Mode allows you to validate motion control of wheels, arms, and head.
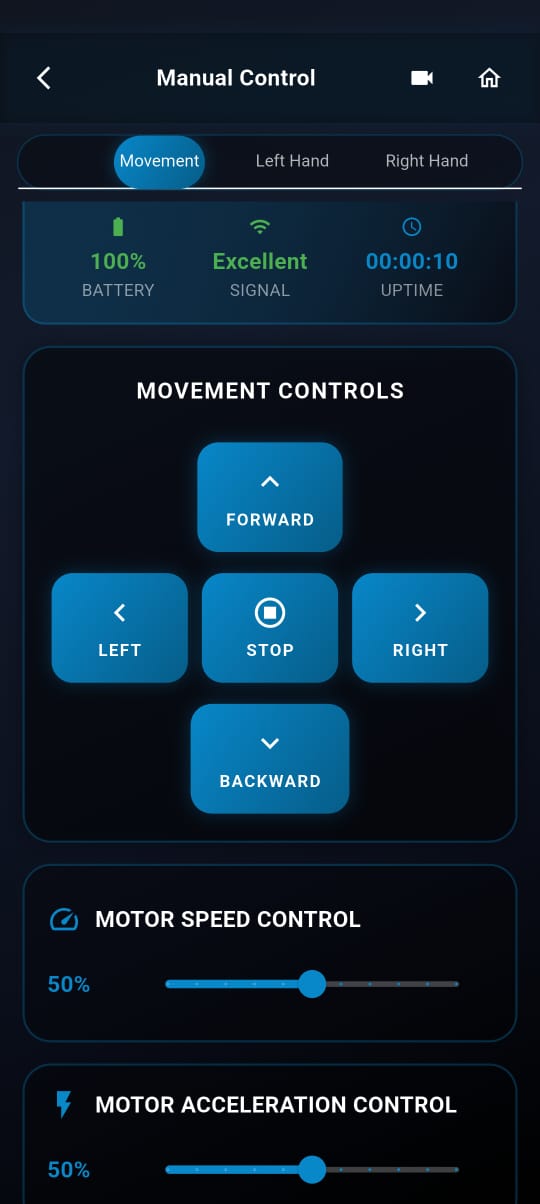
7.1.1 Wheel Movement
- Forward
- Backward
- Left Turn
- Right Turn
- Stop
Increase acceleration gradually for smoother movement.
7.1.2 Arm Movement
- Shoulder Pitch
- Elbow Movement
7.1.3 Head Movement
- Head Pan (left ↔ right)
You can adjust Speed and Acceleration for each movement. Increase values gradually for smoother performance.
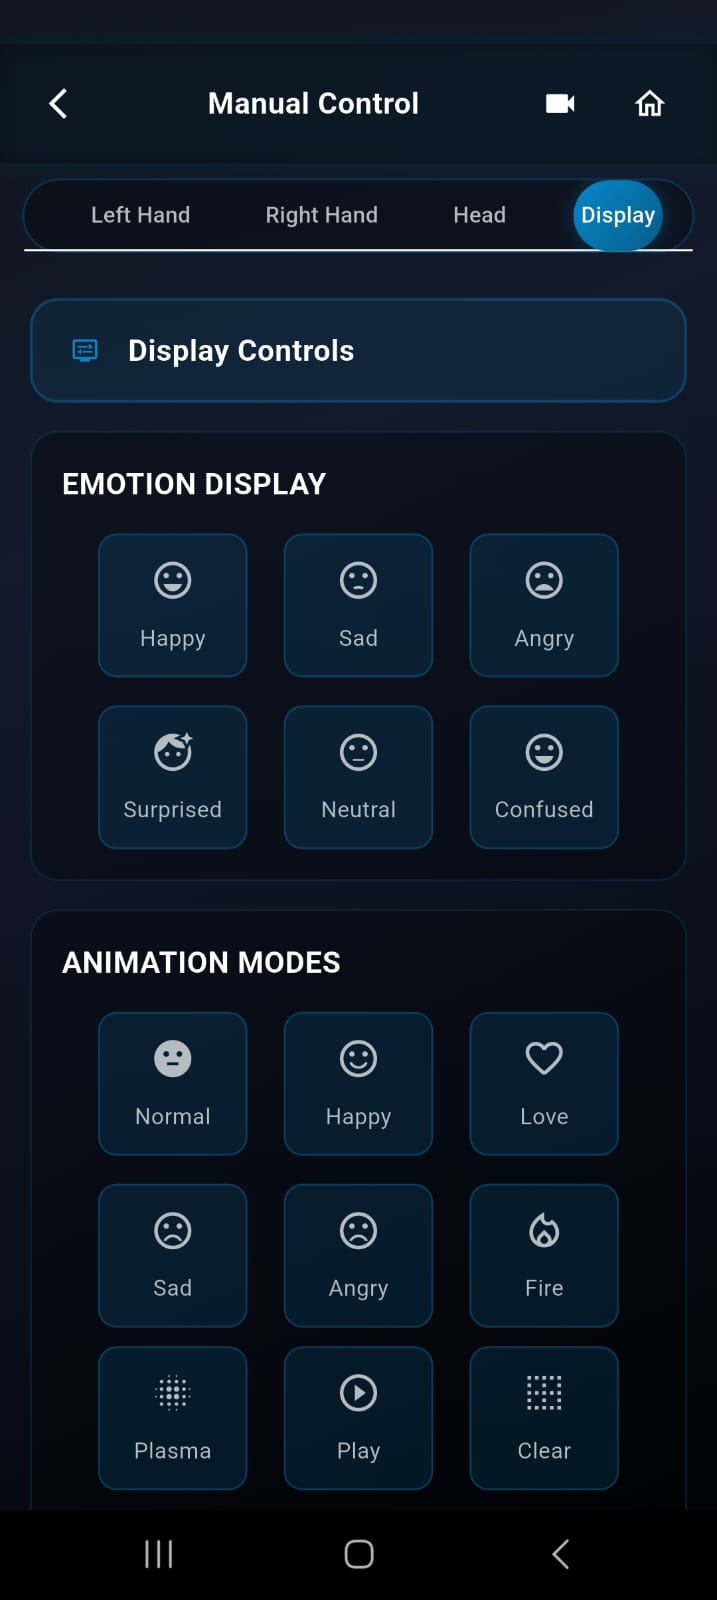
7.1.4 Eye Display
The eye display supports six emotion and animation modes, which can be selected to visually express the robot’s state and interactions.
7.1.5 AI Voice & Function Setup
Set Up AI Voice:
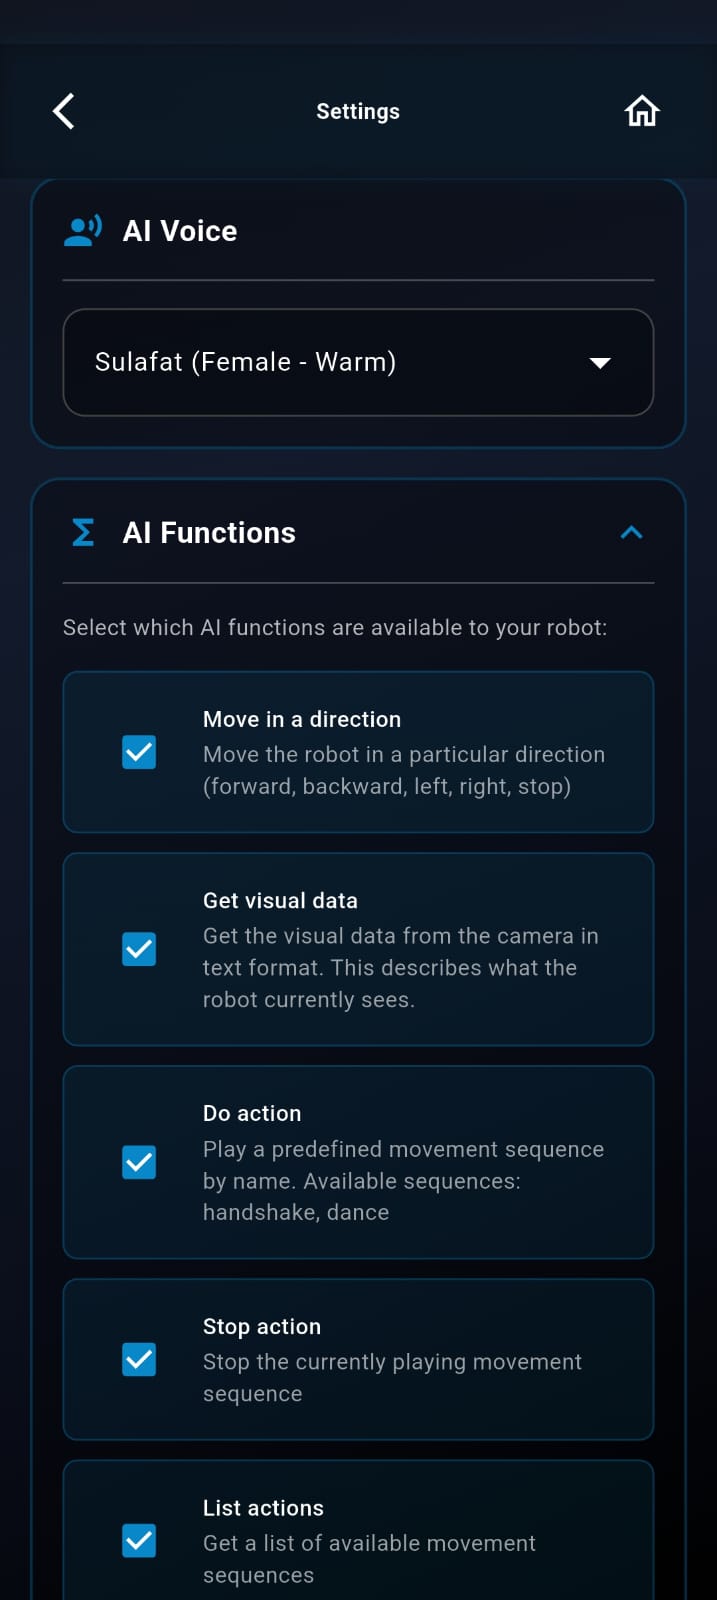
- Go to Settings -> AI Voice
- Select your preferred voice model
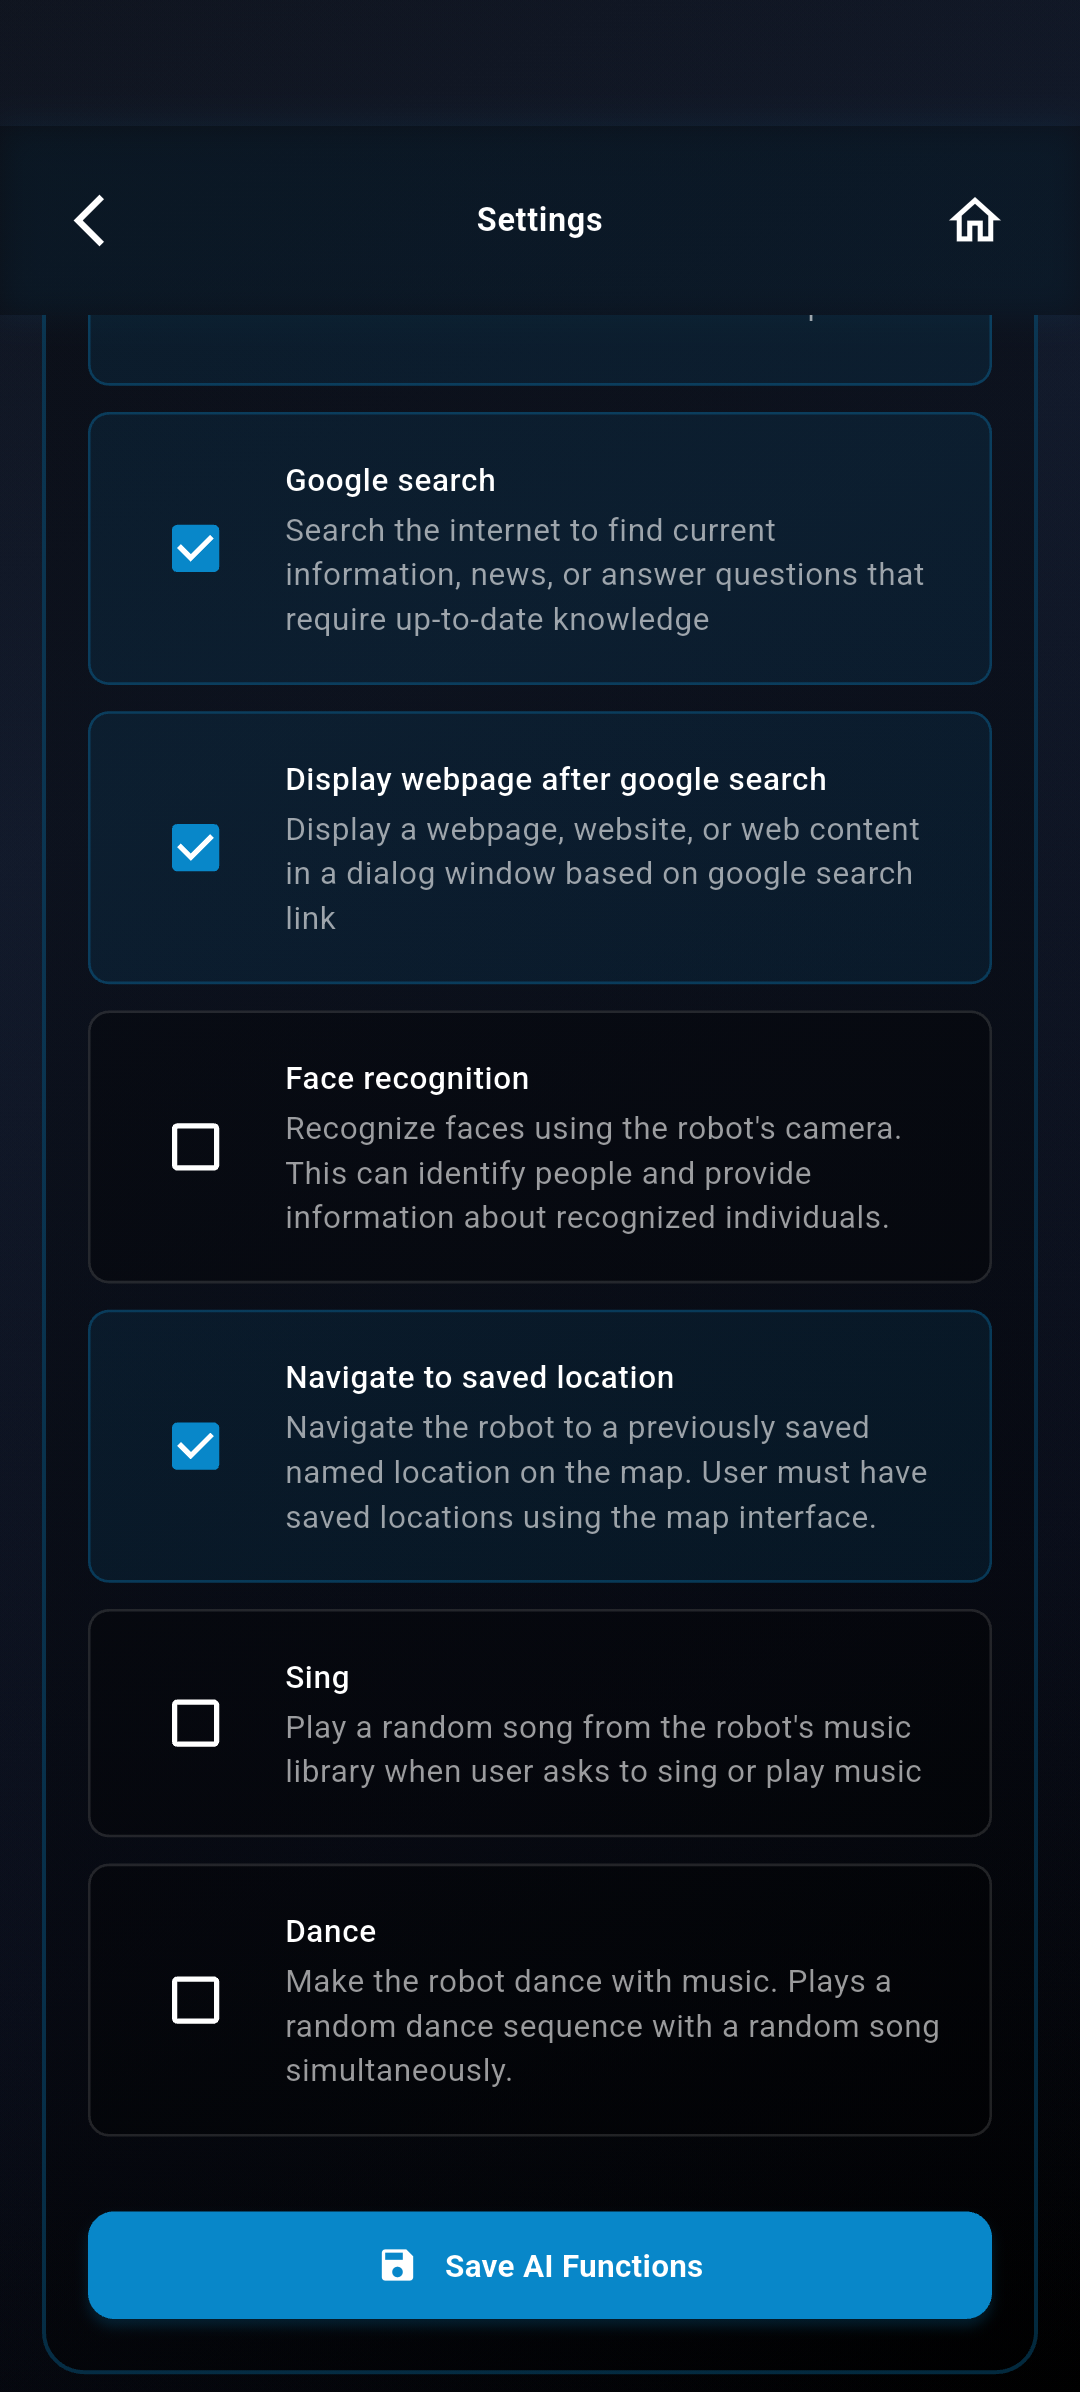
AI Functions
- Go to Settings -> AI Functions
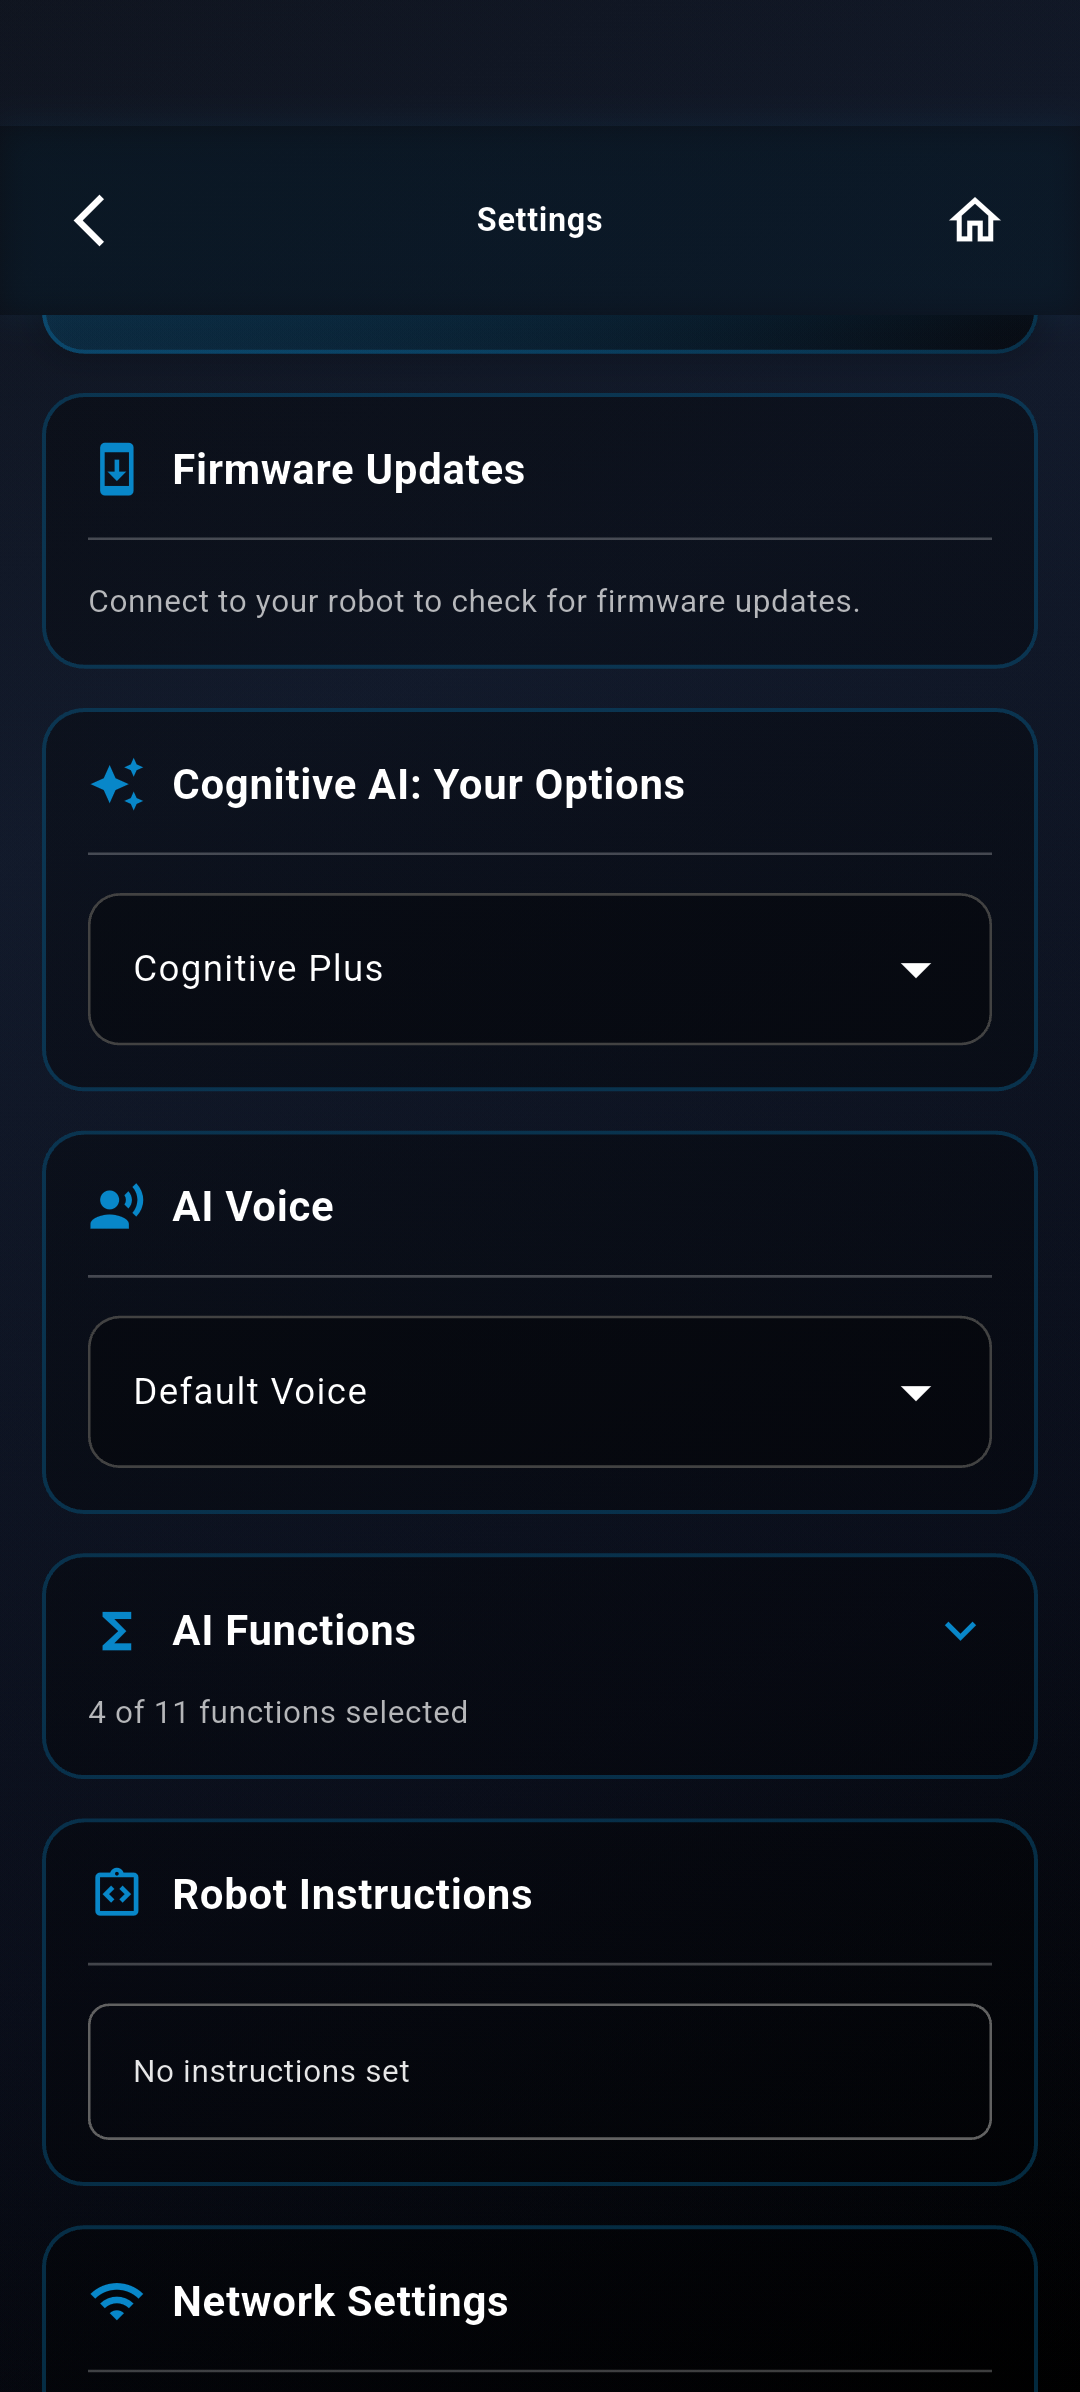
Ensure the following capabilities are enabled depending on your needs:
| Function | Description |
|---|---|
| Move in a direction | Move the robot in a particular direction (forward, backward, left, right, stop) |
| Get visual data | Get the visual data from the camera in text format. This describes what the robot currently sees. |
| Do action | Play a predefined movement sequence by name. Available sequences: pick item, drop item |
| Stop action | Stop the currently playing movement sequence |
| List actions | Get a list of available movement sequences |
| Google search | Search the internet to find current information, news, or answer questions that require up-to-date knowledge |
| Display webpage after google search | Display a webpage, website, or web content in a dialog window based on google search link |
| Face recognition | Recognize faces using the robot’s camera. This can identify people and provide information about recognized individuals. |
| Navigate to saved location | Navigate the robot to a previously saved named location on the map. User must have saved locations using the map interface. |
| Sing | Play a random song from the robot’s music library when user asks to sing or play music |
| Dance | Make the robot dance with music. Plays a random dance sequence with a random song simultaneously. |
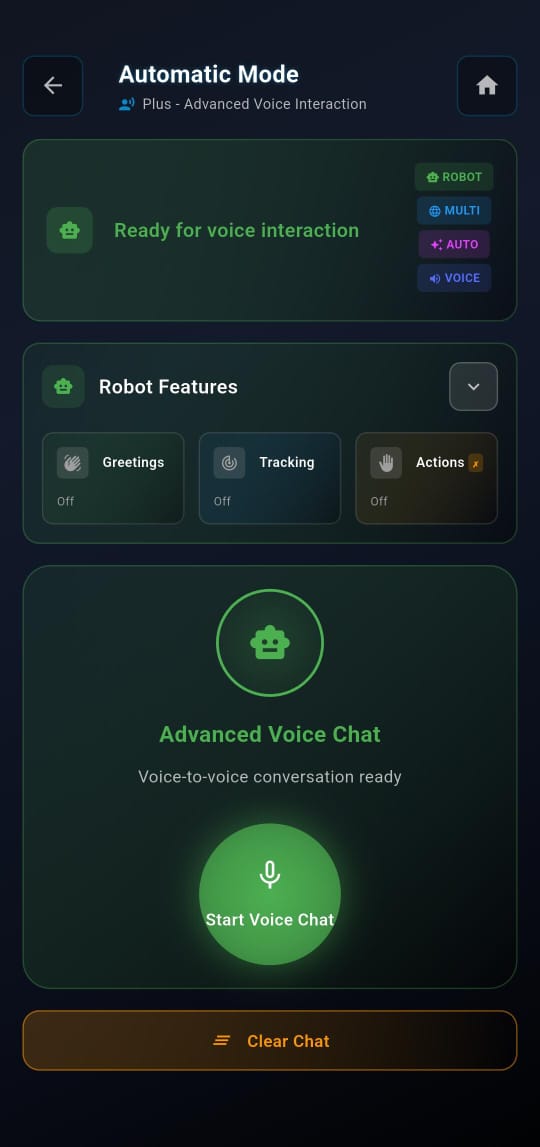
7.2 AI Mode
Use AI Mode to test interactive behaviour and voice response.
To begin: Open AI Mode → Tap Start Voice Chat Speak to the robot and verify audio output and response.
Example Questions
- “Hello BonicBot”
- “Hey BonicBot”
- “What is photosynthesis?”
- “Can you wave your hand?”
- “Tell me a joke”
Step 8: Configuring Raspberry Pi
8.1 Introduction
This section provides step-by-step instructions for configuring the Raspberry Pi for ROS Mode operation with BonicBot A2. It covers enabling ROS Mode, network configuration, and connection verification.
8.2 Enabling ROS Mode
8.2.1 Access ROS Mode
- Open the application and go to the Home Screen.
- Tap ROS Mode.
8.2.2 Enable RPI Monitoring
- Locate the toggle switch labeled RPI Monitoring.
Establishing a secure Bluetooth connection may take a few moments. This delay is normal as the app synchronizes with the robot’s hardware. Please wait until the indicator shows “Connected” before proceeding.
Once the BLE connection is active, the application performs a status check to determine whether the robot is connected to a local network.
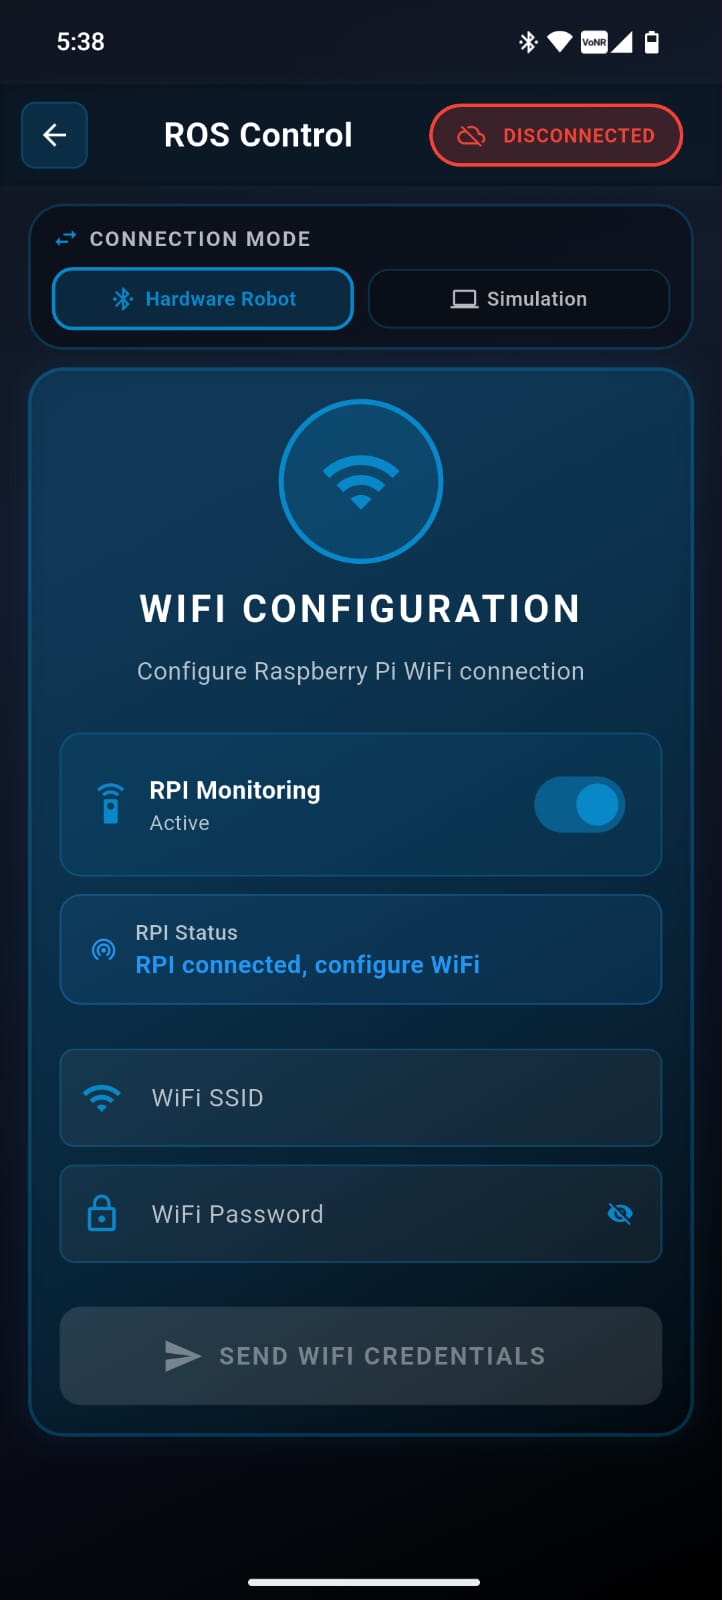
8.2.3 Enter Wi-Fi Details
- Enter the Wi-Fi name (SSID).
- Enter the Wi-Fi password.
- Tap Send.
After a successful connection, the Raspberry Pi responds with its local IP address, which is displayed in the connection section.
Step 9: ROS-Based Operation
9.1 Connect to Robot
- Tap Connect to Robot.
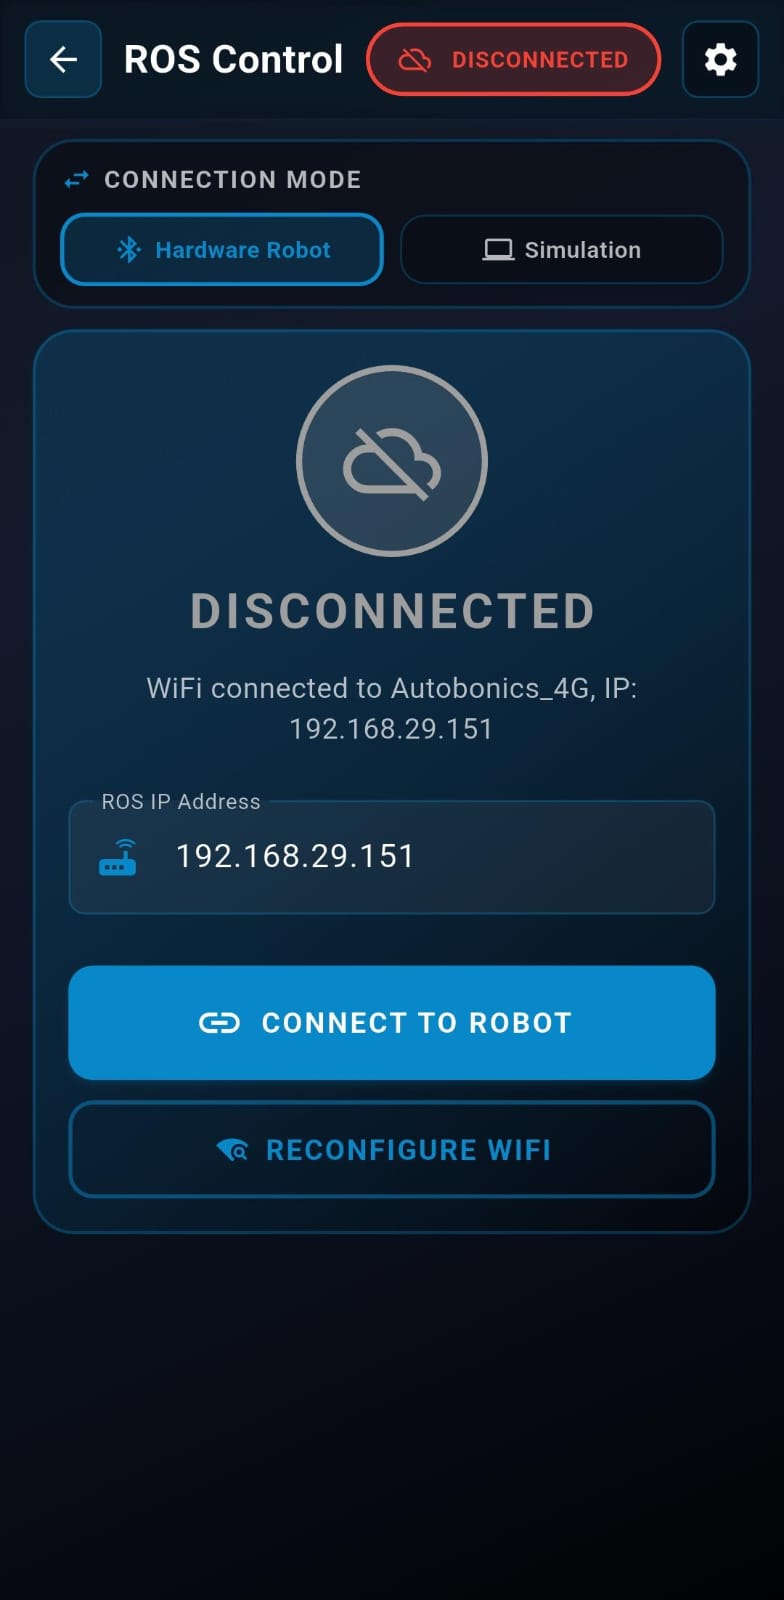
- Tap Open Settings to proceed.
The Prerequisites section displays:
- RPI Connected: Indicates whether the Raspberry Pi is connected.
- Wi-Fi Connected: Displays the connected Wi-Fi network.
- IP Address: Shows the current IP address.
9.2 Launching ROS
- Tap Launch ROS.
- Tap OK to confirm.
Wait at least 30 seconds before connecting to the robot. You can tap SHOW TERMINAL to view the logs and monitor the launch process.
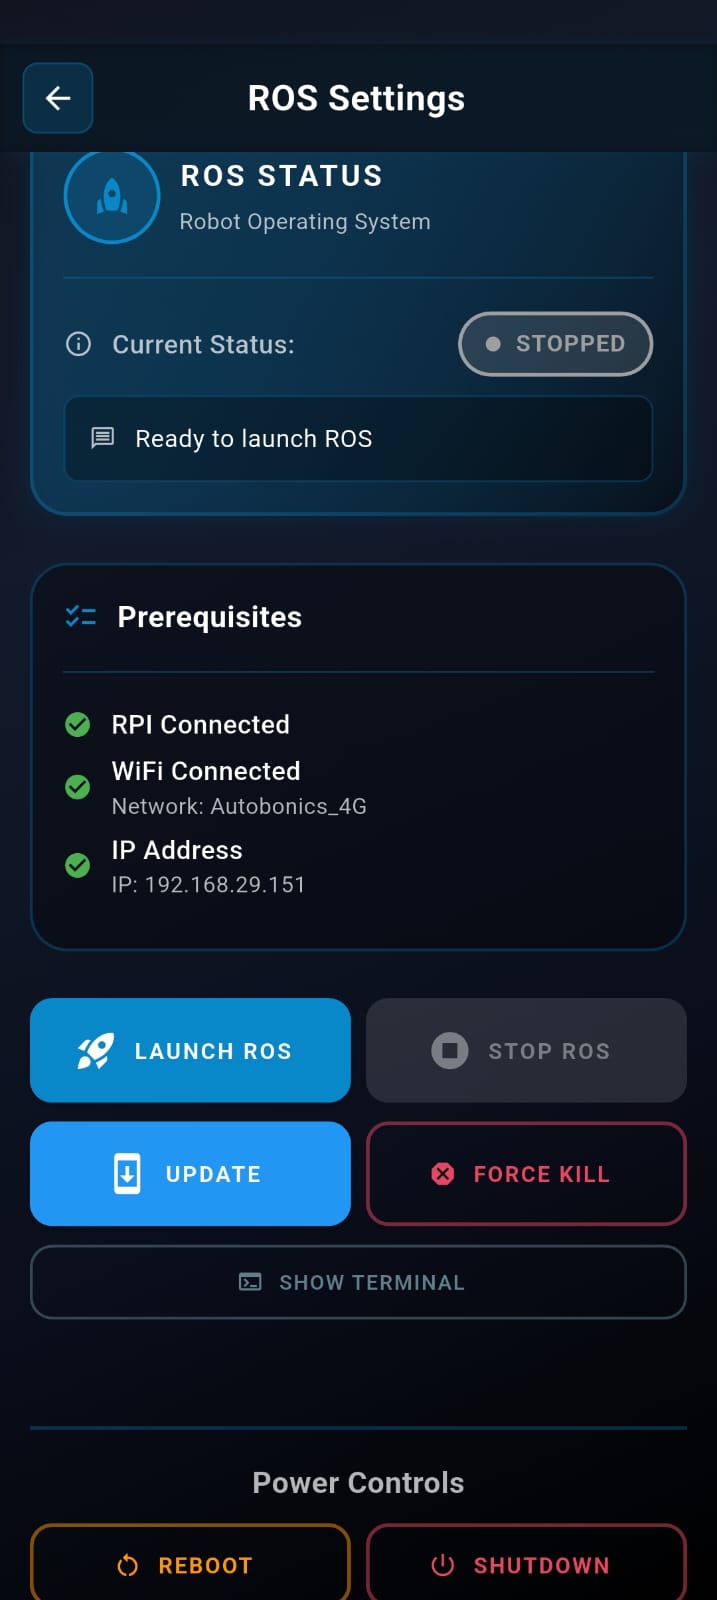
- Tap Connect to Robot.
9.3 ROS Interface Overview
The ROS interface consists of various control pipelines. Select a tab below to explore each interface:
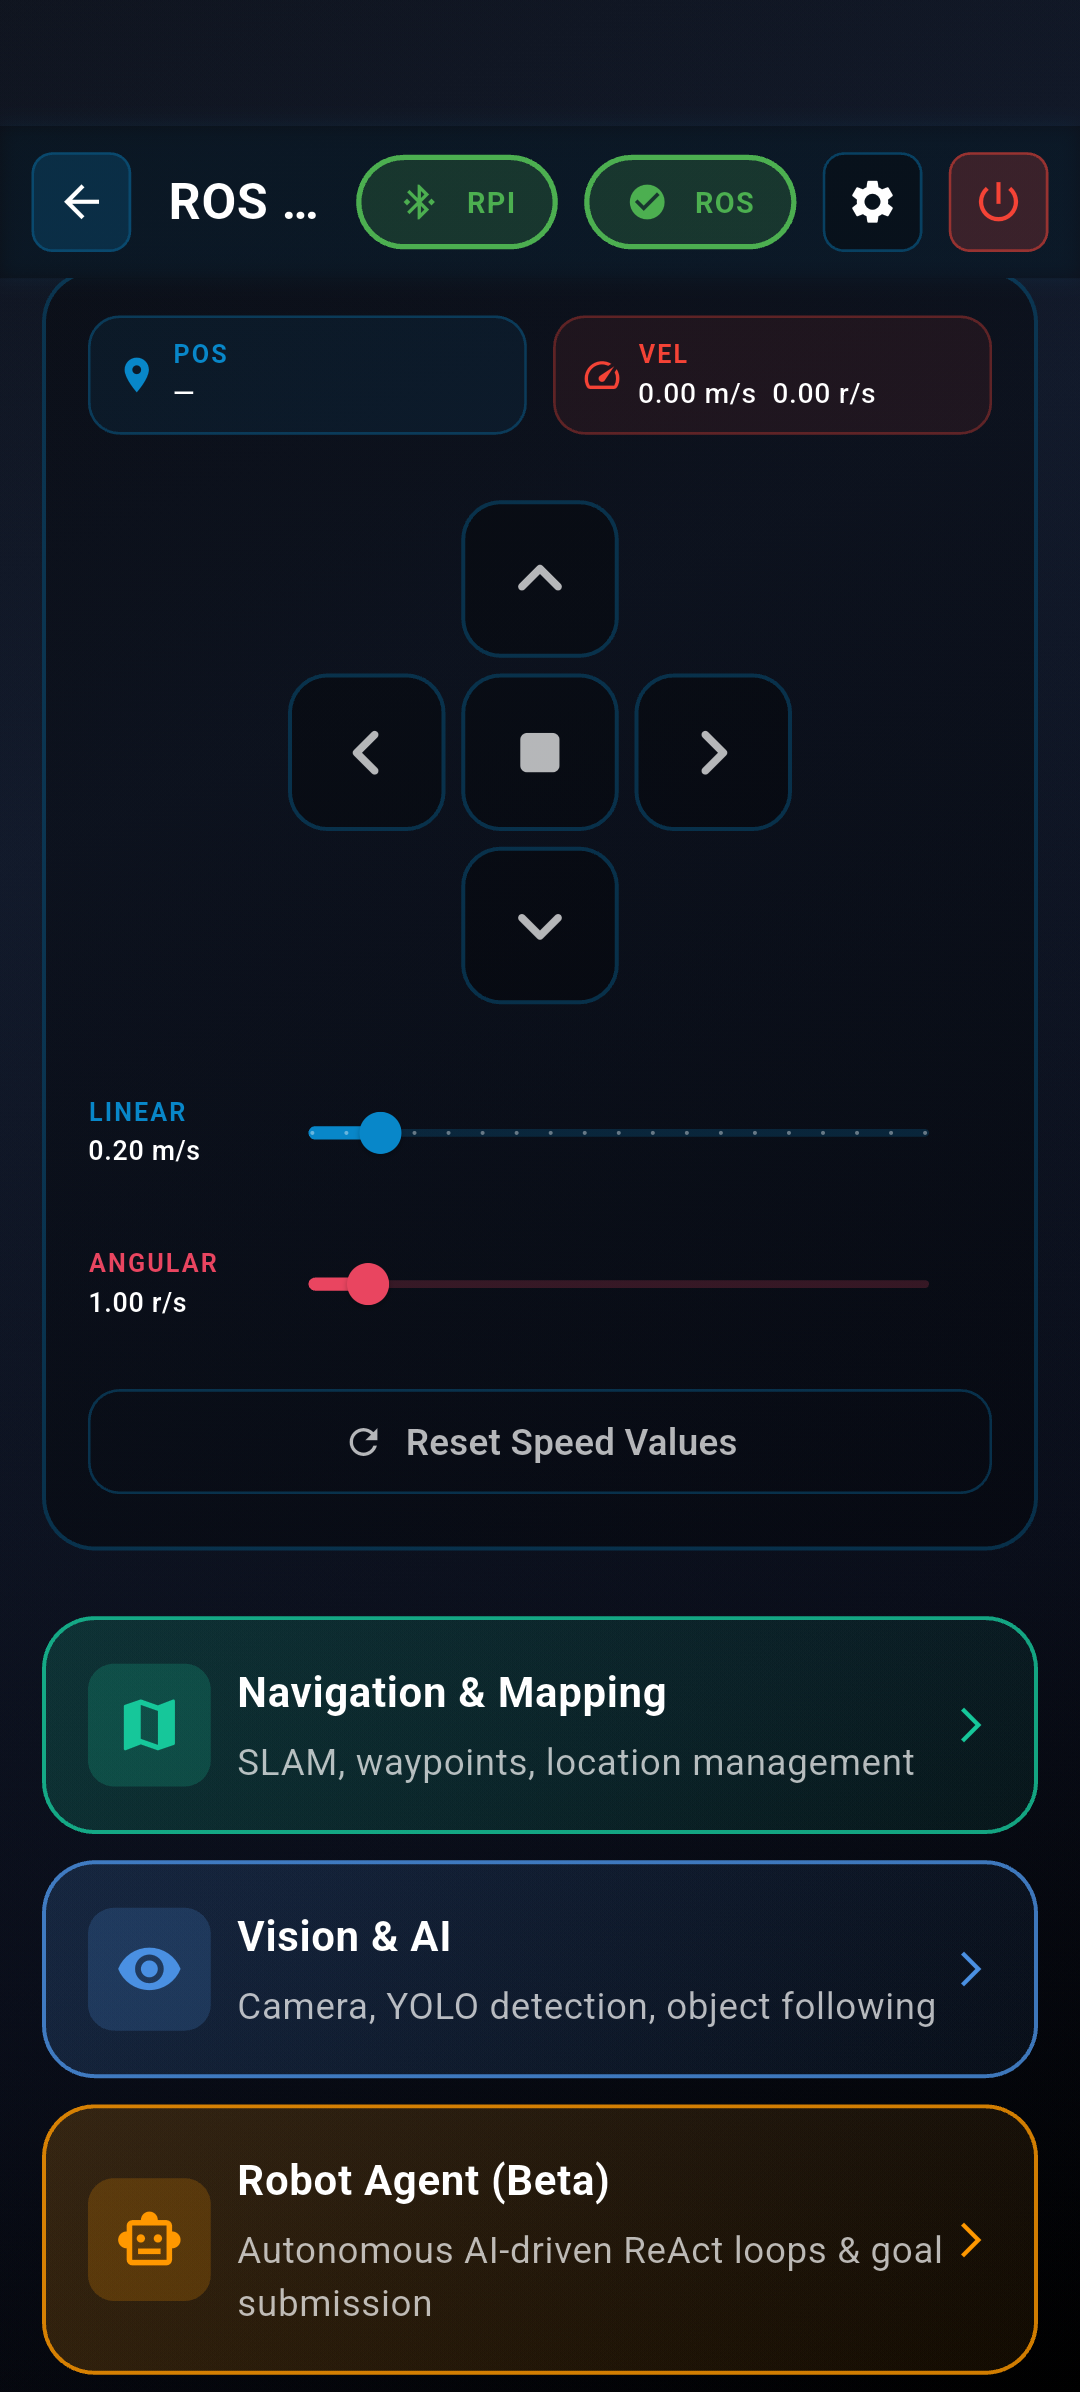
9.3.1 Movement & Precise Motion
When the ROS interface opens, the Movement Control page is displayed by default.
-
Movement Controls Use the on-screen controls to move the robot.
-
Speed Values Adjust the following parameters:
-
Linear Speed: Forward and backward movement speed
-
Angular Speed: Rotational movement speed
-
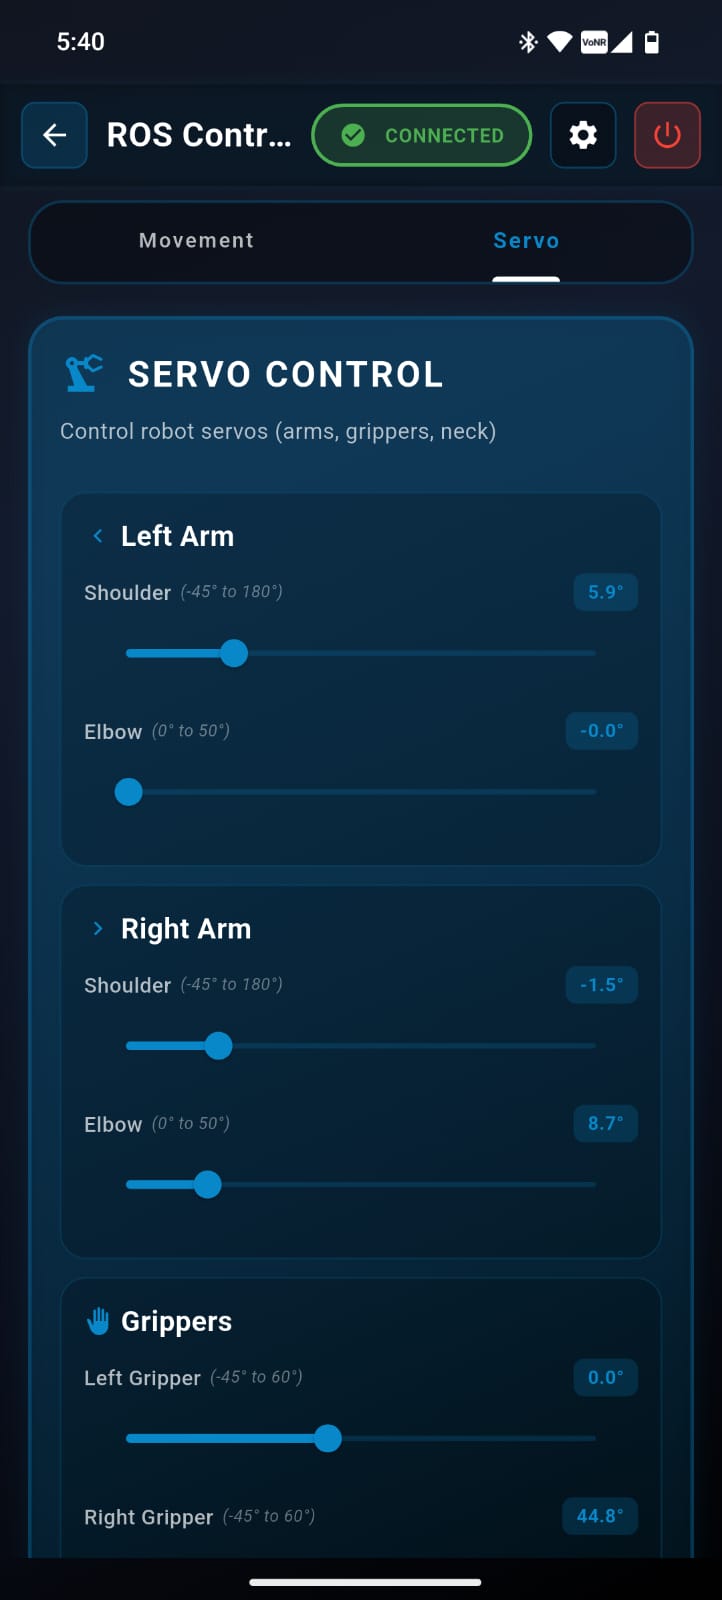
Precise Motion Switch to the Precise Motion page to gain fine-tuned, exact control over individual joints and motors.
Available control points:
- Left Shoulder
- Right Shoulder
- Left Elbow
- Right Elbow
- Left Gripper
- Right Gripper
- Neck
Precise Motion features:
- Individual servo position adjustment with high accuracy
- Real-time angular position feedback
- Exact, repeatable control for complex movements and custom gestures
9.3.2 Vision & AI
The Vision and AI interface allows you to access the real-time camera feed and advanced computer vision pipelines.
- Tap Start Vision to activate the robot’s visual sensors.
Wait at least 30 seconds for the vision systems and AI models to initialize.
- Expand the Camera Feed toggle. The real-time video feed will appear on your screen.
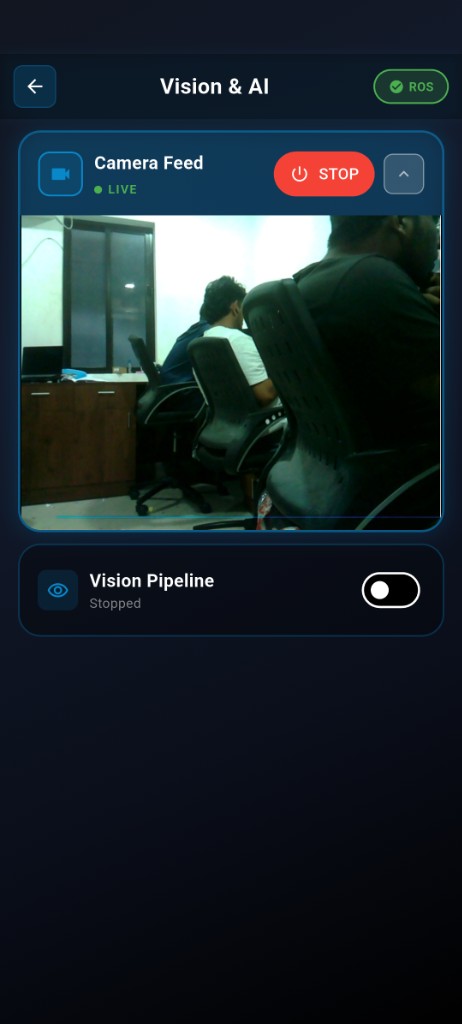
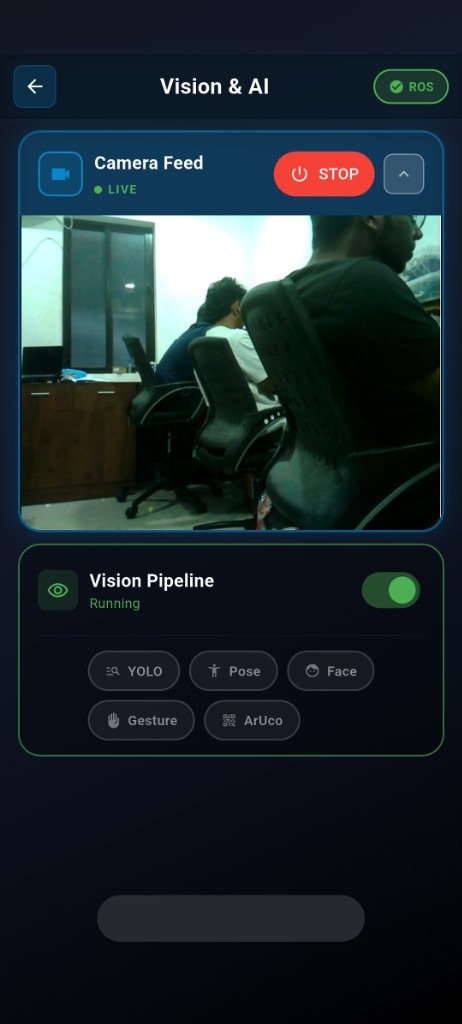
- Toggle the Vision Pipeline to enable AI processing. You can select different modes such as Pose, Face, Gesture, and ArUco markers.
- Scroll down to view the Detection Results in real-time, including bounding boxes and tracking data on the camera feed.
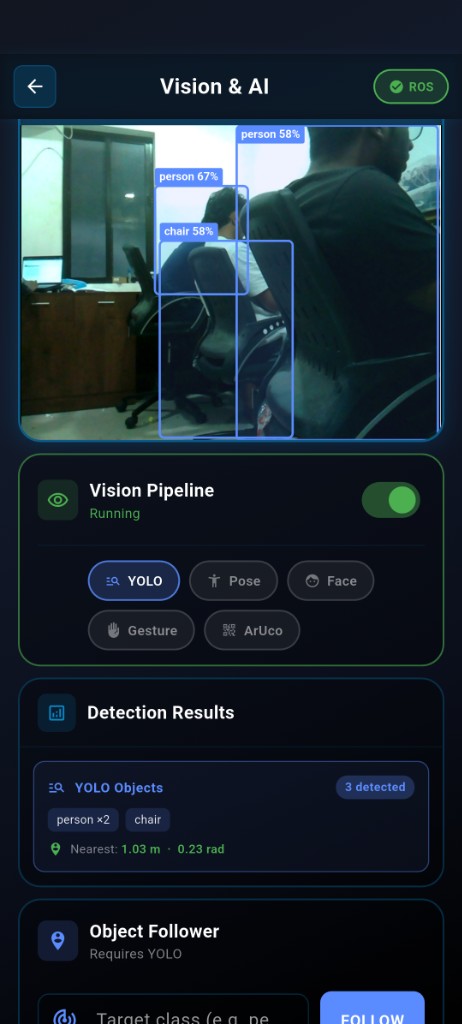
- Utilize the Object Follower to command the robot to automatically track and follow specific detected classes.

9.3.3 Map Generation
The Mapping and Navigation section appears below the speed controls.
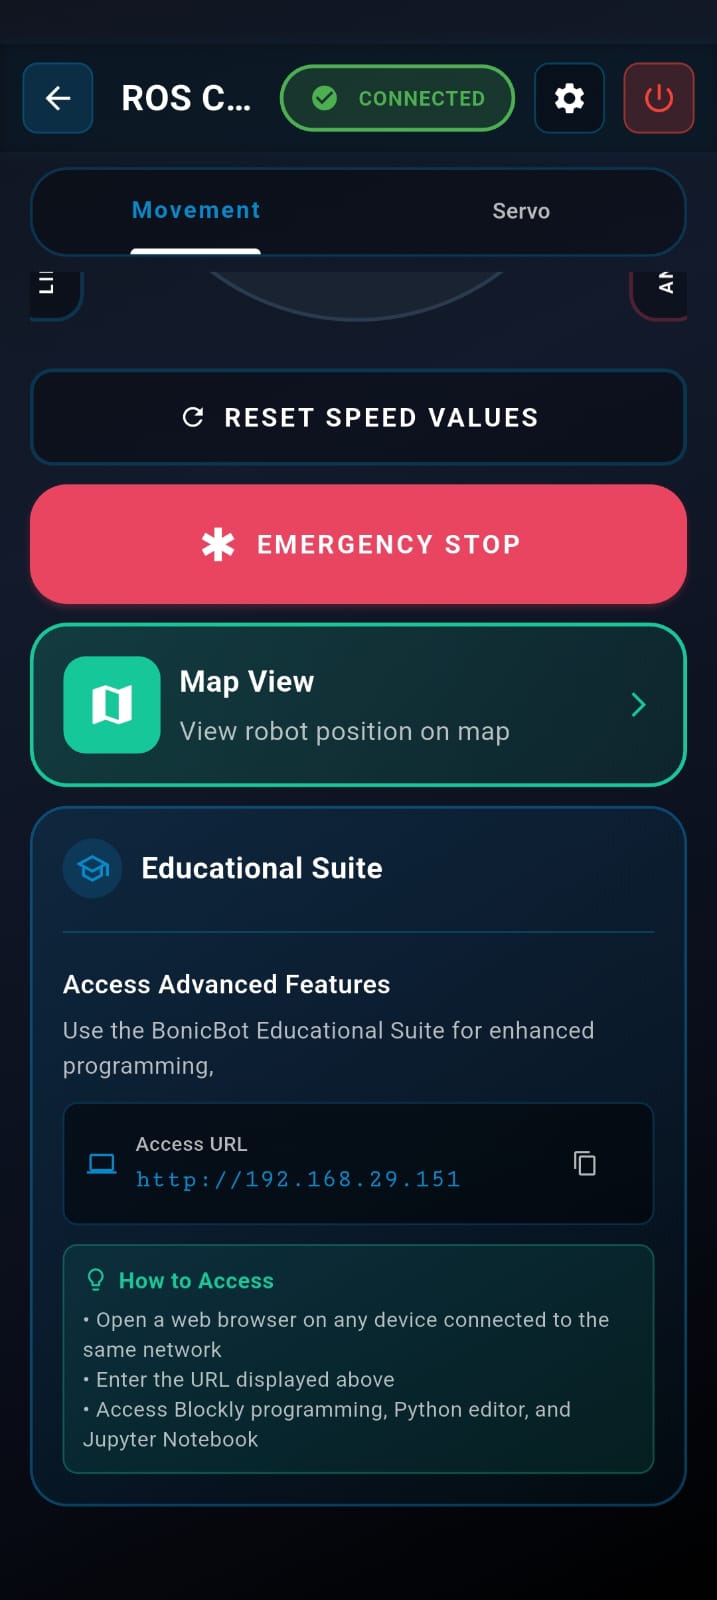
- Start Mapping
- Tap Map View.
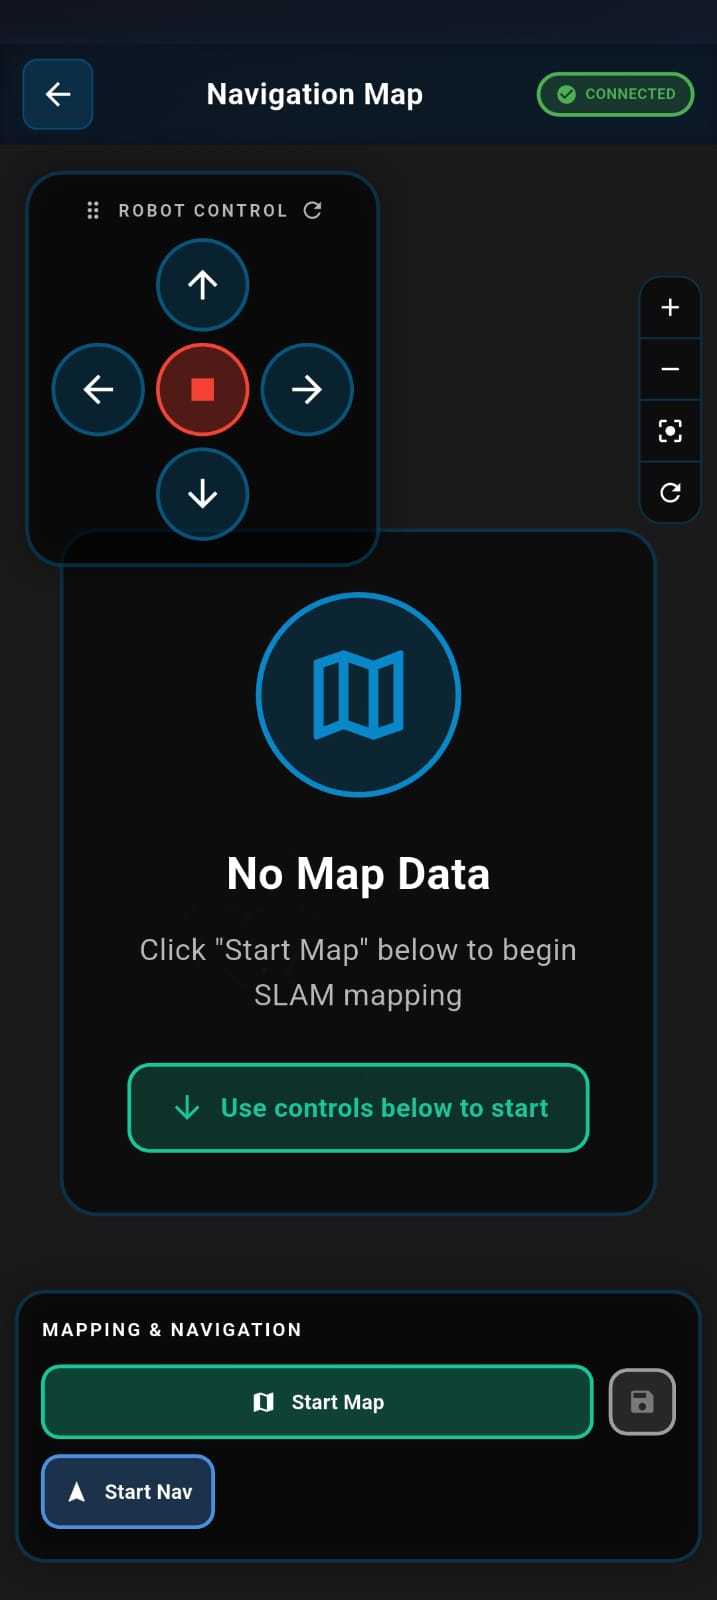
- Tap Start Map to begin creating a map of your environment
Wait up to 30 seconds for the map to initialize.
- Move the robot using the joystick or the BonicBot Controller App.
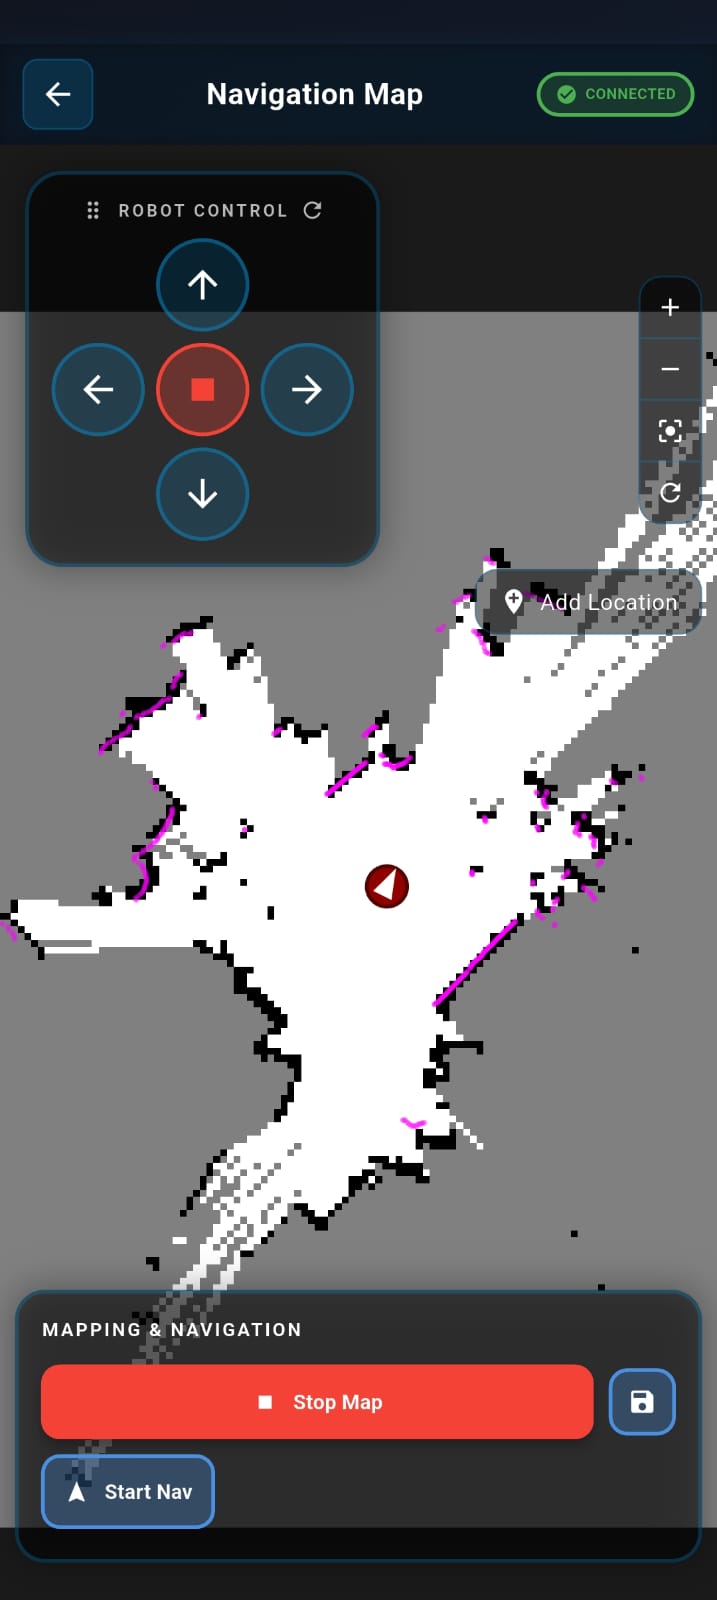
- Scan the Area: Drive the robot around the entire area you wish to map. Continue driving until the map on your screen looks complete and all boundaries/obstacles are clearly visible.
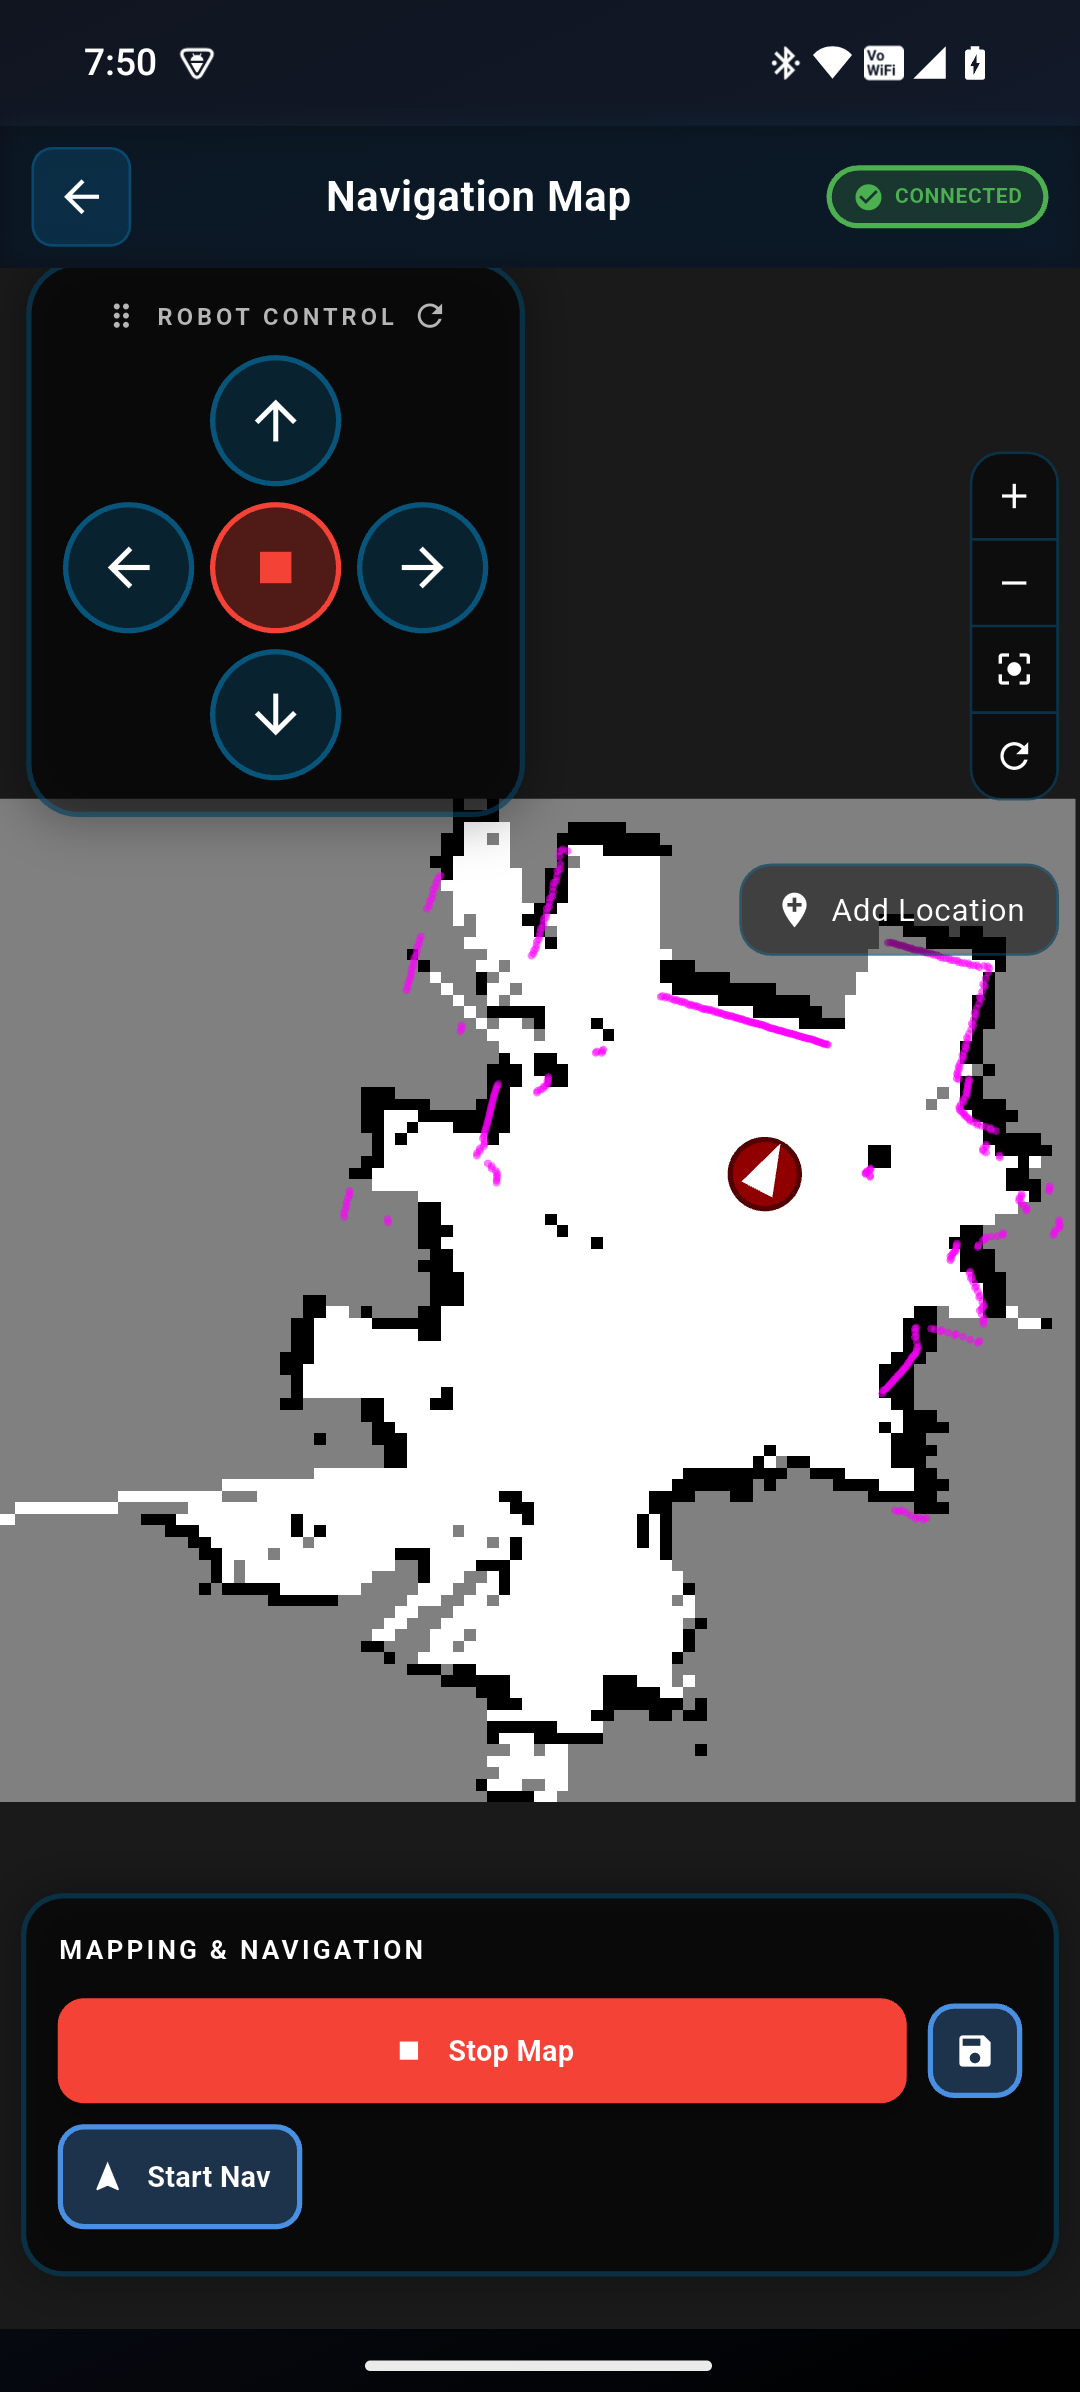
- Save the Map: Once the scan is complete, tap the Save Map button. This securely stores the current map data.
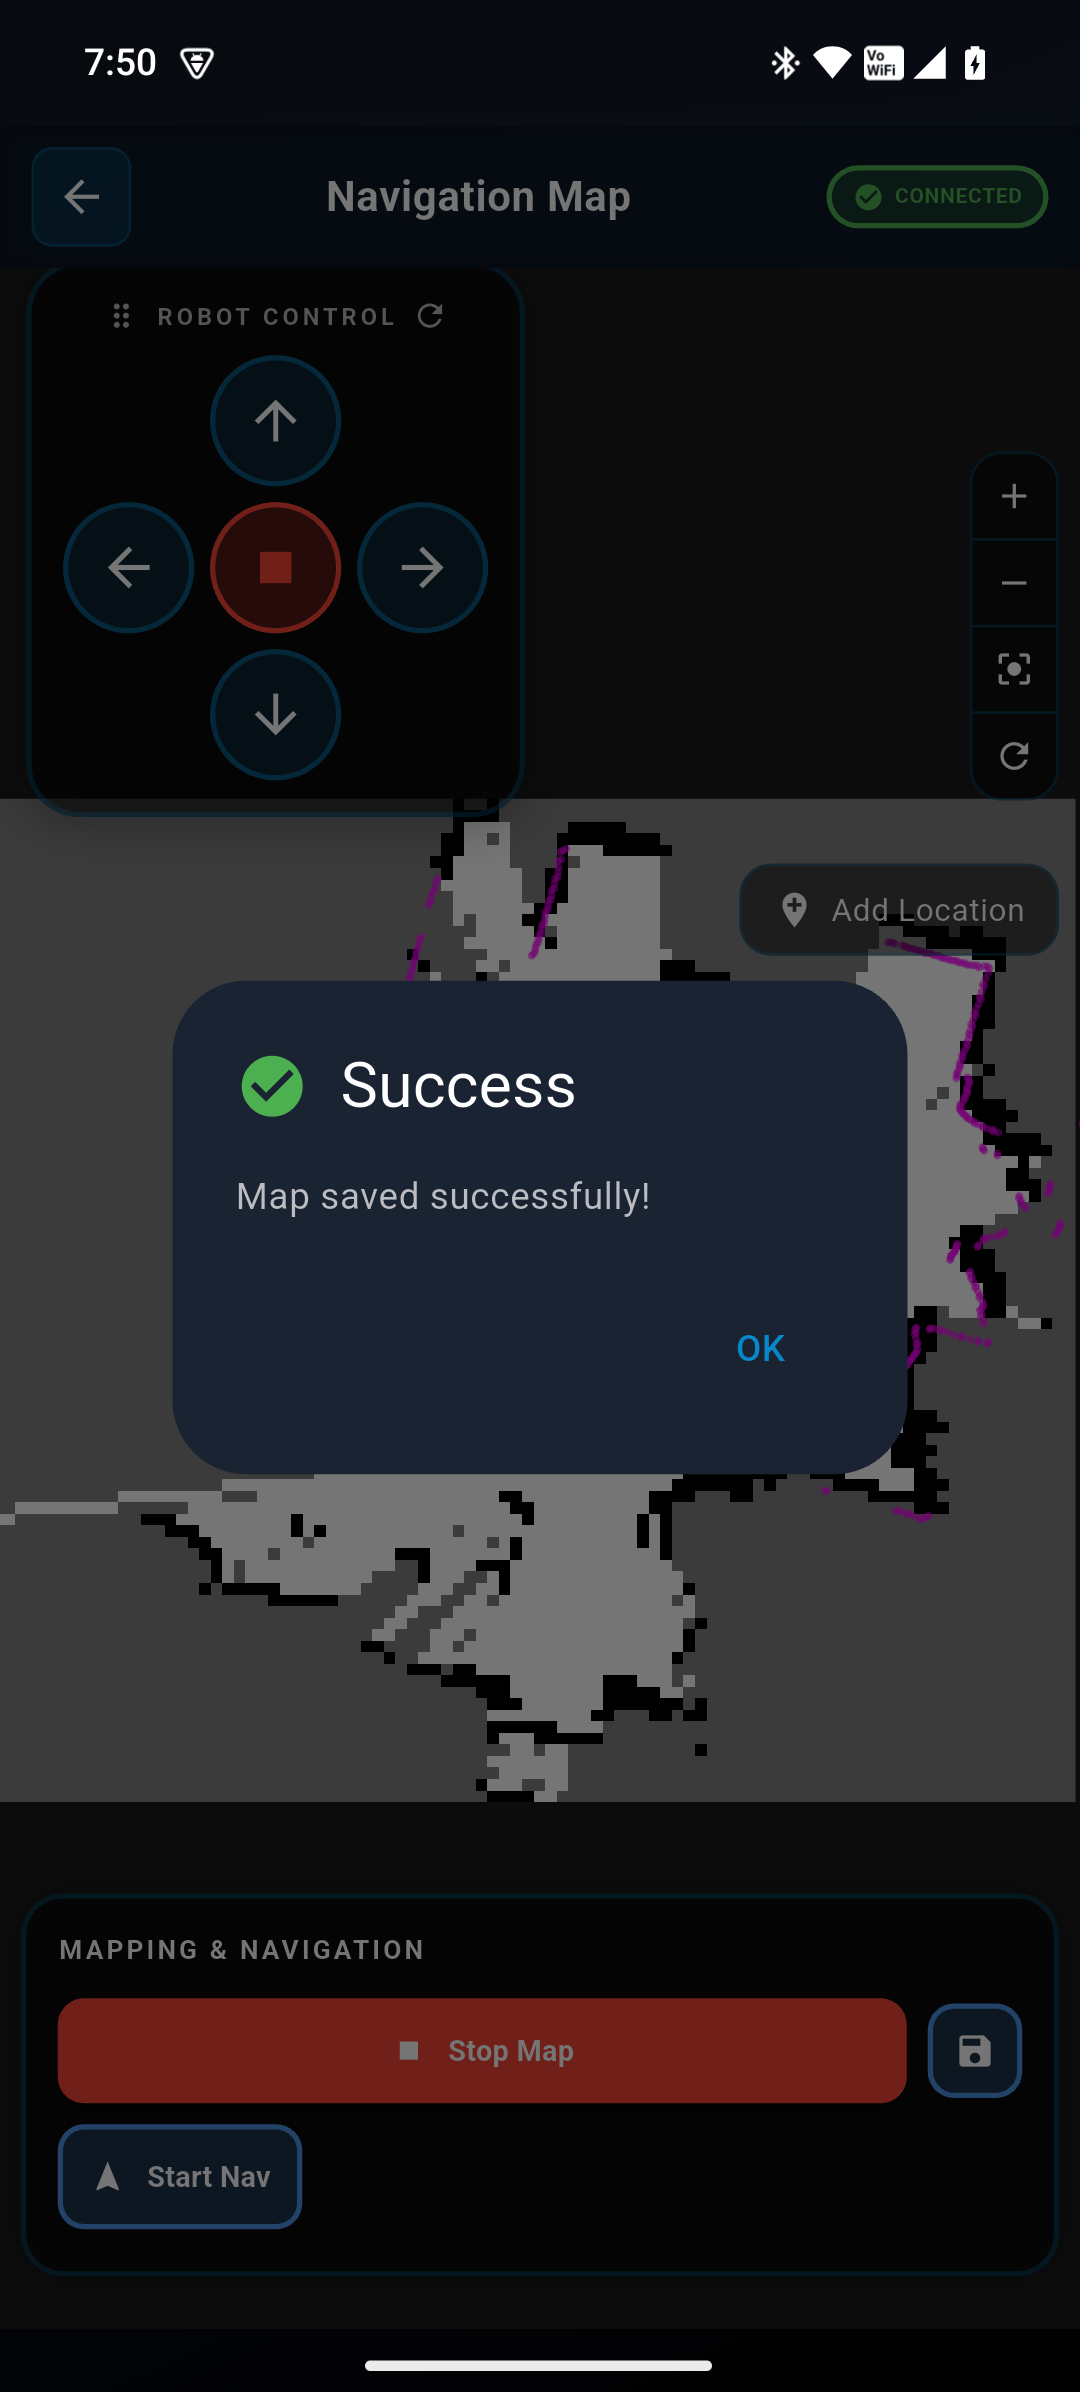
- Stop Mapping: After saving, tap Stop Map to finalize the mapping process.
We strongly recommend following this exact sequence (Save -> Stop) whenever you use the Auto-Navigation feature. This ensures the map data is “locked in” and stable, preventing errors that can occur if the robot tries to navigate while still updating the map.
- Switch to Navigation: Simply tap Start Nav to begin navigating within the map you just created.
The actual navigation instructions continue below in the next section.
9.3.4 Autonomous Navigation
-
Prerequisite Ensure the mapping process is completed before starting autonomous navigation.
-
Initialize Navigation
- Tap Start Nav.
Wait up to one minute for the cost map to load.
The mapped area turns blue, indicating the Cost Map, which defines safe navigation zones. Wait until the map turns blue before setting a navigation goal.
Scenario A: Navigation on a Live Map (Use this mode if you skipped “Stop Map” to continue updating the environment)
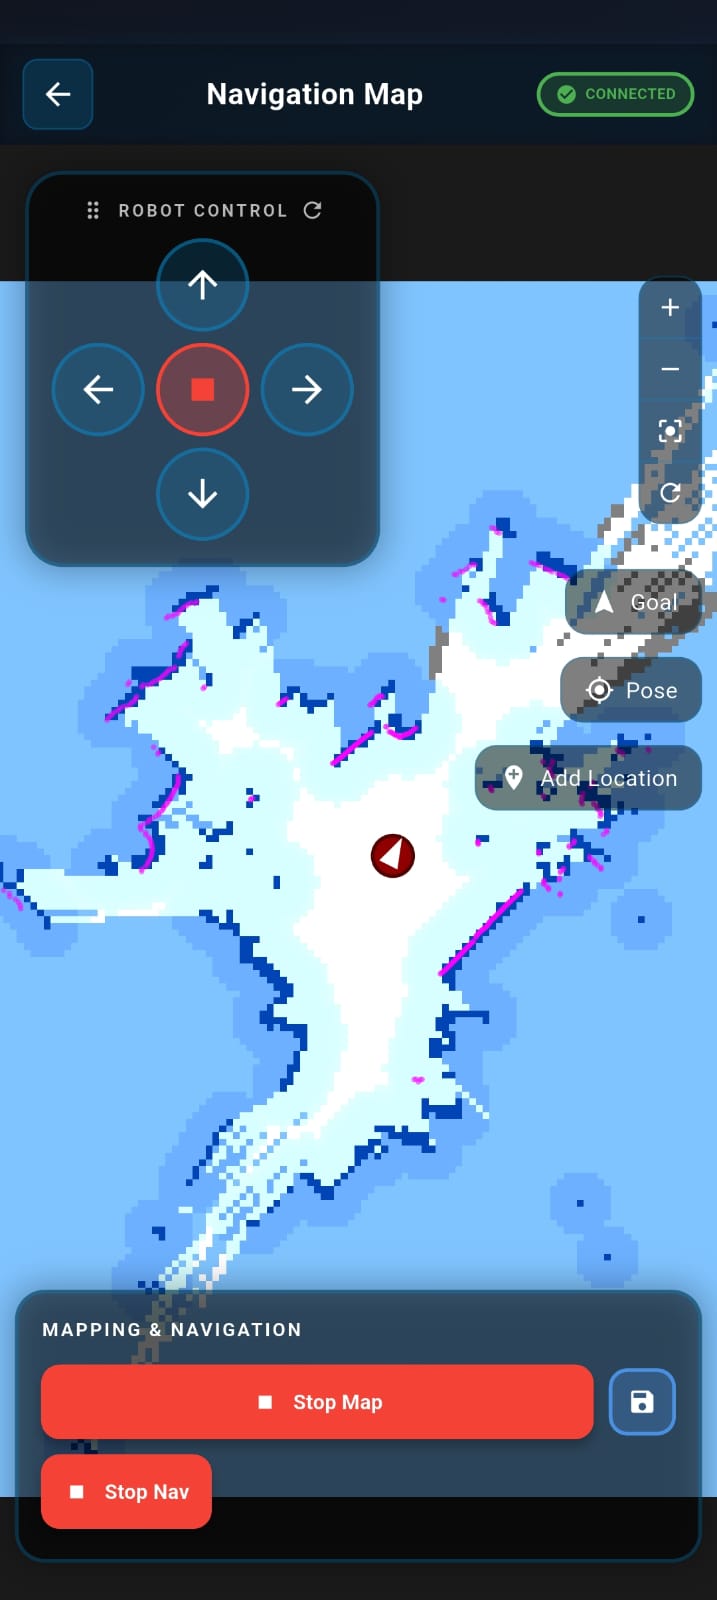
Scenario B: Navigation on a Saved Map (Use this mode for stable navigation on a finalized map)

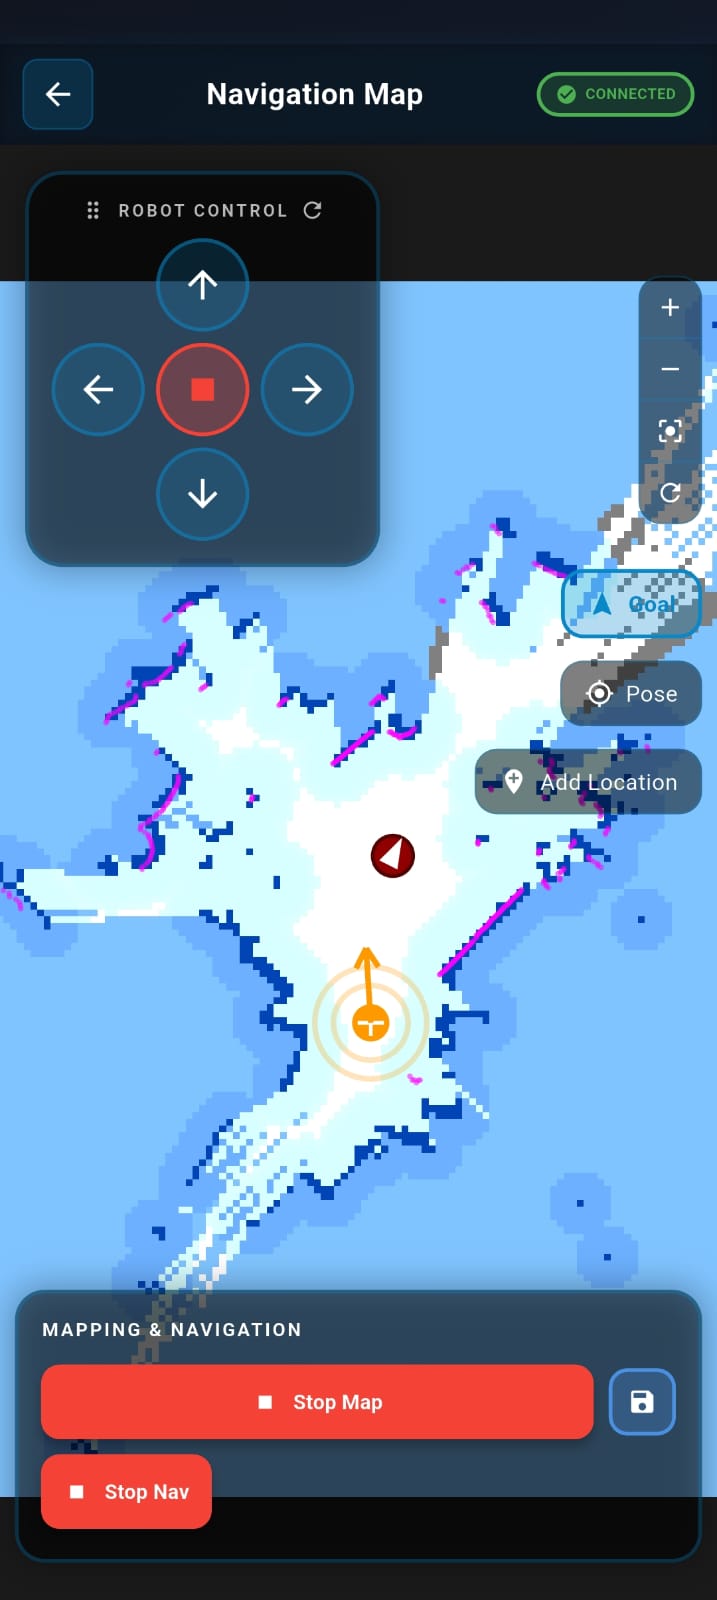
- Set a Target
- Select Destination: Tap on the map or drag the target marker to your desired location within the blue zone.
- Initiate Movement: Release the marker to confirm the position. The robot will automatically calculate the route and begin moving.
The process is the same for both Live and Saved maps.
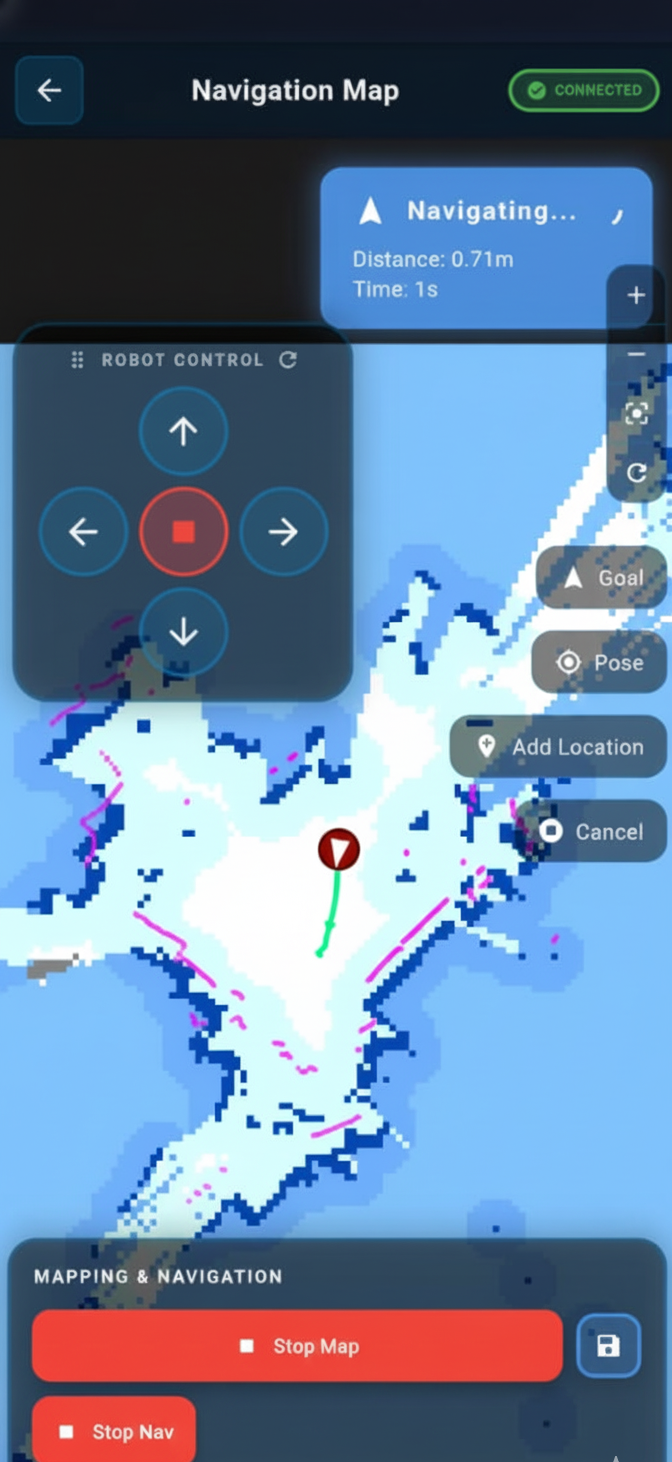
- Monitor Progress A green line represents the planned navigation path, and the robot icon moves along this path in real time.
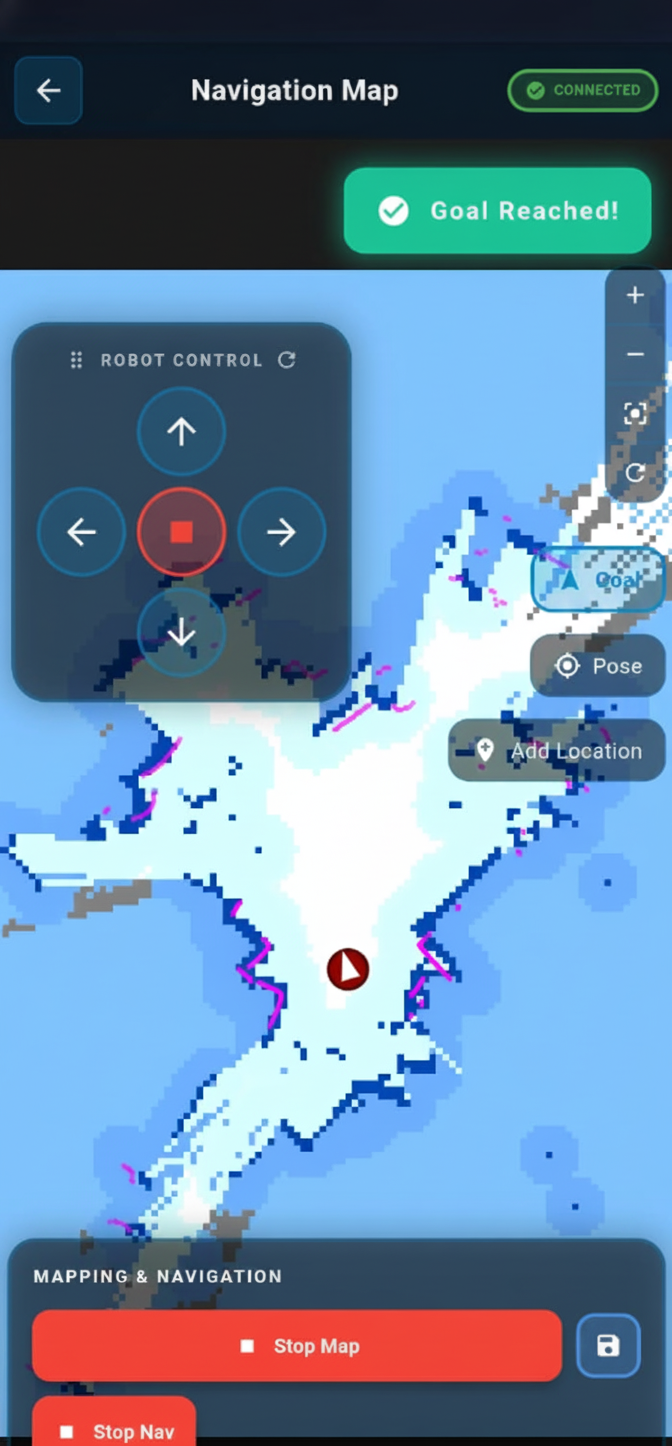
- Arrival and Completion When the robot reaches the destination, a Goal Reached message is displayed. Tap Stop Nav to end navigation.
- Adding Named Locations
- Navigate the robot to the desired location.
- Enter a name for the location.
- Tap Add Location.
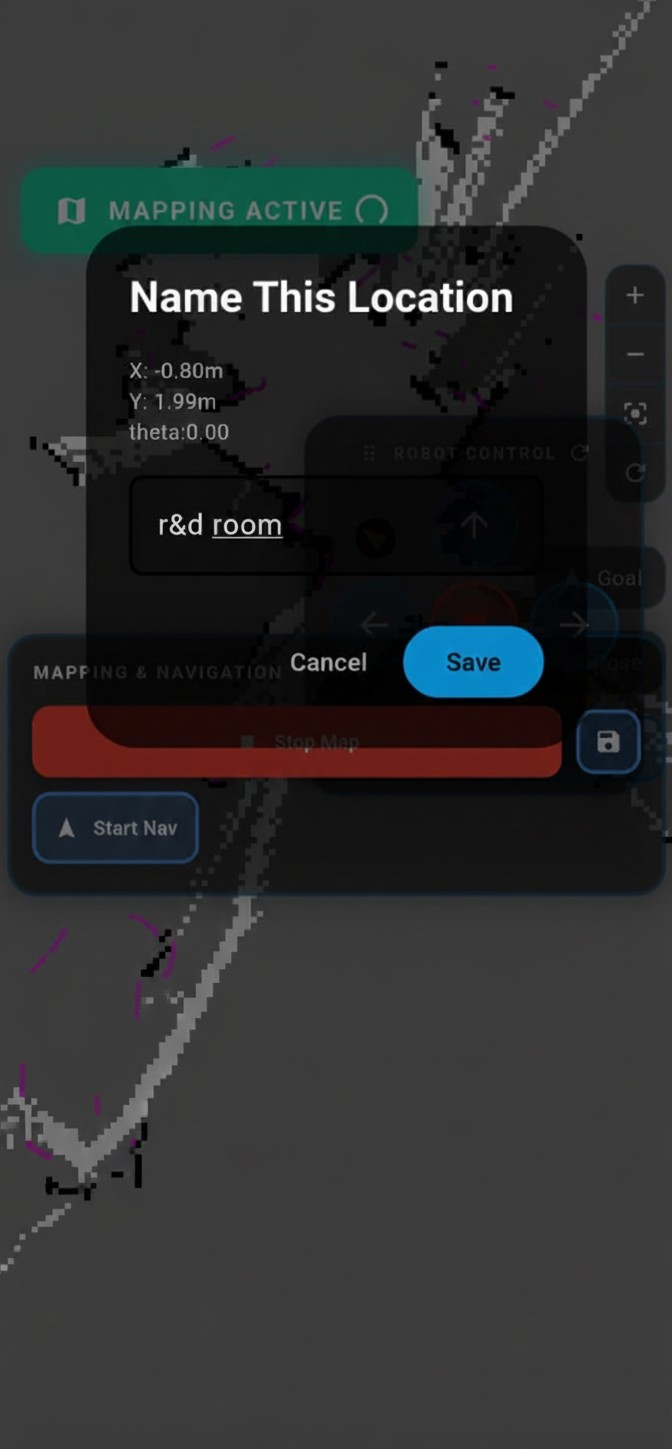
After saving, the robot moves toward the location when the location name is spoken in AI Mode.
9.3.5 AI Voice-Controlled Navigation
BonicBot A2 can navigate to any previously saved map location using a spoken voice command in AI Mode — no manual tapping required. This requires the Navigate to saved location AI Function to be enabled first.
1. Enable the function
Scroll down in the AI Functions list and enable the “Navigate to saved location” toggle.
This feature requires at least one named location to have been saved via the Map interface. If no locations have been saved yet, refer to the Adding Named Locations section.
2. Save and confirm
Tap Save AI Functions to apply the change.
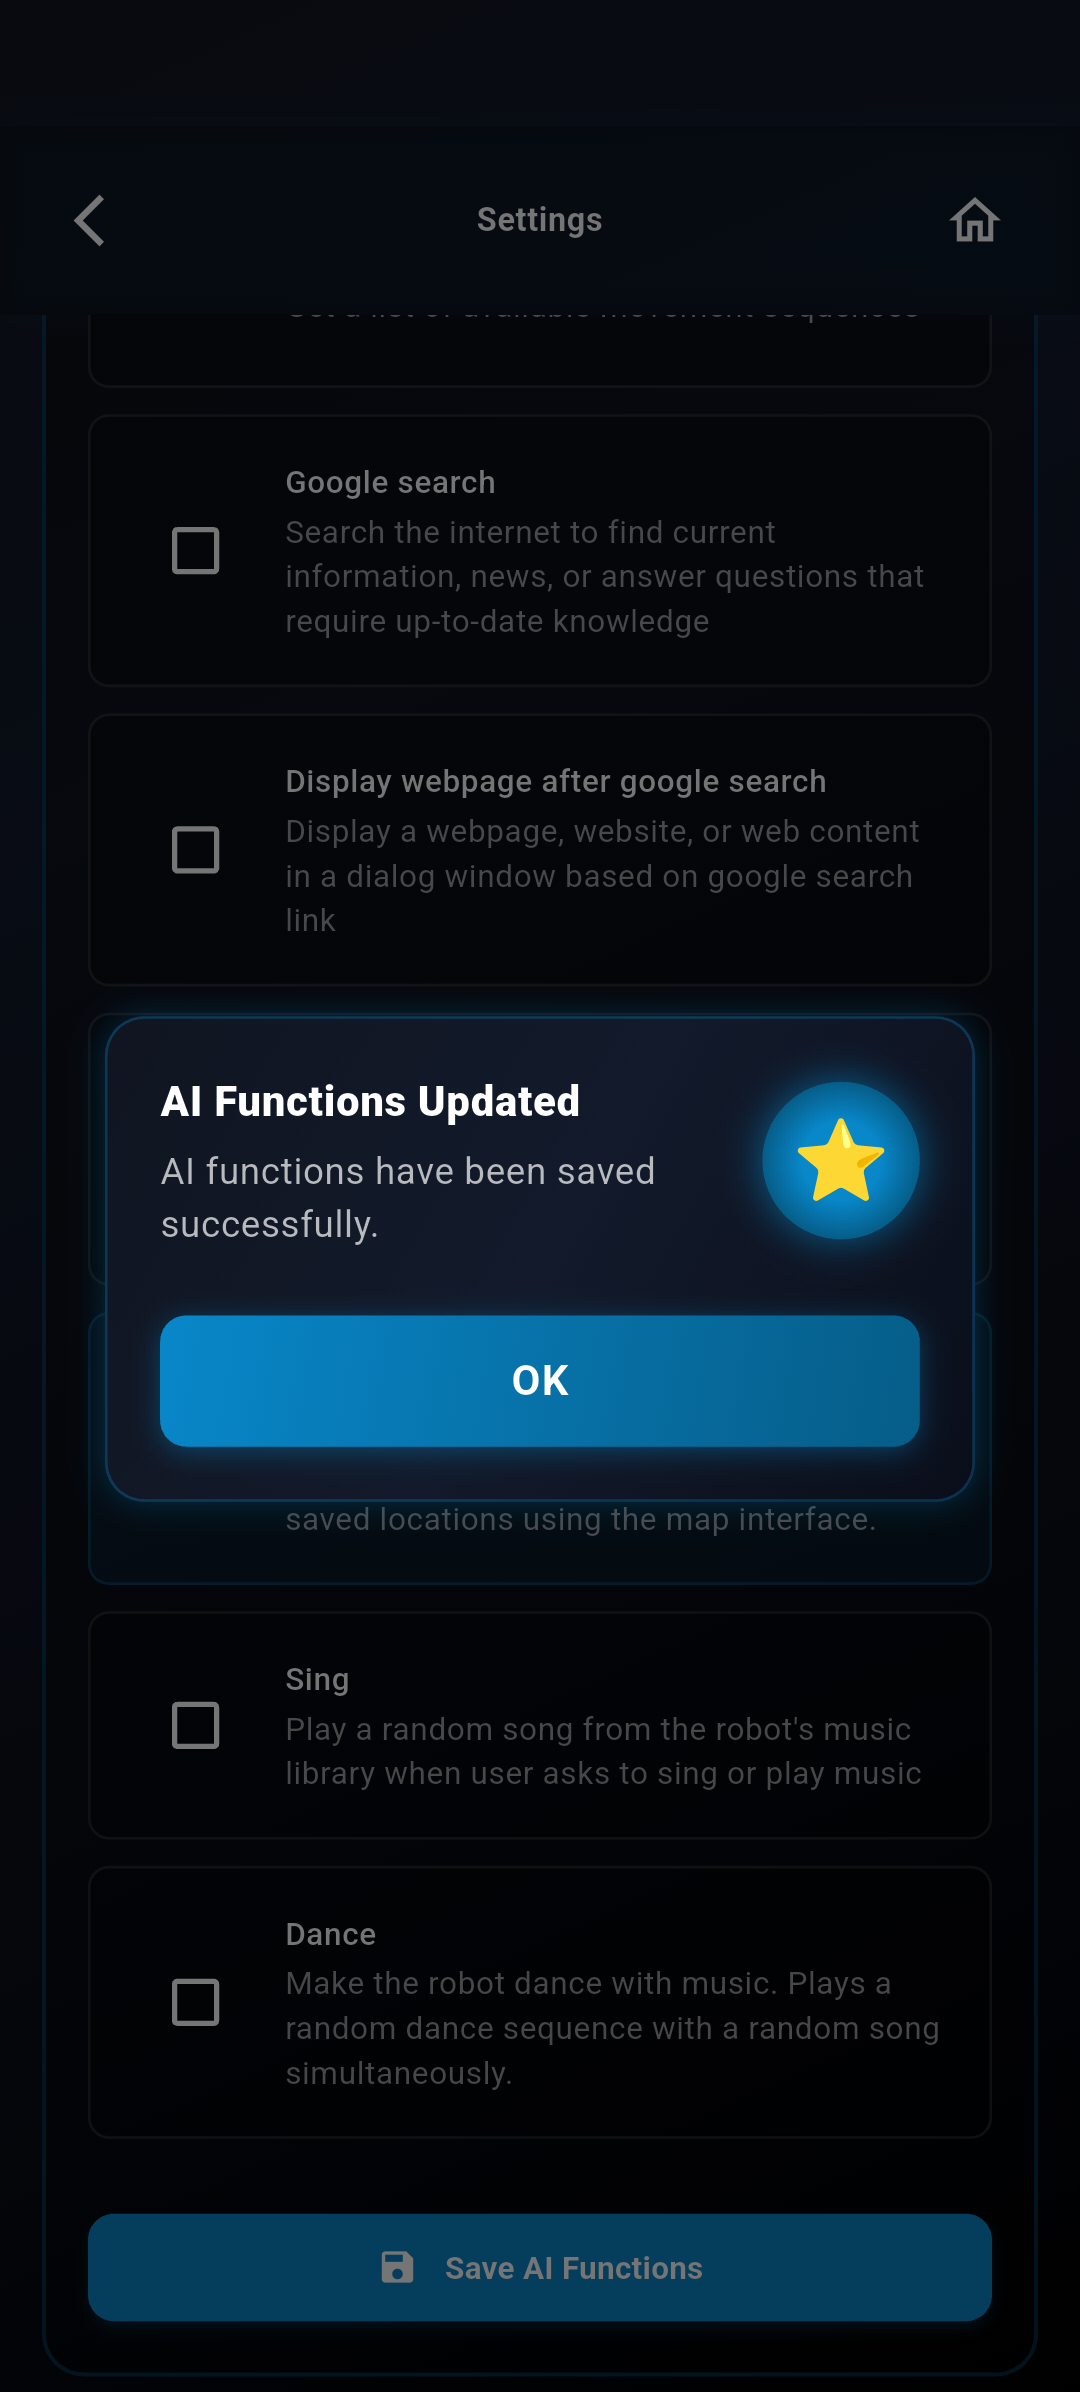
The setting is now active and the robot will respond to navigation commands in AI Mode.
3. Navigate using your voice
Open AI Mode from the Home Screen and tap Start Voice Chat.
Speak the name of a saved location naturally.
Example Commands
- “Go to the reception”
- “Navigate to the meeting room”
- “Take me to the hall”
The spoken location name must exactly match a name saved in the Map interface. If the name is not recognised, the robot will not move.
Next Steps
Now that your BonicBot A2 is fully set up, calibrated, and connected, you are ready to start building!
Explore the development ecosystem to see the different ways you can program and interact with your robot.