Hand Assembly
Step 1: Collecting All Required Parts
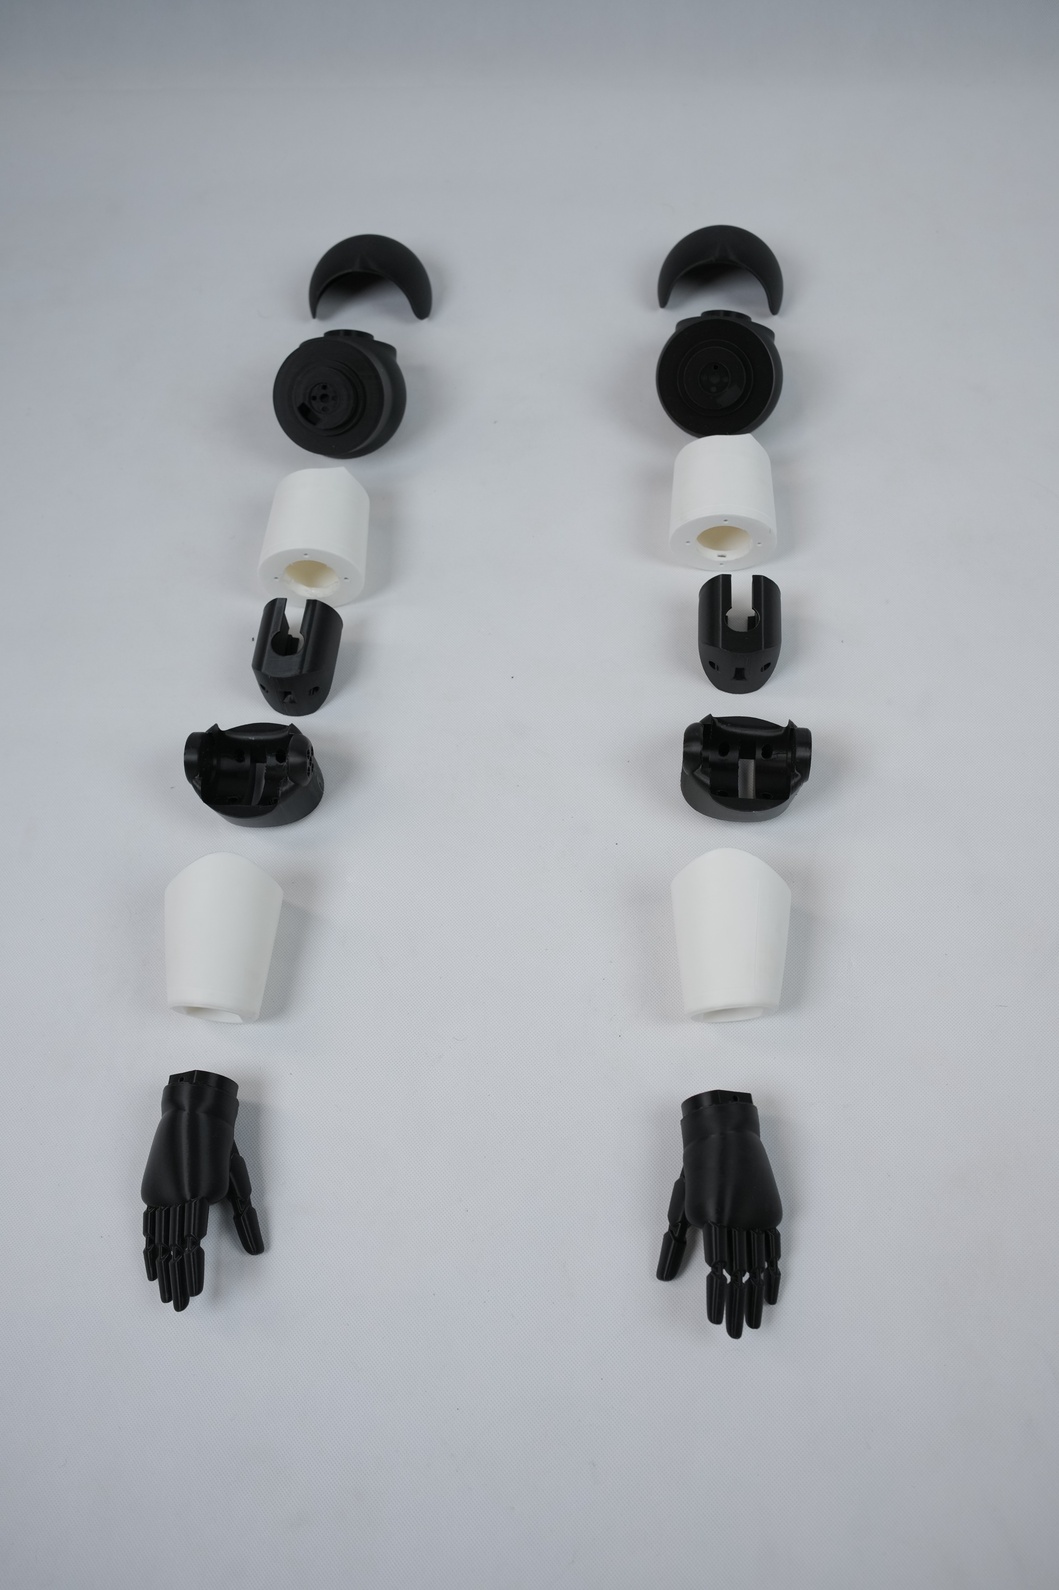
3D Printed Parts:-
- Shoulder Joint Left
- Shoulder Cover Left
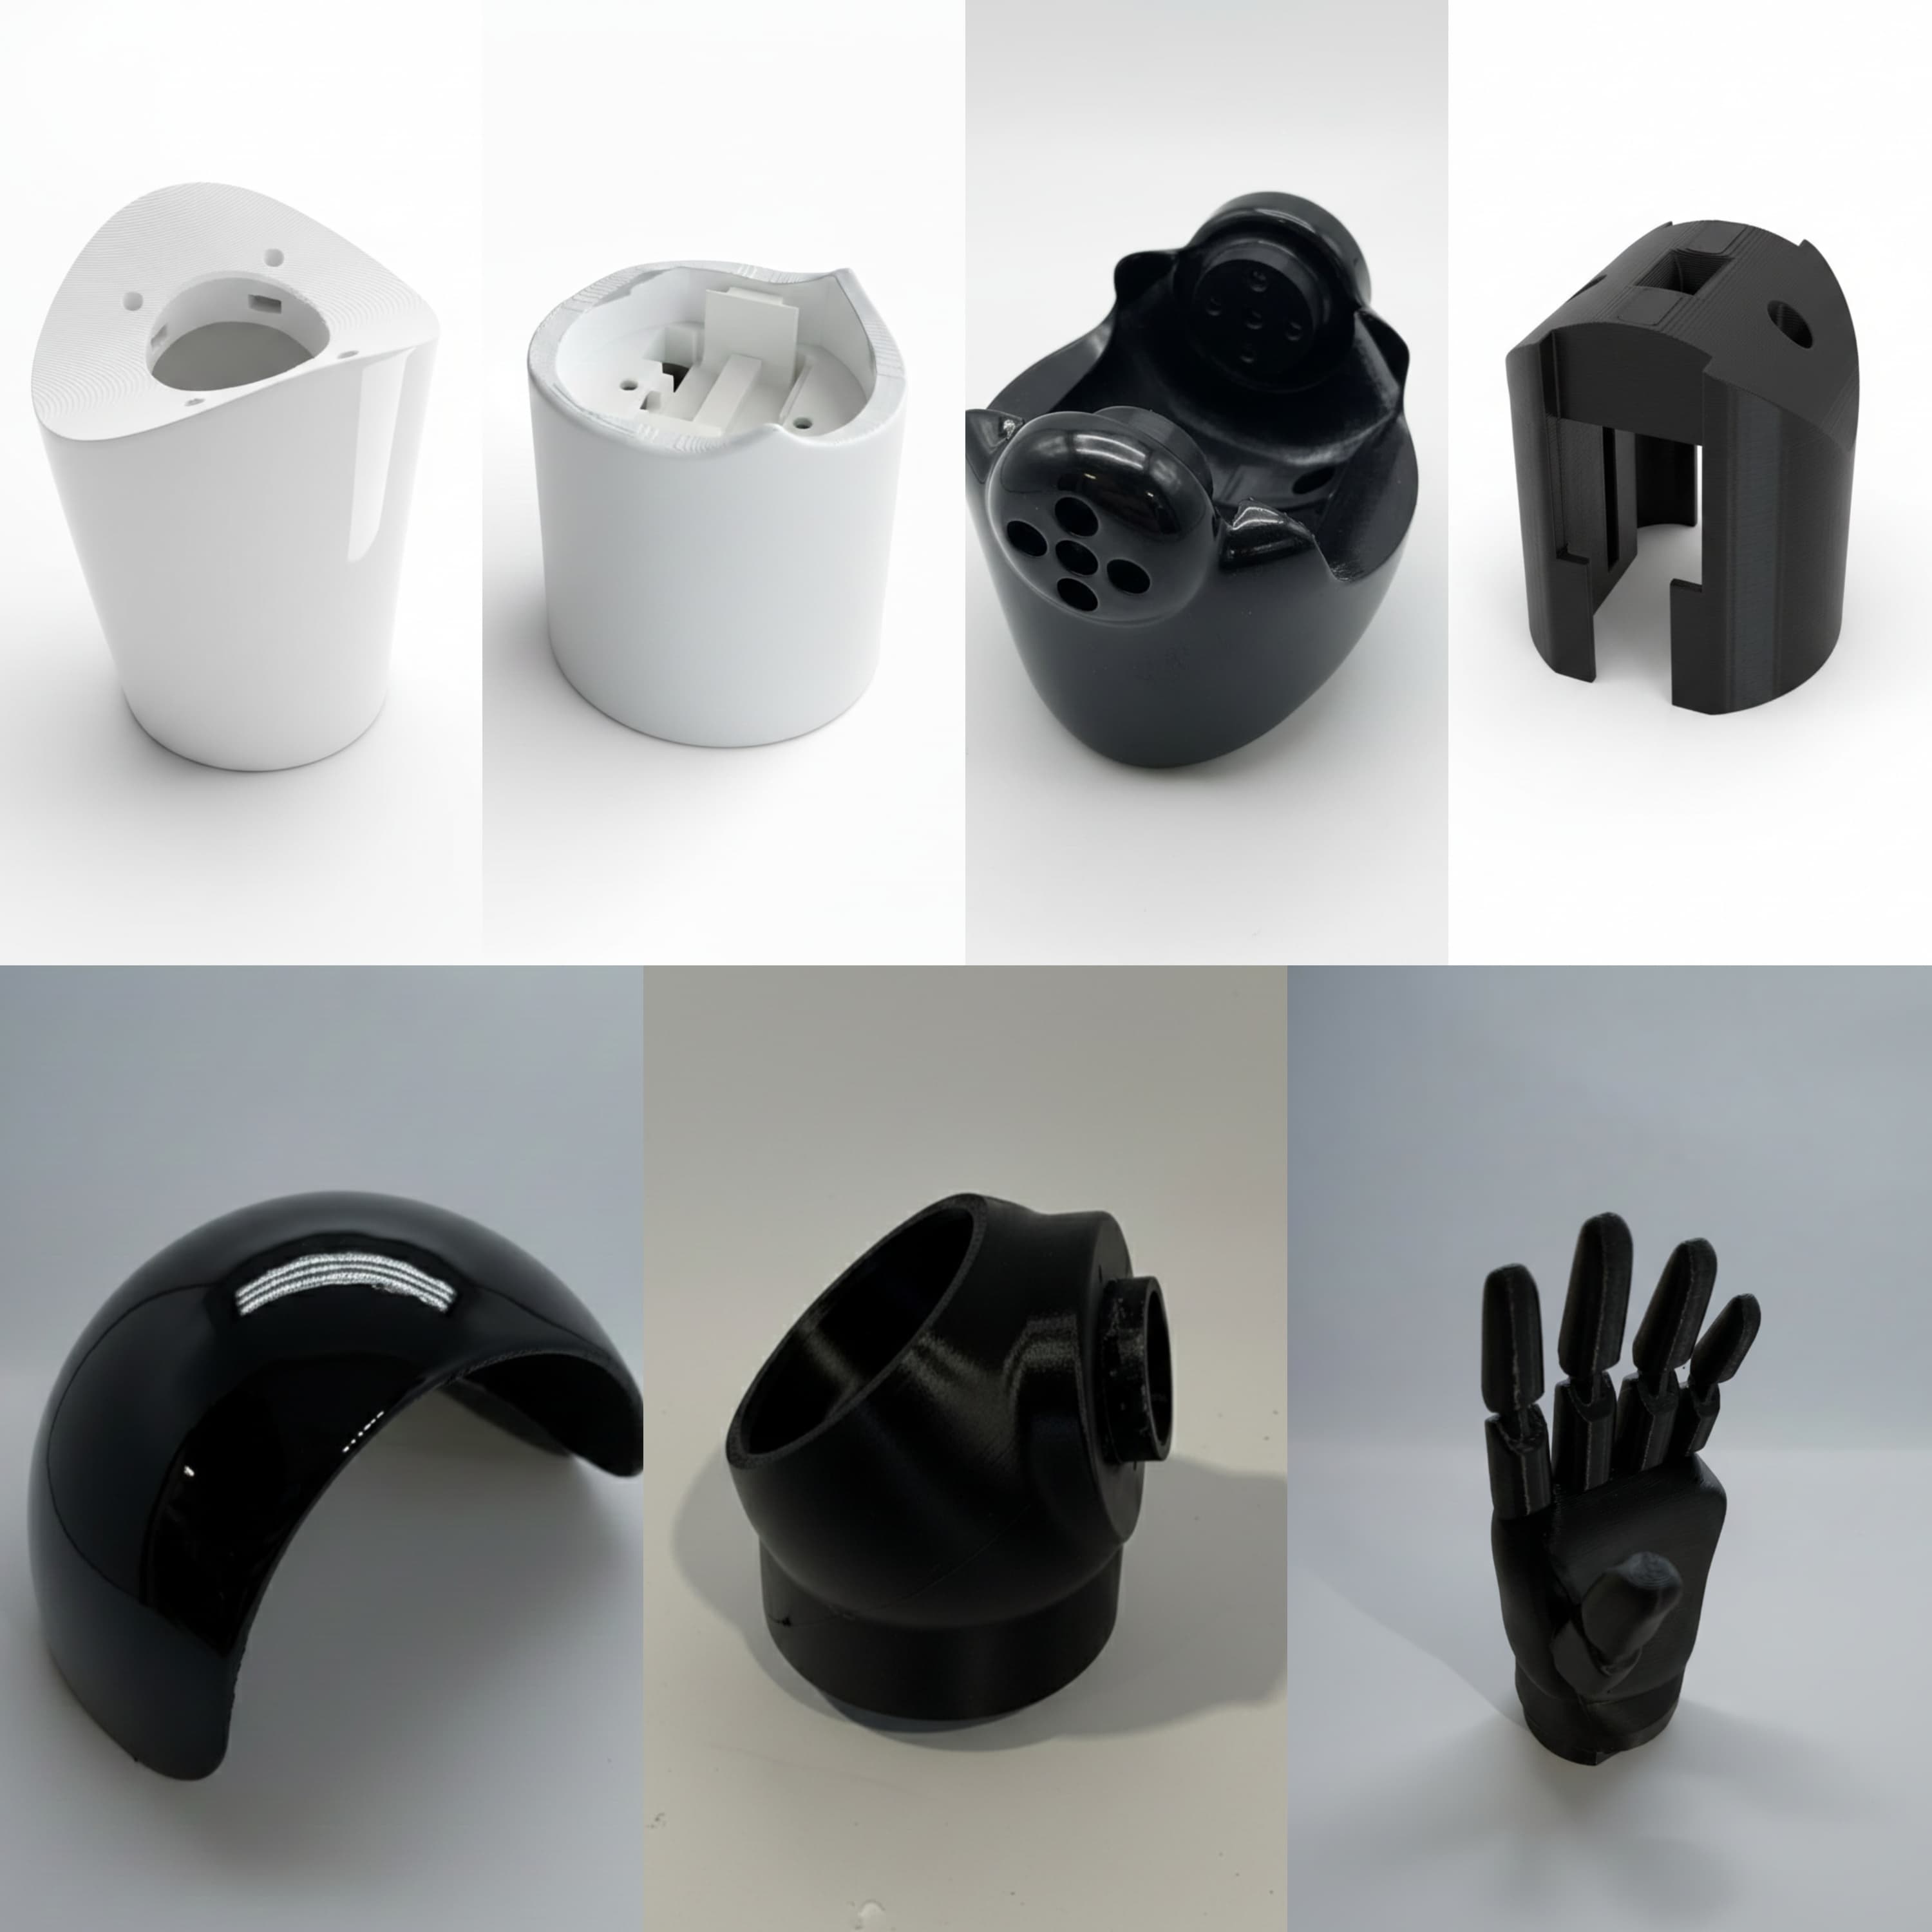
- Upper Arm Left
- Elbow Servo Mount Left
- Elbow Joint Left
- Wrist Joint Left
- Palm Left
- Shoulder Joint Right
- Shoulder Cover Right
- Upper Arm Right
- Elbow Servo Mount Right
- Elbow Joint Right
- Wrist Joint Right
- Palm Right
Electronic Parts:-
- Servo Motor x 2
Step 2:- Starting the Hand Assembly
Left Hand Assembly
Items Required: 2 x Servo Motors, 11 x M3 Nuts and Bolts
-
Insert 5 x M3 nuts in the required places of the Upper Arm Left (2 nuts on one side and 3 on the other) and glue them properly
-
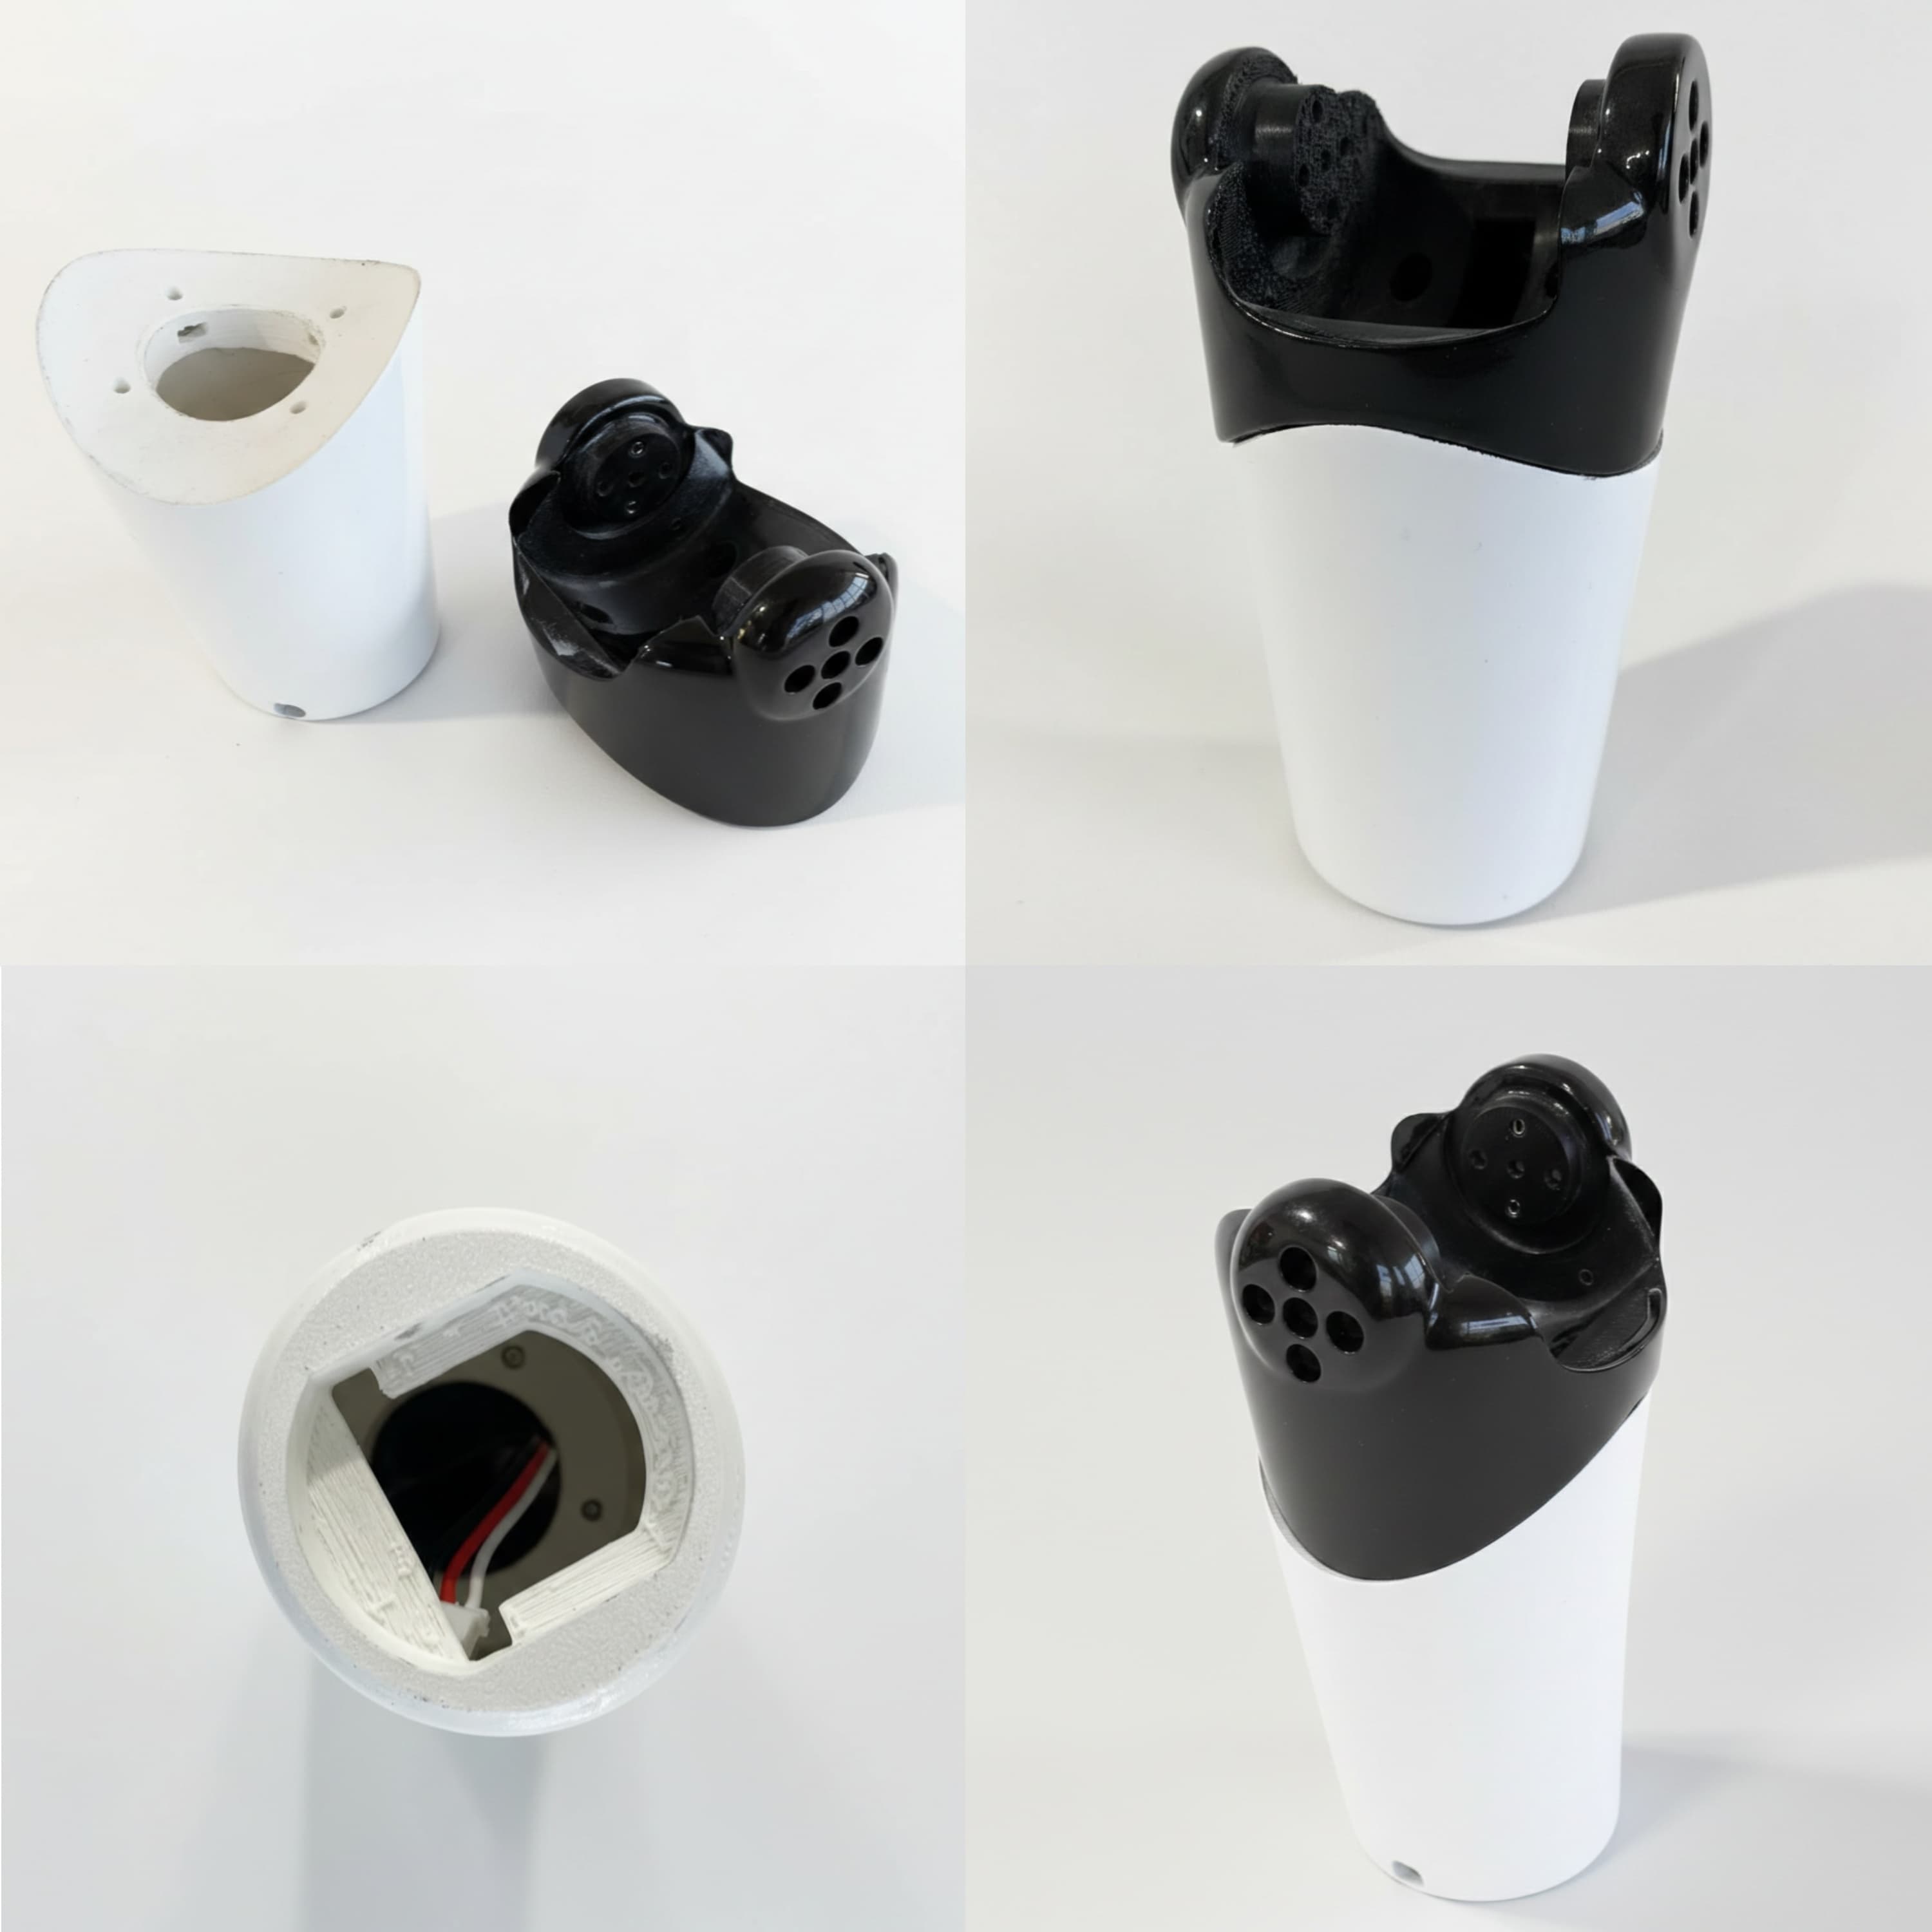
Insert a servo motor into the Elbow Servo Mount Left as shown below by passing the servo cables properly through the given gaps
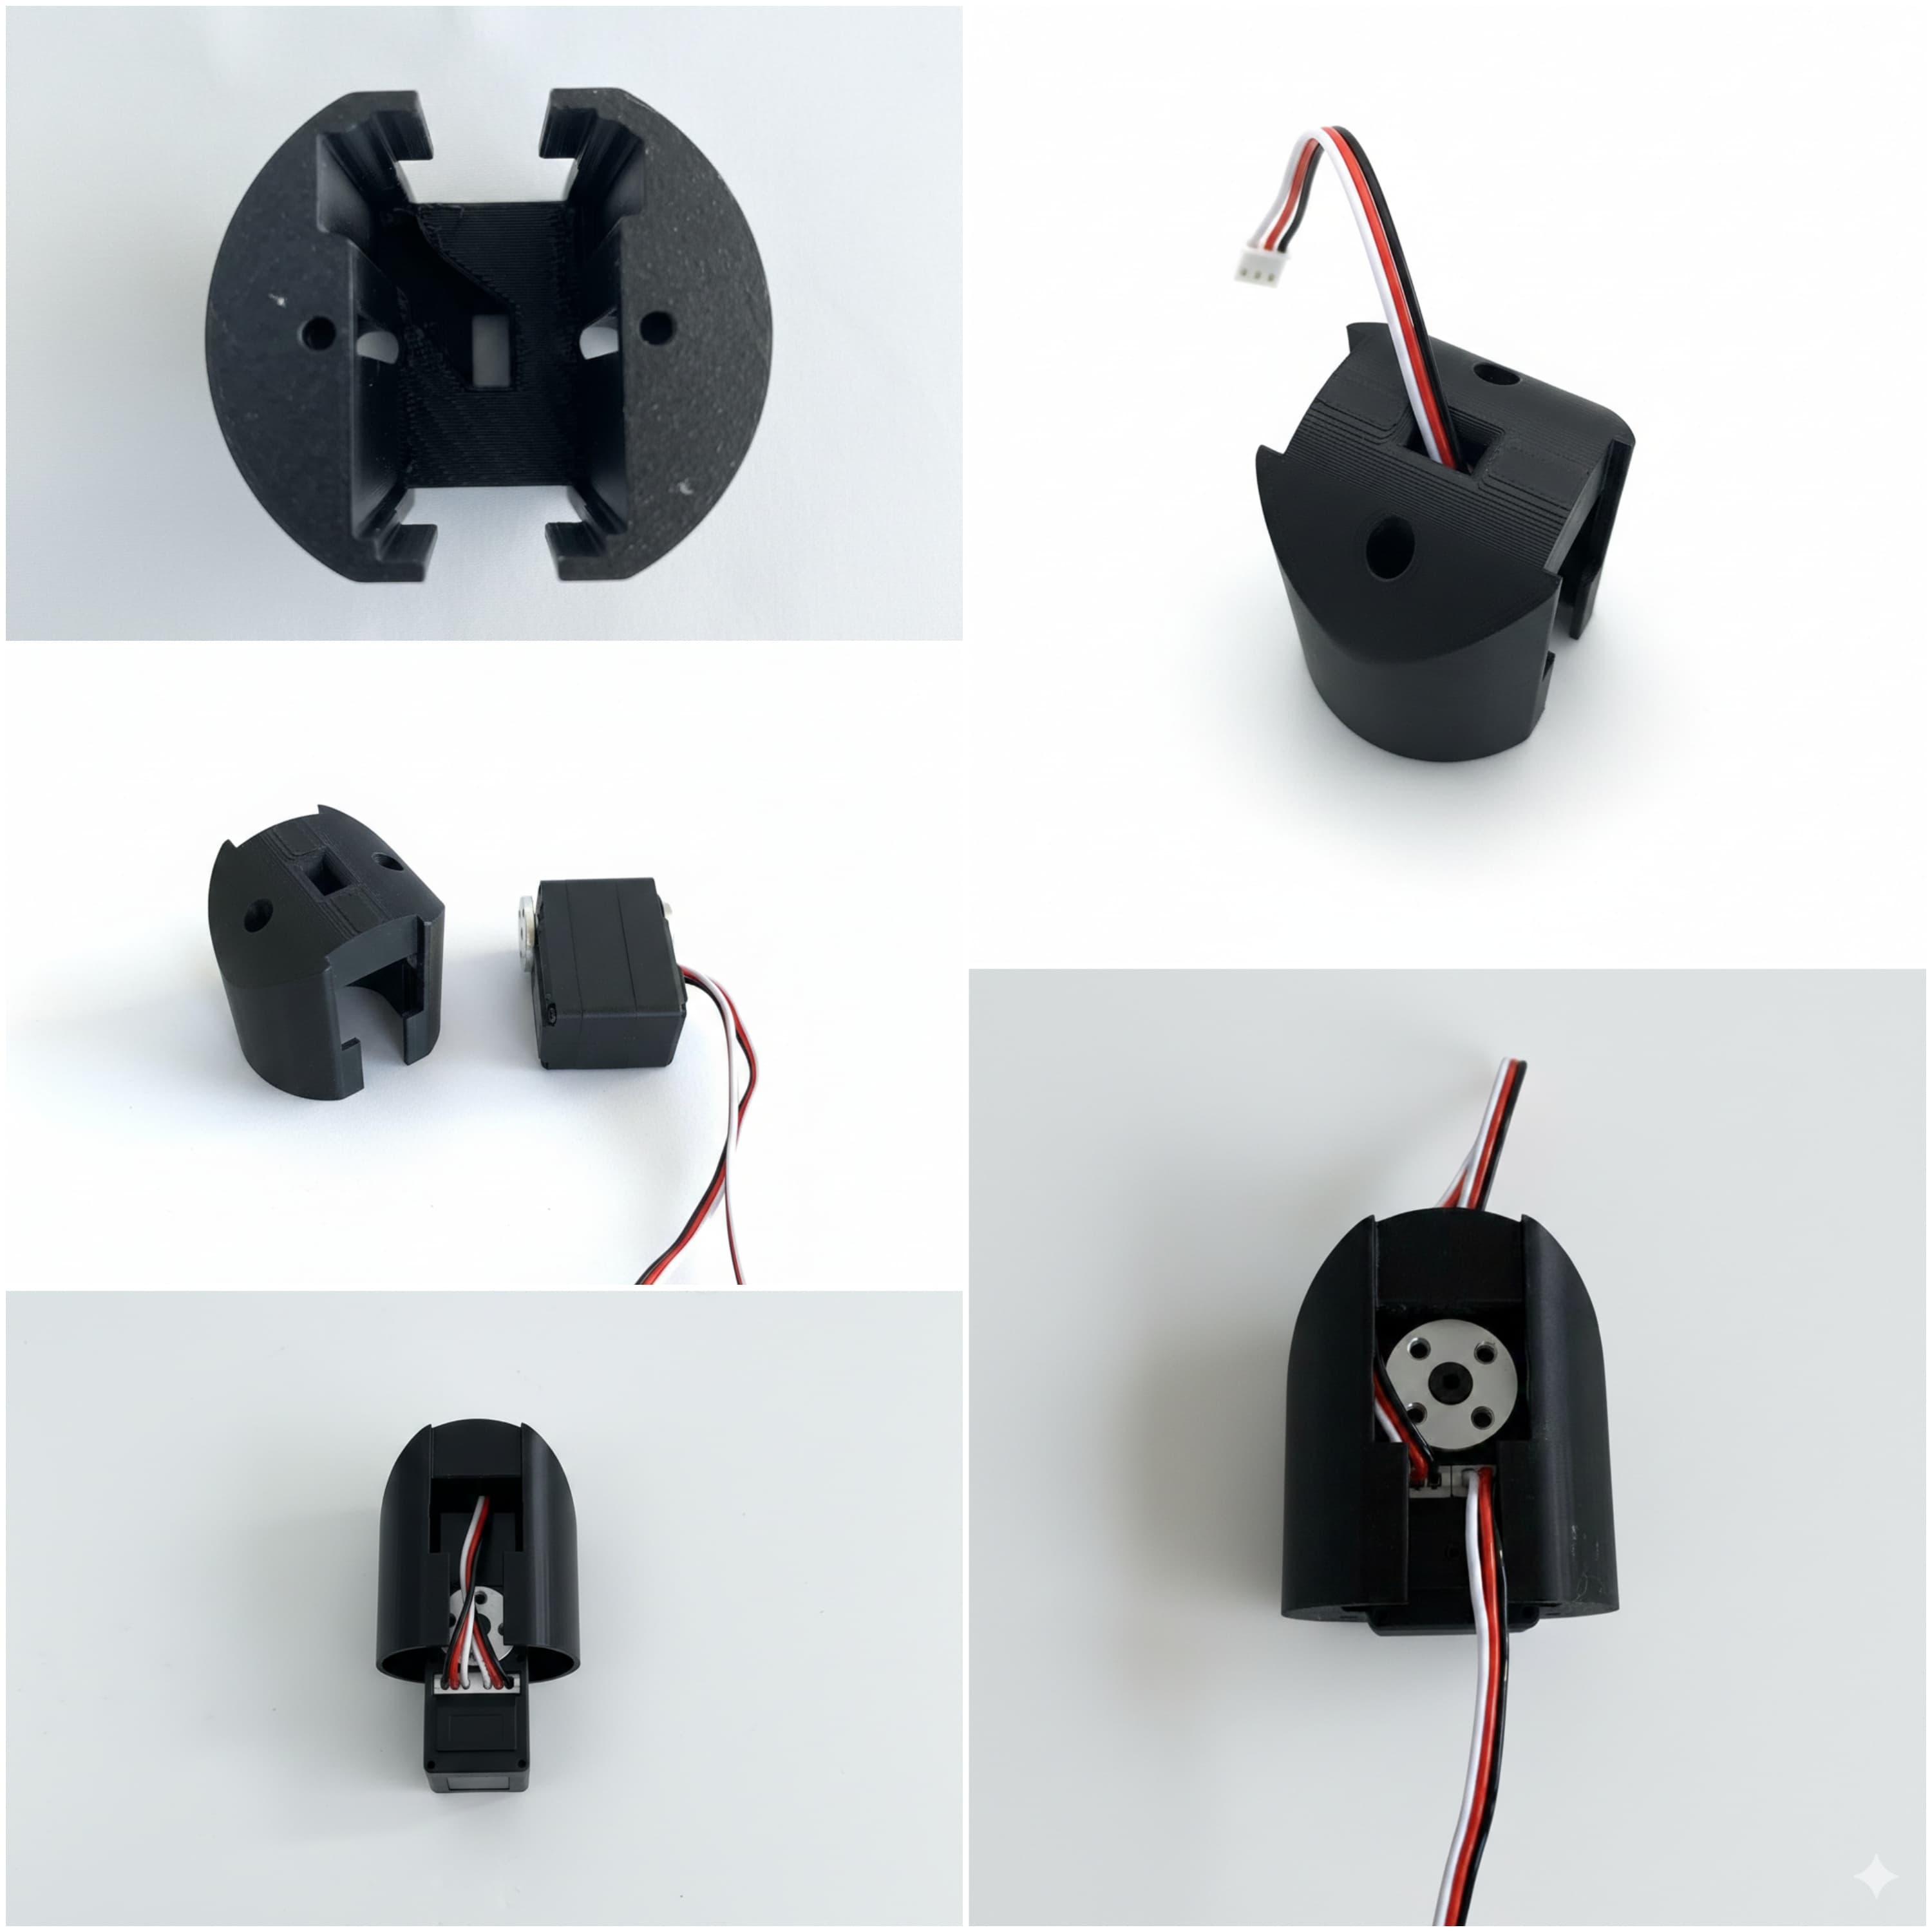
-
Fix the Elbow Servo Mount Left on the lower portion of the Upper Arm Left making sure the servo cable is passing through the given slot on the Upper Arm Left, using 2 x M3 bolts
-
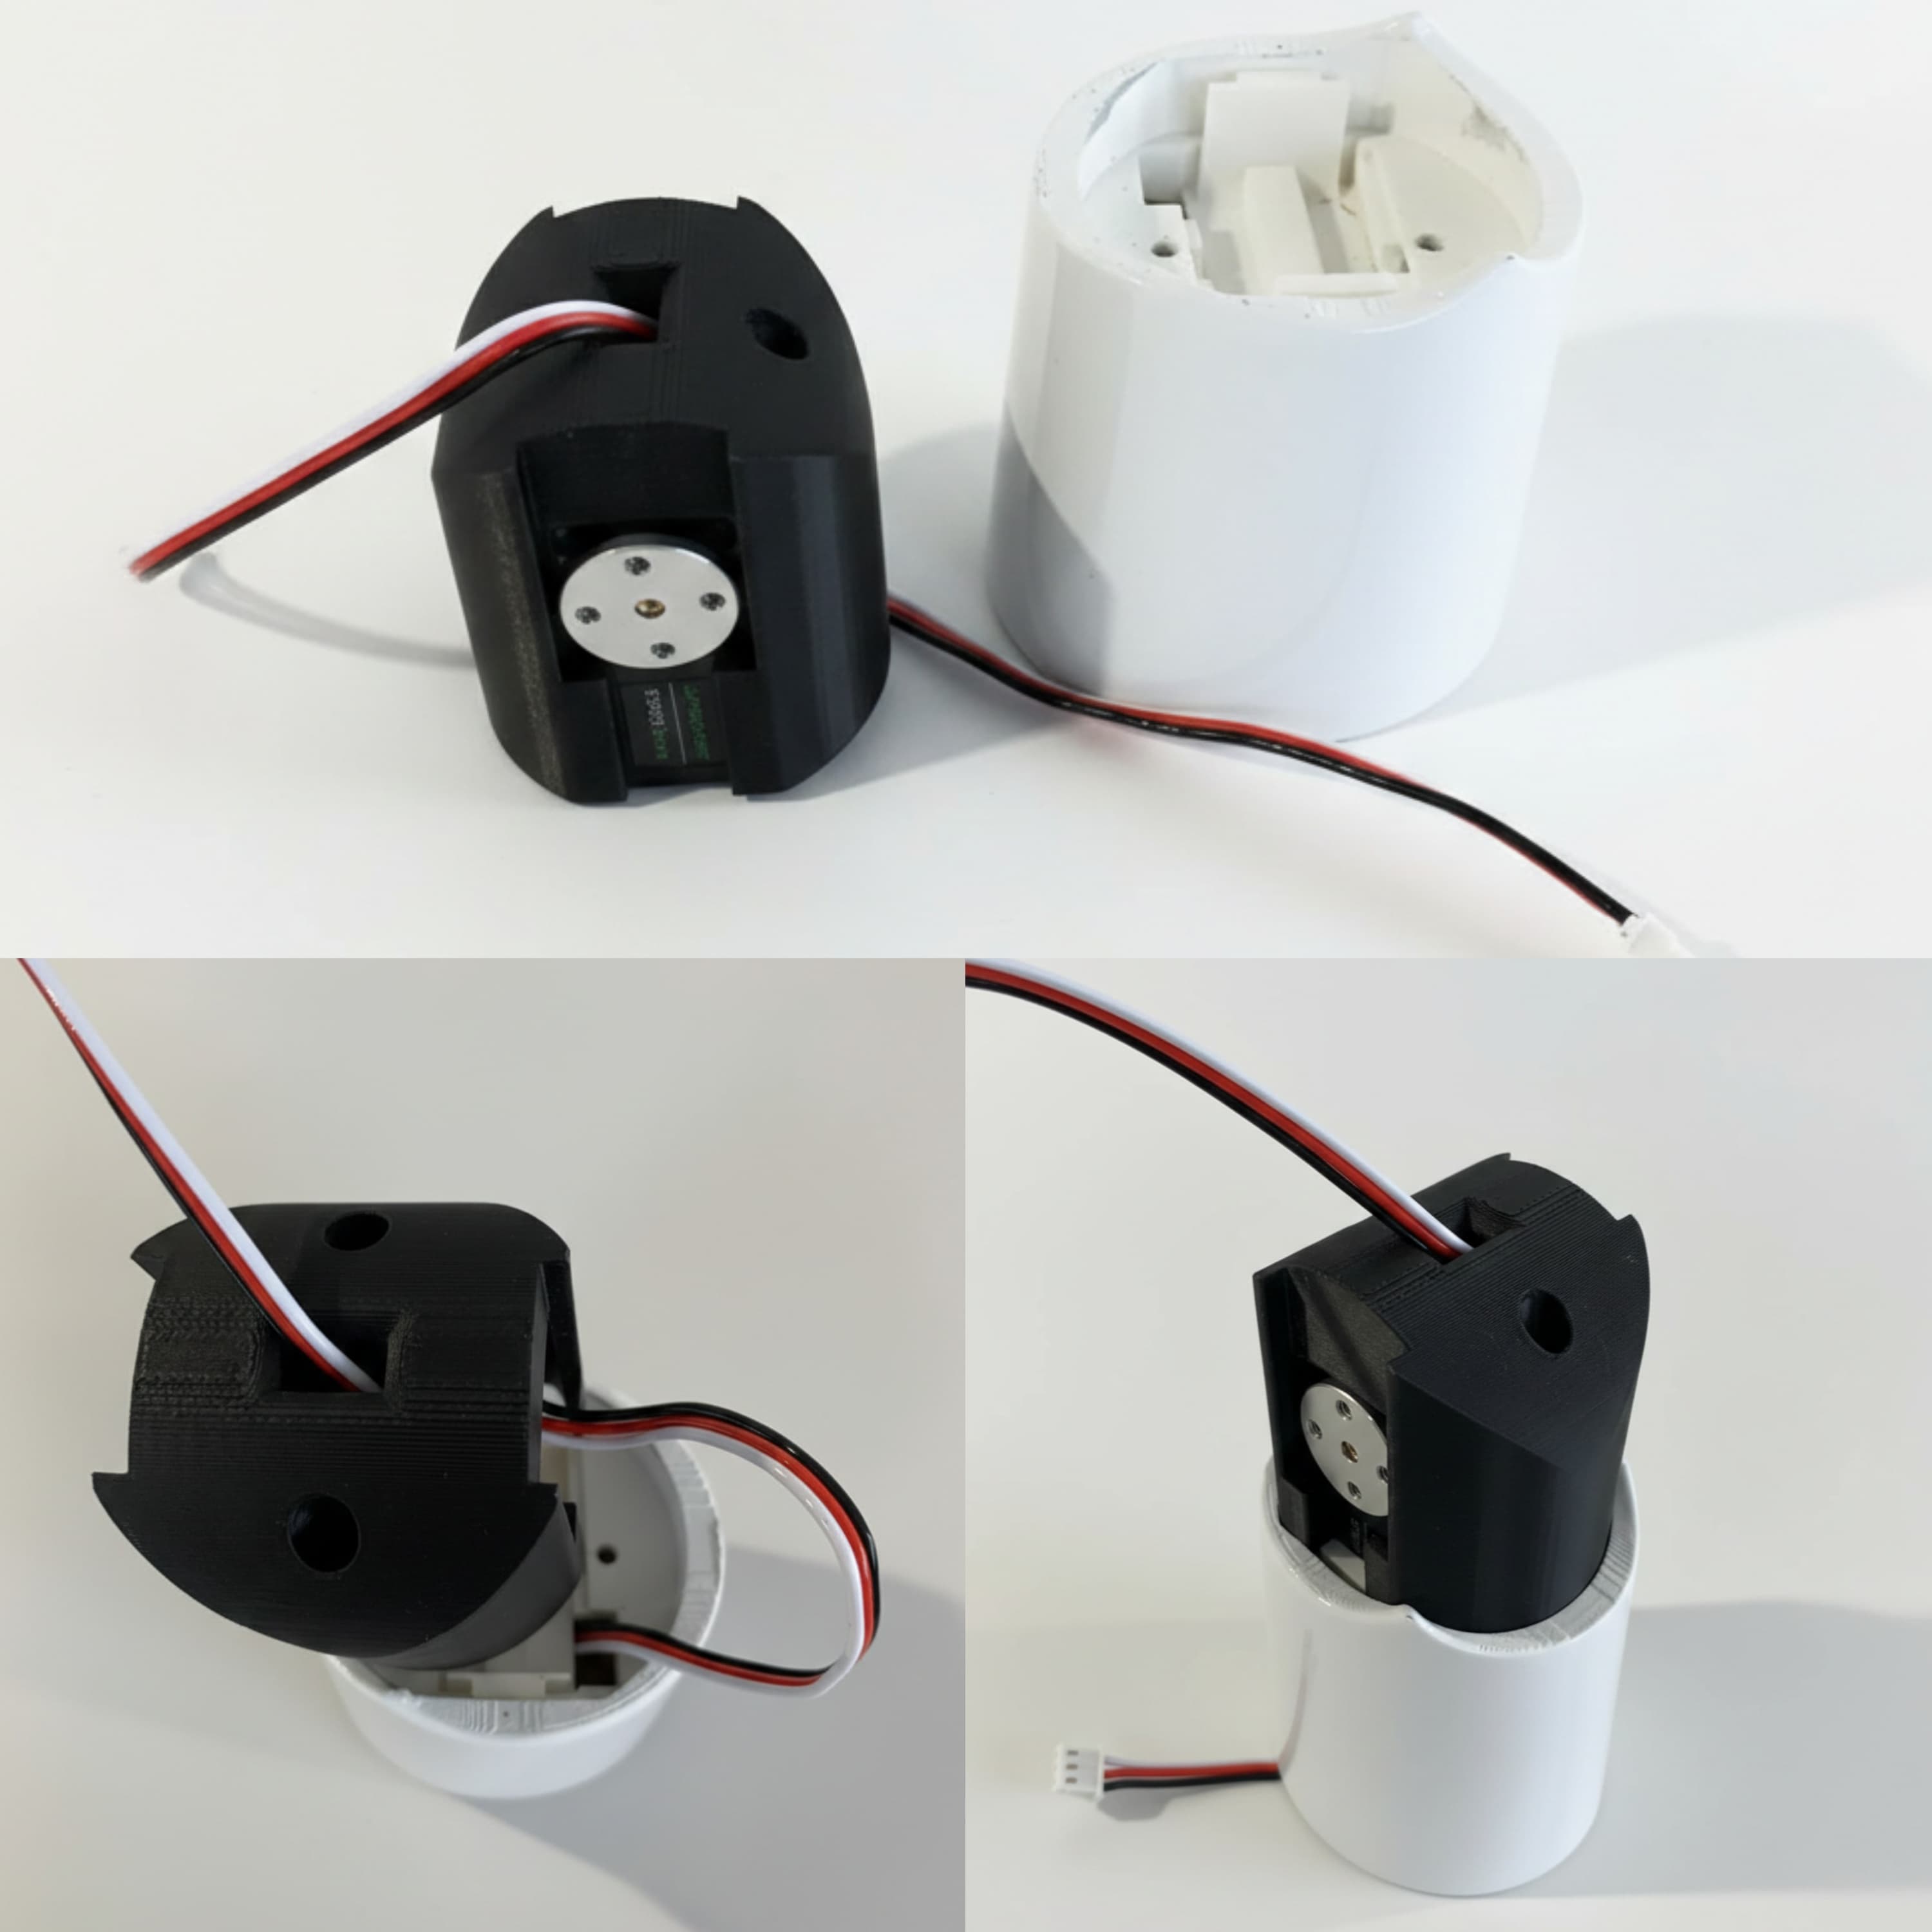
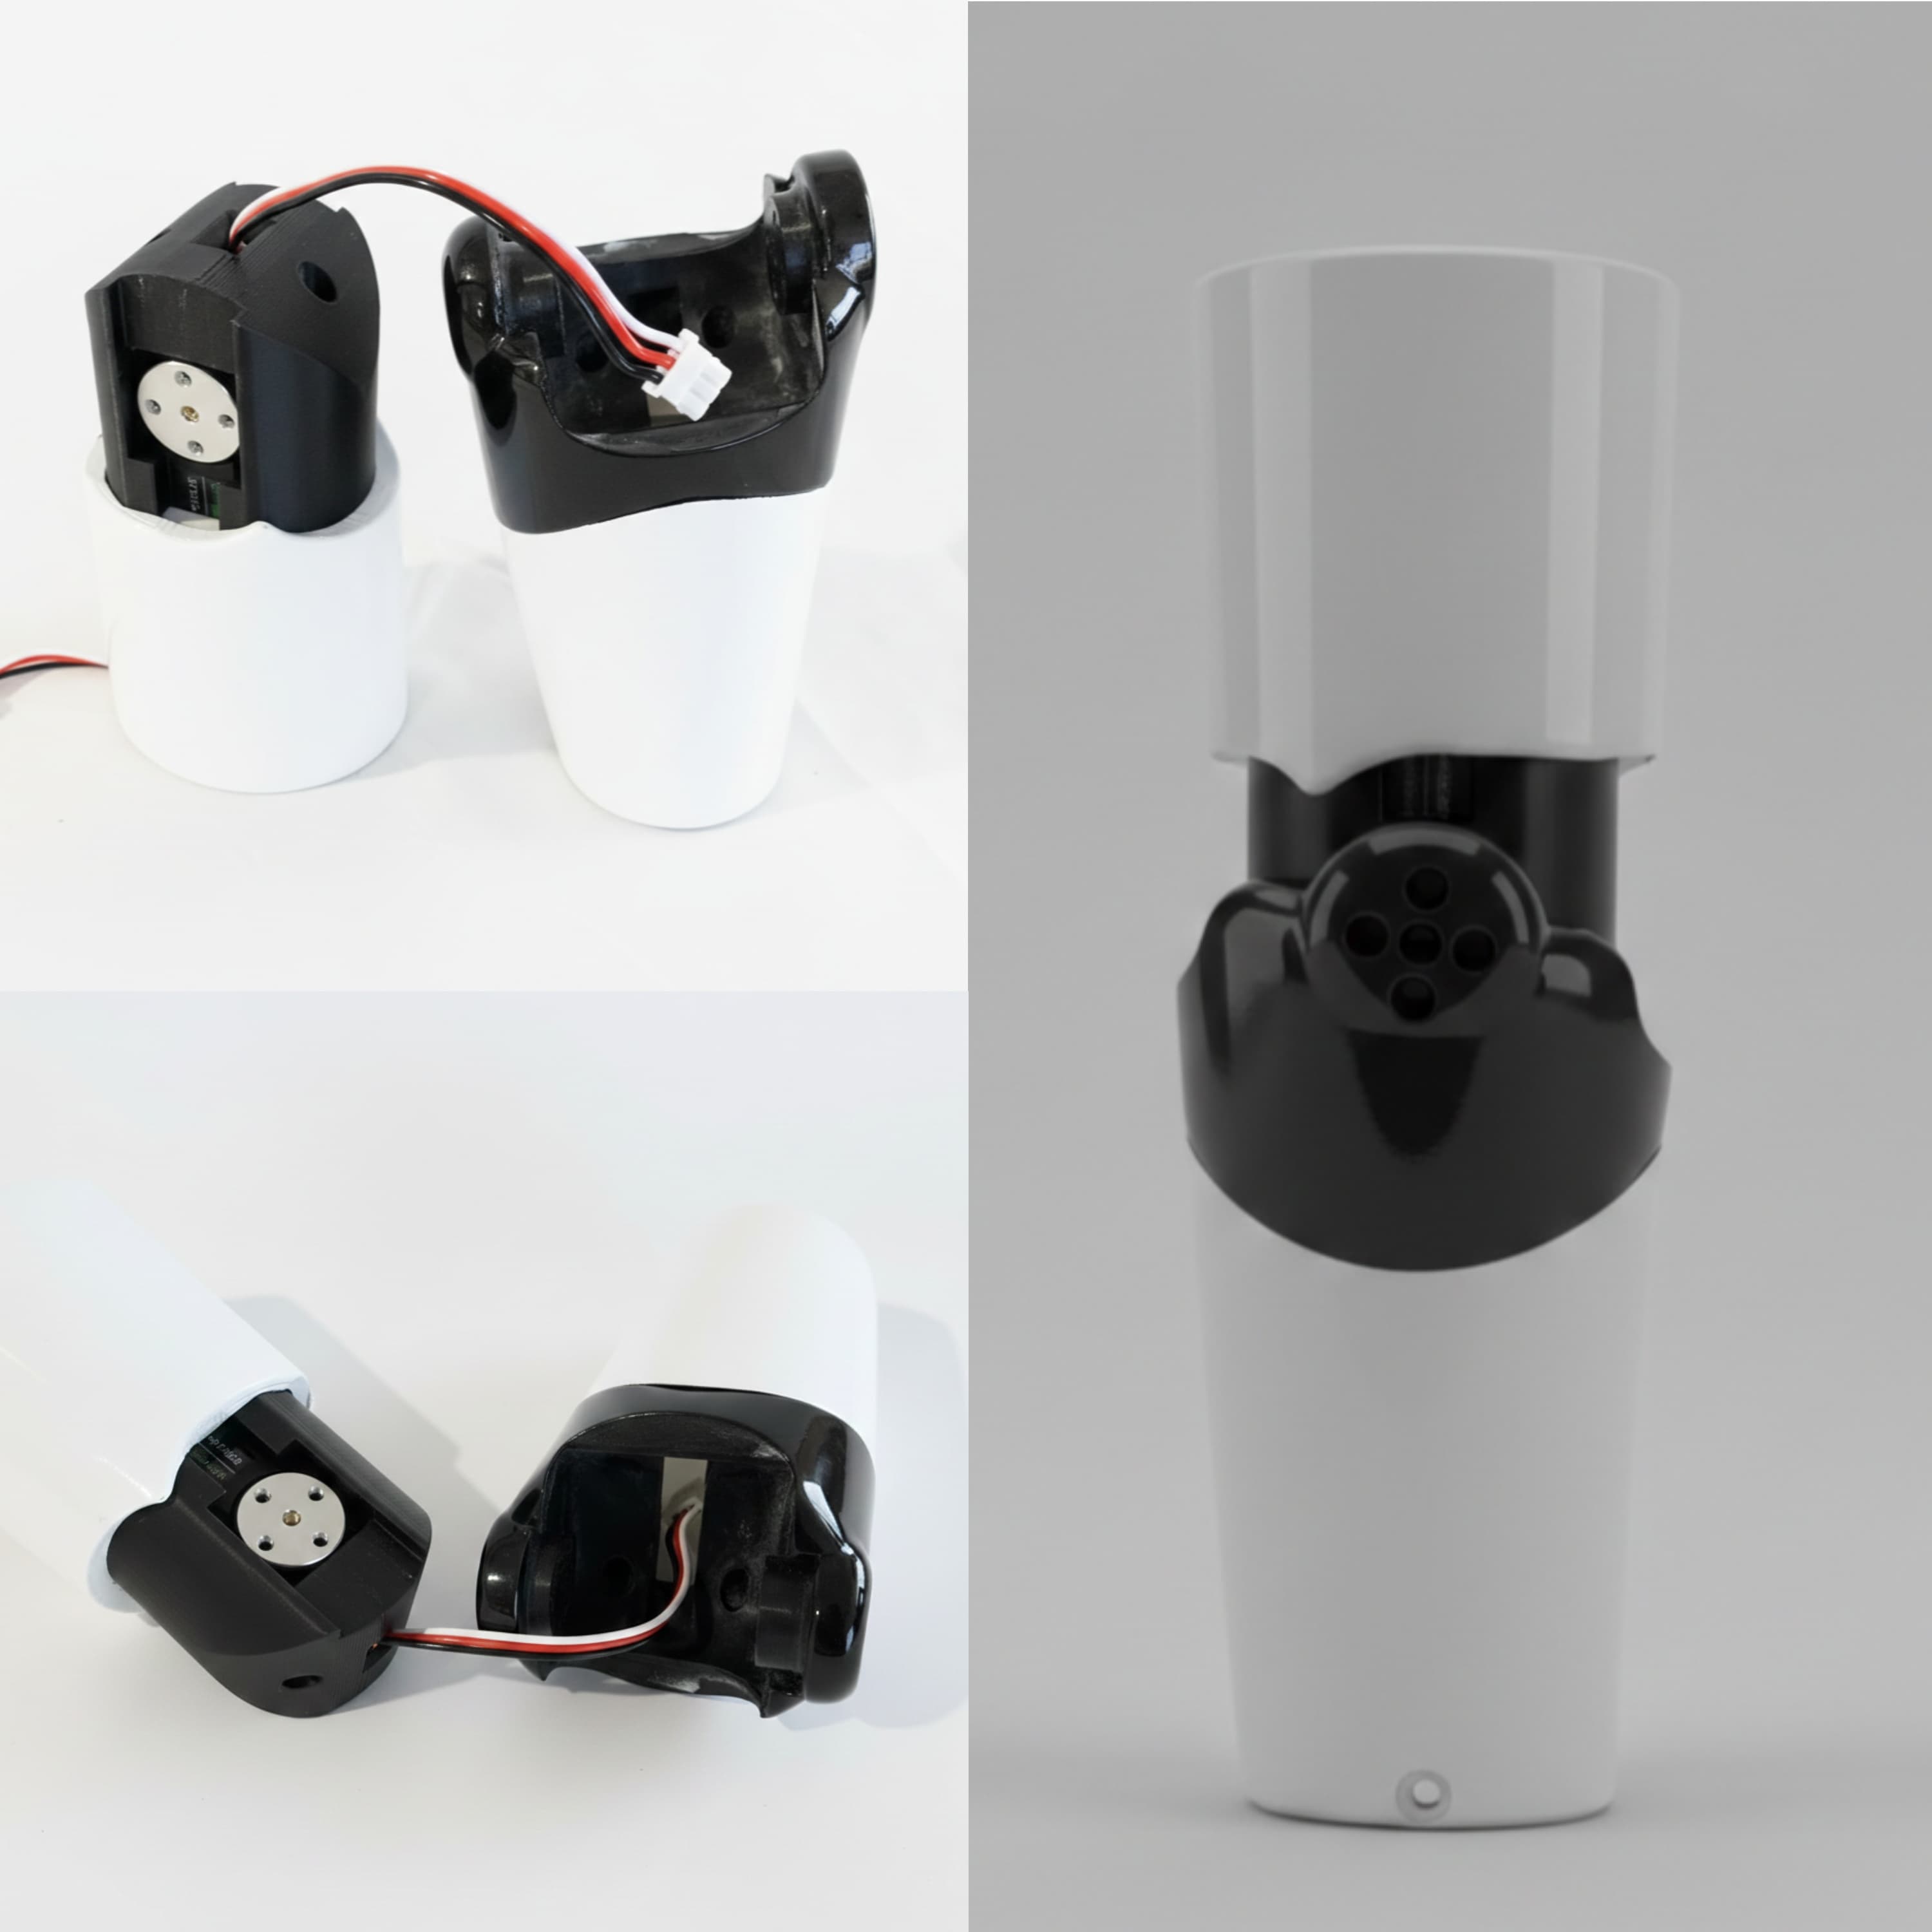
Take the Wrist Joint Left and insert 4 x M3 nuts into the given holes and glue them properly
-
Fix the Elbow Joint Left on the Wrist Joint Left using 4 x M3 bolts by aligning it properly.
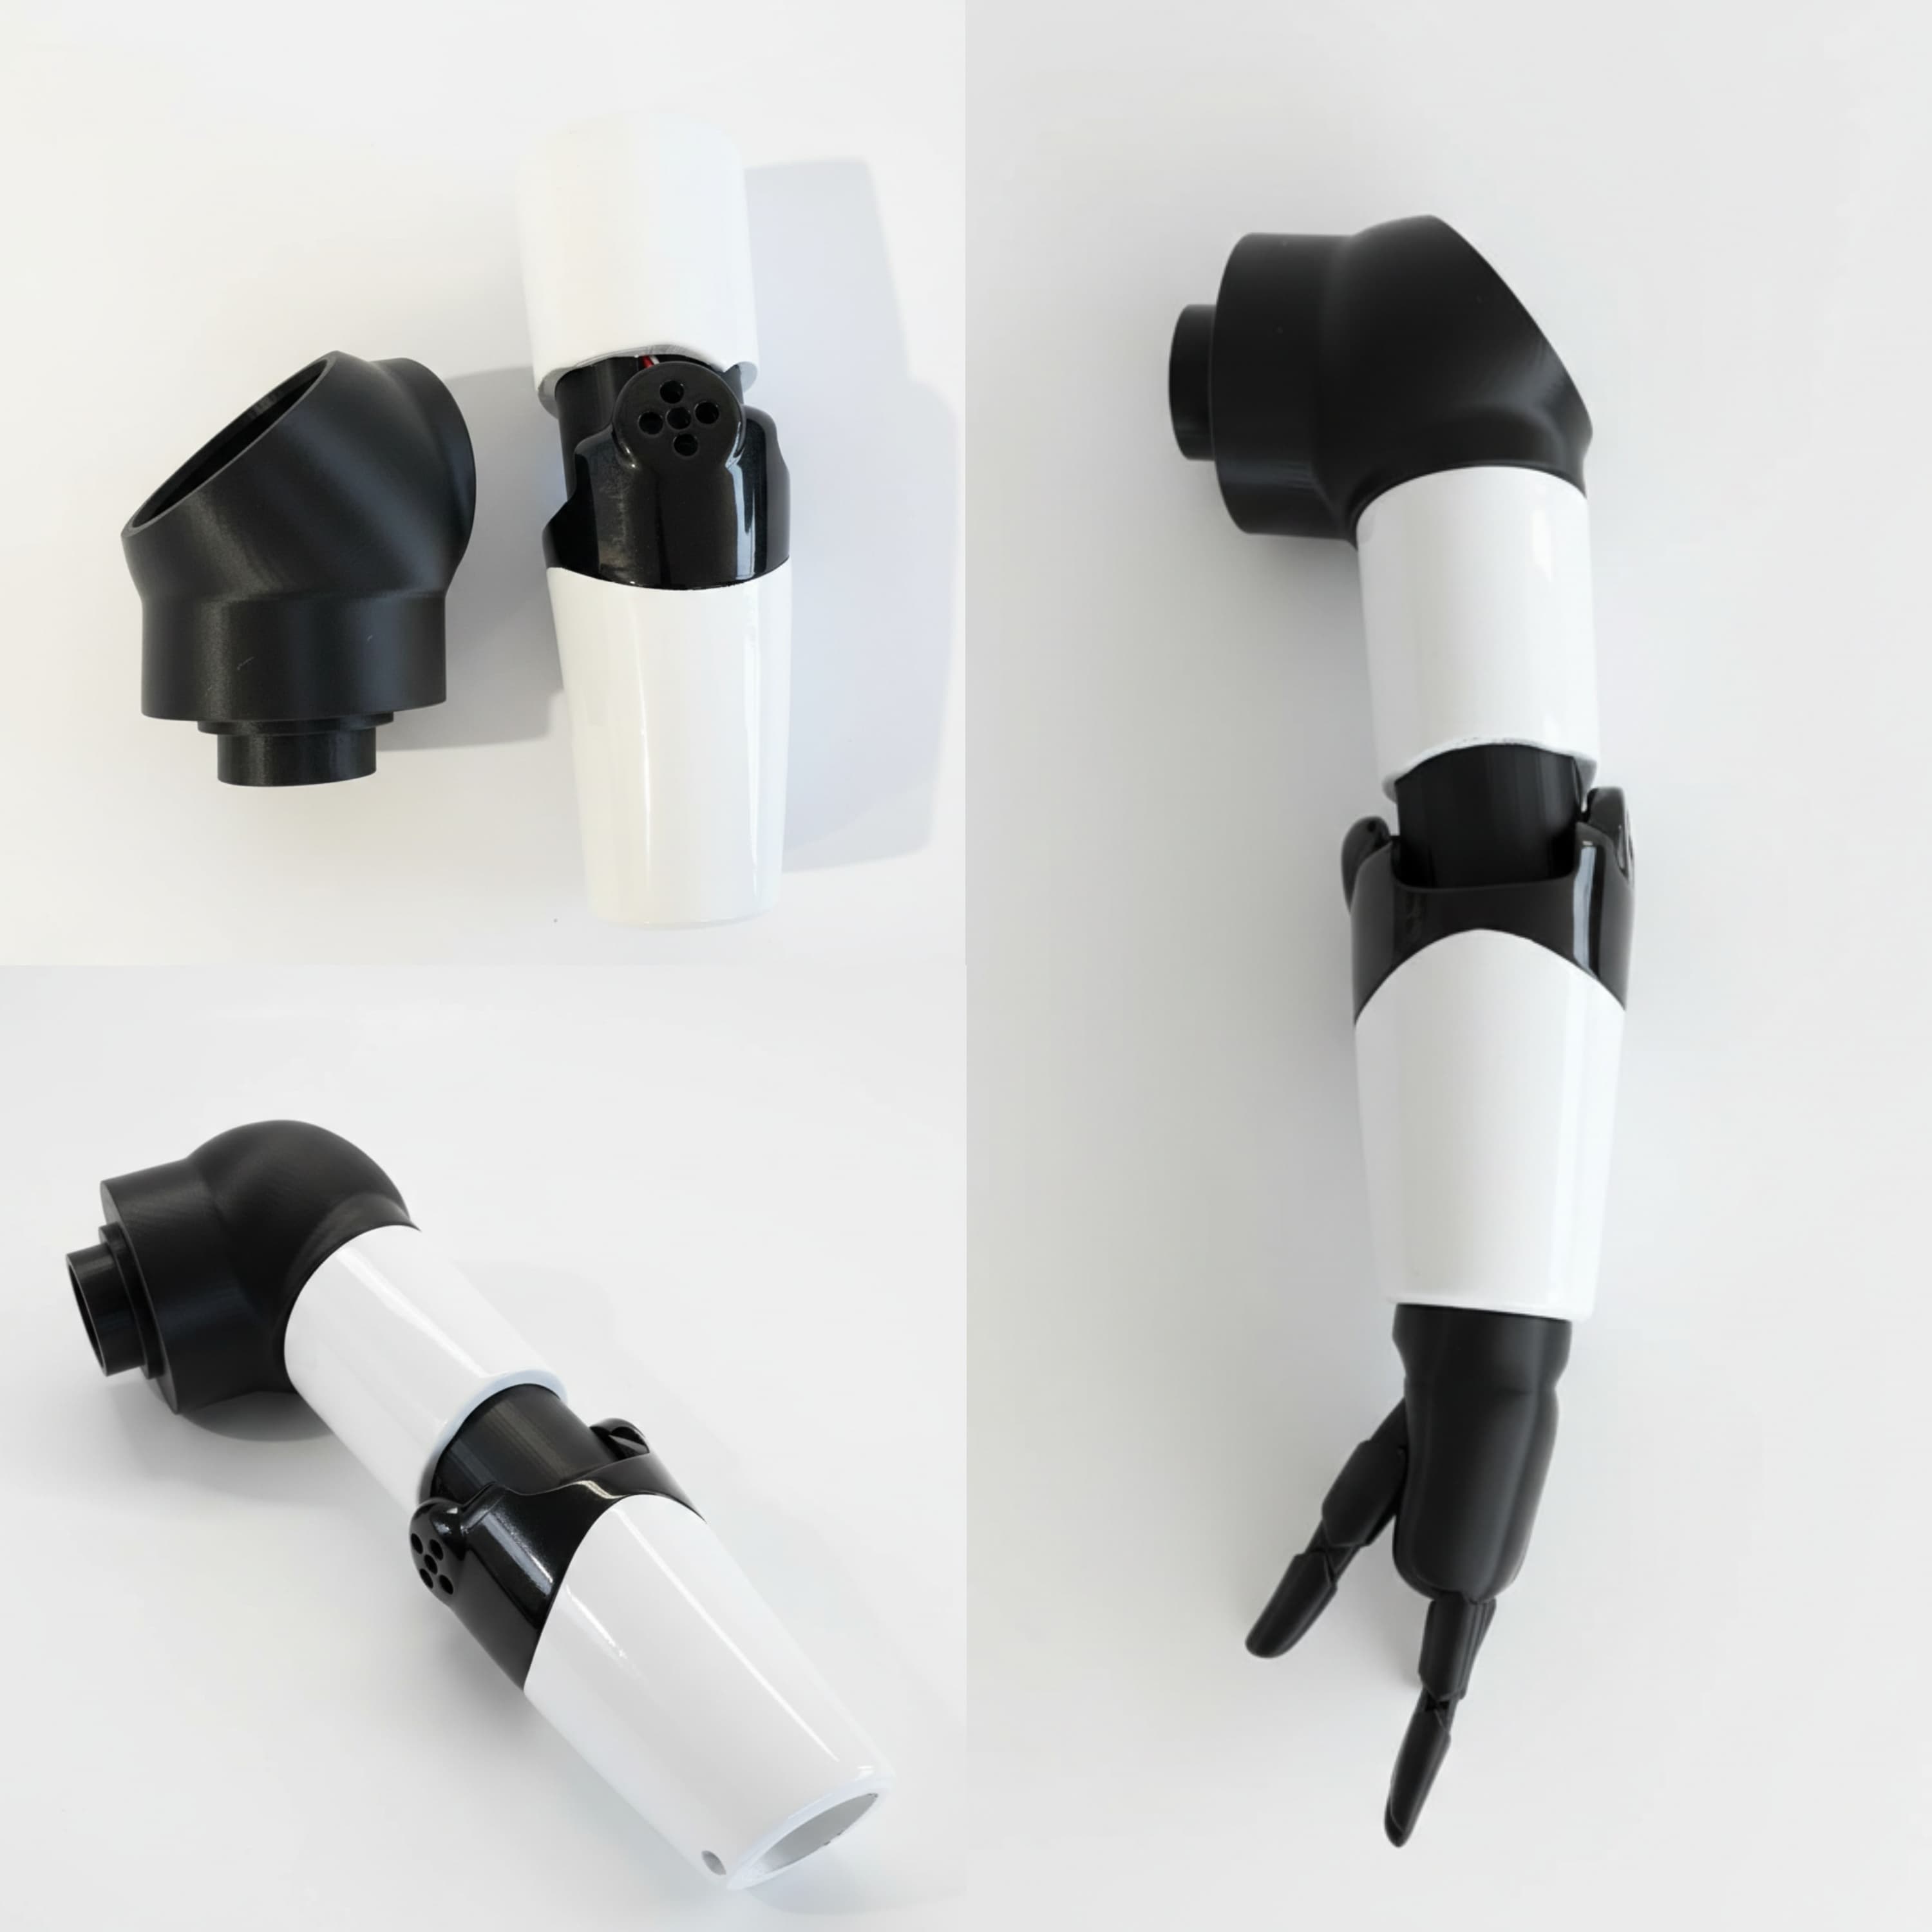
- Fix the upper arm with the wrist portion by aligning the holes on the Elbow Joint with the holes of the servo horns on both sides of the servo motor using servo bolts
- Fix the Shoulder Joint Left on top of the Upper Arm Left piece using 4 x M3 bolts. Insert an M3 nut into the Palm Left and fix it on the Wrist Joint Left using an M3 bolt
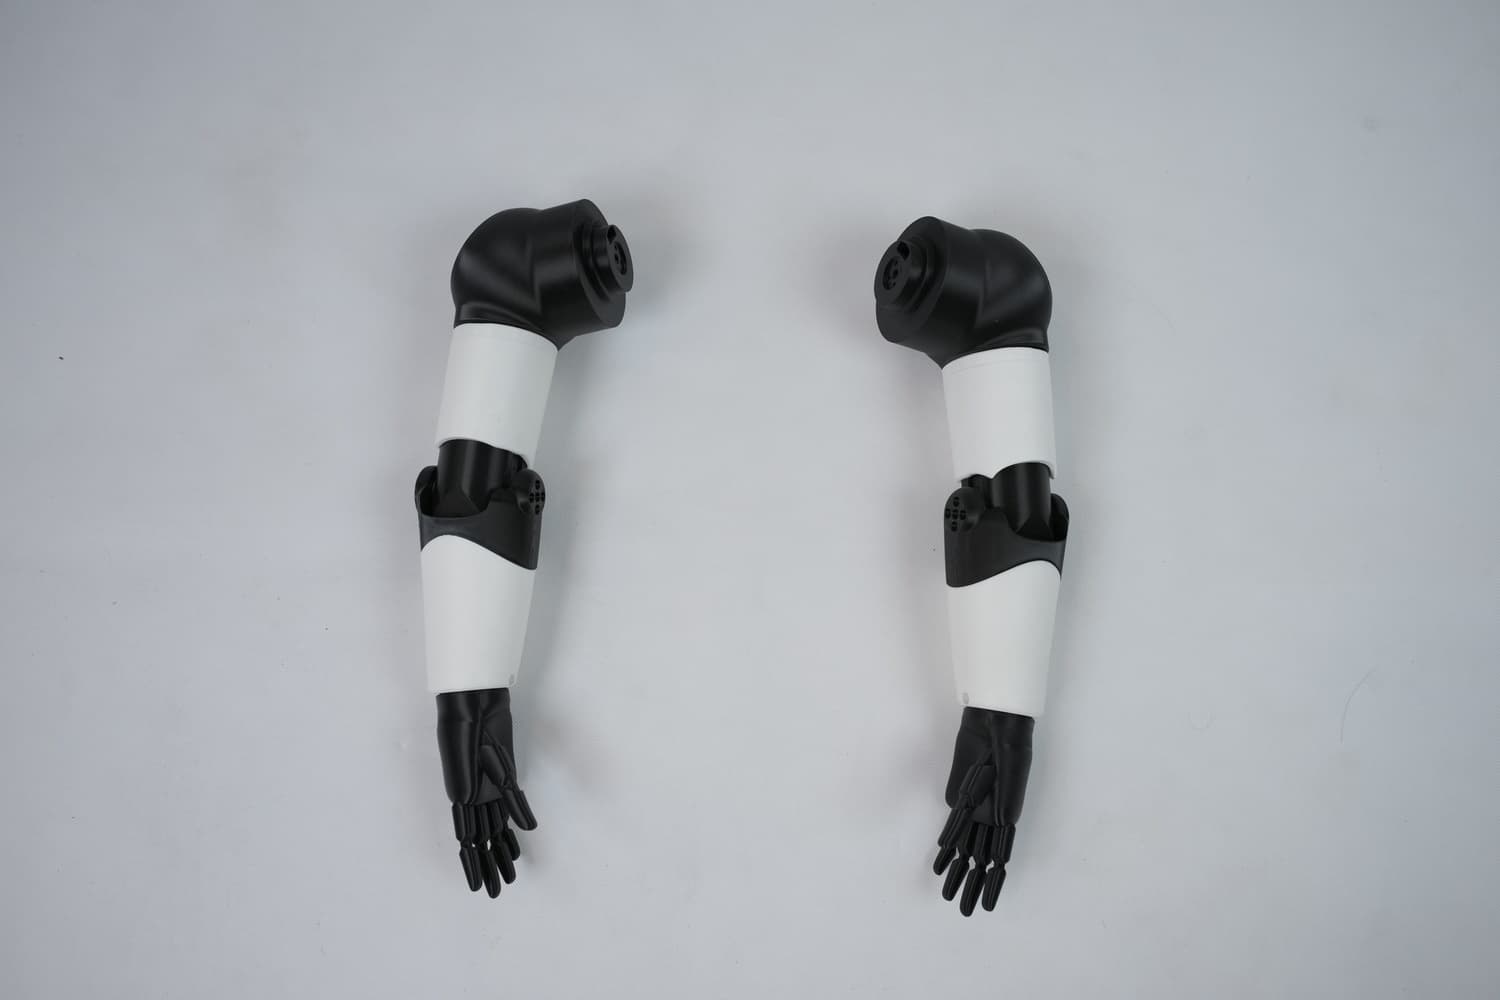
- Now the left hand is ready.
Right Hand Assembly
- Do the same steps as the left hand assembly for the right hand
Final Status
- Both hands are now assembled
Last updated on