Getting Started
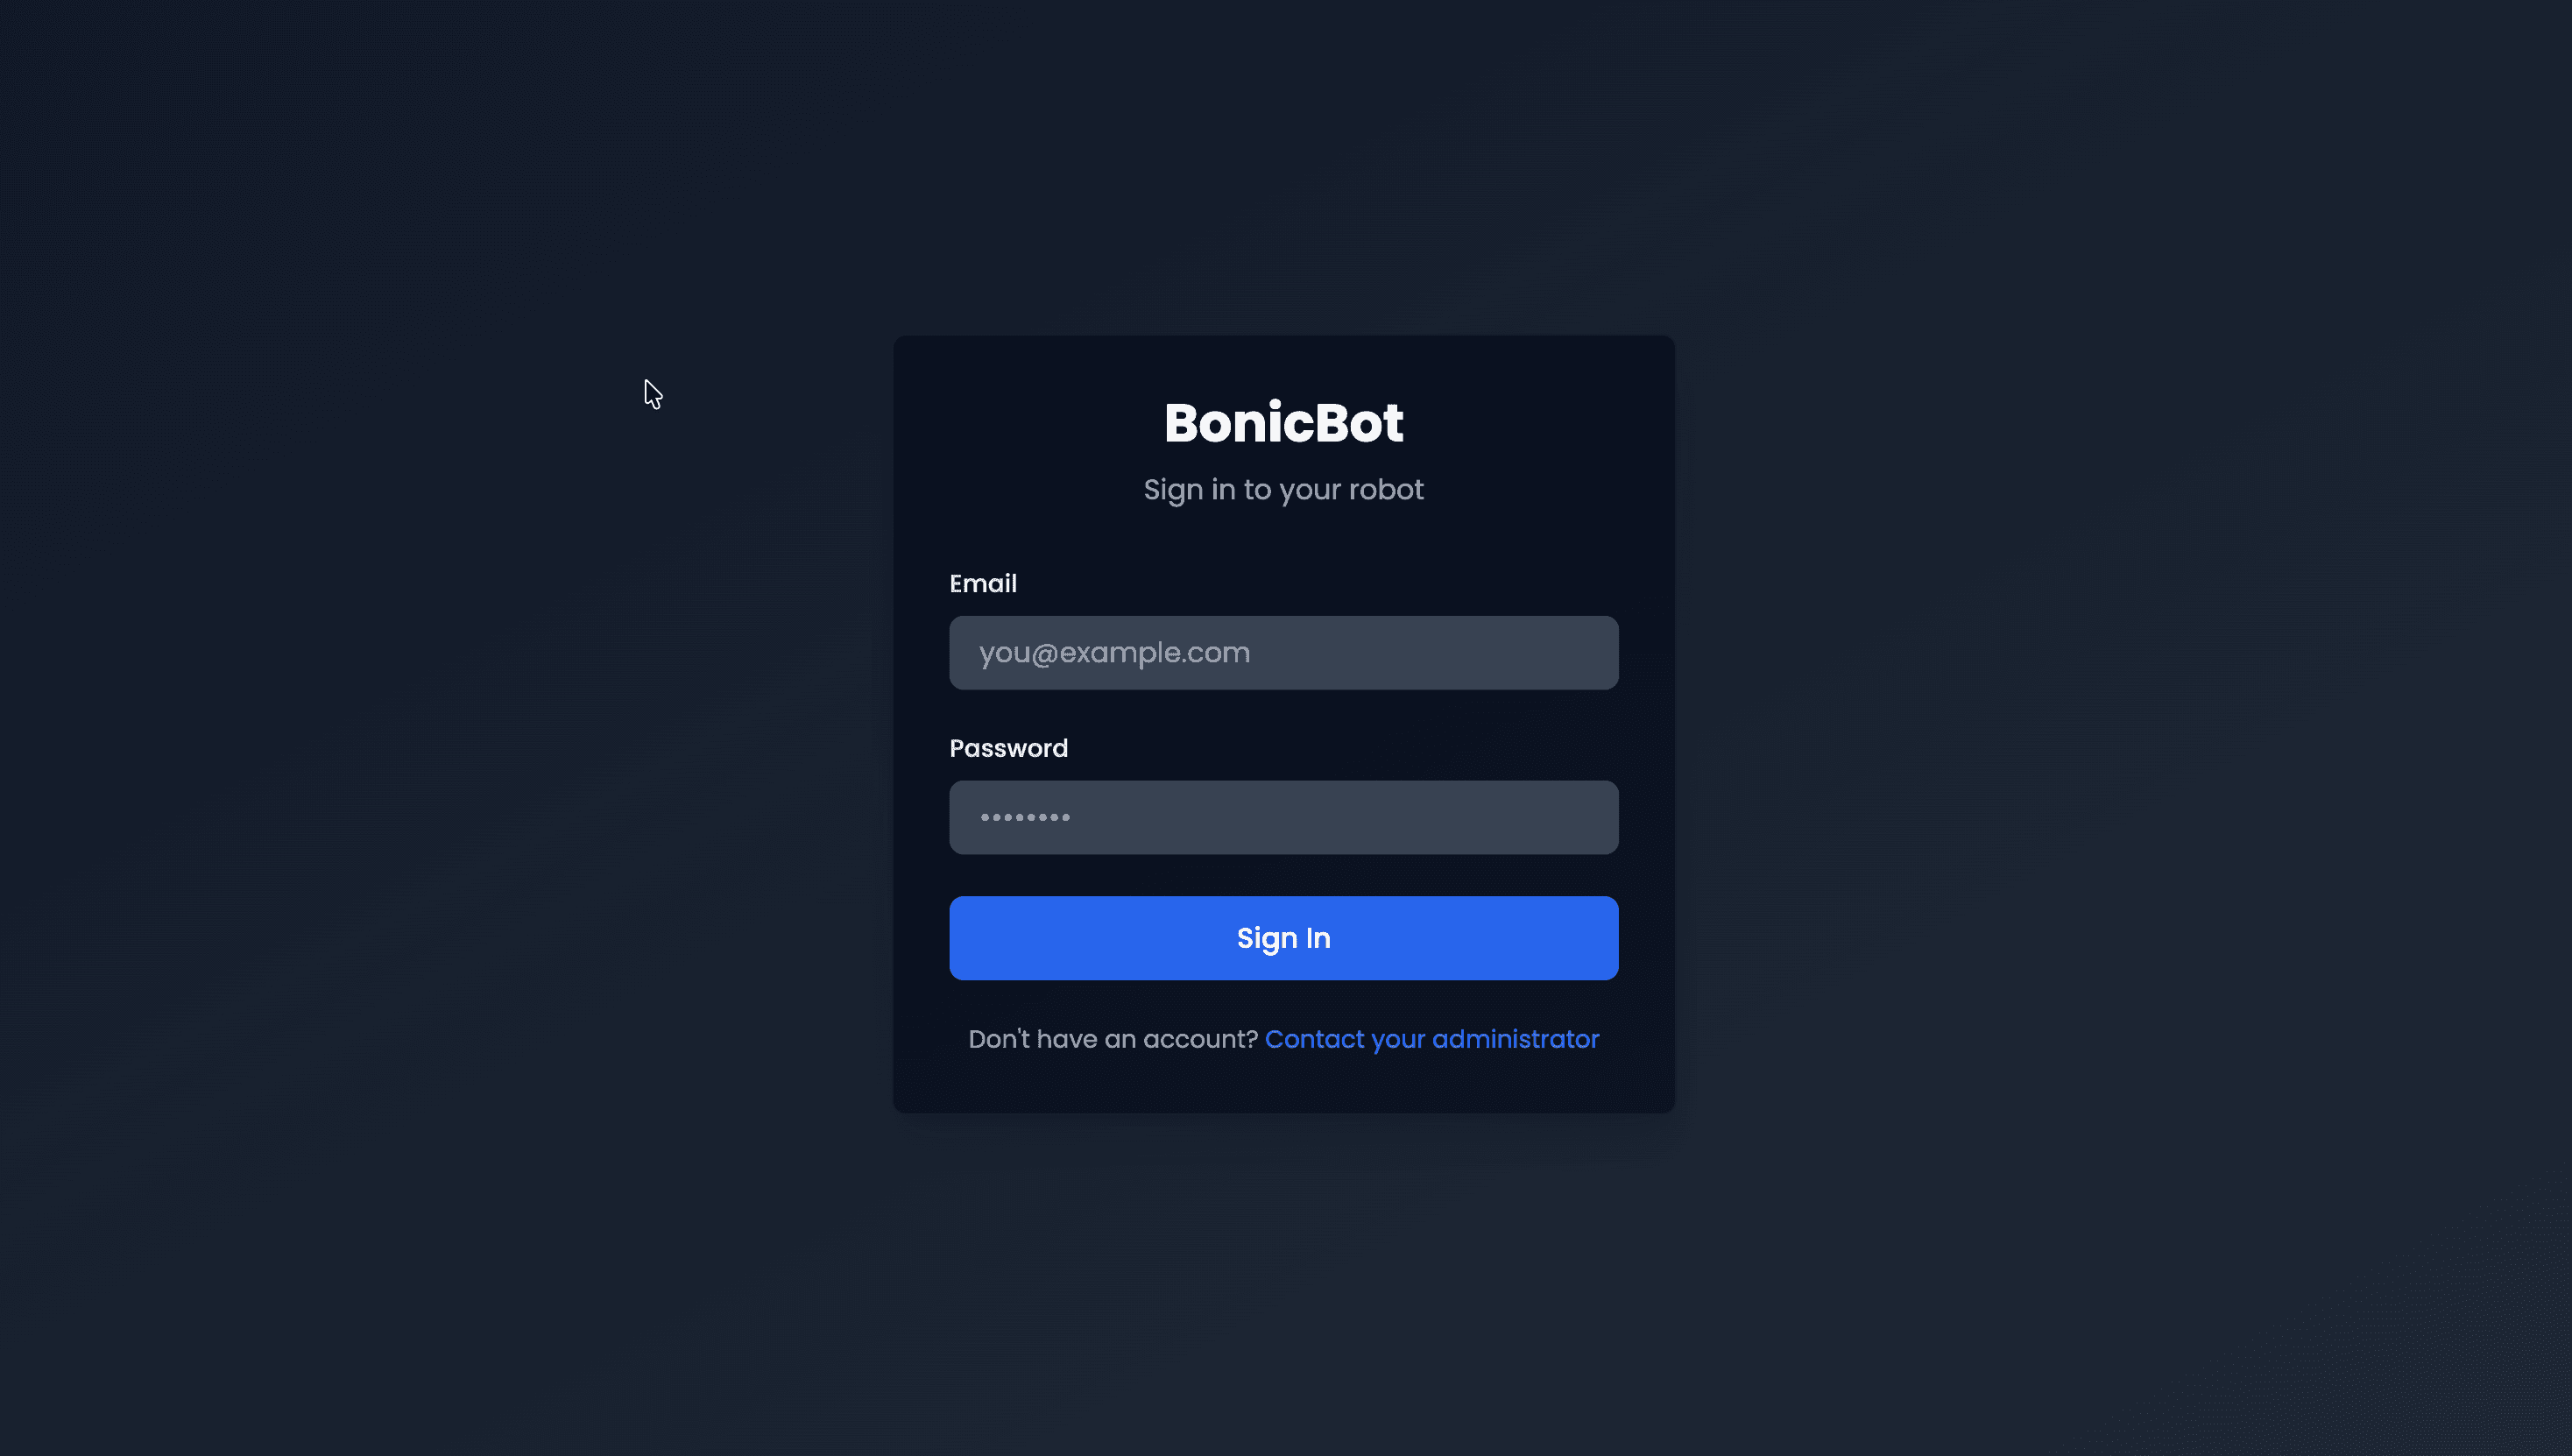
1. Initial Access
- The kiosk loads automatically when the robot starts.
- If this is the first access, the Admin Login screen appears.
- After authentication, the main User Selection screen loads.
2. First-Time Setup Checklist
Before operating the kiosk, ensure:
- Robot is configured in the Admin Dashboard
- At least one AI configuration exists
- At least one login method is enabled
- AI credits are available
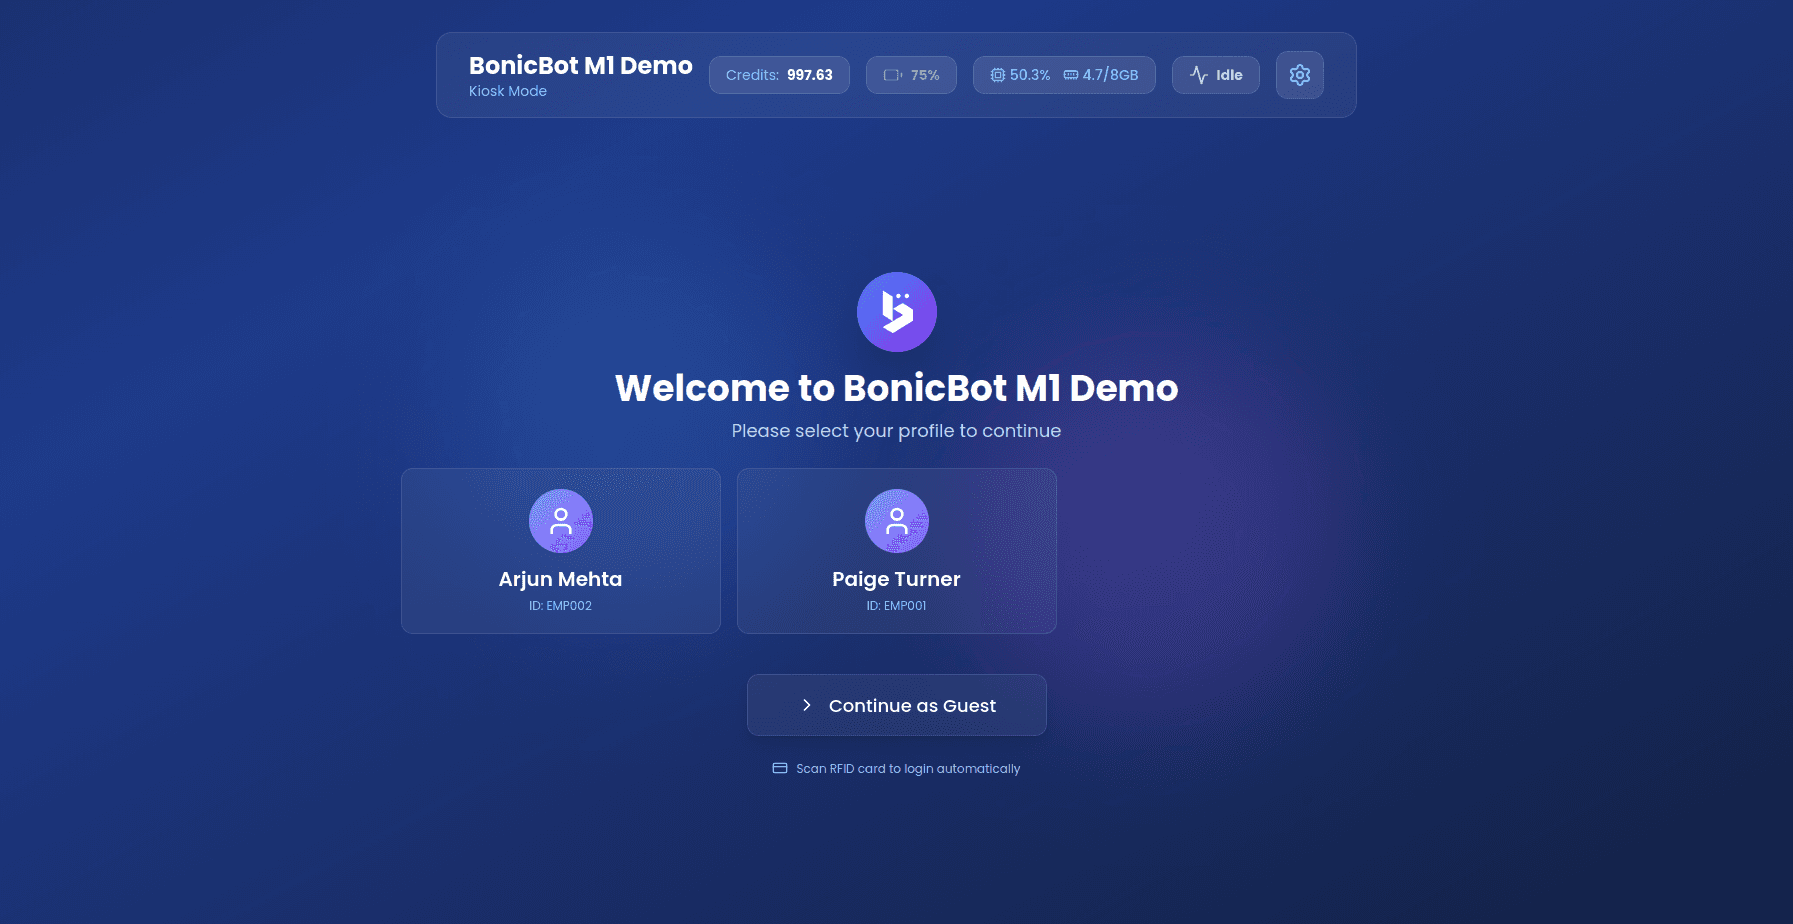
3. User Interface Overview
Top Bar (Always Visible)
The top bar provides system-wide status and controls.
It displays:
- Robot Name and Logo
- Credit Balance (color-coded)
- White: ≥ 100 credits
- Yellow: < 100 credits
- Red: 0 or below
- Battery Indicator
- System Metrics (CPU, Memory, Temperature)
- Robot Status
- Settings Icon
4. Logging In
The kiosk supports three login methods:
- Manual User Selection
- Guest Mode
- RFID Card Login
These modes are only visible and accessible if enabled by the administrator.
4.1 Manual User Selection
- Registered users appear in a grid layout.
- Each card displays:
- User avatar
- User name
- User ID (if available)
To begin:
- Tap a user card.
- A loading indicator appears.
- The system navigates to the Active Session screen.
User cards are touch-friendly and temporarily disabled during loading to prevent multiple taps.
4.2 Guest Mode
- Tap “Continue as Guest”.
- An anonymous session begins.
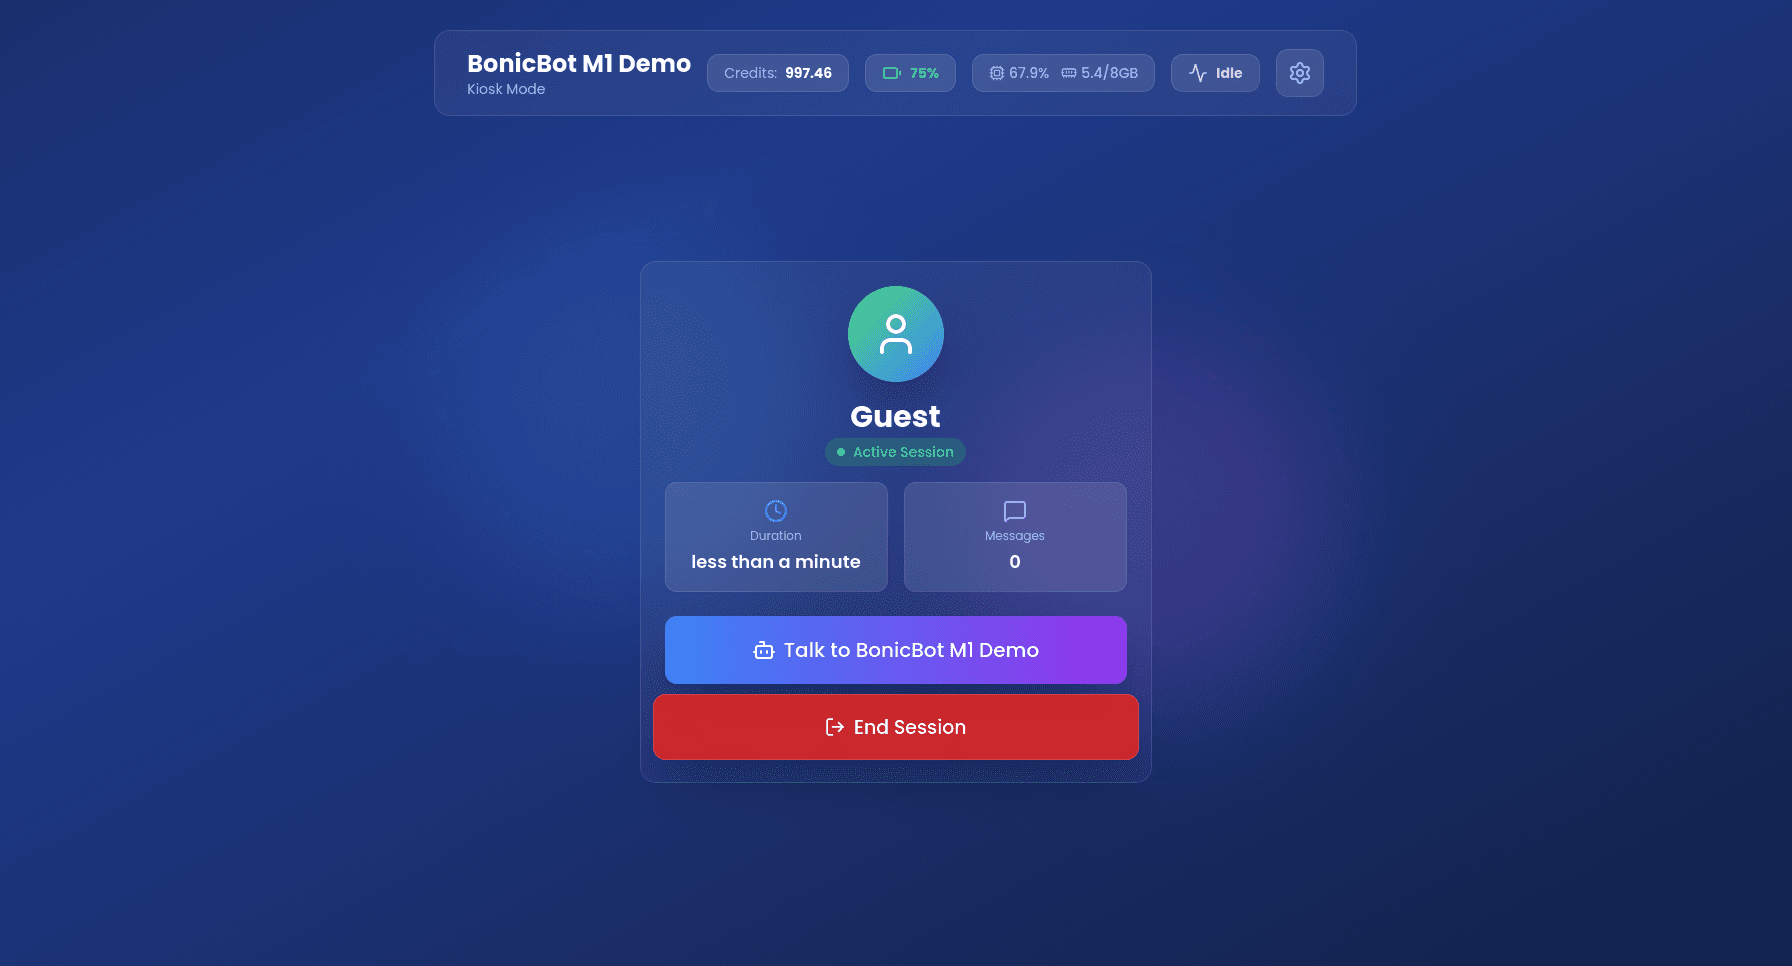
Guest sessions:
- Have limited personalization
- Allow AI conversations (if credits are available)
4.3 RFID Card Login
- Tap the registered RFID card on the reader.
- Login occurs automatically.
Screen hint:
“Scan RFID card to login automatically.”
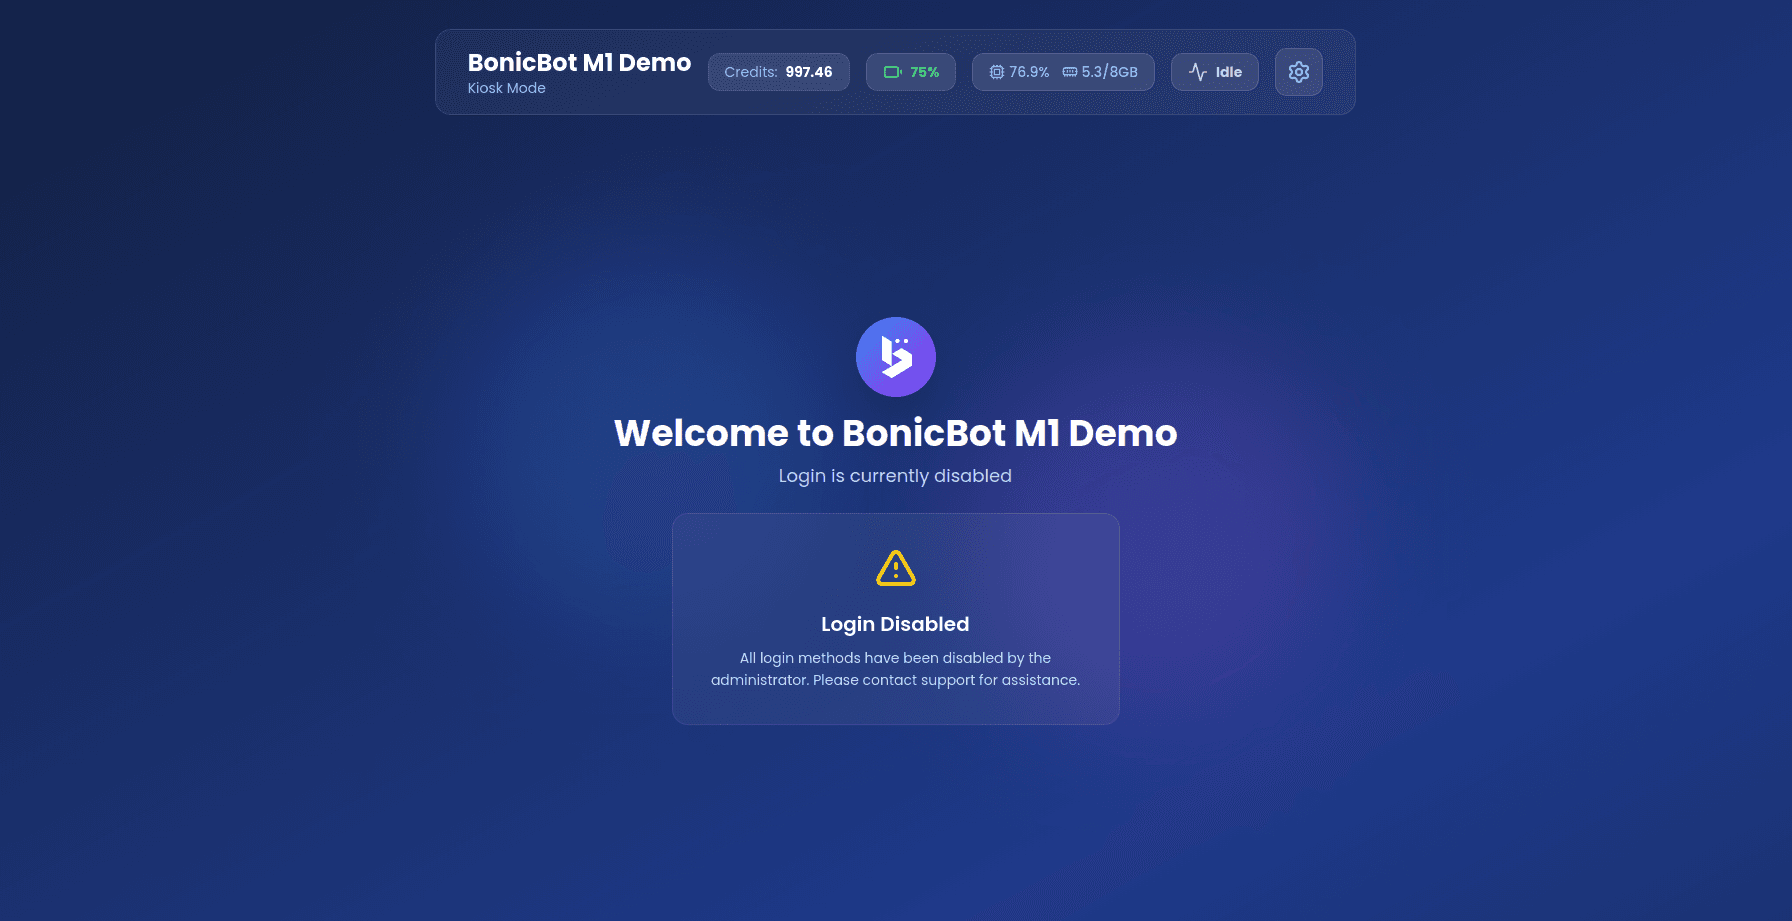
Login Disabled State
If all login methods are disabled by the administrator:
- A “Login Disabled” warning appears.
- Users are instructed to contact the administrator.
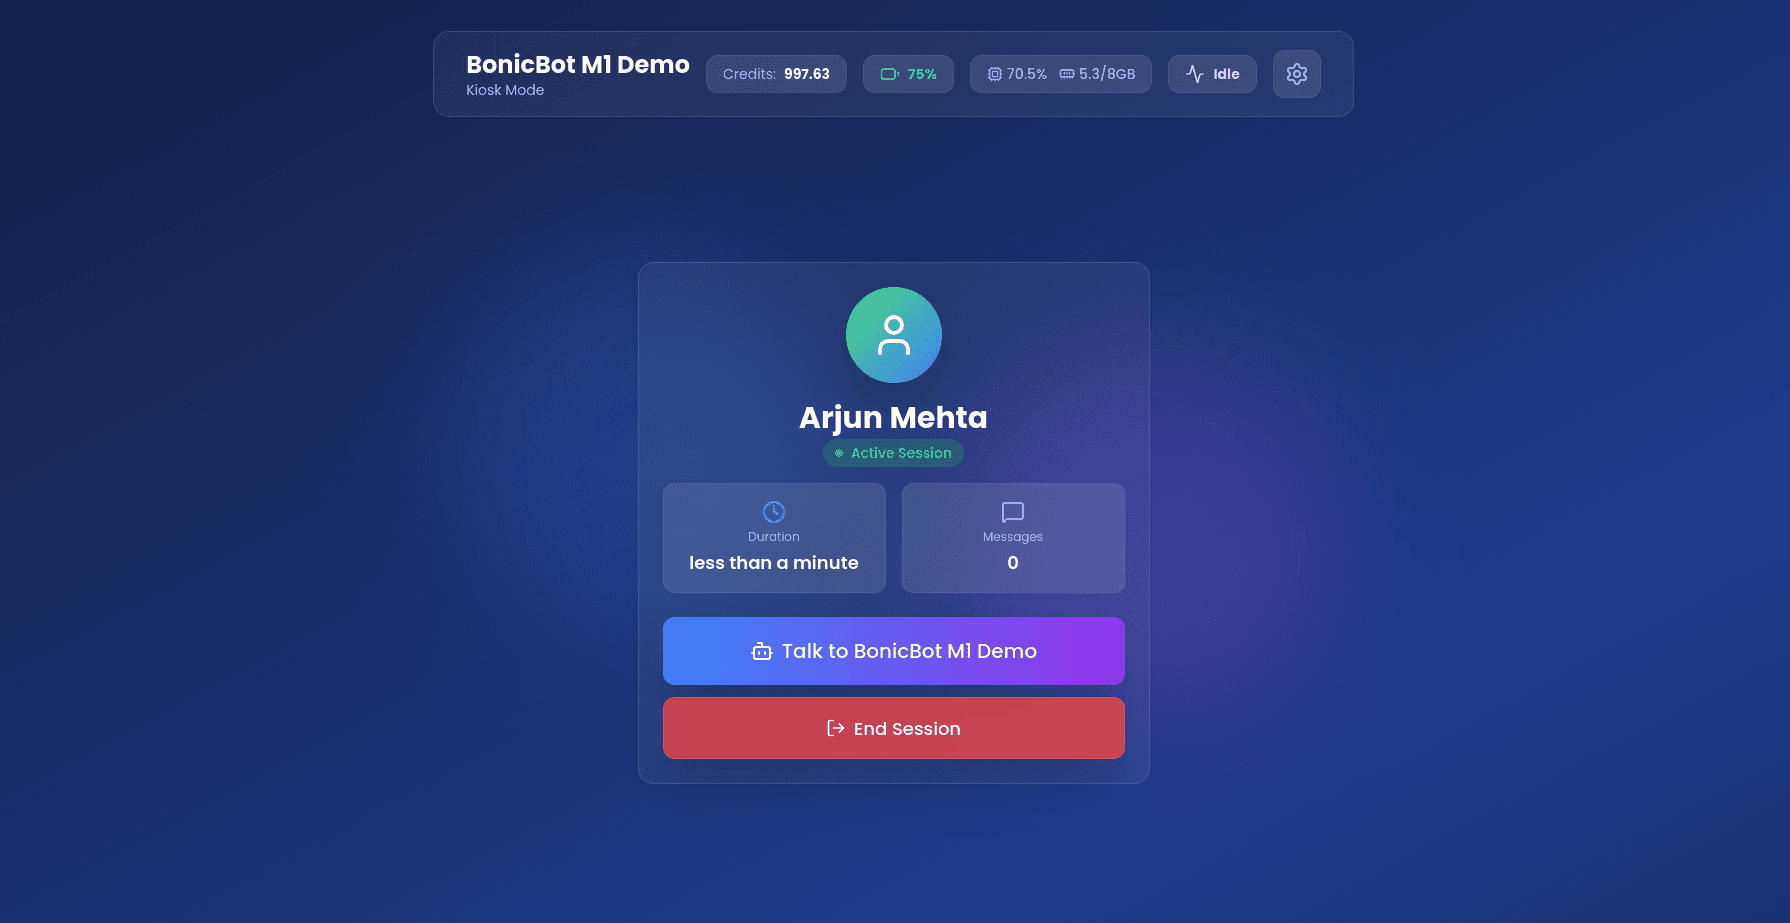
5. Active Session
After successful login, the Active Session screen appears.
Session Display Elements
- User Avatar: A prominent circular profile image indicating the current user’s active status.
- User Name: Displays the account name prominently; guest users are identified as “Guest”.
- Active Badge: A green pulsing indicator labeled “Active Session” to confirm the session is live.
- Session Statistics:
- Duration: A real-time timer tracking the elapsed time of the current session.
- Message Count: A live counter tracking the number of AI interactions performed.
Session Actions
Talk to AI
- Opens conversation interface
- Disabled if credits are depleted
End Session
- Displays confirmation dialog
- Saves session data
- Returns to login screen
Greeting Behavior
Upon login:
- Robot may play an animation
- Robot speaks a greeting message
- Approximately 1-second delay before speech
- Registered users may receive personalized greetings
6. AI Conversation
6.1 Starting a Conversation
-
Tap “Talk to [Robot Name]”.
-
A Connectivity Check window appears.
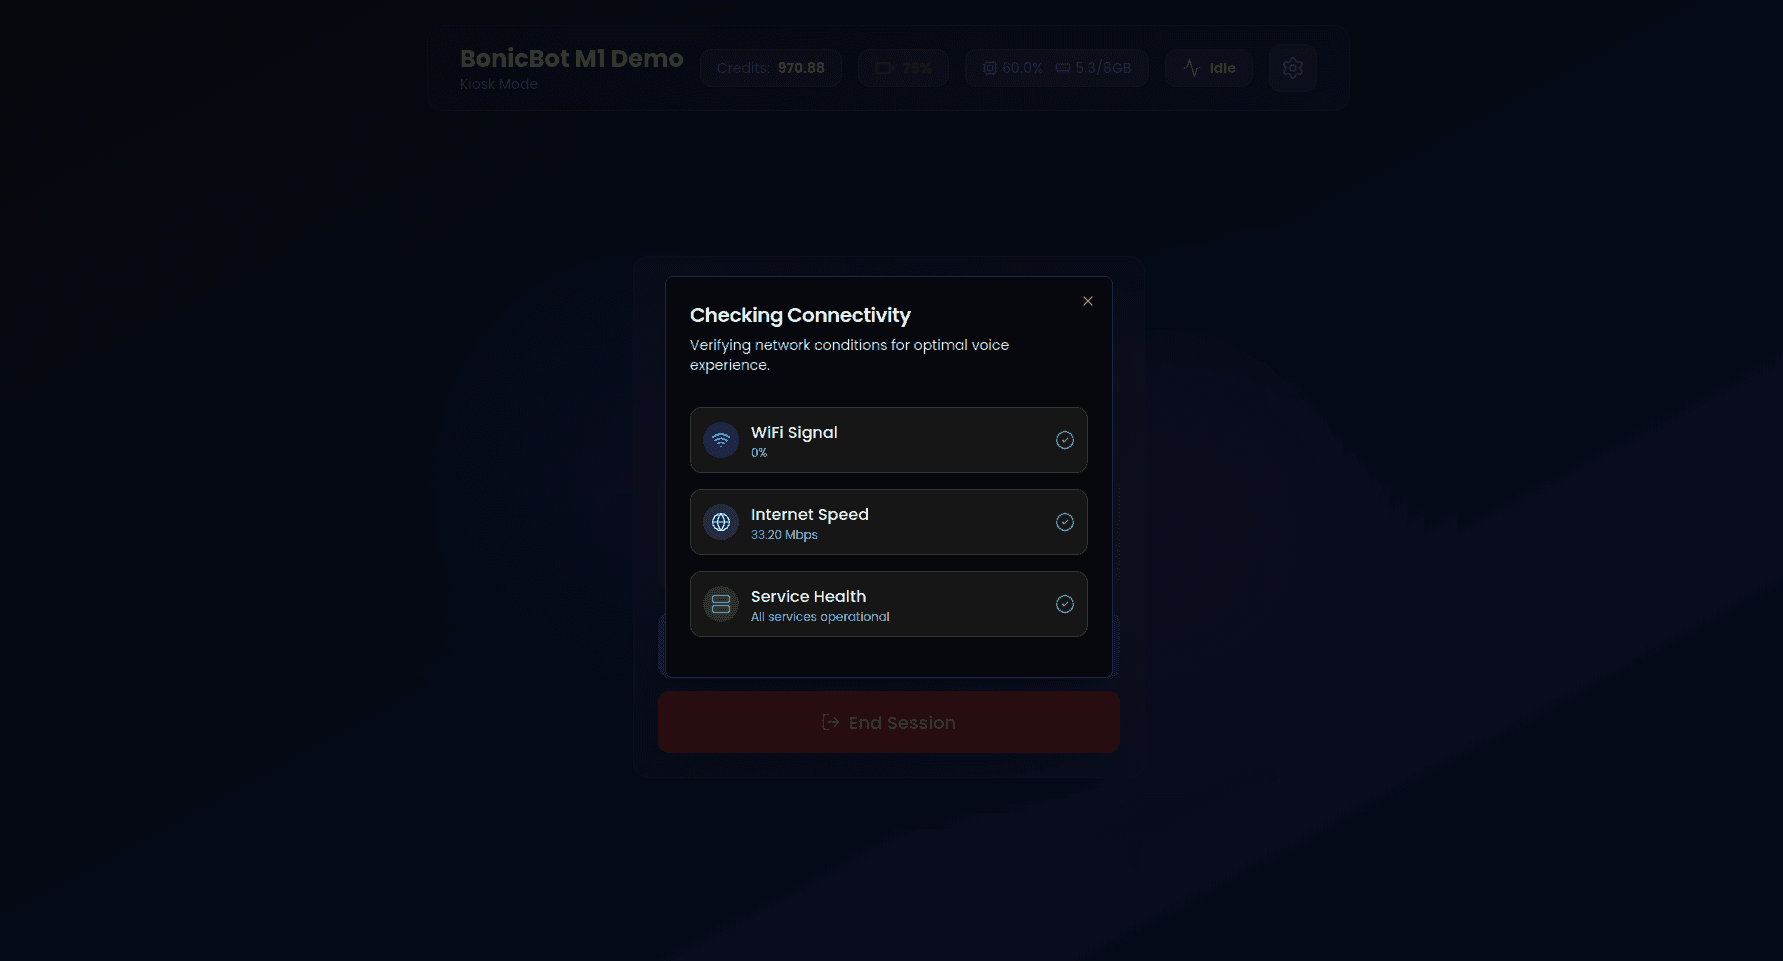
The system verifies:
- WiFi signal strength
- Internet speed
- Service health
-
If all checks pass:
- The system automatically redirects to the conversation interface.
-
If any check fails:
- A “Retry Checks” button appears.
- Tap Retry Checks to re-validate network and service status.
- The conversation page will load only after all checks succeed.
6.2 AI Assistant Selection
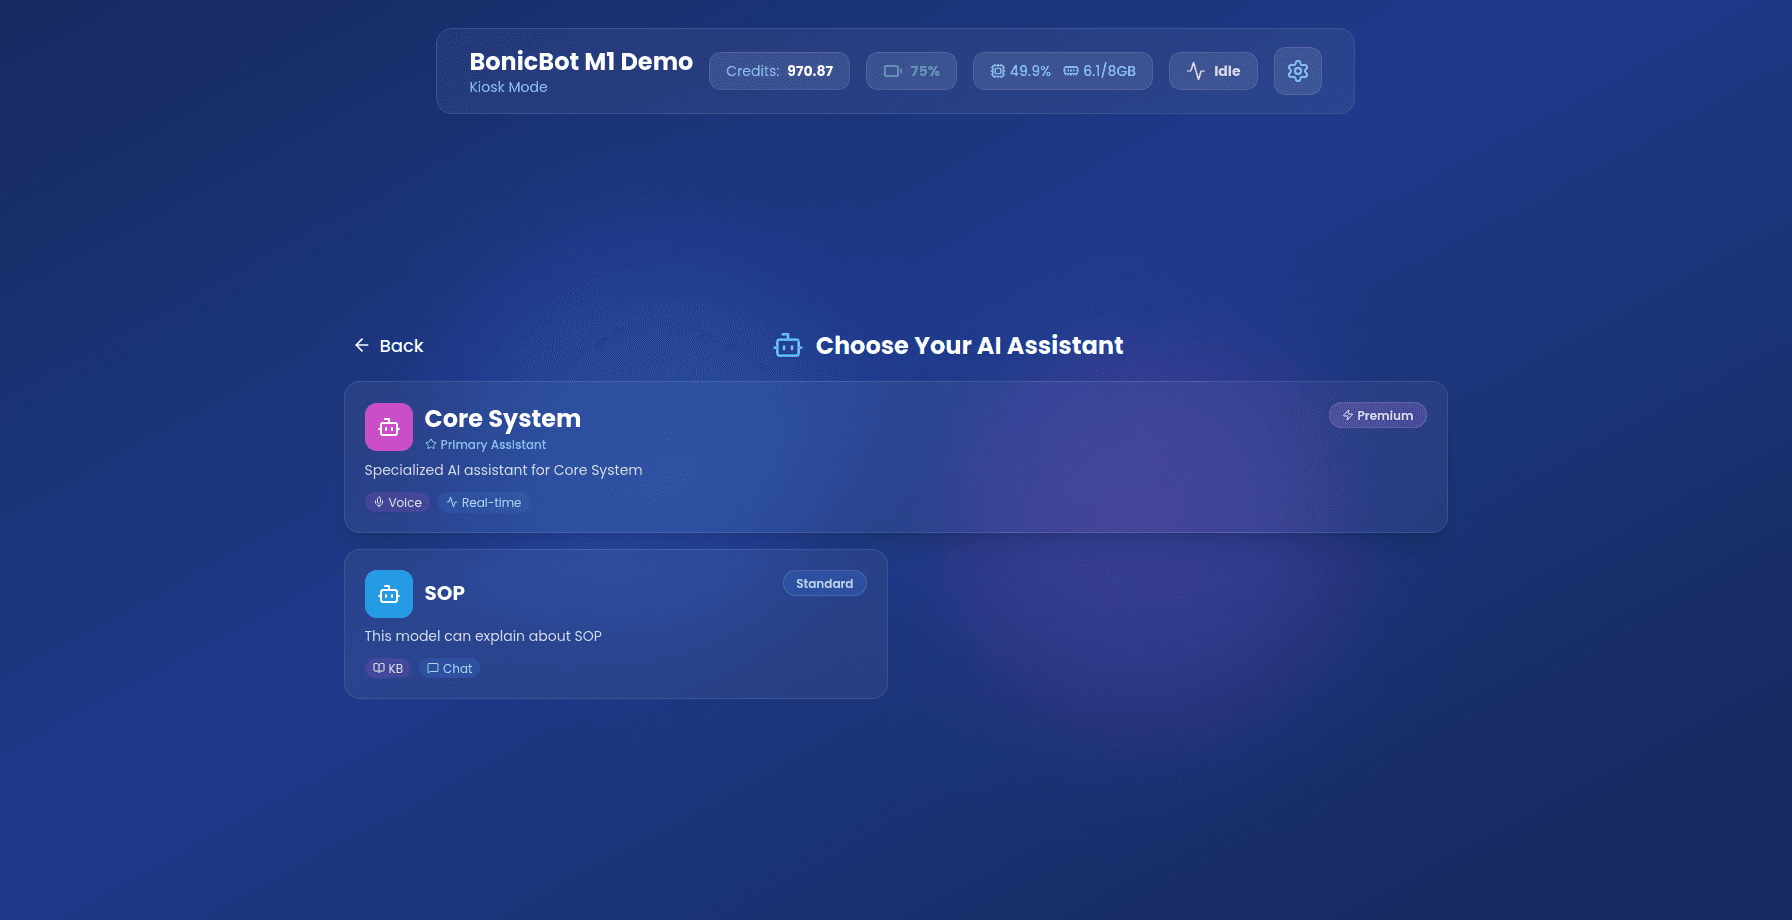
Only AI assistants configured by the administrator are visible on this screen.
Each assistant card displays:
- Assistant name
- Description
- Tier (Standard or Premium)
- Knowledge Base indicator (if enabled)
- Voice capability indicator
6.3 Assistant Conversation Interface
After selecting an AI assistant, the conversation interface loads.
The interface behavior depends on the selected assistant configuration.
6.3.1 Core System (Default Assistant)
When Core System is selected:
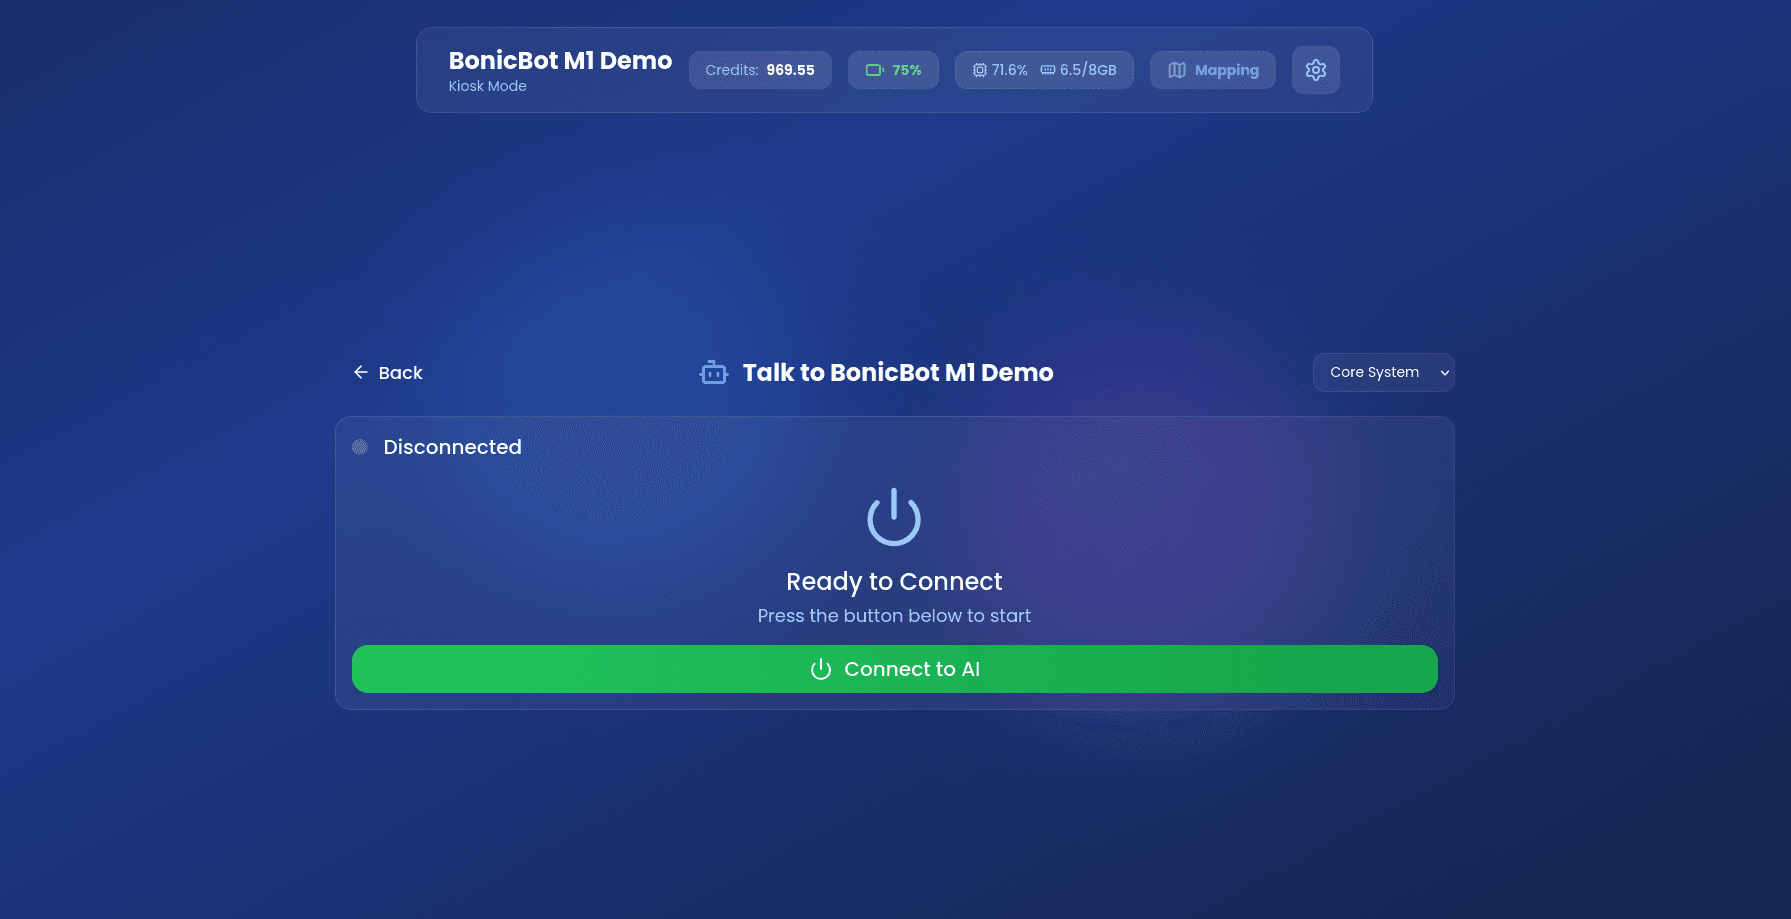
Initial state:
- Status shows Disconnected
- A Connect to AI button is displayed
- Click on Connect to AI button to start the session
After clicking Connect to AI:
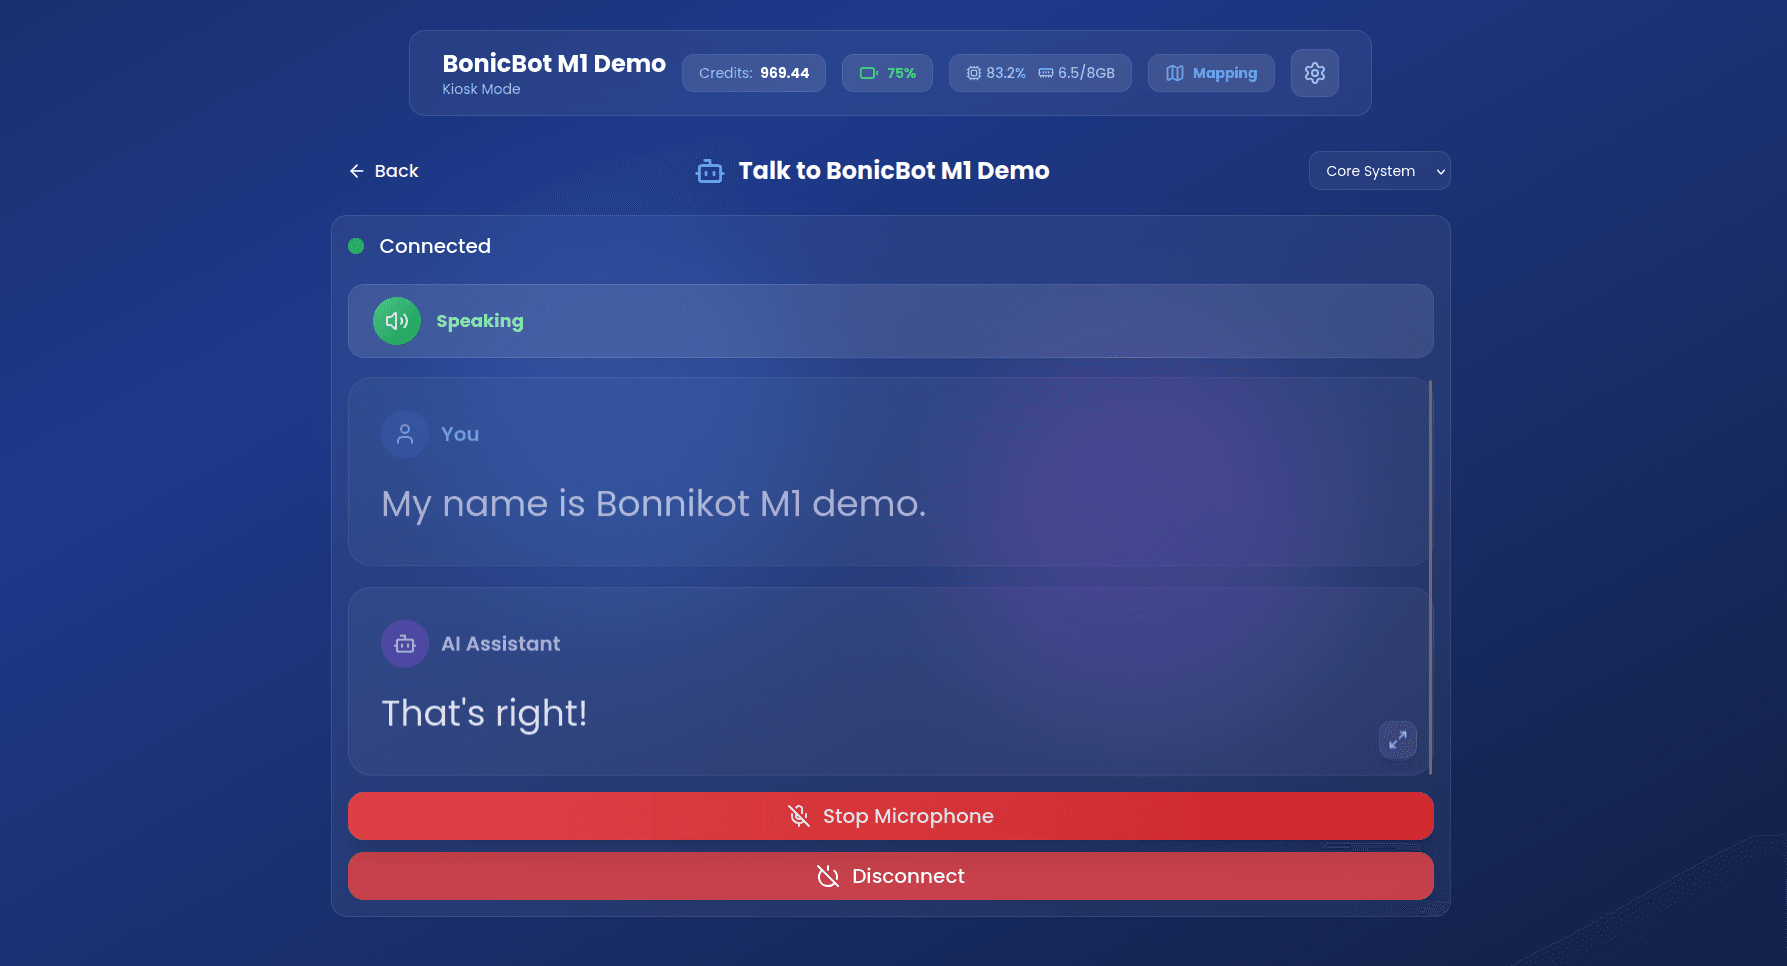
- Status changes to Connected
- Real-time voice interaction begins
- Speaking indicator appears when AI is responding
- Controls available:
- Stop Microphone: Prevents the AI from hearing the user’s voice input.
- Disconnect: Terminates the active session.
6.3.2 Custom Scenario (Example: SOP – RAG Enabled)
When SOP (Custom Scenario) is selected:
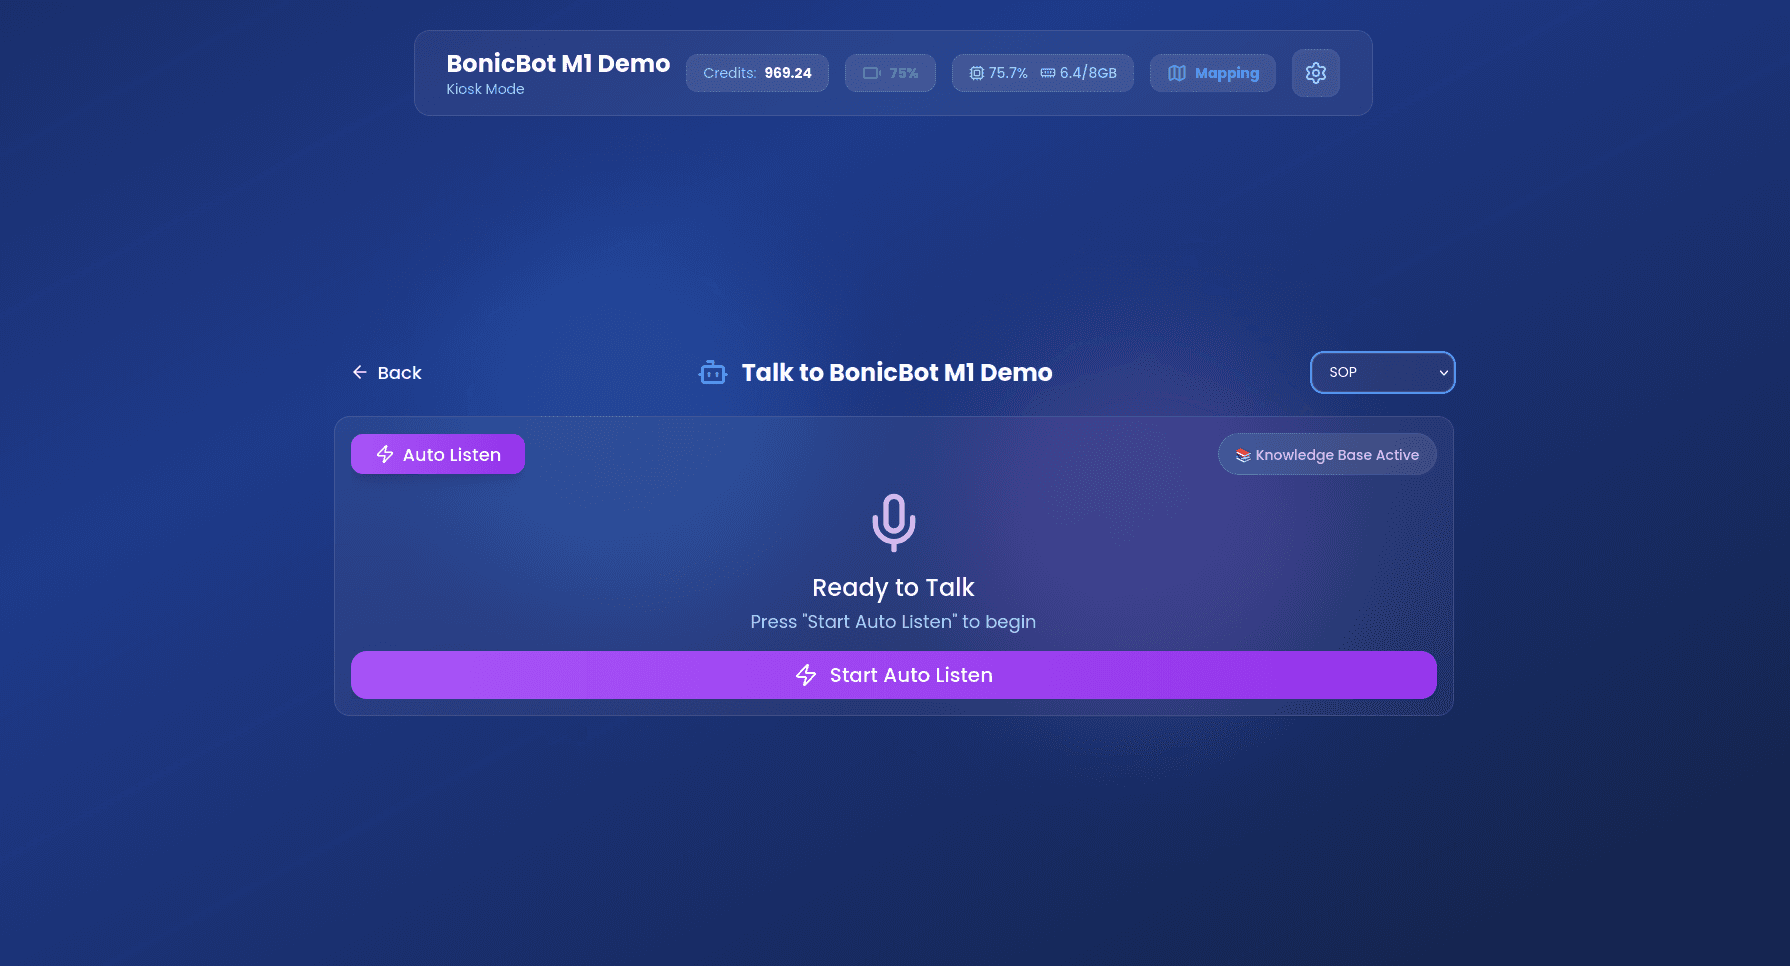
Initial state:
- Displays Ready to Talk
- Knowledge Base Active indicator is visible
- A Start Auto Listen button is displayed
- Click on Start Auto Listen to begin interaction
After clicking Start Auto Listen:
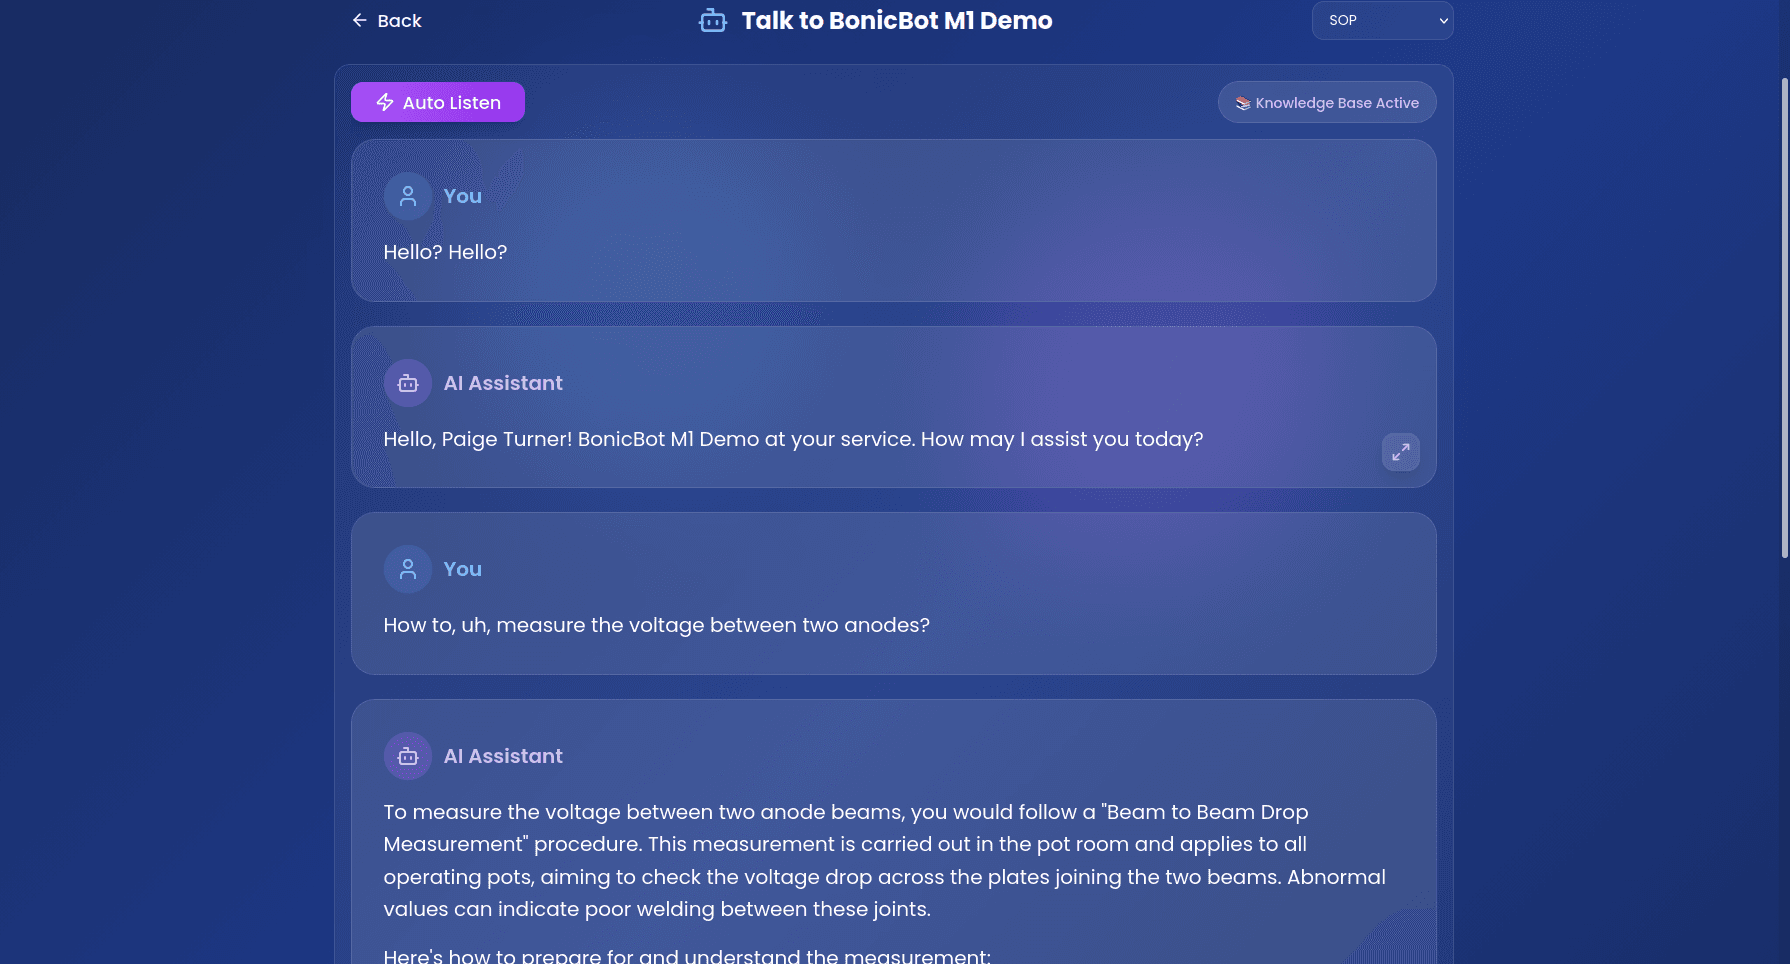
- The system starts listening to the user
- User speech is processed
- Responses are generated based on documents uploaded by the administrator (RAG enabled)
- Conversation continues until manually stopped or exited
Important Notes
- Only administrator-configured scenarios appear in the assistant list.
- RAG functionality works only if:
- Knowledge Base is enabled
- Documents are uploaded by the administrator
Credit Warning
If credits are depleted:
- “Out of Credits” warning appears
- Conversation is disabled
- Balance displayed