Jupyter Notebook
Overview
The Jupyter Notebook feature in the Education Suite provides an interactive Python programming environment directly integrated with the robot system. It allows learners and developers to write, execute, and test Python code step by step while interacting with the robot in real time using the BonicBot Python SDK (bonicbot-bridge – Python SDK). This SDK provides a simple interface to control robot movements, read sensor data, manipulate servos, and access robot APIs directly from Python code. This environment is ideal for:
- Learning Python programming
- Experimenting with robot APIs via bonicbot-bridge
- Analyzing sensor data
- Prototyping robotics and AI logic
Key Features Supported by Jupyter Notebook
Data Visualization
- Supports rich visualization to help users understand data and program behavior clearly.
- Plot graphs and charts (line, bar, scatter, etc.), display outputs inline, and visualize robot states, sensor values, and trends.
- Compatible with libraries such as:
- Matplotlib
- Seaborn
- Plotly
Live Code Execution
- Execute Python code cell by cell and modify code to instantly view results.
- Ideal for testing logic, algorithms, and robot behaviors with repeated execution for debugging and learning.
Interactive Outputs
- Display tables, images, charts, logs, and print outputs inline below code cells.
- Eliminates the need for external terminals or tools by keeping all outputs in one place.
Markdown-Based Documentation
- Markdown cells allow explanations alongside code with headings, bullet points, and notes.
- Enables structured learning material and makes notebooks beginner-friendly and readable.
Mathematical & Formula Support
- Supports LaTeX for mathematical expressions inside Markdown cells.
- Useful for algorithm explanations, machine learning formulas, and sensor or robotics calculations.
Library & Framework Support
- Works seamlessly with Python standard libraries, data science libraries, AI and ML frameworks, and robotics-related Python packages.
- Suitable for education, experimentation, and development in one environment.
Kernel Management
- Each notebook runs on a dedicated Python kernel that manages code execution, memory, and variables.
- Kernel can be restarted to recover from errors or clear memory, and multiple languages are supported with Python as default.
File Handling & Export
- Notebooks are saved automatically within the workspace and can be exported as:
- HTML
- Python script (.py)
- This supports sharing, reviewing, and maintaining documentation.
Beginner-Friendly Learning Environment
- Code, output, and explanations exist in one place, encouraging experimentation without affecting the main system.
- Ideal for step-by-step teaching, demonstrations, and incremental learning.
How Jupyter Notebook Works in the Education Suite
Accessing Jupyter Notebook
Inside the Education Suite interface, click “Open Jupyter Lab”.
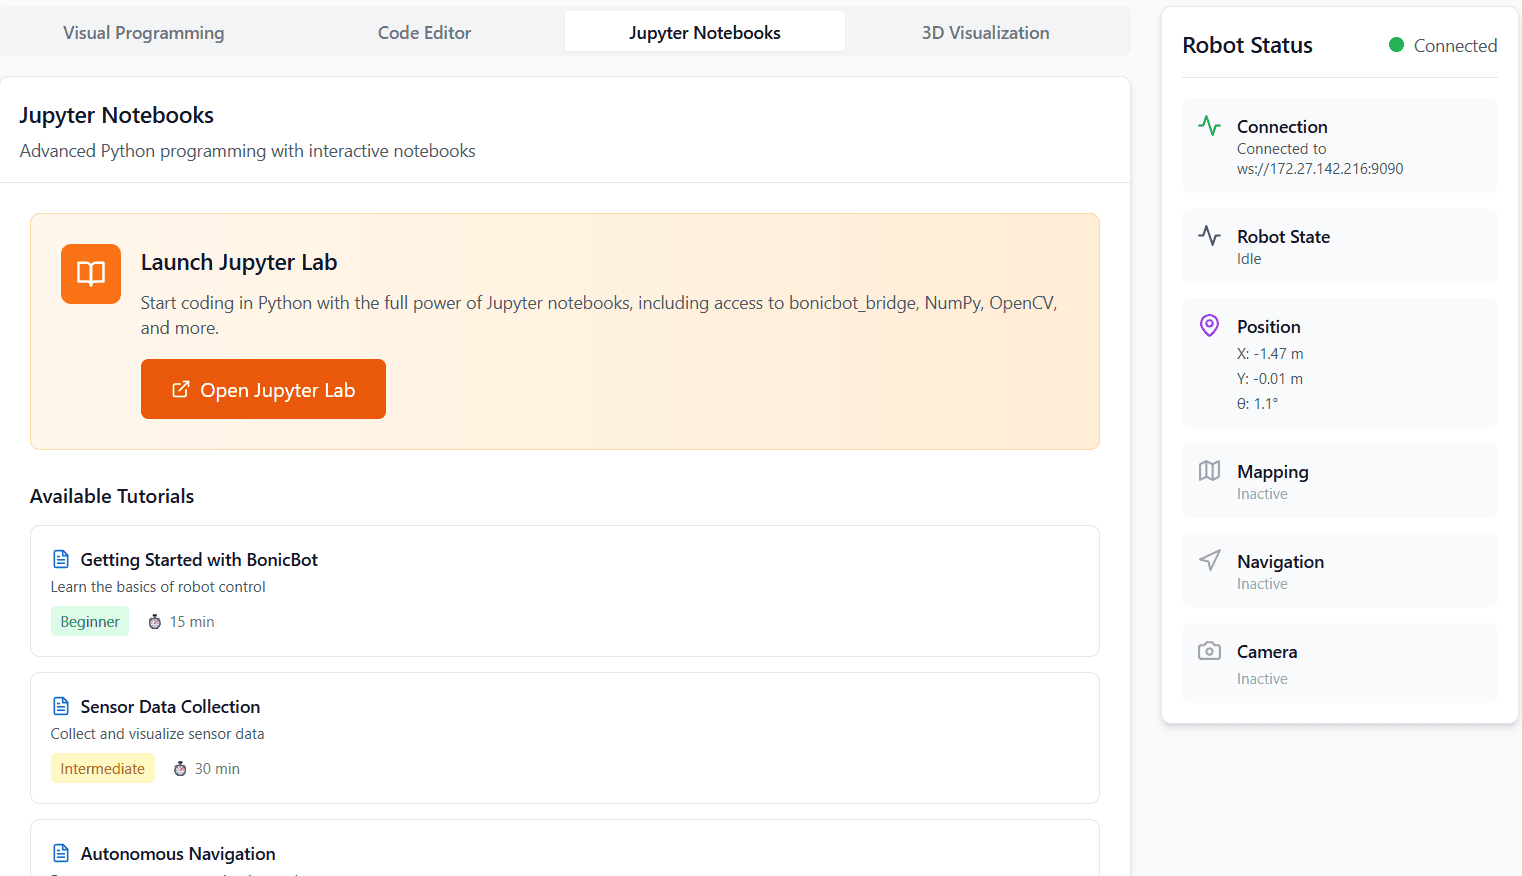
Jupyter Notebook opens directly in the browser with no separate installation or configuration required.
Jupyter Lab runs on the robot’s onboard system and connects directly to the Education Suite environment.
Working Environment
- Provides a file-based workspace to create and manage notebooks and a pre-configured Python environment.
- Offers direct access to Education Suite libraries and robot APIs so users can start coding immediately.
Code Execution Flow
- Python code is written in code cells, and each cell runs independently.
- Outputs such as text, tables, graphs, and logs appear directly below the cell, with errors displayed clearly for easier debugging.
Visualization in the Education Suite
- Enables visualization of program outputs, sensor readings, robot positions and states, and analytical graphs and charts.
- All visual elements are rendered inline for better understanding.
Documentation Alongside Code
- Markdown cells are used to explain concepts, so code and explanations coexist in the same notebook.
- Supports structured tutorials, reports, and learning materials.
Learning & Experimentation
- Users can modify code and instantly observe results in a safe environment for testing logic and workflows.
- Useful for experimenting with robotics, AI, and data processing pipelines.
Saving & Sharing Work
- Notebooks are saved inside the Education Suite workspace and can be exported and shared easily.
- Enables review of student work and tracking learning progress.
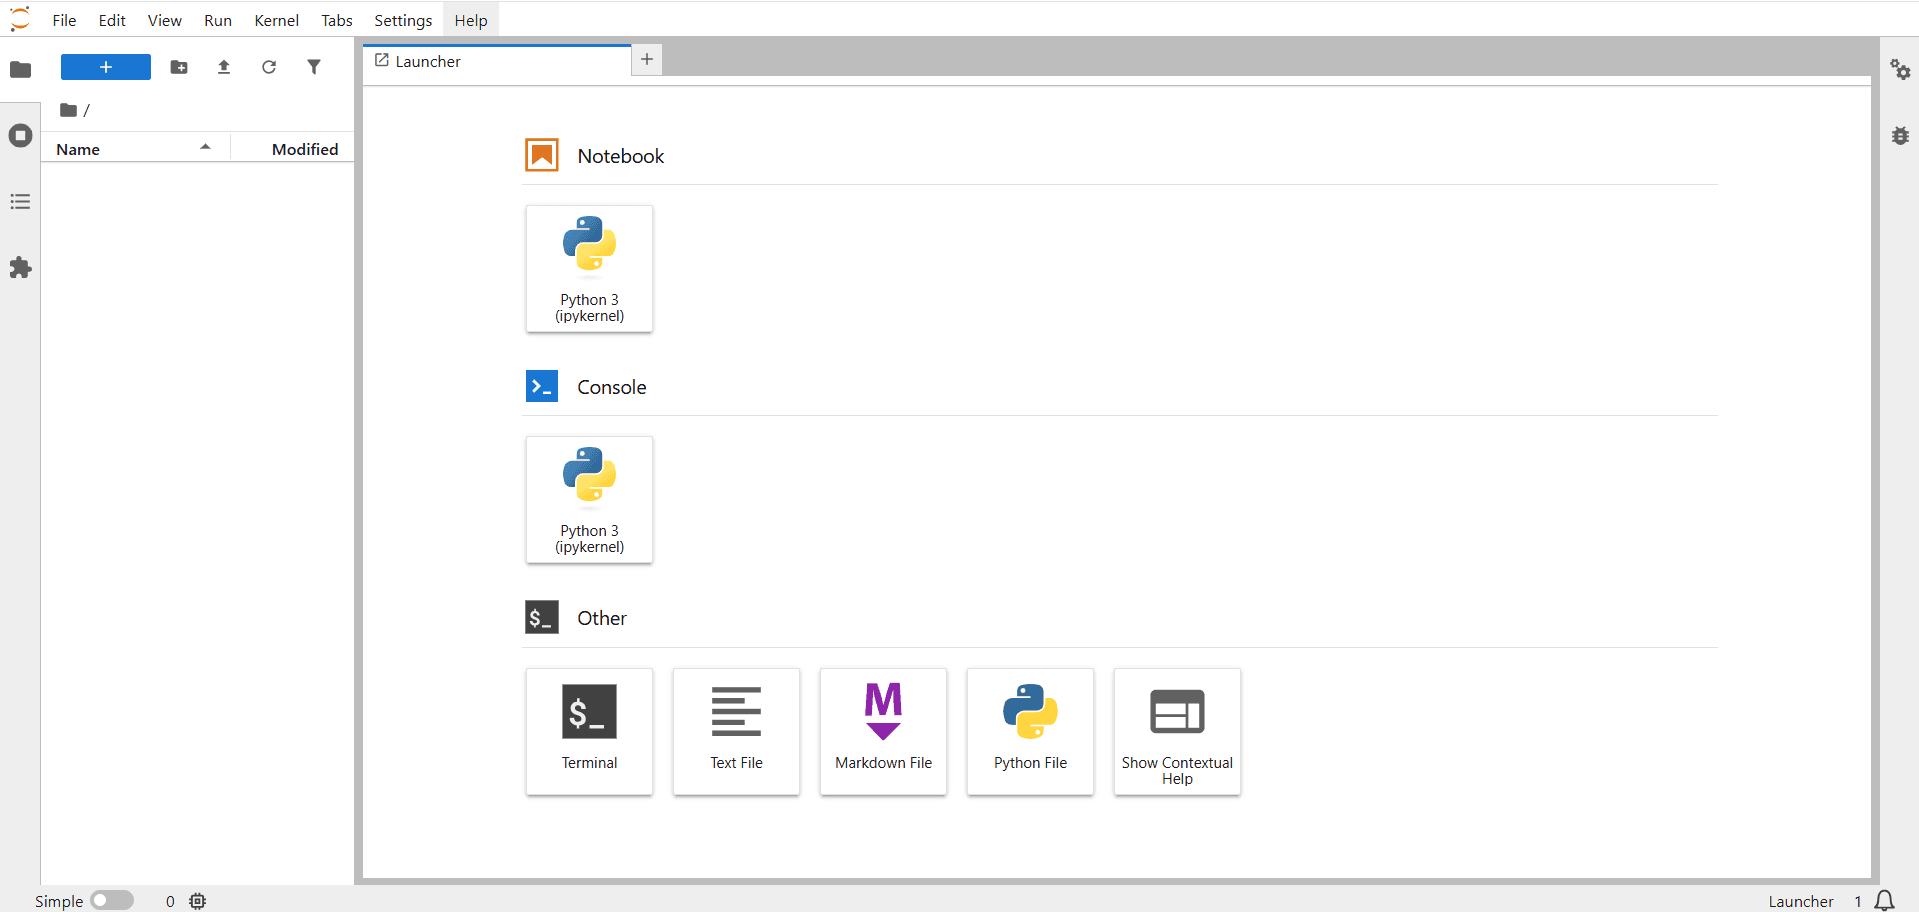
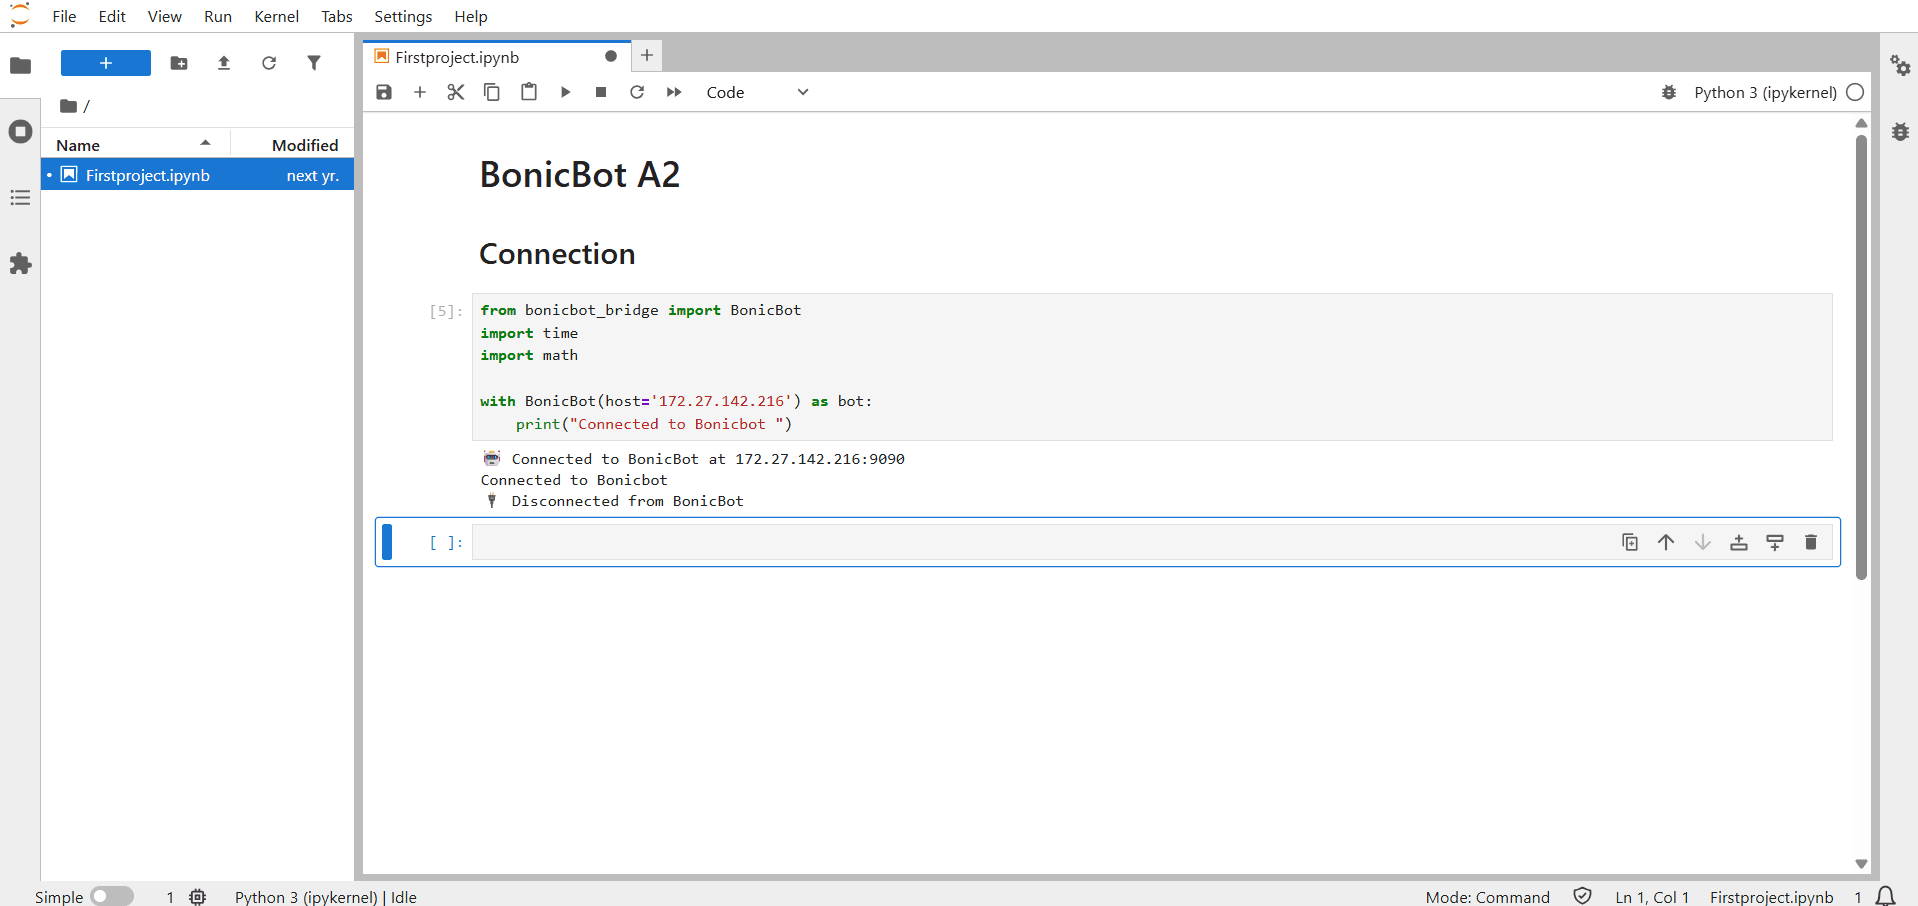
Jupyter Lab Interface Overview
After opening Jupyter Lab, the main components include several key elements.
Notebook Files (.ipynb)
- Store Python code, outputs, and Markdown explanations in a single file (for example,
Untitled.ipynb).
Code Cells
- Used to write and execute Python code such as:
print("BonicBot A2")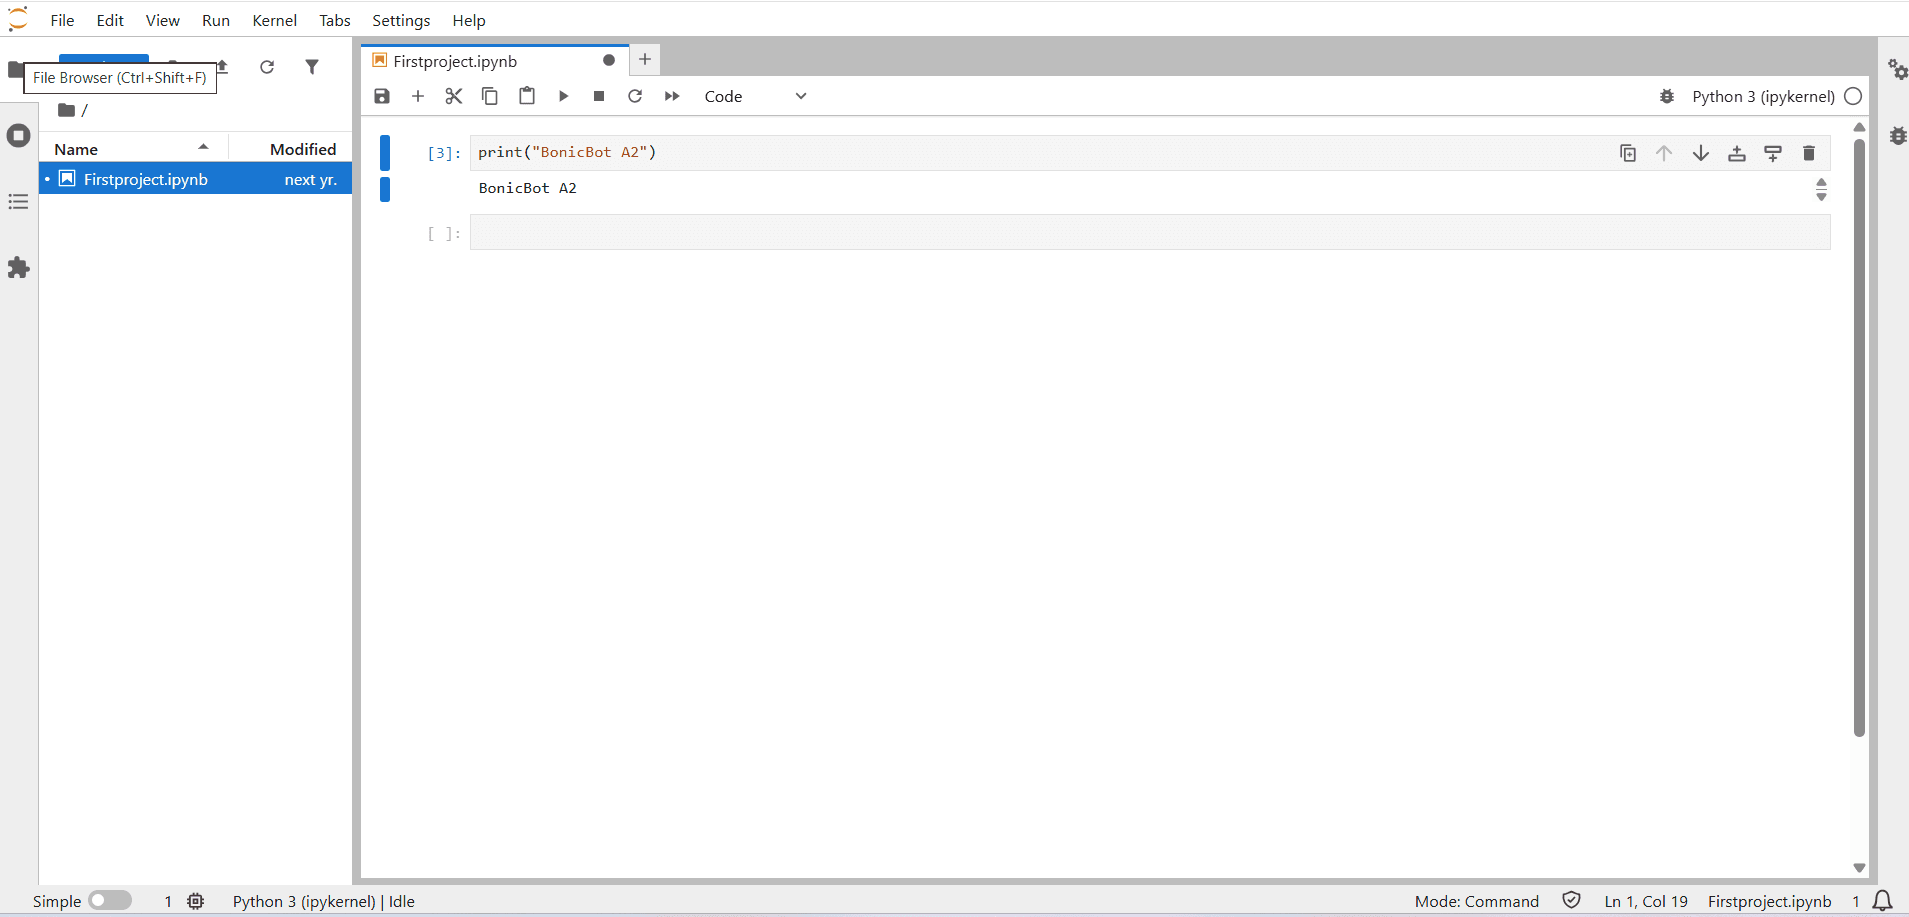
Running Code
- Click the Run ▶ button or press Shift + Enter to execute a cell.
- Output appears immediately below the cell.
Kernel (Python Environment)
- Uses Python 3 (ipykernel) to manage execution, variables, and memory.
- Restarting the kernel clears all variables and resets the execution state.
File Browser (Left Panel)
- Displays notebooks and files in the workspace and allows creating, opening, and organizing learning materials.
Markdown in Jupyter Notebook
Markdown is used to combine executable code with rich, narrative documentation in a single, shareable document. It helps explain logic, guide learners through analysis, and create reproducible computational workflows.
Why Jupyter Notebook Is Used in the Education Suite
- Provides a beginner-friendly learning environment with interactive, hands-on programming.
- Enables step-by-step concept validation and combines documentation with execution, making it ideal for Python, robotics, and AI education.
Role of Jupyter Notebook in the Education Suite
Jupyter Notebook acts as:
- A coding playground
- A visualization tool
- A documentation platform
- A learning and experimentation environment
Users can:
- Control robot movements
- Read real-time sensor data
- Process camera inputs
- Test AI and logic workflows
- Visualize robot behavior and data
Python SDK (bonicbot-bridge) in Jupyter Notebook
The bonicbot-bridge Python SDK is used inside Jupyter Notebook to communicate with the BonicBot A2 robot. It acts as a bridge between Python code and the robot’s hardware and services, allowing users to send commands and receive real-time data directly from the notebook. Using this SDK in Jupyter Notebook makes it easy to write, execute, and test Python code interactively while controlling the robot or visualizing its data (Python SDK file ).
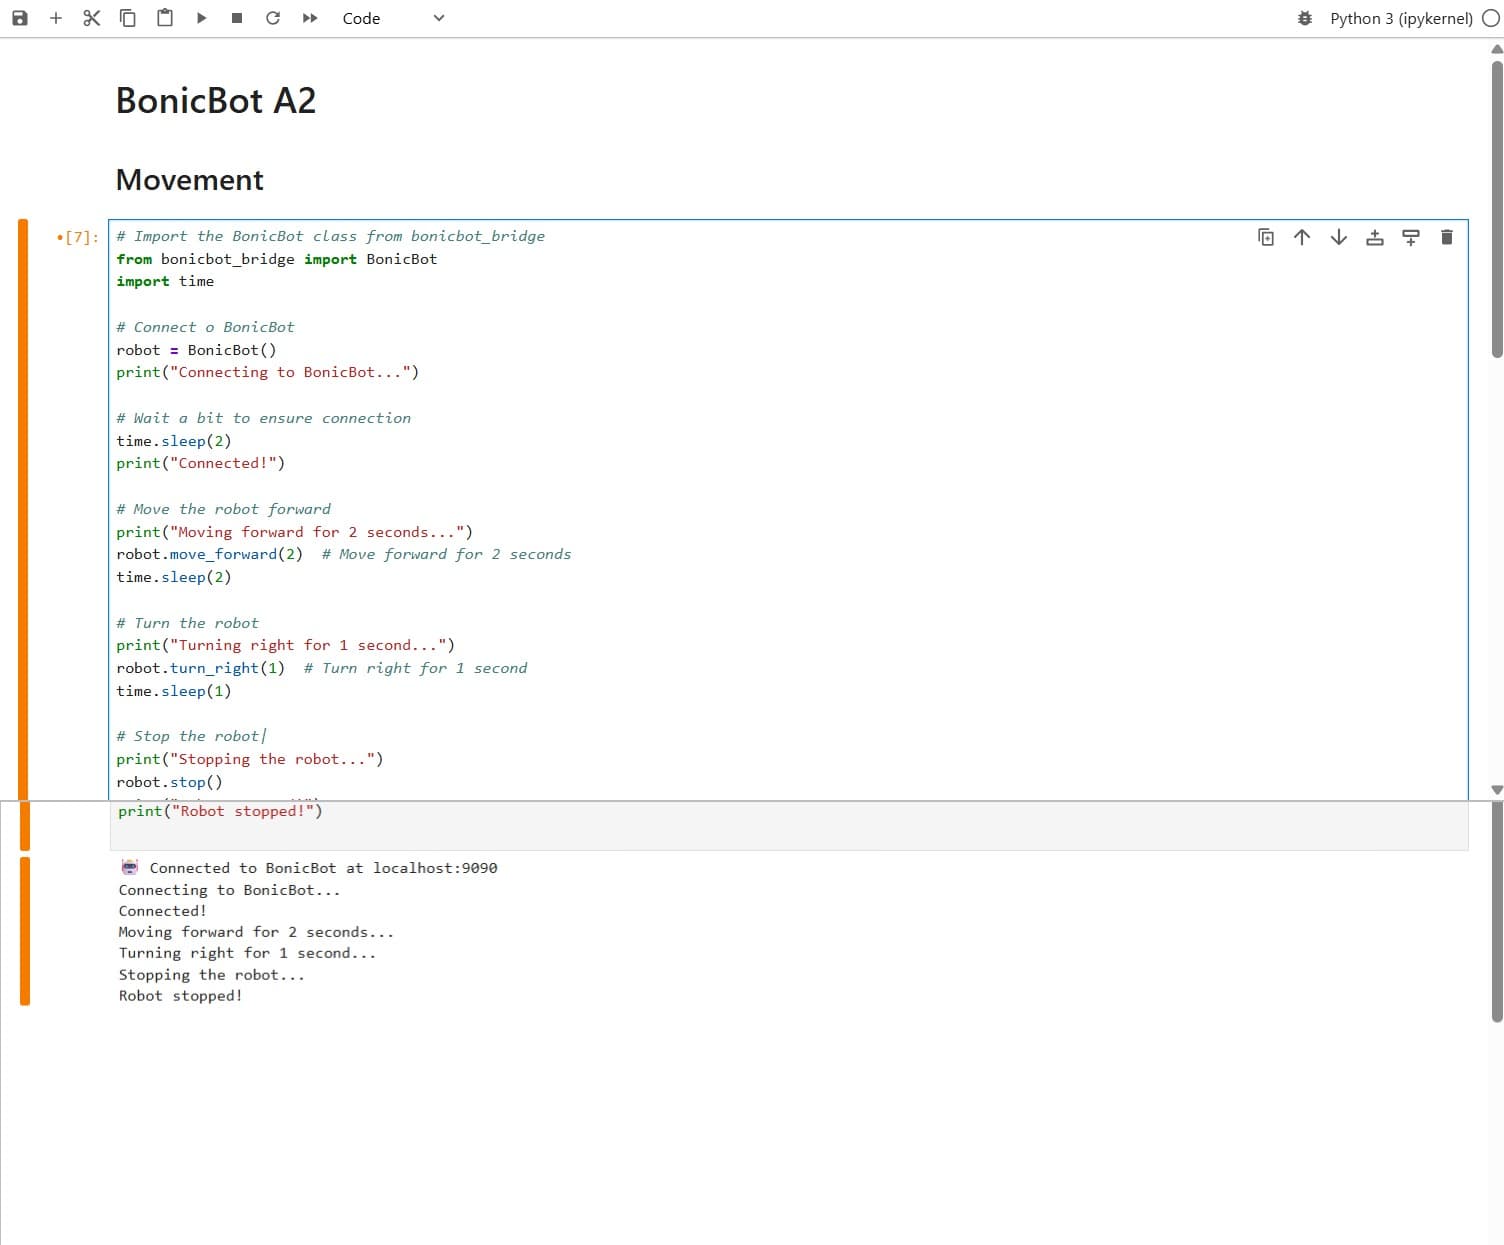
Example 1: Basic Robot Movement Using BonicBot Bridge
This example demonstrates how to connect to BonicBot using Jupyter Notebook and control basic movements such as moving forward, turning, and stopping using Python commands.
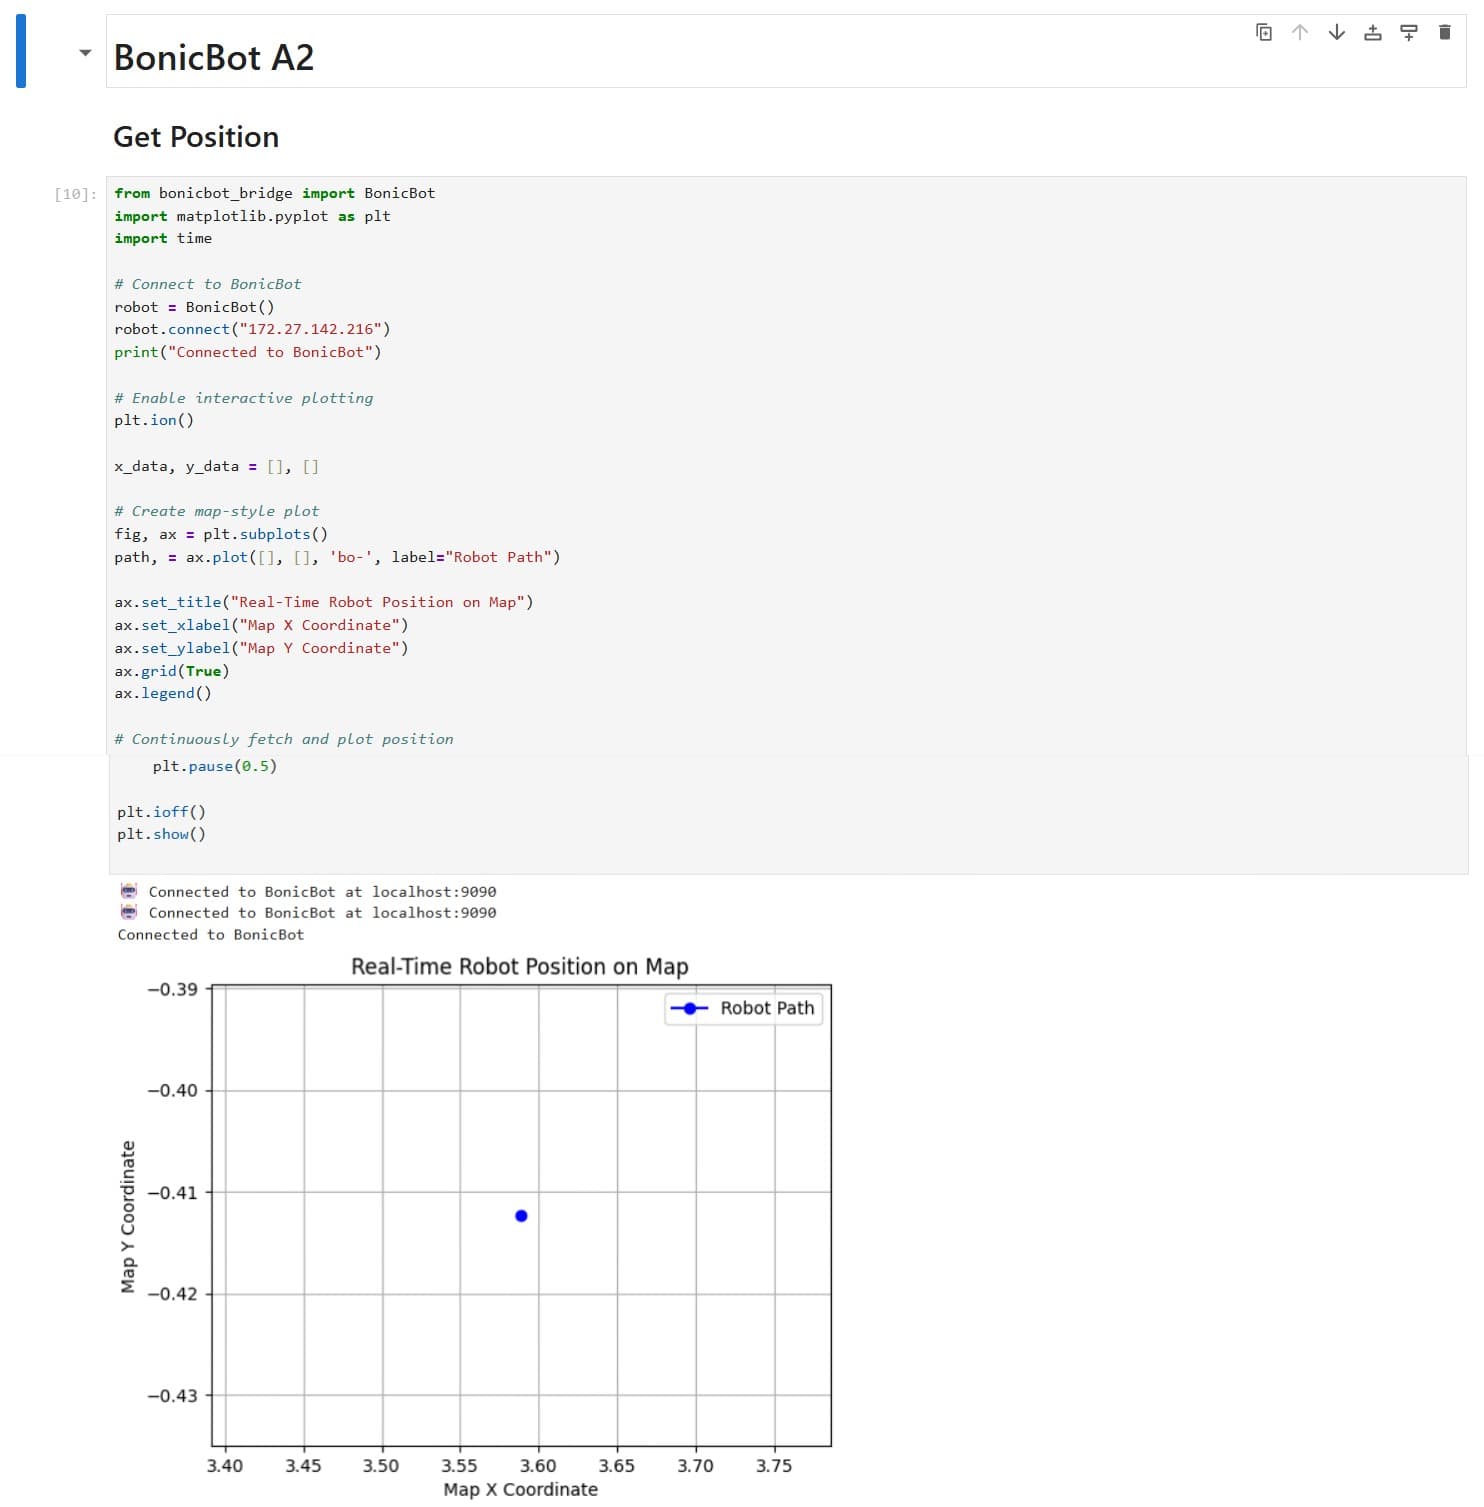
Example 2: Real-Time Robot Position Visualization on Map
This example demonstrates how to fetch BonicBot’s live position data using the BonicBot Bridge API and visualize the robot’s movement path on a 2D map in real time using Jupyter Notebook.