Getting Started
The Education Suite provides a browser-based robotics learning and development environment for BonicBot A2. It allows users to program, test, and interact with the robot directly through a web interface.
The Education Suite comes pre-installed on the real BonicBot A2 robot.
Before You Begin
Before accessing the Education Suite, make sure:
- The robot is powered on
- Bluetooth is enabled on your device
- The robot and your laptop are connected to the same Wi-Fi network
To get the robot IP address and launch ROS services, use the BonicBot App.
See the Getting Started & Usage documentation to learn how to connect to the robot, retrieve the IP address, and launch ROS services using the BonicBot App.
Accessing the Education Suite
To access the Education Suite from your browser:
- Connect your laptop to the same Wi-Fi network as the robot
- Launch ROS services using the BonicBot App
- Open a web browser
- Enter the robot IP address
Example:
http://192.168.1.100ROS services must be running because they provide:
- Robot communication
- Sensor data streaming
- Camera streaming
- Navigation data
- Visualization updates
- Robot state information
Most Education Suite features and visualization modules depend on active ROS services.
Connecting to the Robot
Before using any Education Suite environment or visualization tools, a connection must be established with the robot.
- Enter the robot IP address in the Robot Host field
- Click the Connect button
Example:
172.27.142.216Once connected:
- Robot status changes from Disconnected to Connected
- Robot data becomes available inside the Education Suite
- Visualization modules become active

Coding Environments
The Education Suite includes multiple programming and experimentation environments designed for different robotics workflows.
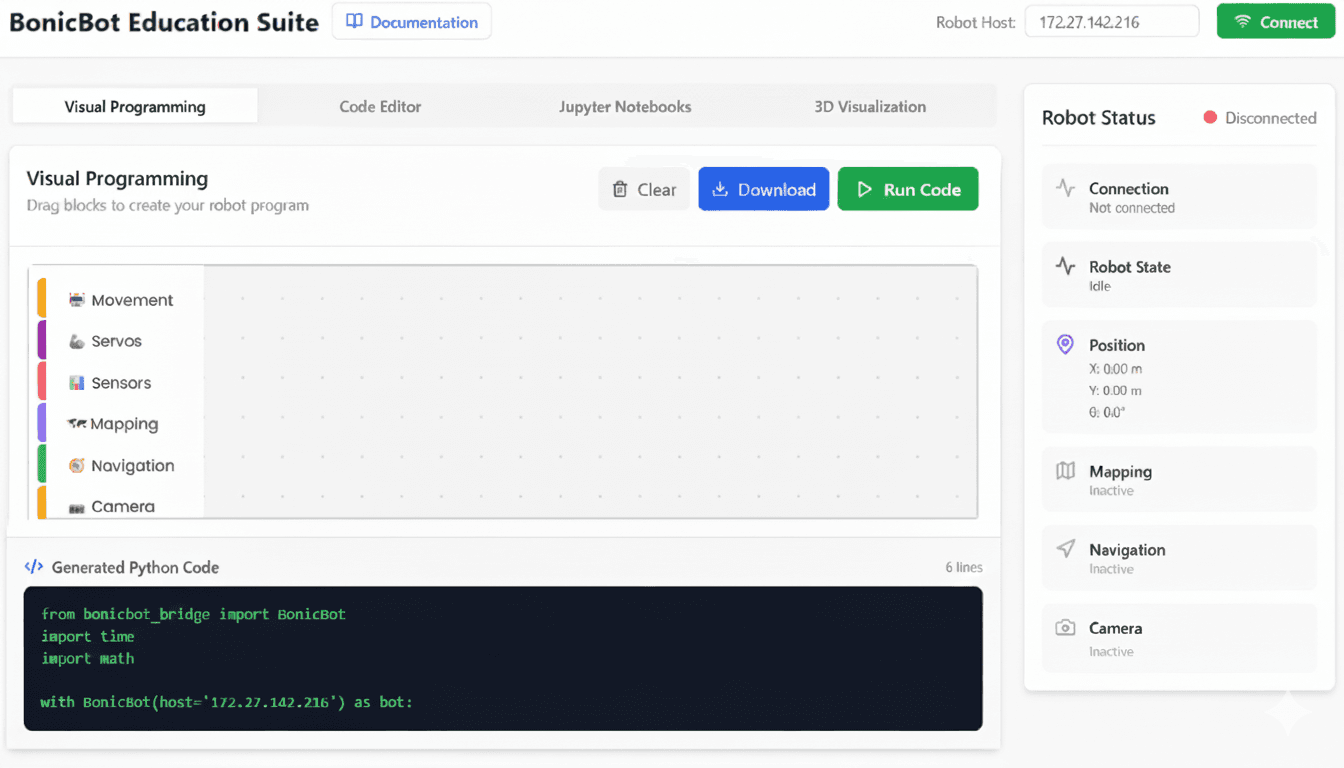
Visual Programming
A Blockly-based drag-and-drop programming environment designed for robotics learning and STEM education.
Users can create robot behaviours visually using programming blocks for:
- Robot movement
- Sensors and interactions
- Logic and conditions
- Expressions and animations
Visual Programming Documentation
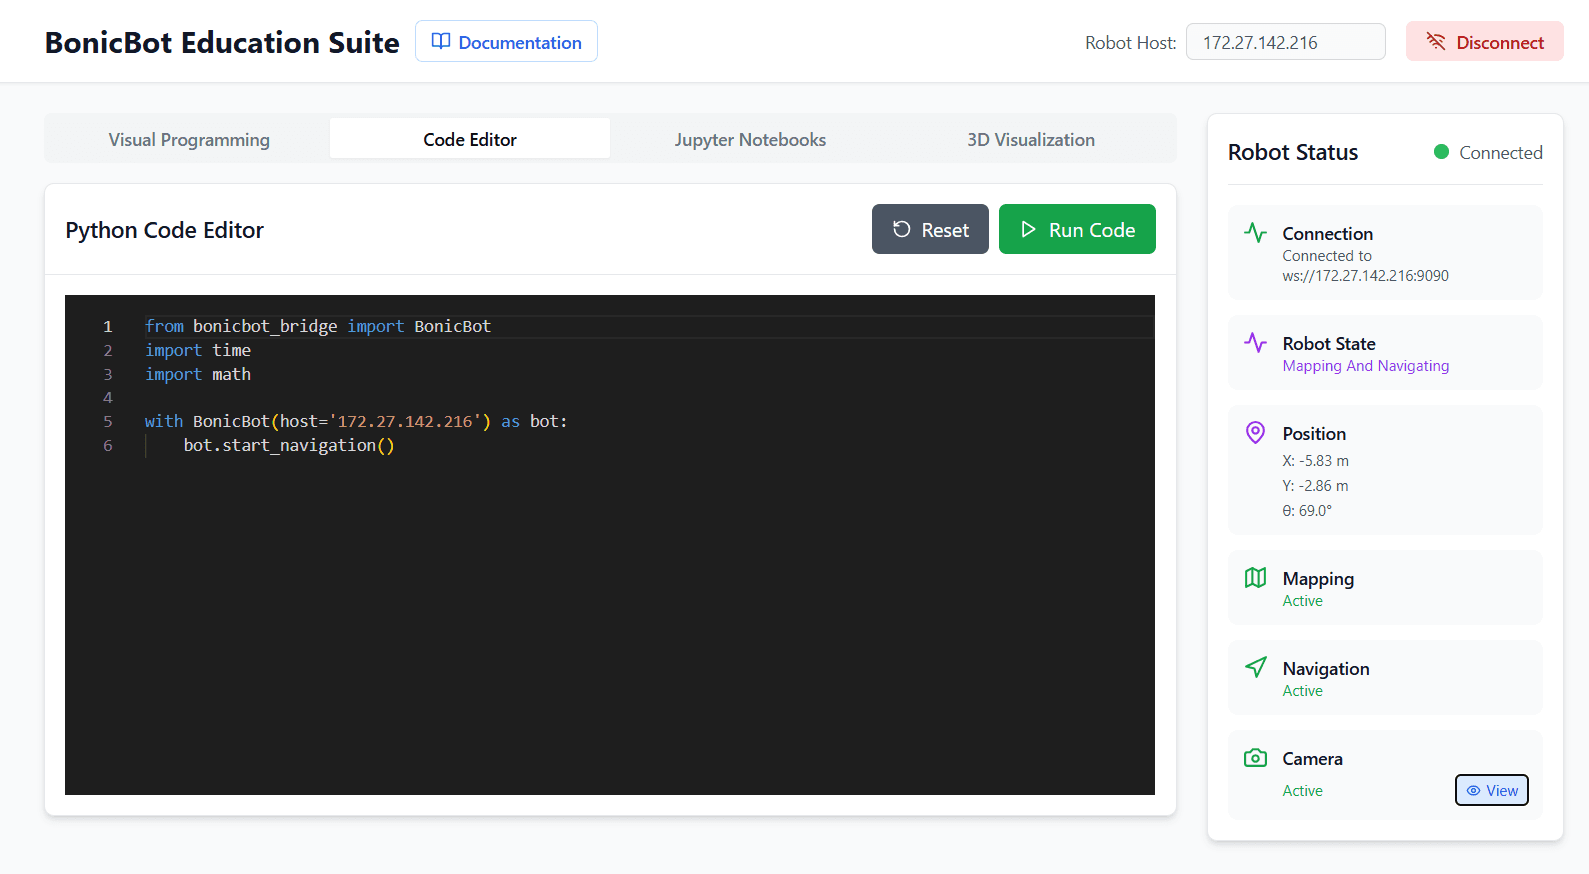
Python Editor
A Python code editor for writing and testing robotics programs directly on the robot.
The editor can be used for:
- Robot control
- Sensor interaction
- Robotics experimentation
- Python scripting
Jupyter Notebook
An interactive environment for robotics experimentation, testing, and analysis.
Jupyter Notebook can be used for:
- Sensor visualization
- Camera experiments
- Data analysis
- Interactive robotics workflows
Note: Jupyter Notebook integration is currently under development.

Jupyter Notebook Documentation
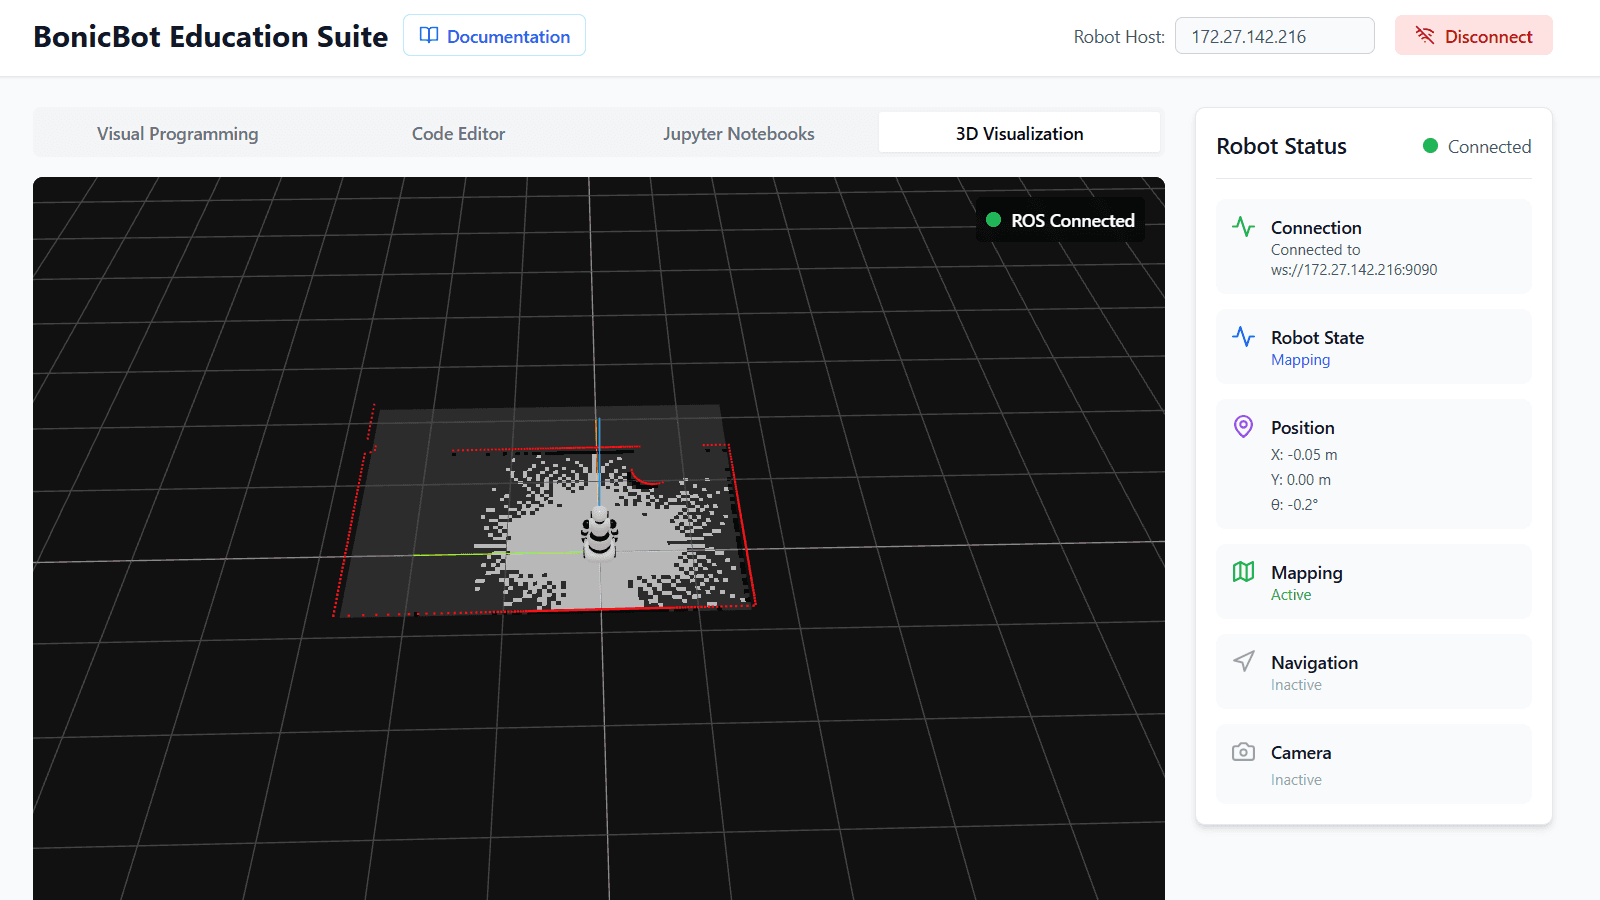
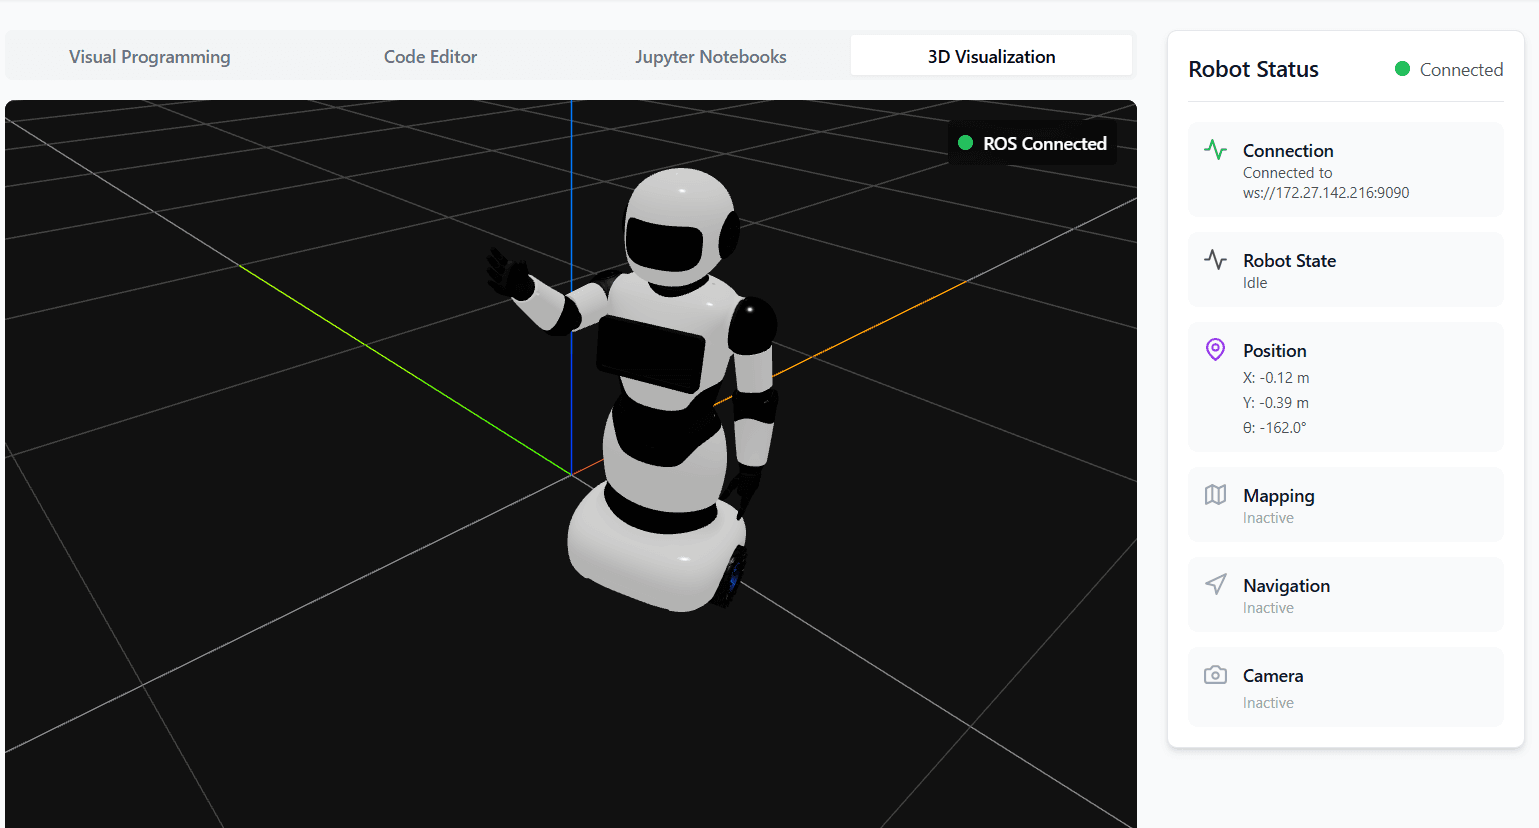
3D Visualization
The 3D Visualization environment provides a real-time graphical view of the robot, maps, sensors, camera streams, and navigation behaviour.
It helps users understand how the robot interacts with its environment during operation and robotics experimentation.
The visualization environment works together with:
- Robot movement and positioning
- Mapping workflows
- Navigation systems
- Camera streams
- Robot joint movements
- Sensor data
Robot Visualization
A real-time 3D model of BonicBot A2 is displayed inside the visualization environment.
The model updates continuously to reflect:
- Robot movement
- Position changes
- Direction changes
- Joint and robot body movement
This allows users to visually observe robot behaviour while programs and robotics workflows are running.
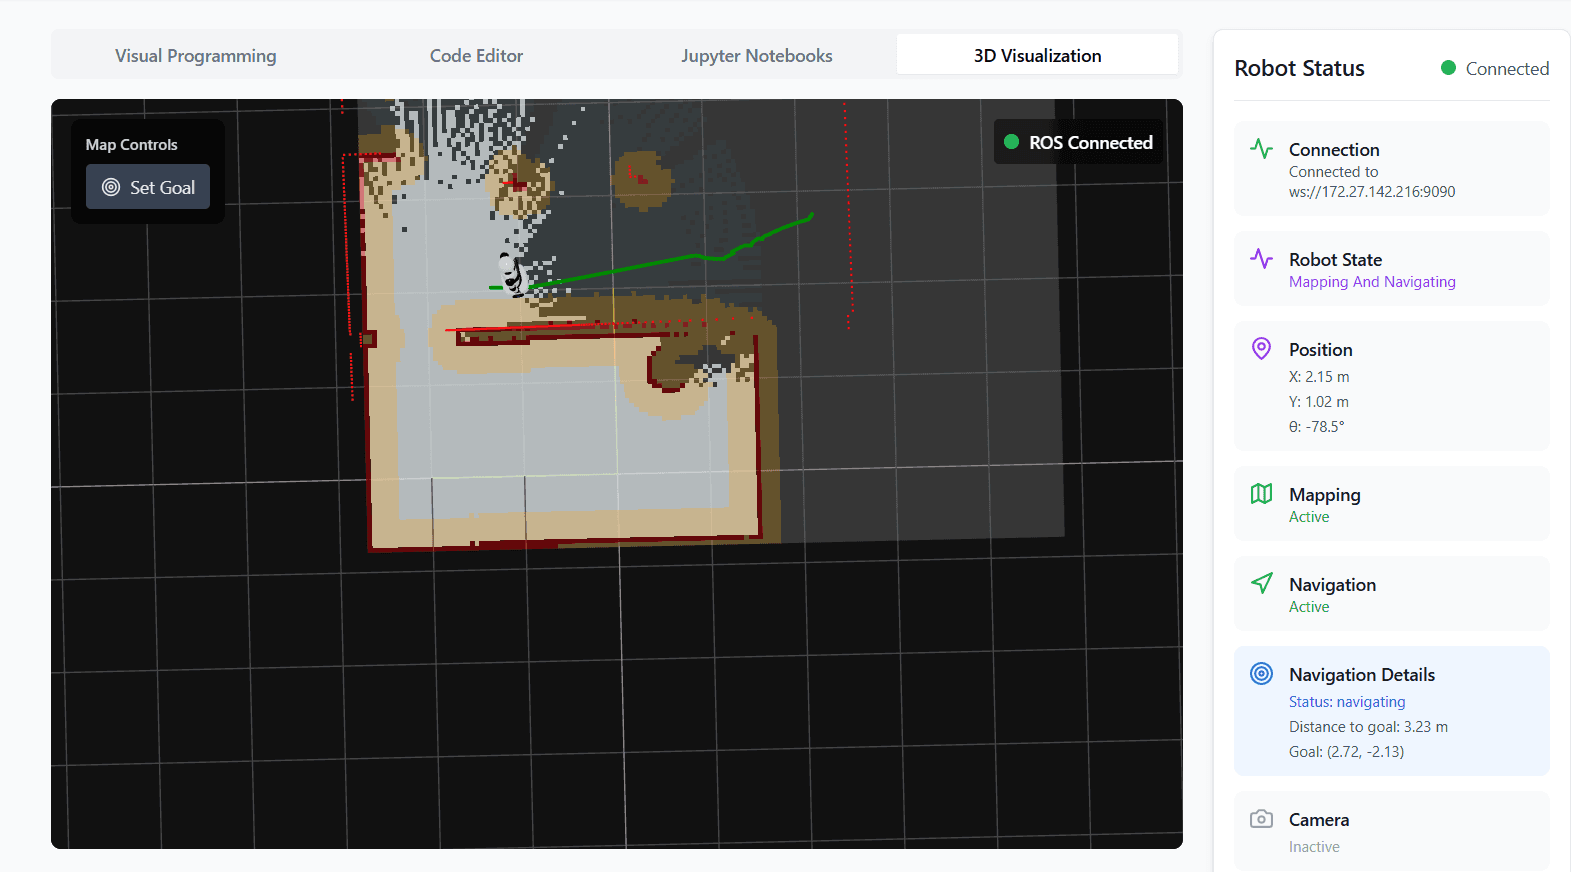
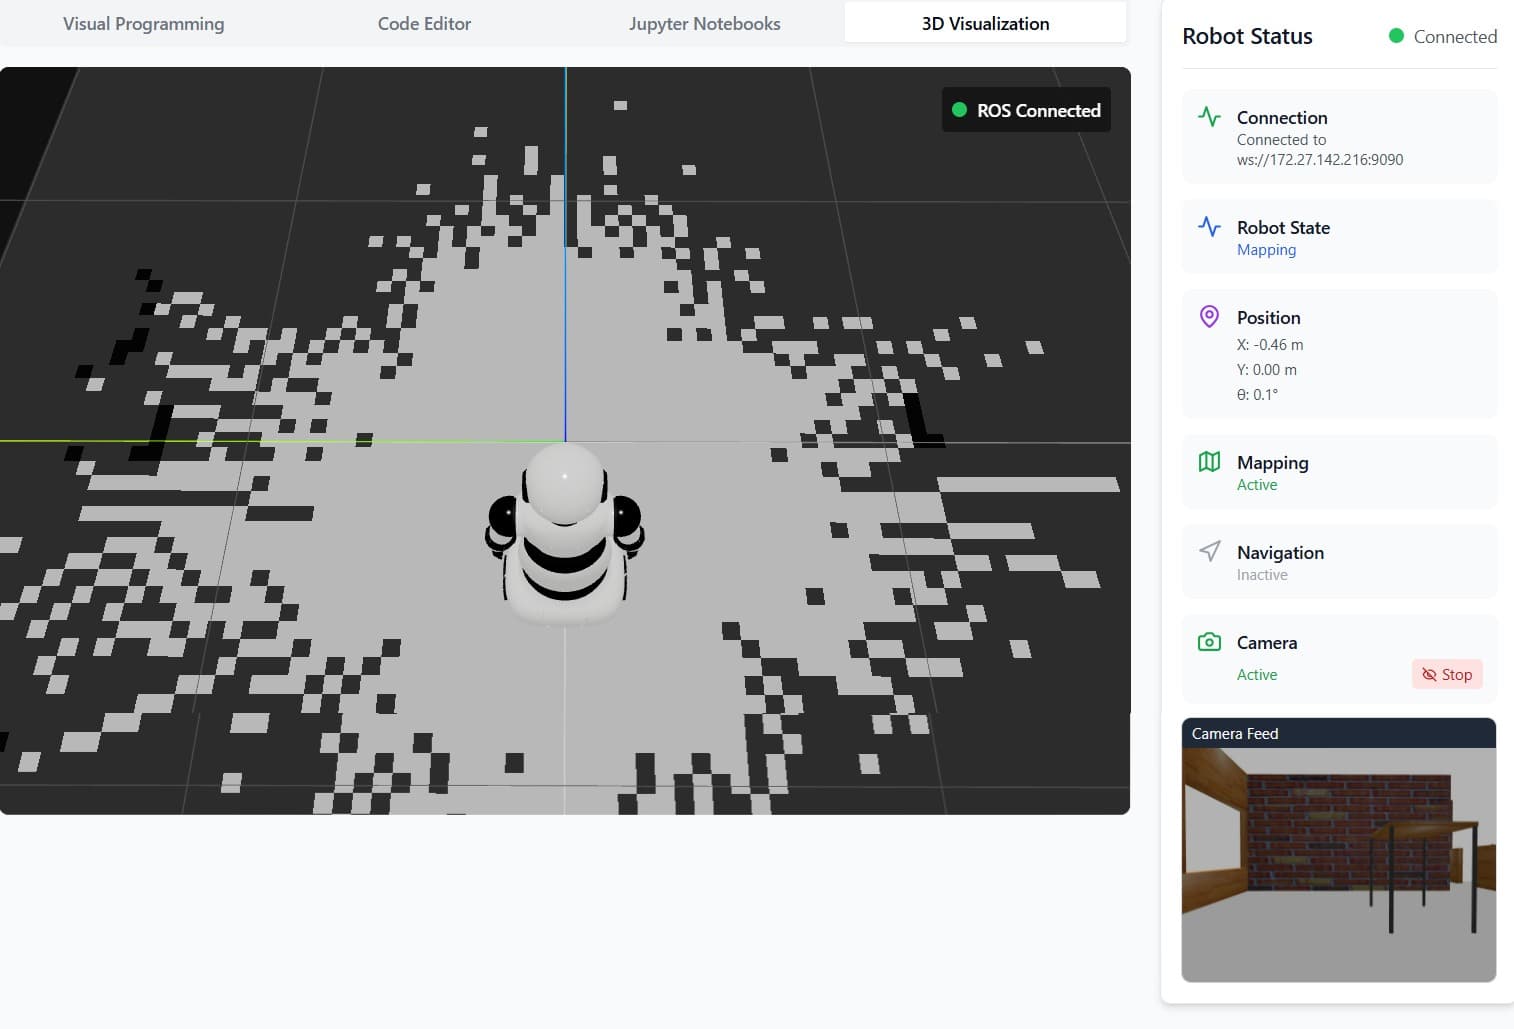
Mapping and Navigation Visualization
The visualization environment displays the map generated by the robot together with real-time navigation behaviour.
During mapping and navigation workflows, users can observe:
- Environment map generation
- Robot movement inside the map
- Position updates
- Navigation path execution
- Direction changes during movement
Mapping Visualization
Navigation Visualization
Robot Joint Movement Visualization
The 3D robot model also reflects live robot joint and movement updates during operation.
This helps users understand how different robot parts move while robotics programs are running.
Camera Visualization
The visualization environment can display the live camera stream from the robot during operation.
This allows users to monitor the robot’s visual perspective while testing robotics programs and behaviours.
Next Steps
- Start building programs using Visual Programming
- Write robotics scripts in the Python Editor
- Explore robotics experimentation using Jupyter Notebook