Visual Programming
Overview
The Visual Programming module allows users to create robot programs using a block-based interface, making it ideal for beginners and educational environments.

Connecting to the Robot
- Enter the robot’s IP address in the Robot Host field located at the top of the interface
- Click the Connect button to establish a connection with the robot
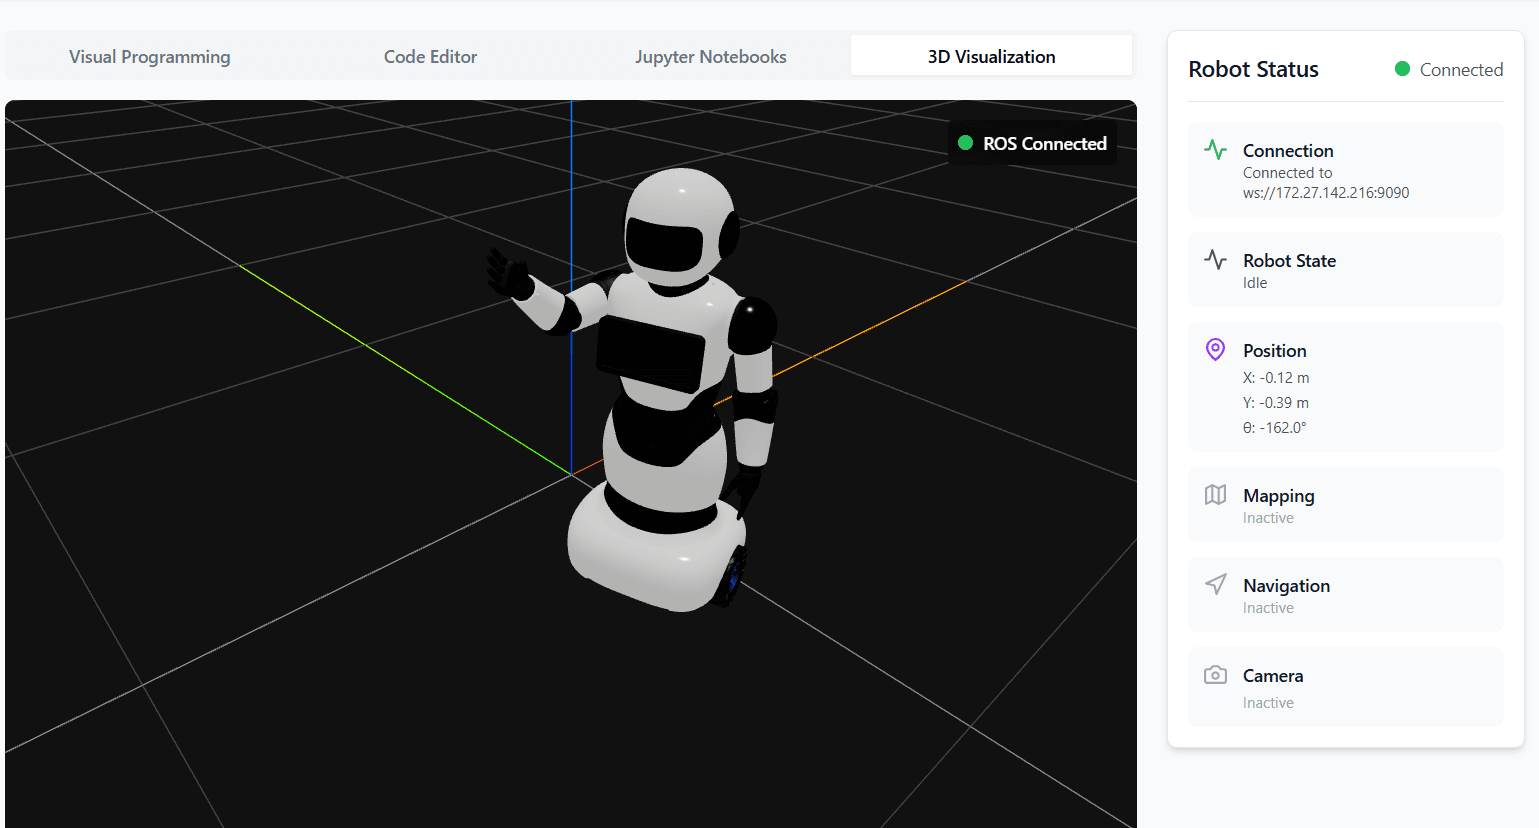
Once connected, the Robot Status panel on the right displays real-time information, including:
- Connection status and connected IP address
- Current robot state
- Robot position (X, Y, θ)
- Mapping status
- Navigation status
- Camera status
Interface Overview
Left Panel (Block Categories)
Contains available visual programming blocks such as Movement, Servos, Sensors, Mapping, Navigation, Camera, Logic, Loops, Math, Text, Lists, and Variables.
Center Workspace
The main canvas where blocks are dragged and connected to create robot behaviors.
Top Controls
- Run Code: Executes the created visual program on the robot
- Download: Downloads the generated program
- Clear: Clears the current workspace
After connecting to the robot and understanding the interface, we can begin building programs by dragging blocks into the workspace and executing them in real time.
Controlling Robot Movement
Now, let’s explore how visual programming works within the workspace.
Movement Blocks
The Movement category provides blocks to control the robot’s motion by defining direction, speed, and duration.
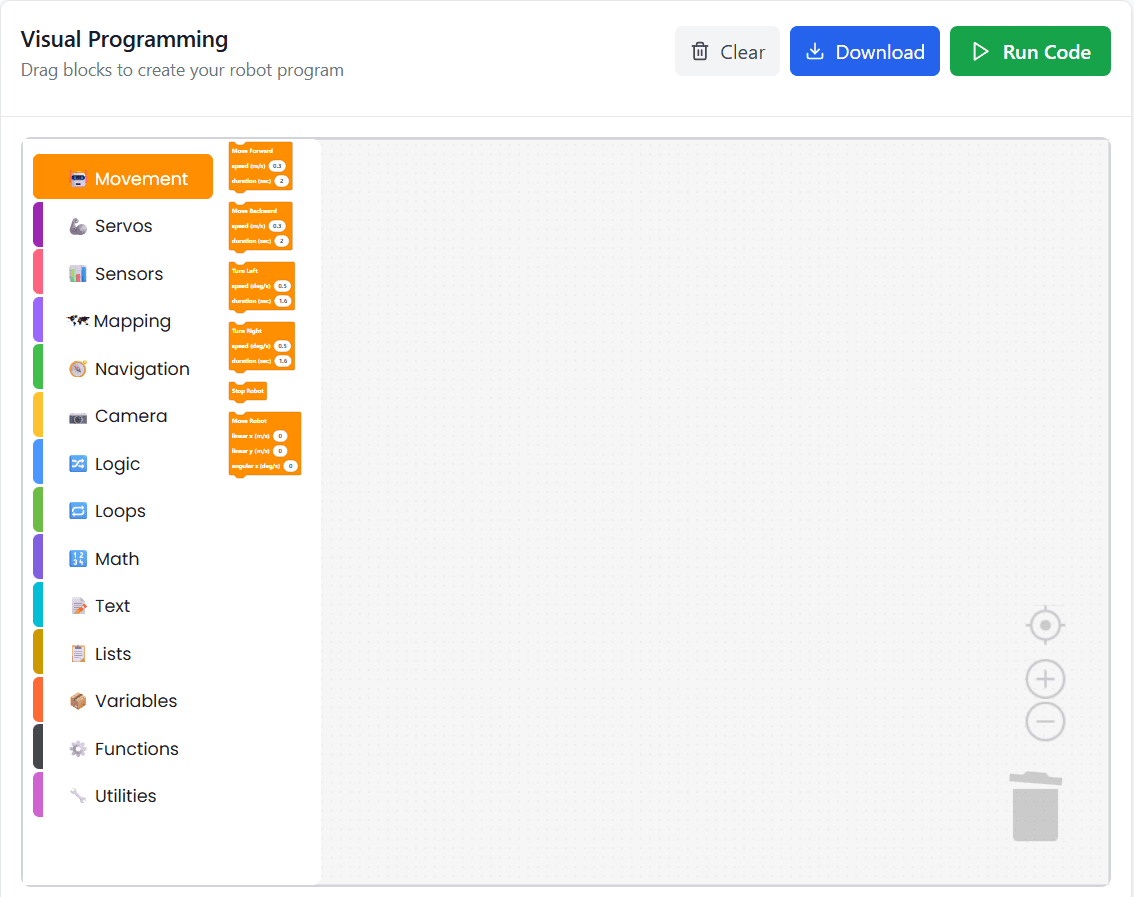
Basic Movement Actions
- Move Forward: Moves the robot forward in a straight line based on the specified speed and duration
- Move Backward: Moves the robot backward in a straight line using the given speed and duration
- Turn Left: Rotates the robot to the left by applying angular motion for the specified duration
- Turn Right: Rotates the robot to the right by applying angular motion for the specified duration
- Stop: Immediately stops all robot movement
Motion Parameters
Each movement block allows fine control using the following parameters:
- Speed (m/s): Defines how fast the robot moves linearly
- Duration (sec): Specifies how long the movement action is executed
Advanced Motion Control
The robot’s movement is internally controlled using three velocity components:
- Linear X (m/s): Controls forward and backward movement along the robot’s forward axis
- Linear Y (m/s): Controls side-to-side (lateral) movement, if supported by the robot hardware
- Angular Z (deg/s): Controls rotational movement around the vertical axis, allowing the robot to turn left or right
By combining these movement blocks and parameters, users can create precise and smooth robot motion sequences within the visual programming workspace.
Example: Executing a Movement Block
To control the robot’s movement using visual programming, open the Movement category and select any available movement block. Place the selected block in the workspace and configure the required parameters such as speed (m/s) and duration (seconds). Once configured, click Run Code to execute the command on the robot.
If View Camera is enabled, the robot’s motion can be observed in real time through the live camera feed, allowing users to visually monitor the execution.
Servos
The Servos panel provides visual programming blocks to control the robot’s joints, arms, gripper, and neck by setting precise angles and positions.
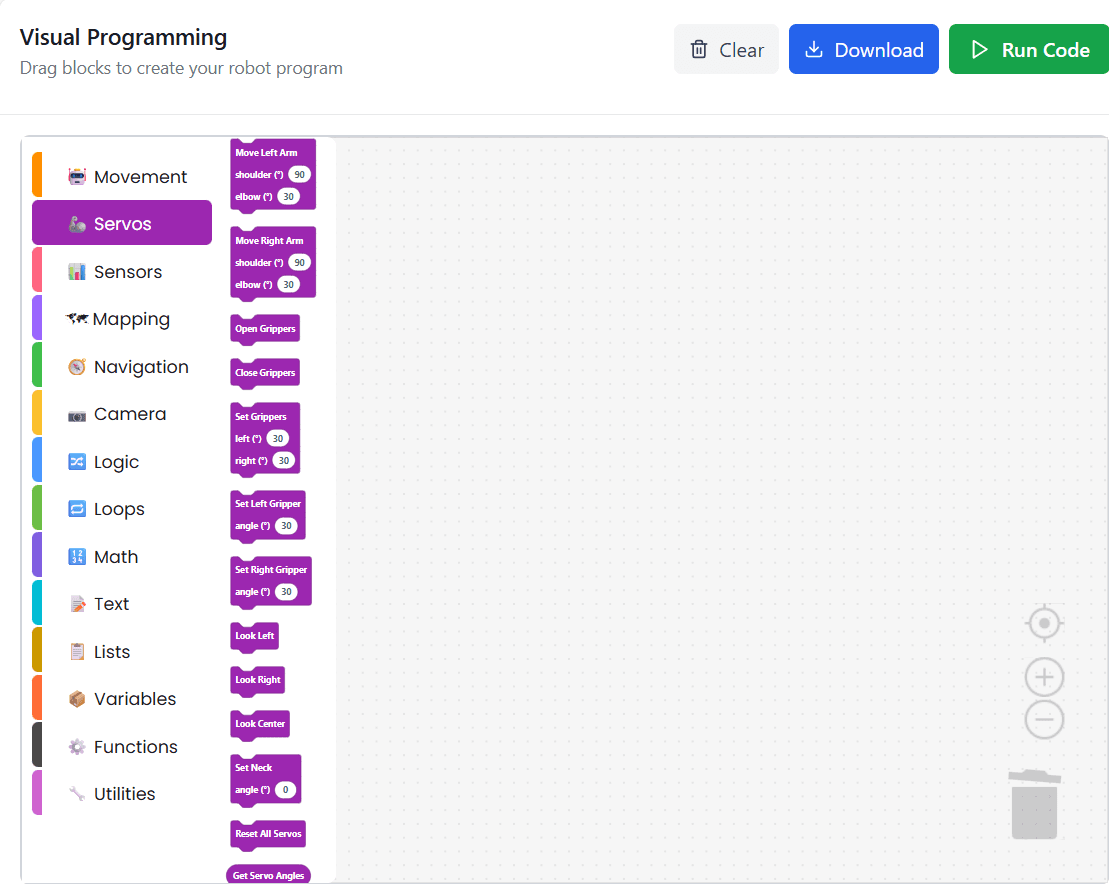
Arm and Shoulder Control
- Move Left Arm / Move Right Arm: Moves the selected arm to a predefined position or to a specified angle
- Shoulder Control: Adjusts the shoulder joint position to raise or lower the arm
Gripper Control
- Open Gripper: Open the gripper to a default open position
- Close Gripper: Closes the gripper to a default closed position
- Set Gripper: Sets the gripper to a specific angle or position value
- Set Left Gripper / Set Right Gripper: Controls the left or right gripper independently by specifying the required position
Head and Neck Control
- Look Left / Look Right / Look Center: Rotates the robot’s head to predefined orientations
- Set Neck: Sets the neck position to a specific angle value
Utility and Feedback
- Reset All Servos: Resets all servo motors to their default (home) positions
- Get Servo Angle: Retrieves the current angle of the selected servo for monitoring or logic-based control
Example: Controlling Servos
- Go to the Servo Panel
- Select the required servo action (for example, move left arm, right arm, shoulder, or gripper)
- Place the selected servo block into the program workspace
- Run the program
Once executed, the selected servo will move according to the chosen action.
Sensors
The Sensor Panel provides real-time information about the robot’s state, position, and navigation. It allows you to monitor key metrics and statuses essential for controlling and troubleshooting BonicBot.
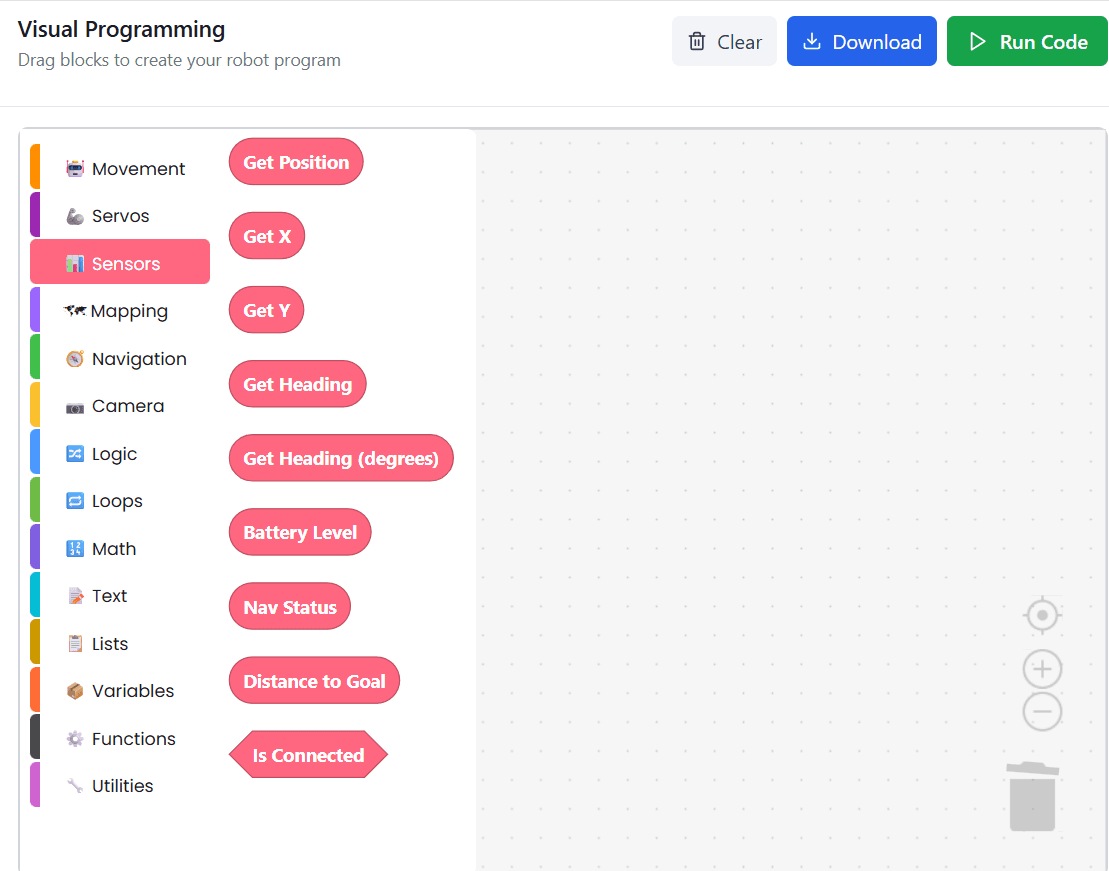
Available Sensor Functions
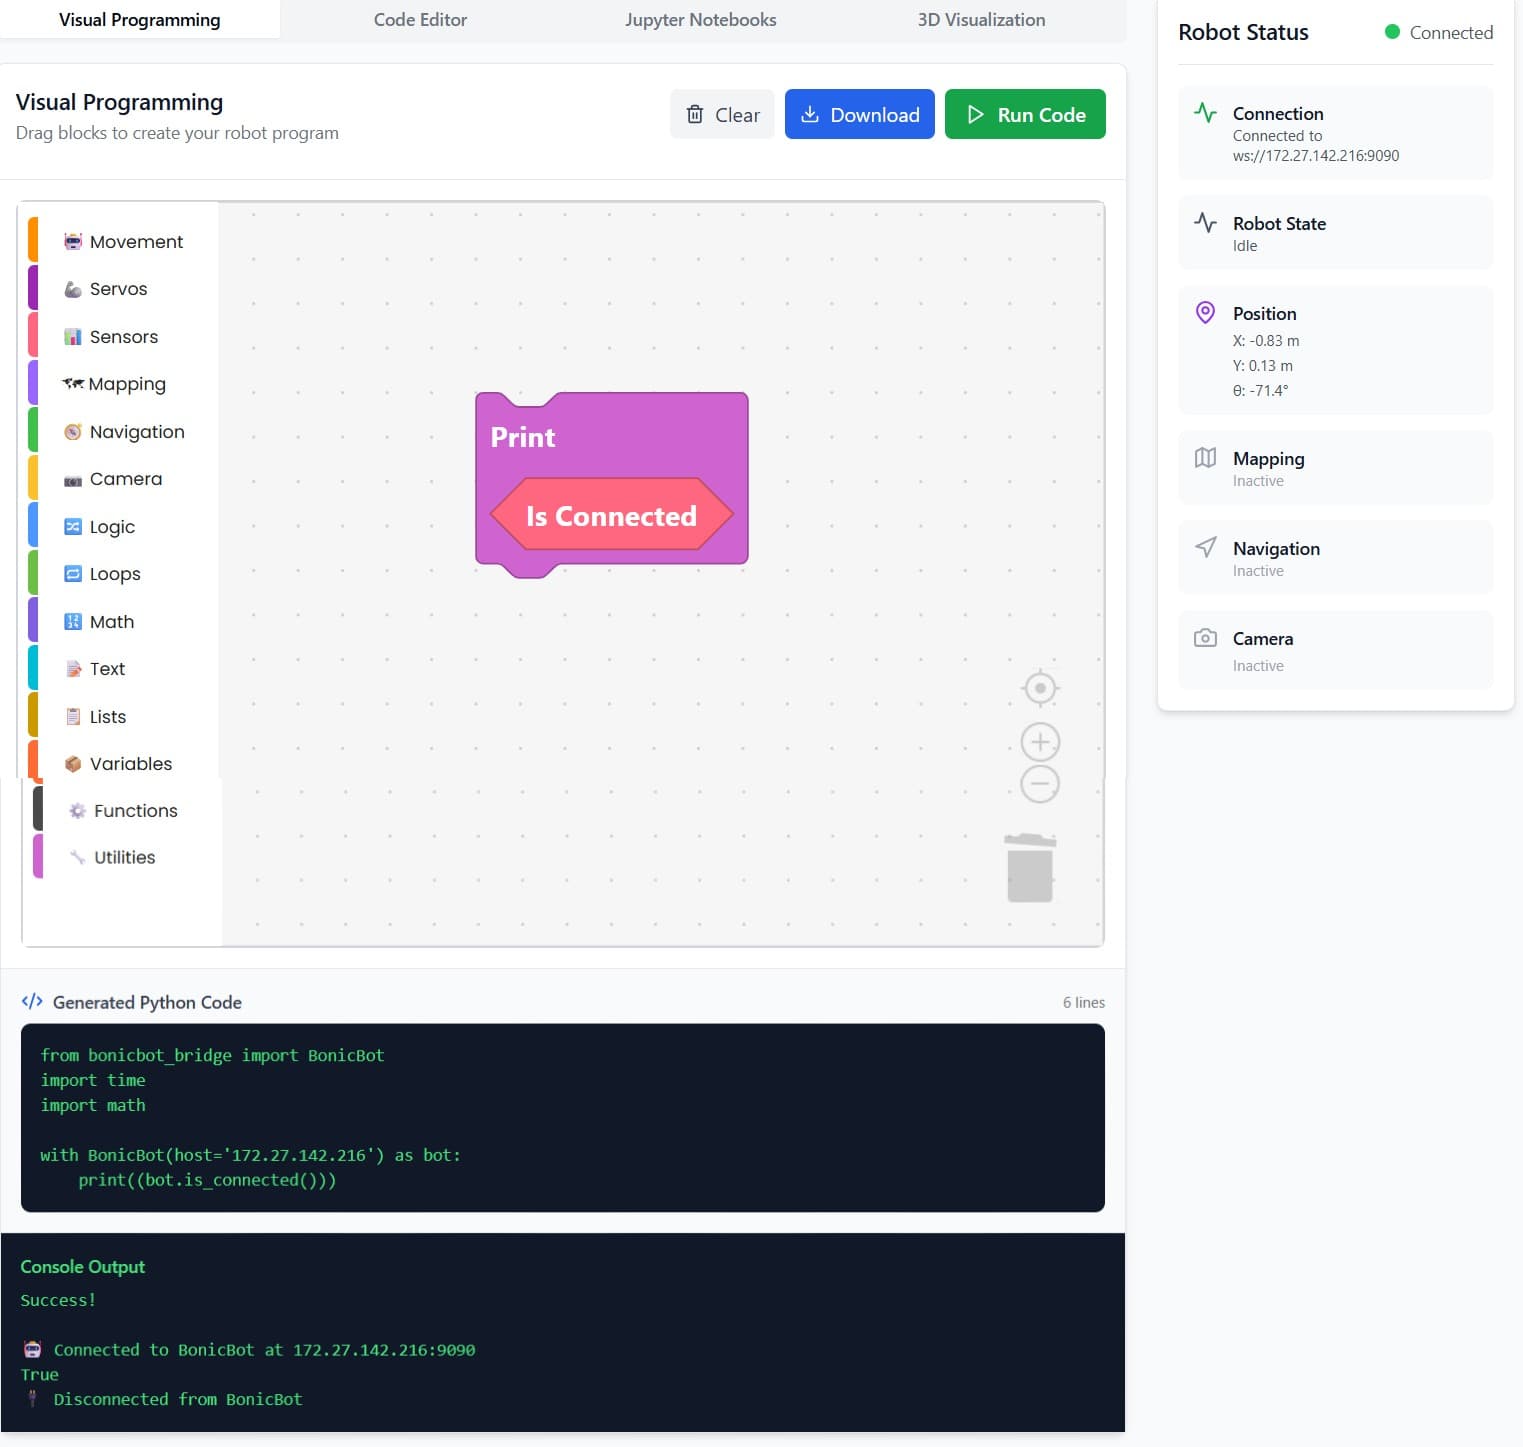
is_connected
Description: Checks if the robot is currently connected and operational.
Returns: True if connected, False otherwise.
Use Case: Ensure commands can be sent only when the robot is connected.
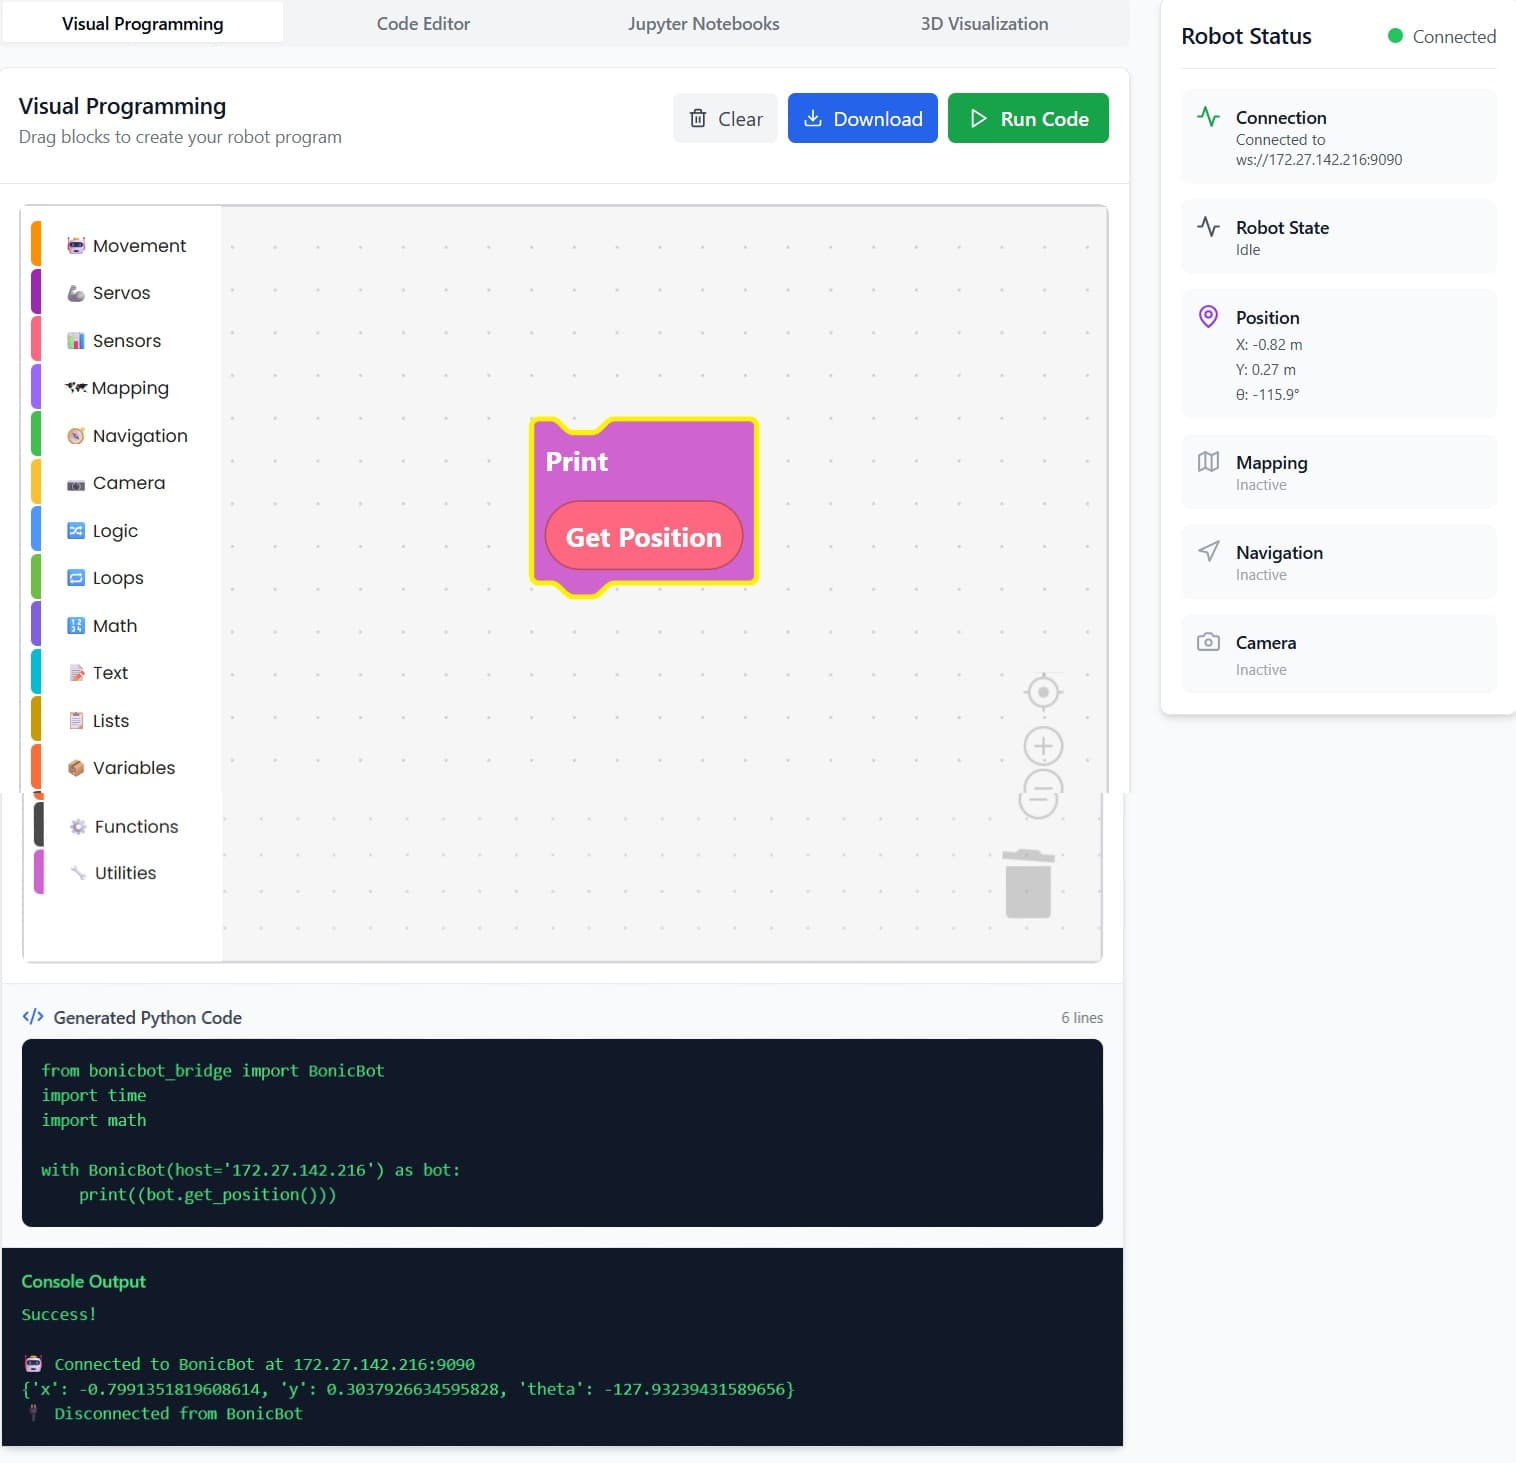
get_position
Description: Retrieves the current position of the robot in the environment.
Returns: A tuple or object representing (x, y) coordinates.
Use Case: Useful for tracking movement or mapping tasks.
get_x
Description: Retrieves the current X-coordinate of the robot.
Returns: Numeric value representing the X position.
Use Case: For navigation and path-planning purposes.

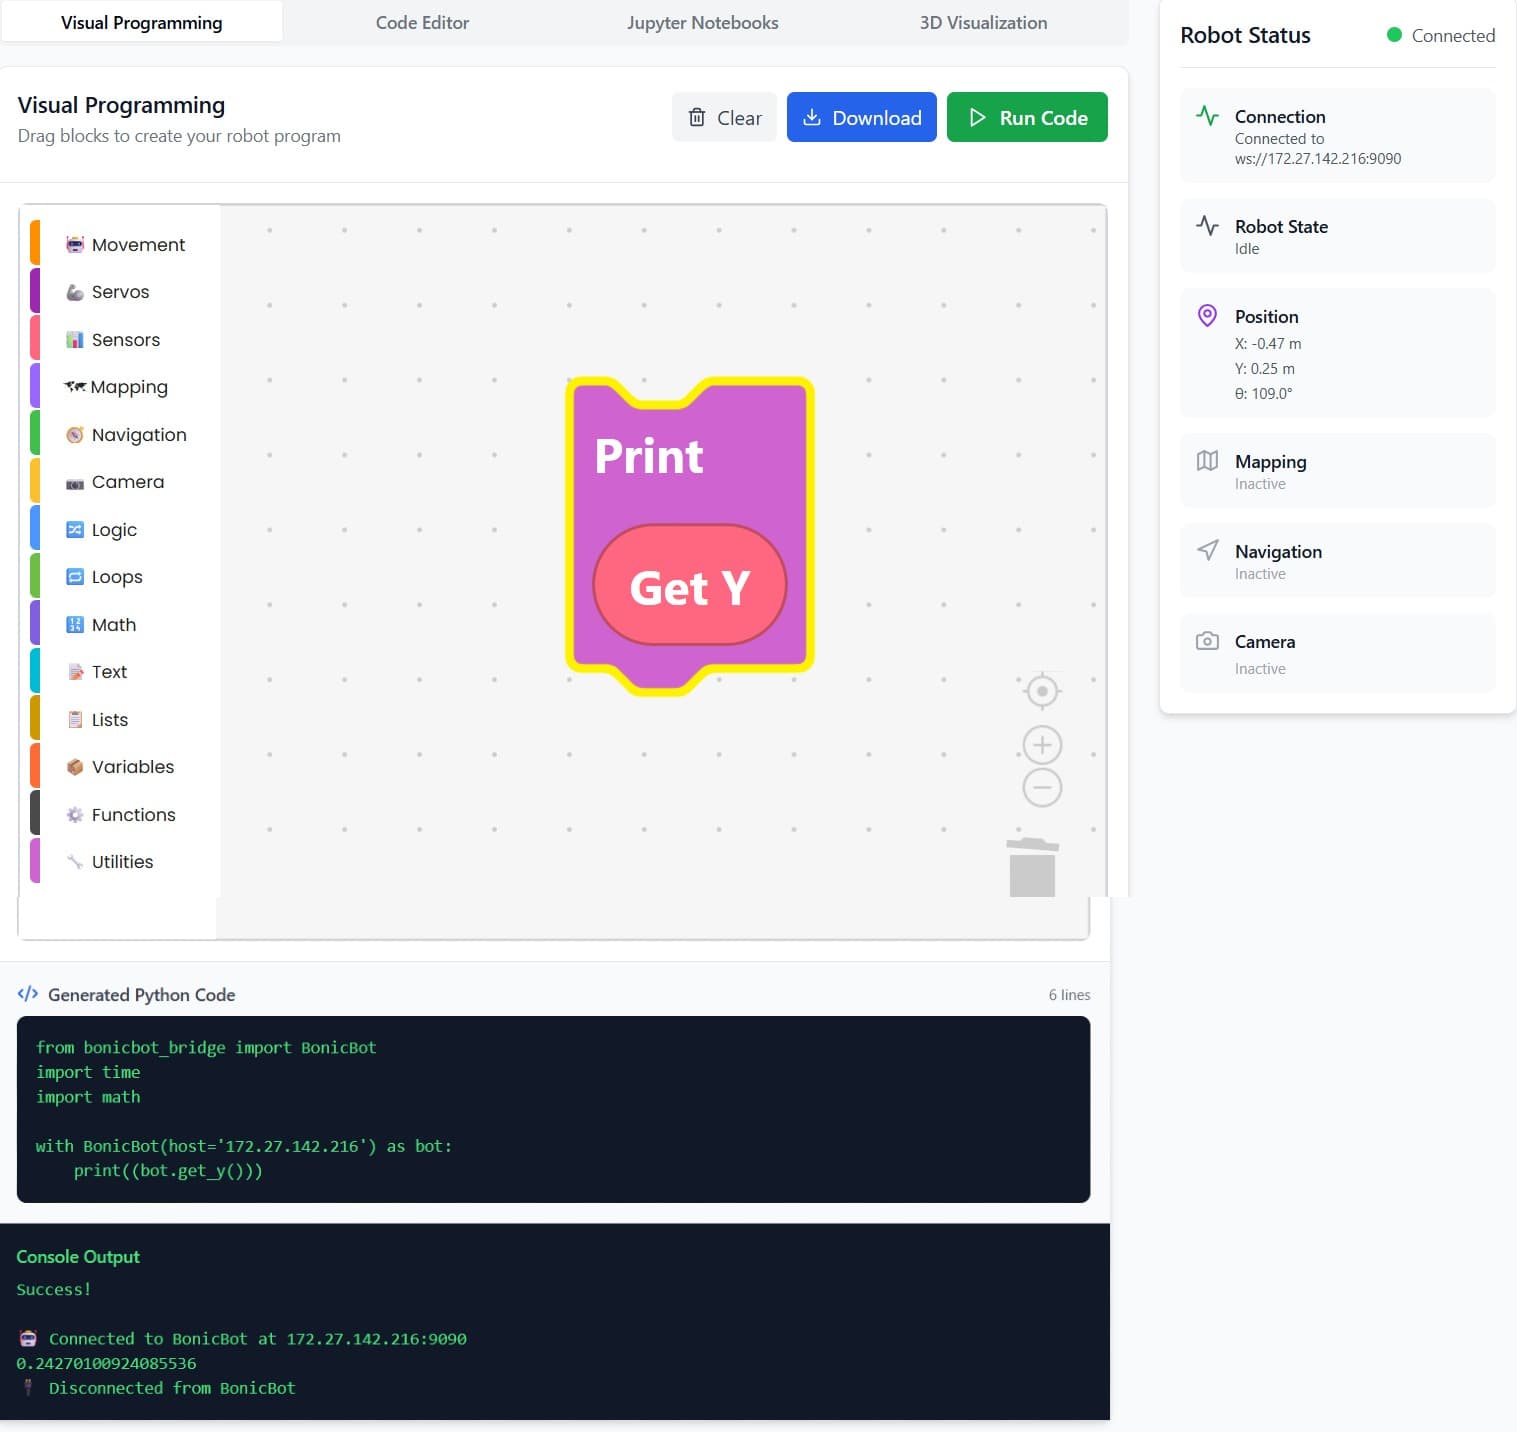
get_y
Description: Retrieves the current Y-coordinate of the robot.
Returns: Numeric value representing the Y position.
Use Case: For navigation and path-planning purposes.
get_heading
Description: Retrieves the robot’s heading in radians.
Returns: Numeric value in radians.
Use Case: Used for directional movement and orientation.

battery_level
Note: Not implemented yet
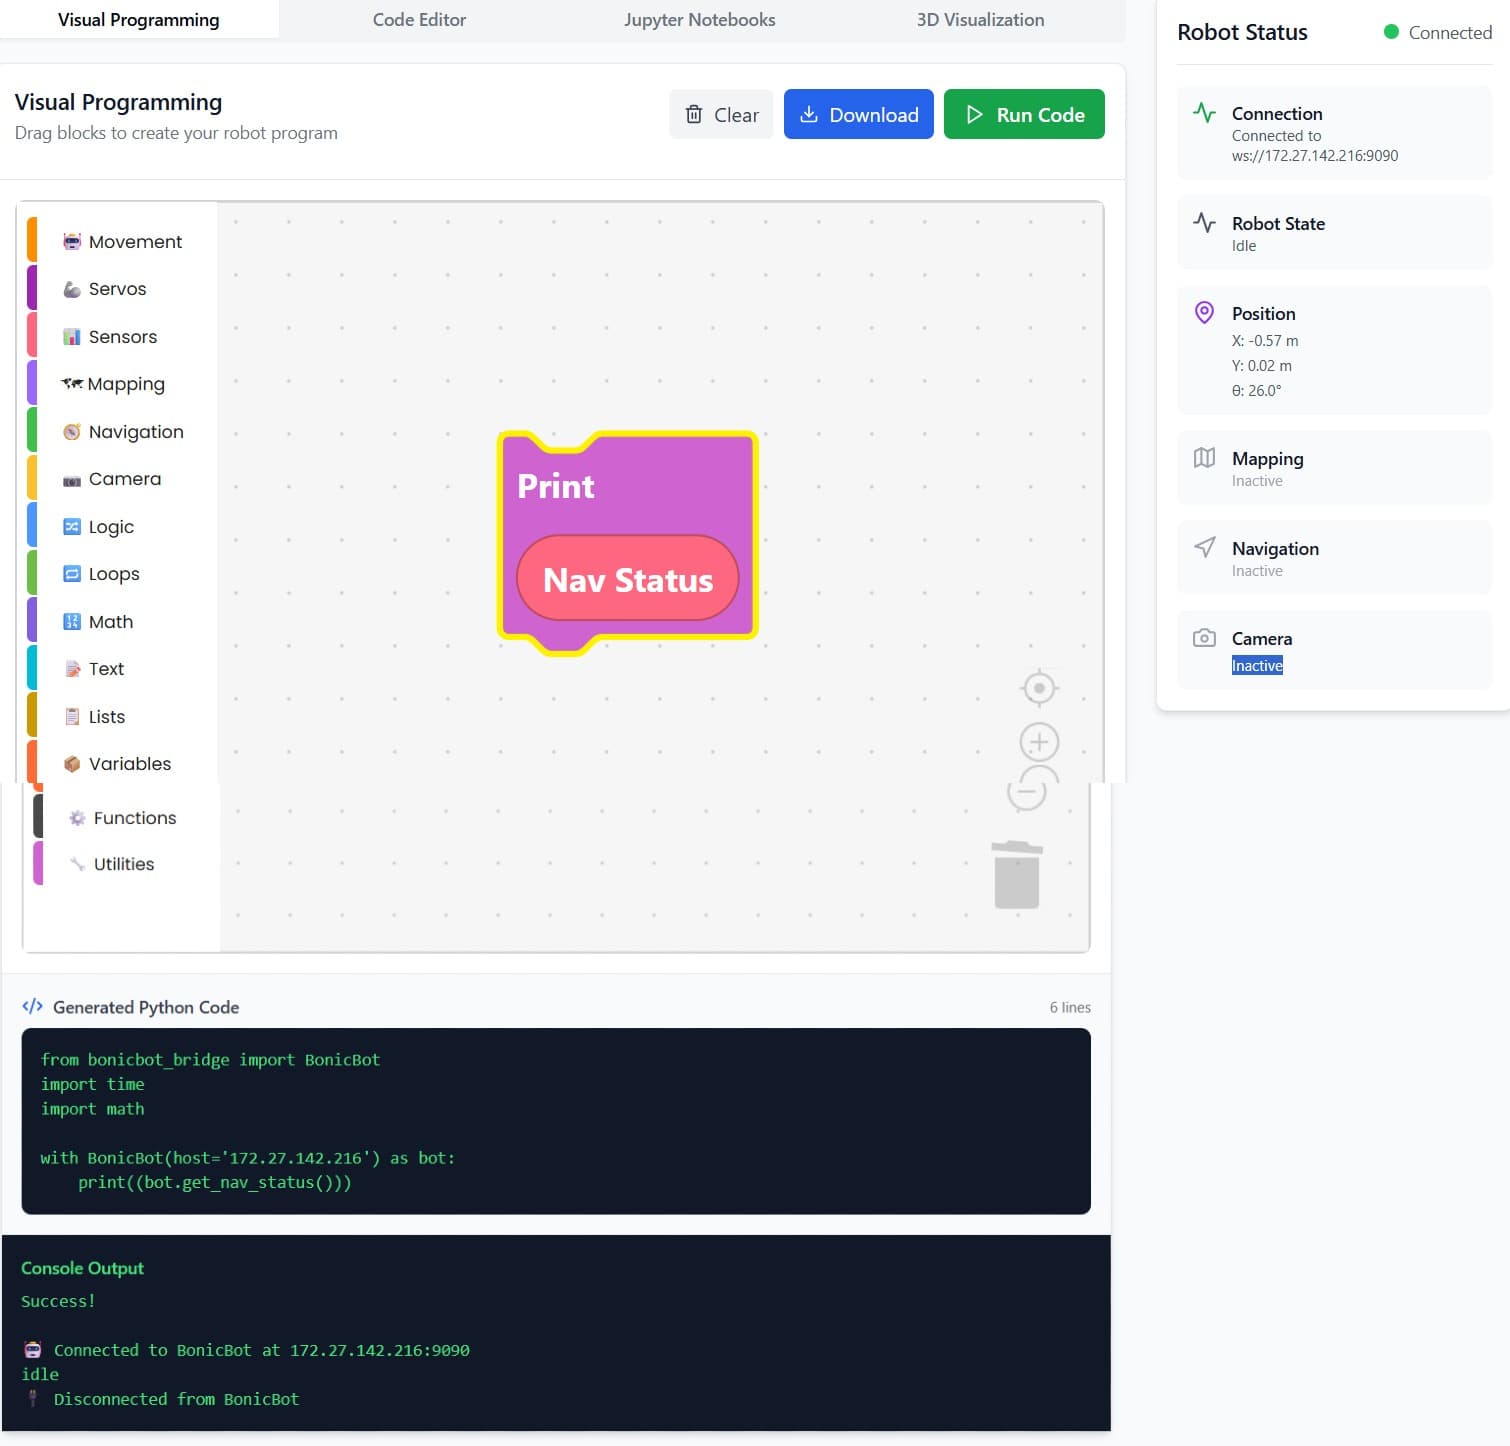
nav_status
Description: Provides the current navigation status of the robot.
Returns: Status such as idle, moving, goal_reached, or error.
Use Case: Understand the current activity of the robot and troubleshoot navigation issues.
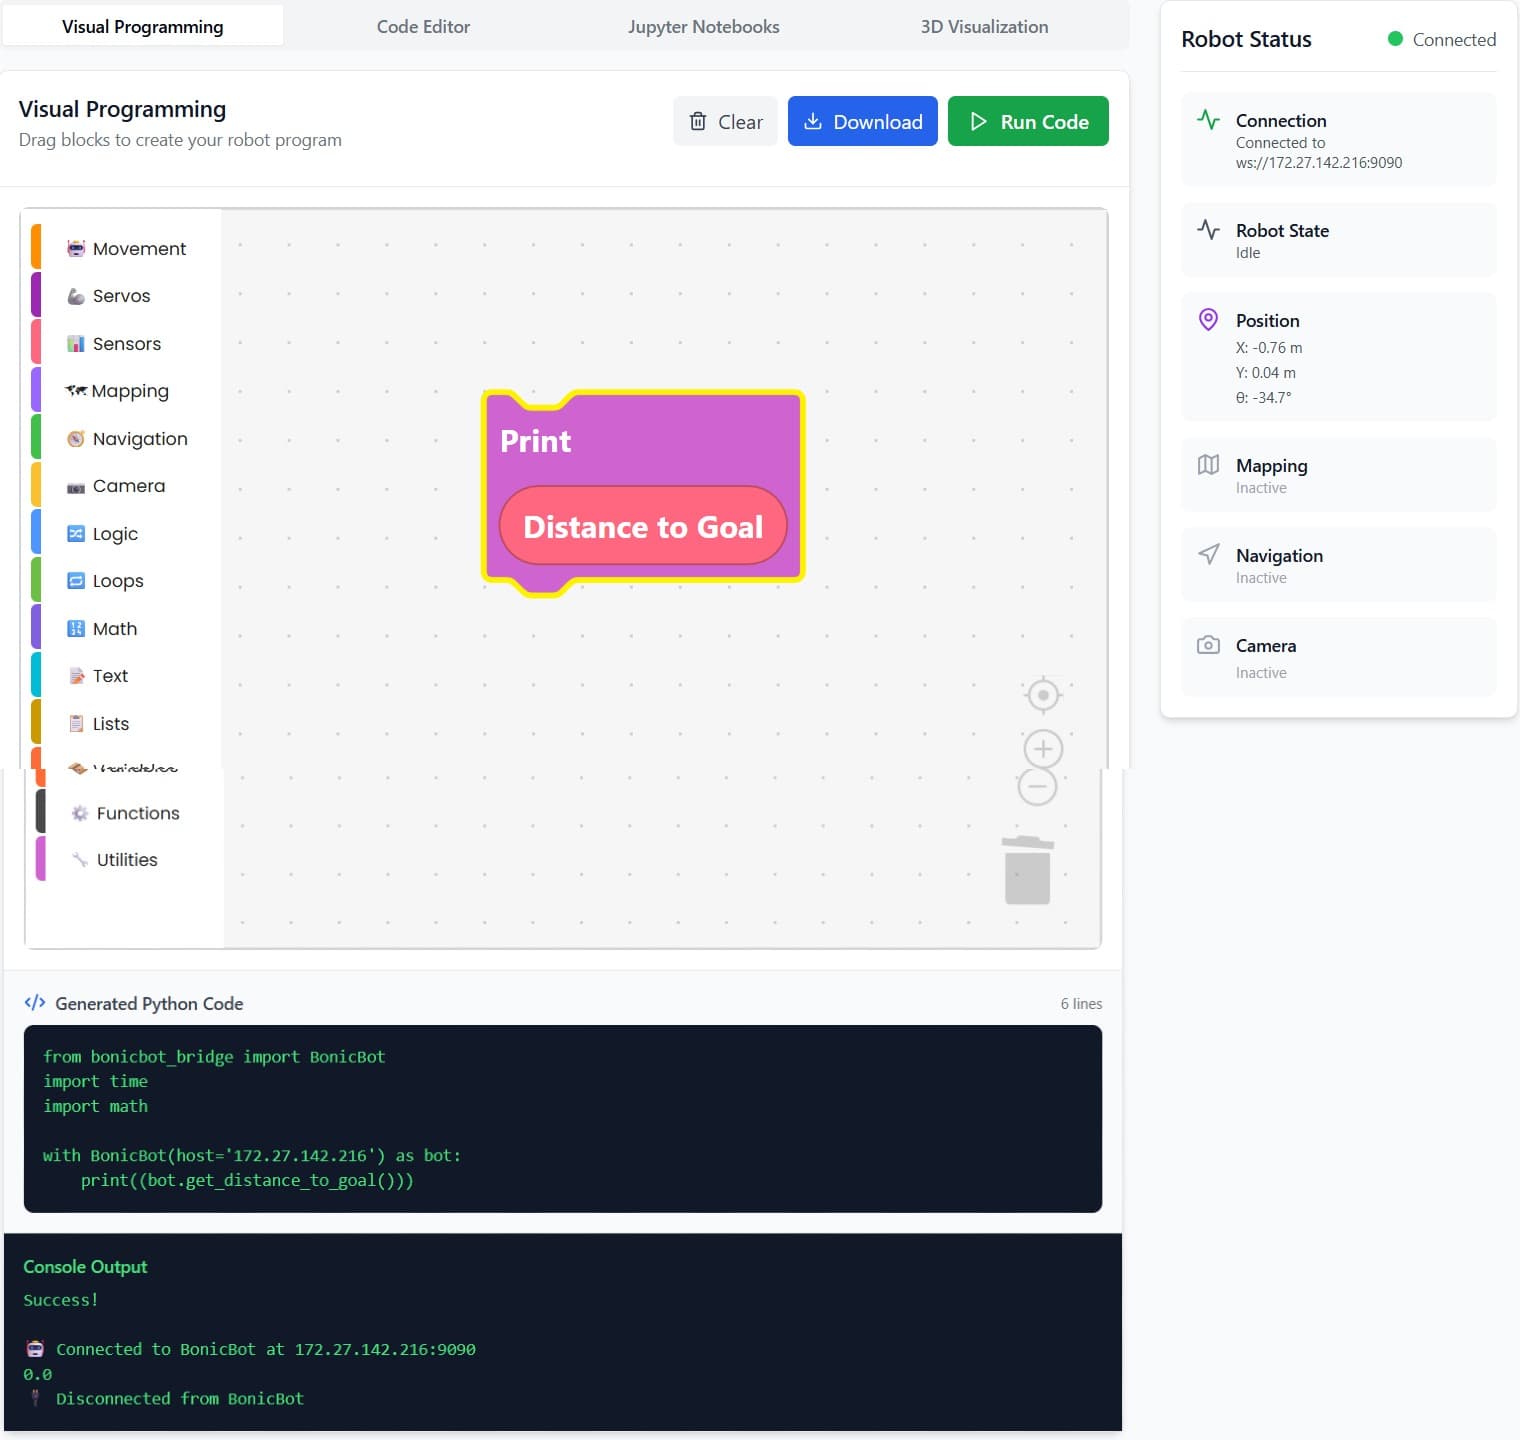
distance_to_goal
Description: Measures the distance from the robot’s current position to the target goal.
Returns: Numeric value (e.g., meters or centimeters).
Use Case: Essential for path planning and dynamic movement adjustments.
Mapping
The Mapping Panel allows BonicBot to create and manage maps of its environment. This is essential for autonomous navigation and path planning. The available blocks are described below:
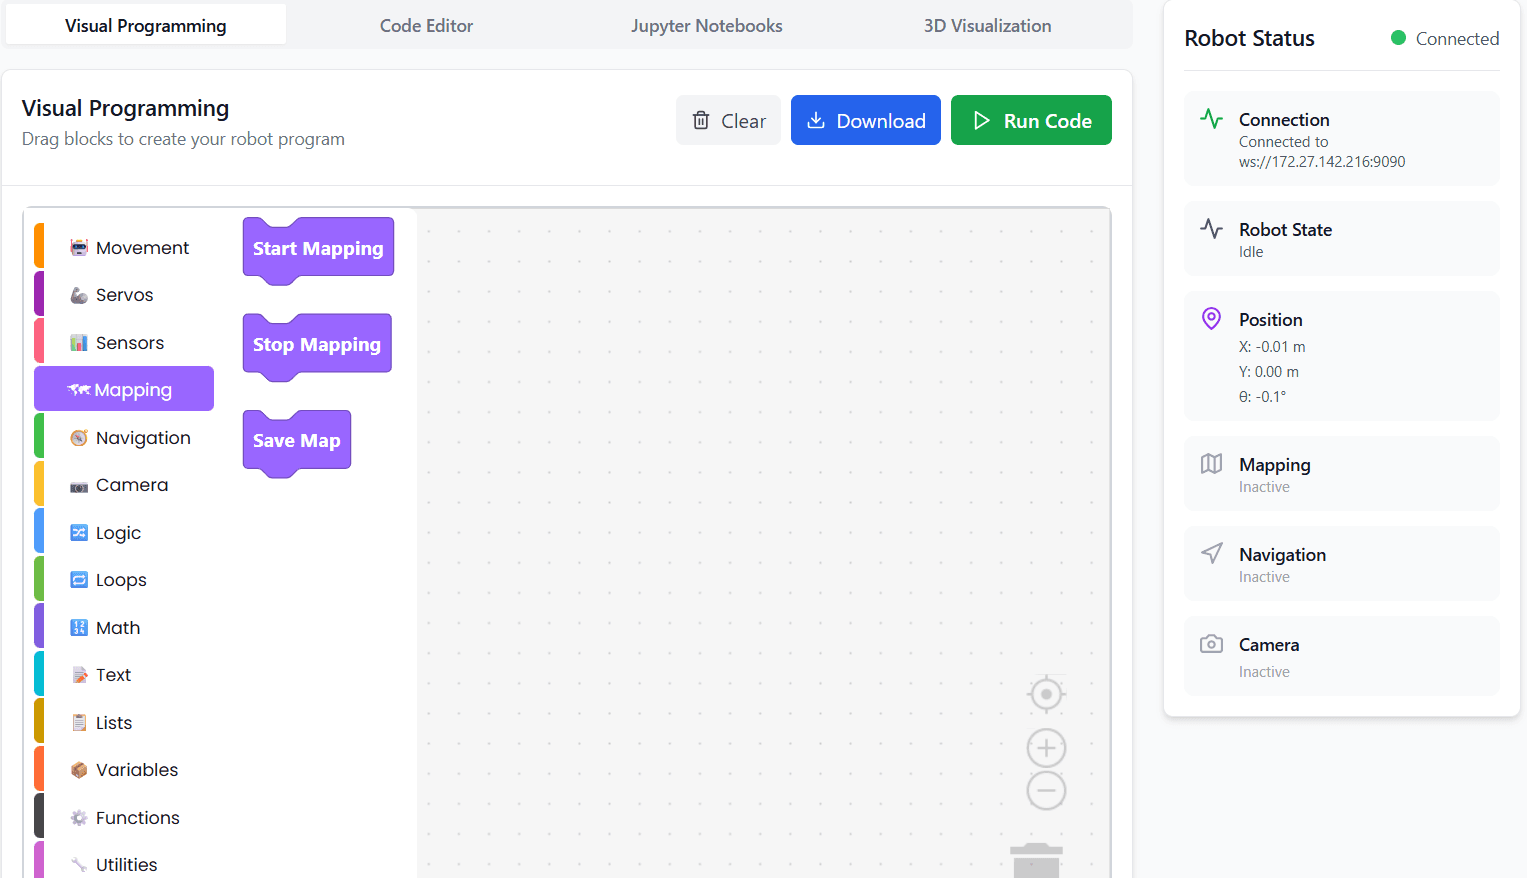
Start Map
This block begins the mapping process. When activated, BonicBot starts scanning its surroundings in real-time to create a map. Use this block at the beginning of any mapping session.
Stop Map
This block stops the ongoing mapping process. It tells the robot to pause scanning. Use this block once you have explored the area you want to map.
Save Map
This block saves the current map into the robot’s memory. You can give the map a specific name to easily identify it later. Always use this block after stopping the mapping session to ensure your map is stored for future use. The Save Map works only when navigation is not active. It cannot be used while the robot is navigating.
Usage Tips
- Always start with the Start Map block before exploring
- Use Stop Map when the mapping session is complete
- Save Map should always follow stopping the map, otherwise the data may be lost
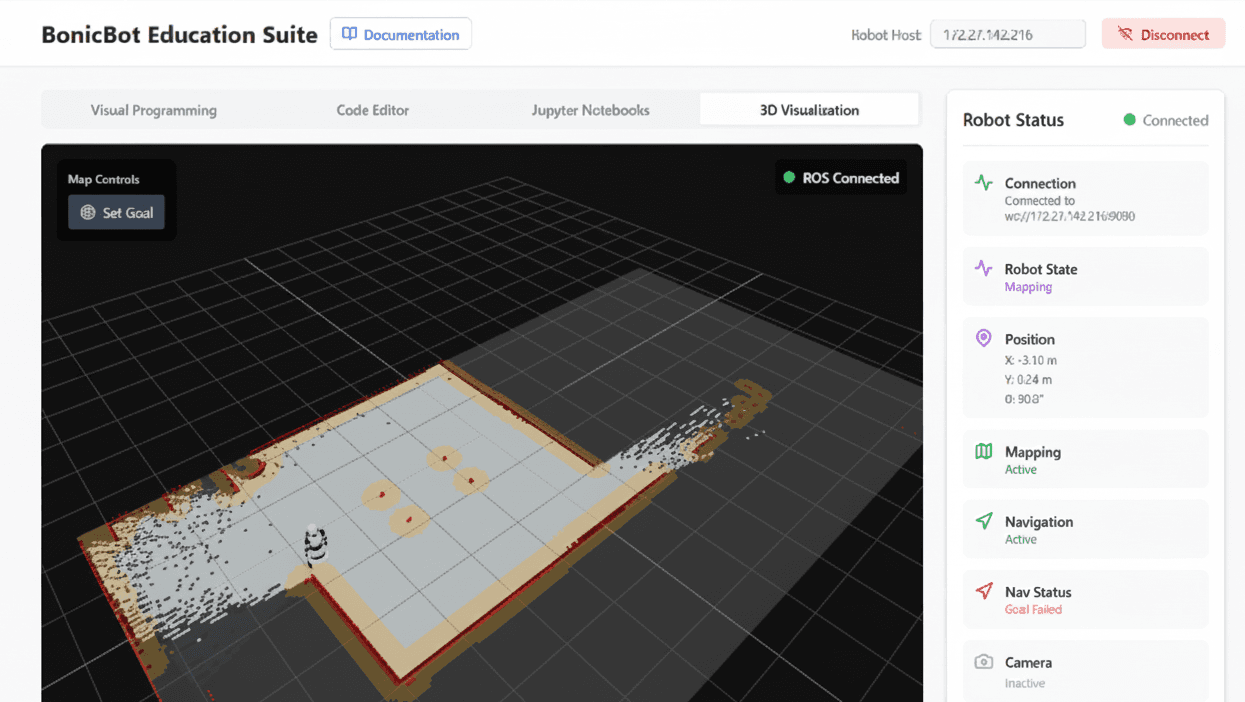
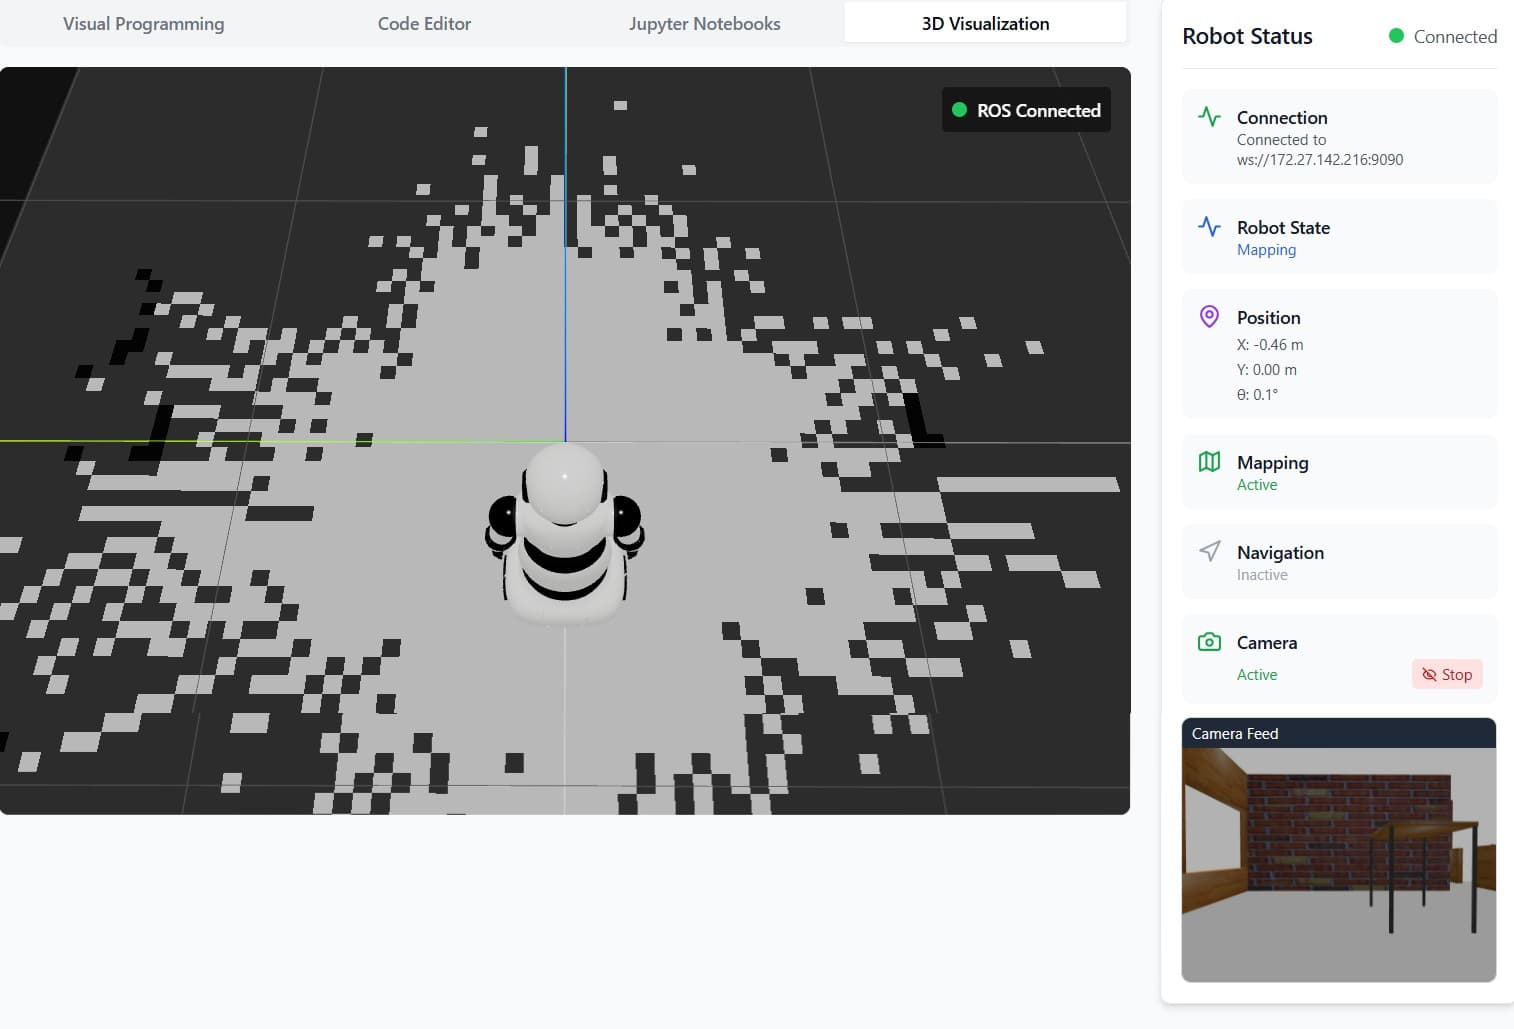
Start Mapping
In the Mapping Panel, select Start Mapping and then run the program. Next, go to the 3D Visualization section, where you can view the map created by the robot in real-time.
Navigation
The Start Navigation feature is enabled only once mapping is successfully completed. The Navigation Panel allows BonicBot to move autonomously within its environment, reach specified goals, and control its position. The panel includes blocks for starting navigation, setting goals, and stopping movement.
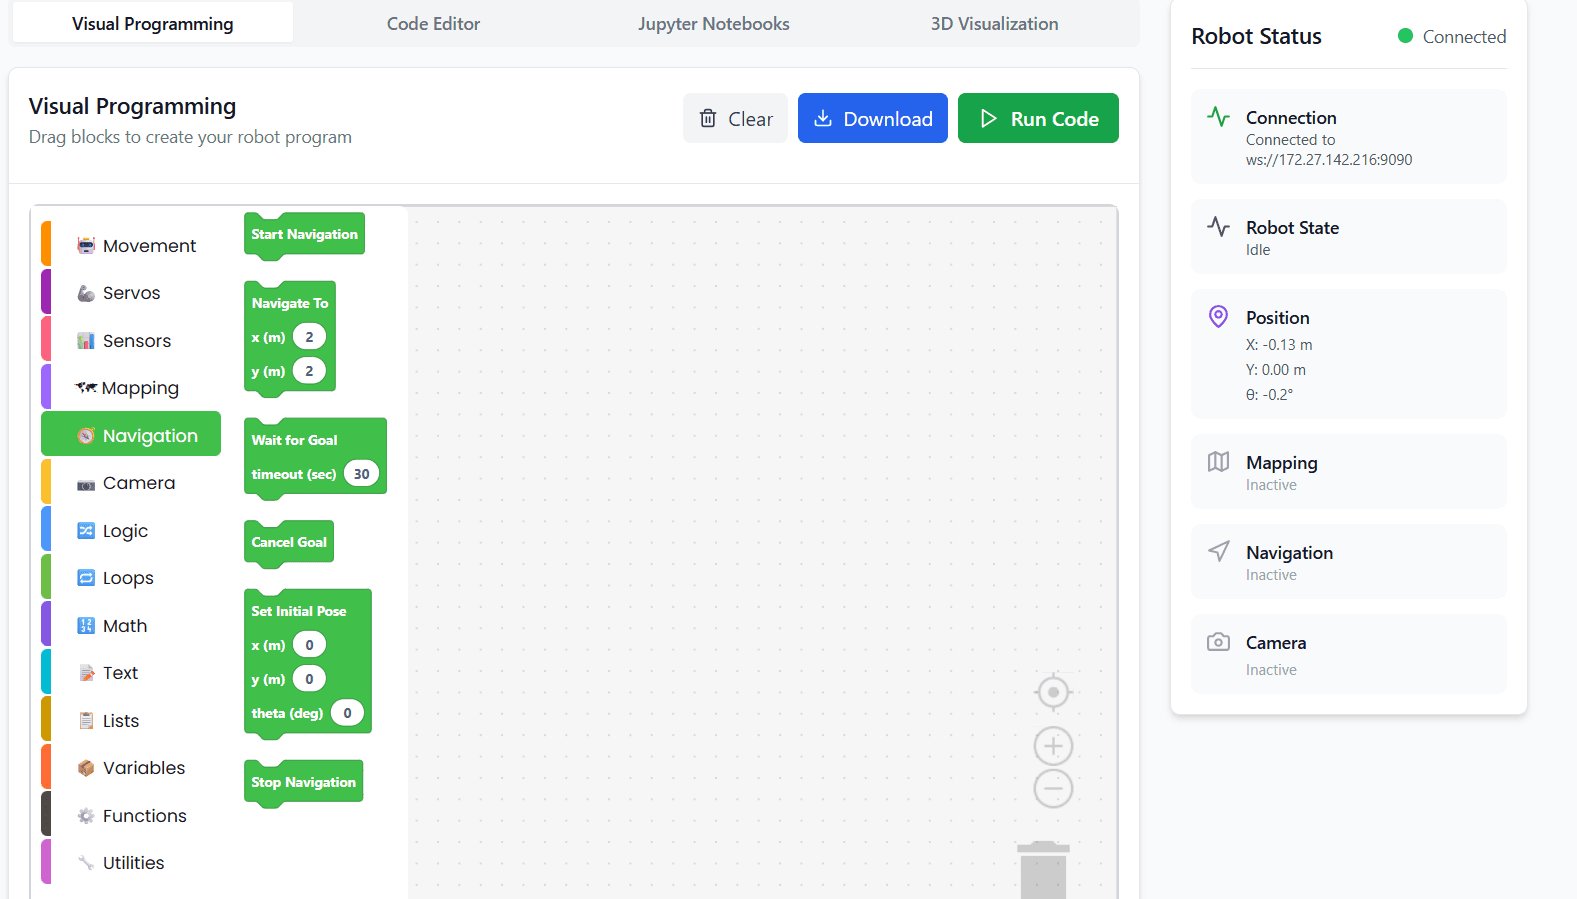
Navigation Blocks
- Start Navigation: Begins the robot’s navigation system. Use this block before sending any movement or goal commands
- Navigate to X (m): Moves the robot to a specified X-coordinate in meters
- Navigate to Y (m): Moves the robot to a specified Y-coordinate in meters
- Wait for Goal Timeout (sec): Waits for the robot to reach its current goal for a specified number of seconds. If the robot does not reach the goal in time, the program continues
- Cancel Goal: Stops the robot from pursuing the current goal immediately
- Set Initial Position X (m), Y (m), Theta (degree): Sets the robot’s starting position and orientation in the environment. X and Y are coordinates in meters, and Theta is the heading in degrees
- Stop Navigation: Stops all navigation activity and brings the robot to a halt
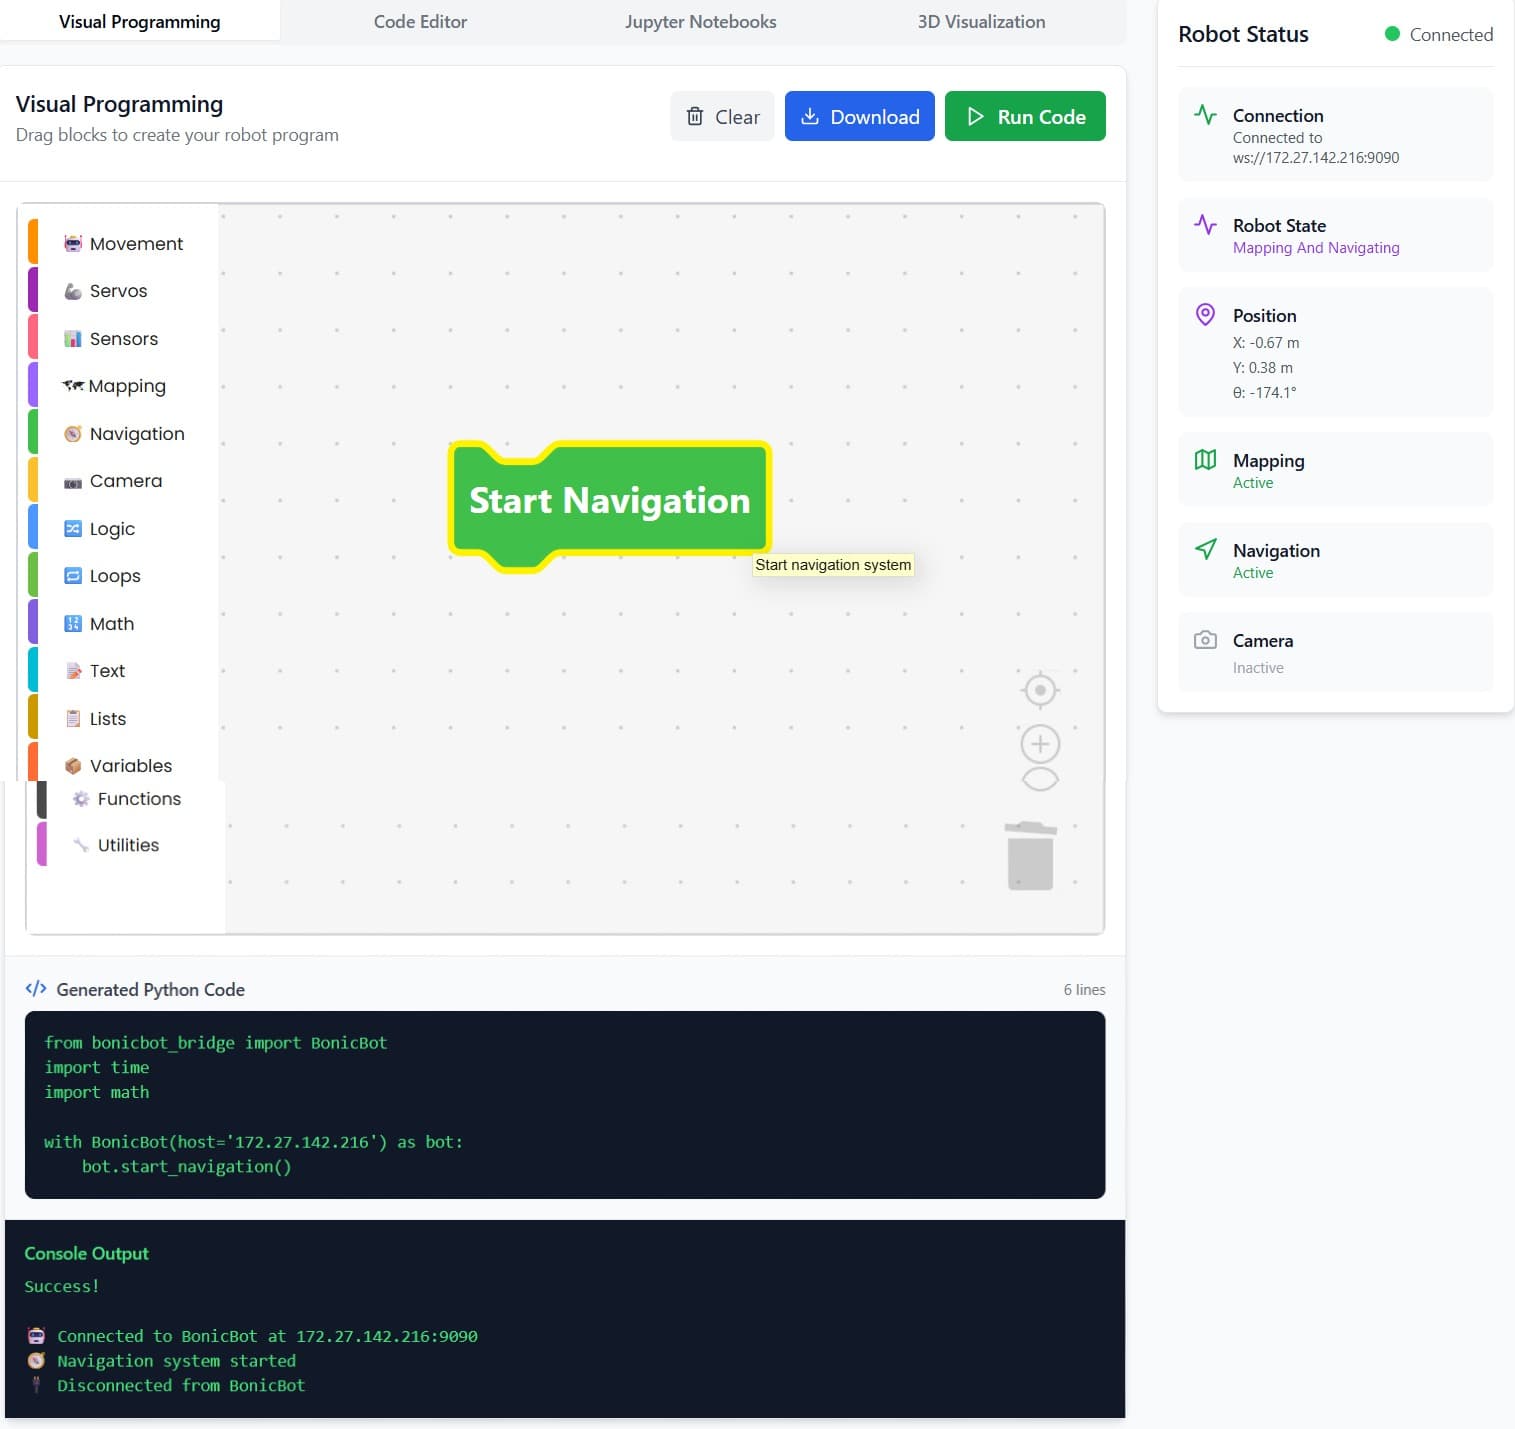
Example: Starting Navigation
- Go to the Navigation Panel
- Drag the Start Navigation block into your program workspace
- Run the program
Once executed, the robot’s navigation system will be activated, and it is ready to move to specified goals using blocks like Navigate to X and Navigate to Y.
Once navigation is started, the robot is ready to move and navigate to any specified goals as desired.
Camera
The Camera Panel allows BonicBot to access and control its camera for viewing, streaming, and capturing images. The panel is divided into three sections: Hardware Control, Streaming Control, and Image Access.
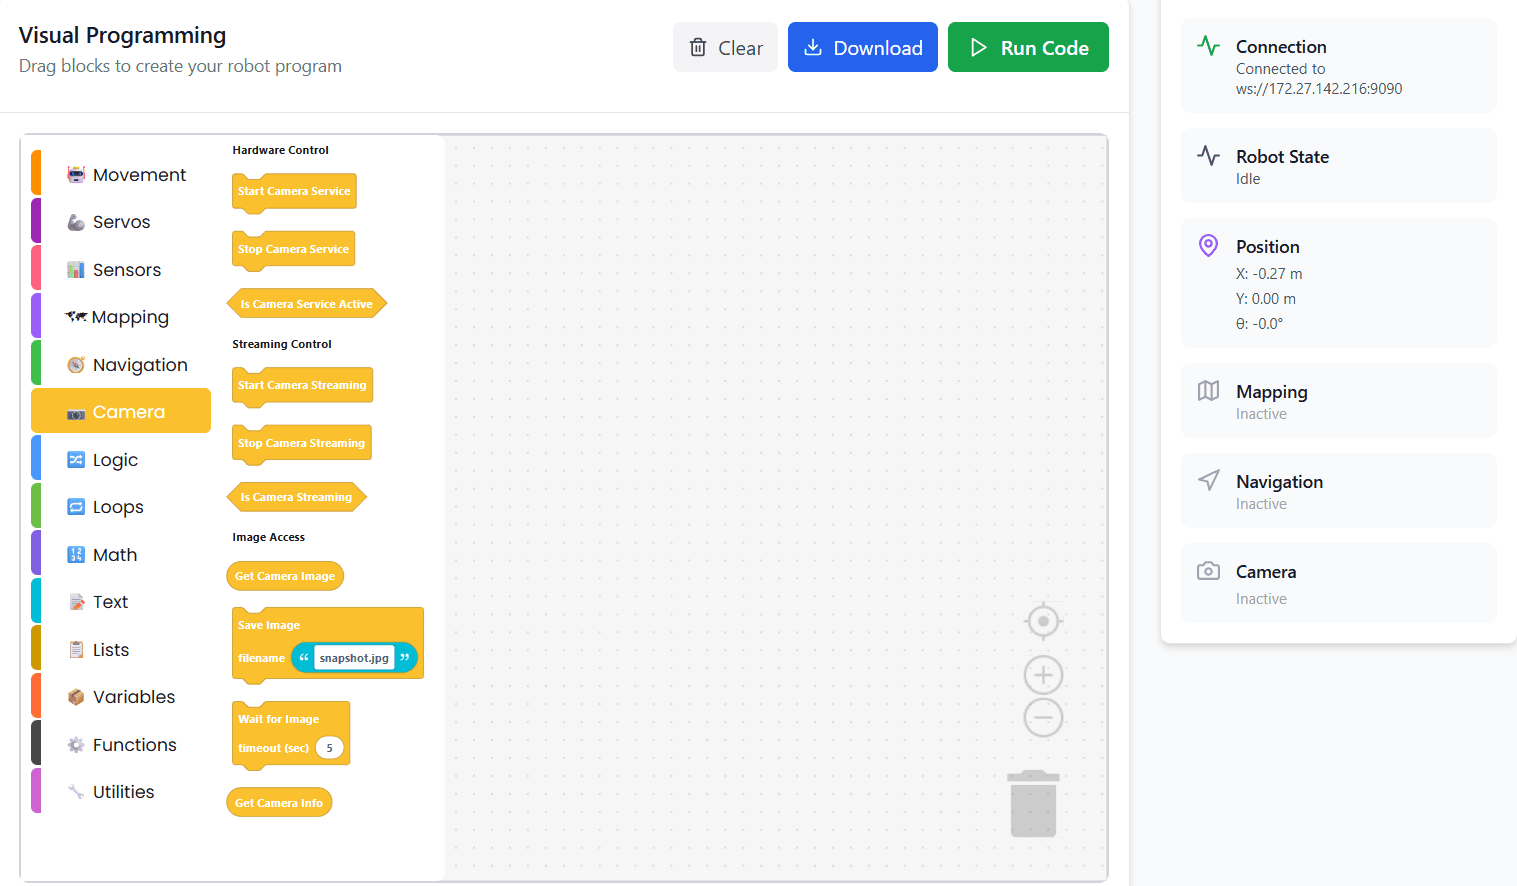
Hardware Control
These blocks manage the camera hardware:
- Start Camera: Turns on the camera
- Stop Camera: Turns off the camera
- Is Camera Service Active: Checks if the camera is currently active
Streaming Control
These blocks manage the live camera feed:
- Start Camera Streaming: Begins the live camera stream
- Stop Camera Streaming: Stops the live stream
- Is Camera Streaming: Checks whether the camera is currently streaming
Image Access
These blocks allow you to work with images from the camera:
- Get Camera Image: Captures the current frame from the camera
- Save Image: Saves the captured image
- Wait for the Image: Waits until a new image is available before continuing
- Get Camera Info: Retrieves information about the camera such as resolution or orientation
Example: Starting the Camera
- Go to the Camera Panel
- Drag the Start Camera block into your program workspace
- Connect it to the Run block (or the beginning of your program)
- Run the program
Once executed, the camera hardware will be activated, and below the Camera Tab, you can see the live camera stream.
Logic Blocks
Purpose
Logic blocks are used to make decisions in a program.

What you can do
- Compare sensor values
- Create conditional behavior
- Control robot actions based on conditions
Examples
- If obstacle is detected → stop robot
- If distance < threshold → turn left
Common Logic Blocks
- If / Else
- AND / OR
- True / False
- Comparisons (<, >, =)
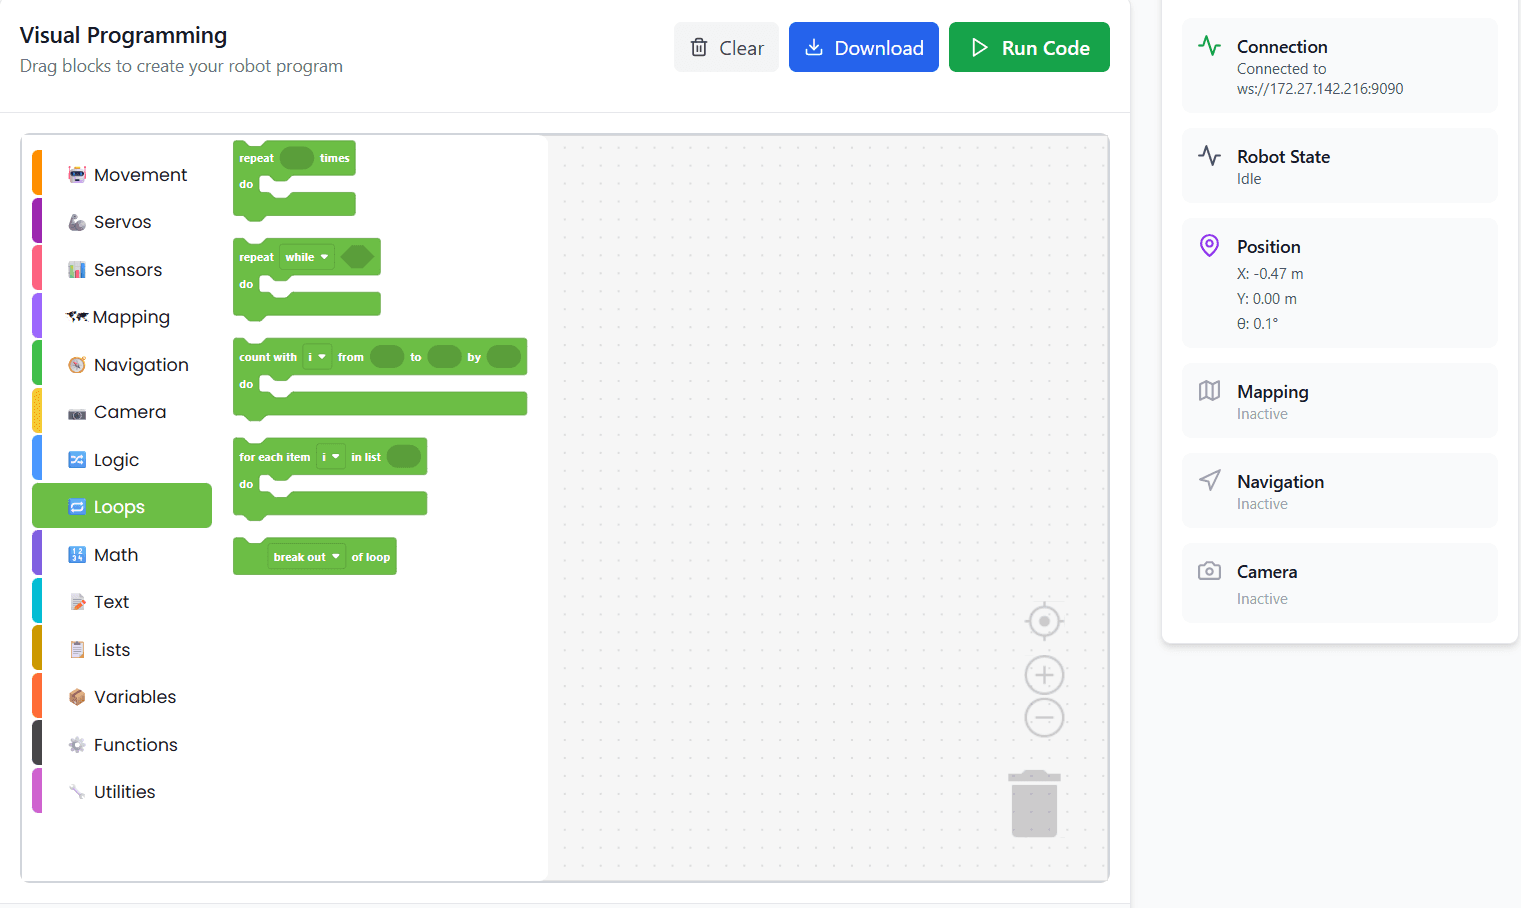
Loops Blocks
Purpose
Loops blocks allow actions to repeat automatically.
What you can do
- Repeat movement actions
- Continuously read sensor data
- Create autonomous behaviors
Examples
- Move forward continuously
- Check sensor values every second
- Repeat servo motion
Common Loop Blocks
- Repeat forever
- Repeat N times
- While / Until
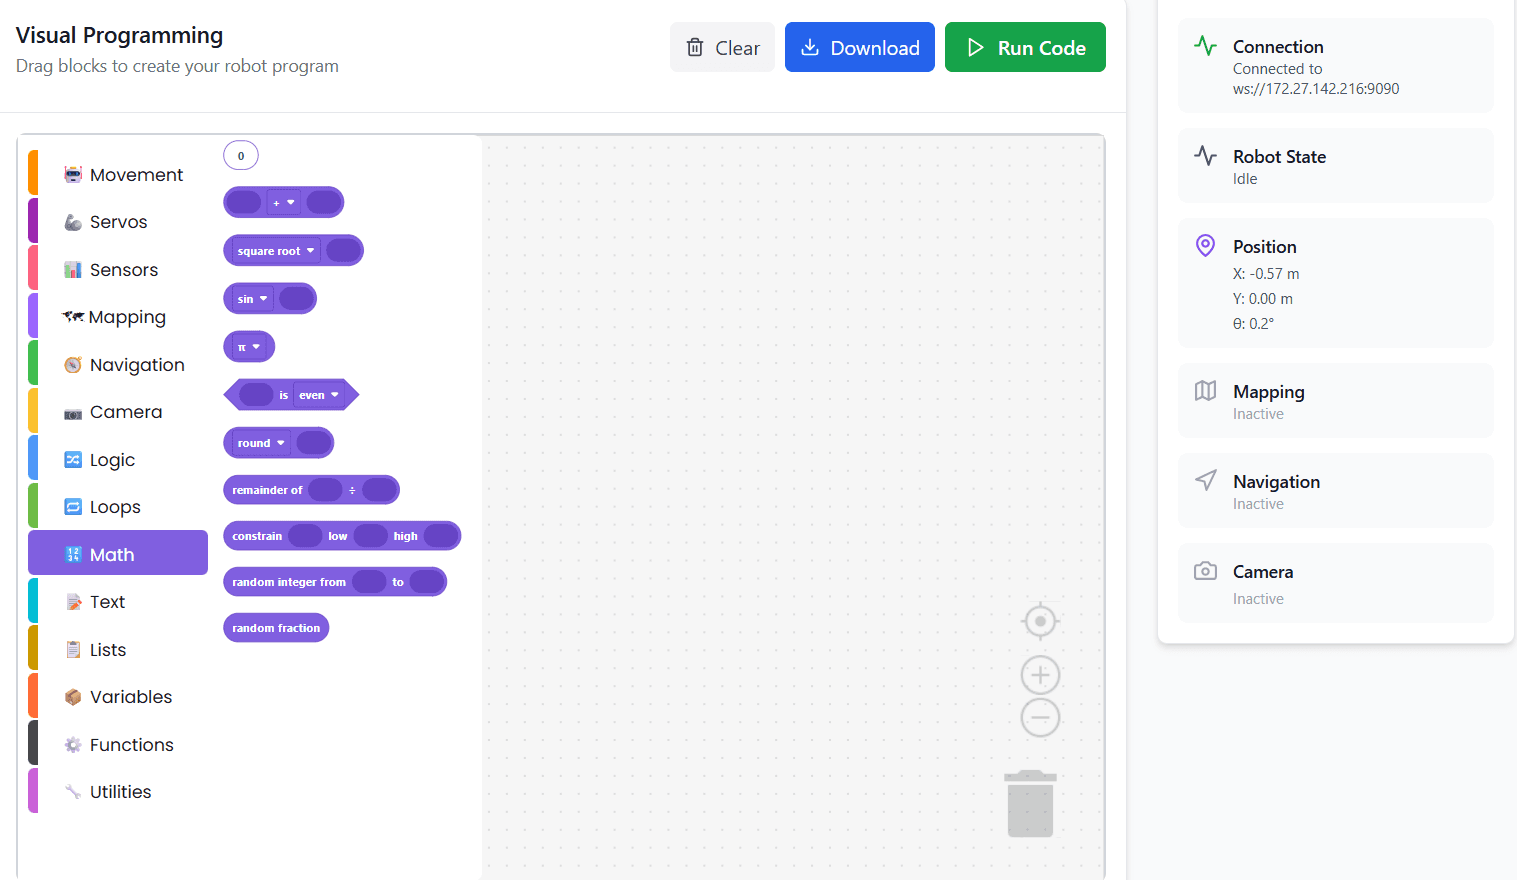
Math Blocks
Purpose
Math blocks are used for calculations and numeric logic.
What you can do
- Calculate distances
- Control angles and speeds
- Perform arithmetic operations
Examples
- Calculate turning angle
- Adjust speed based on sensor input
Common Math Blocks
- Add, subtract, multiply, divide
- Random numbers
- Min / Max
- Trigonometric functions
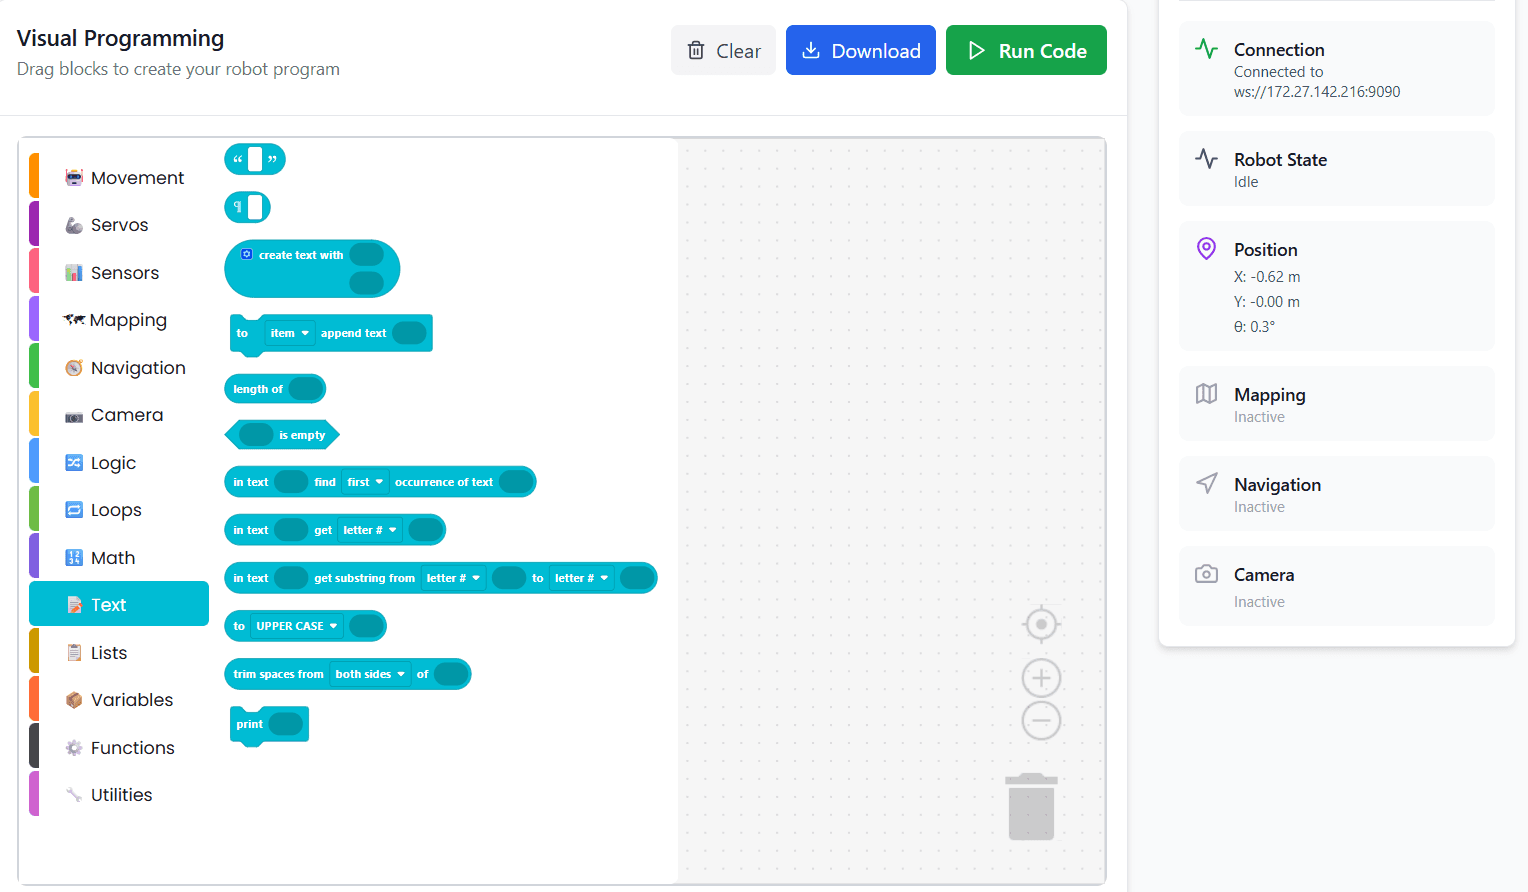
Text Blocks
Purpose
Text blocks handle string and message operations.
What you can do
- Display messages
- Create logs and feedback
- Send text-based commands
Examples
- Display robot status
- Print sensor readings
Common Text Blocks
- Create text
- Join text
- Length of text
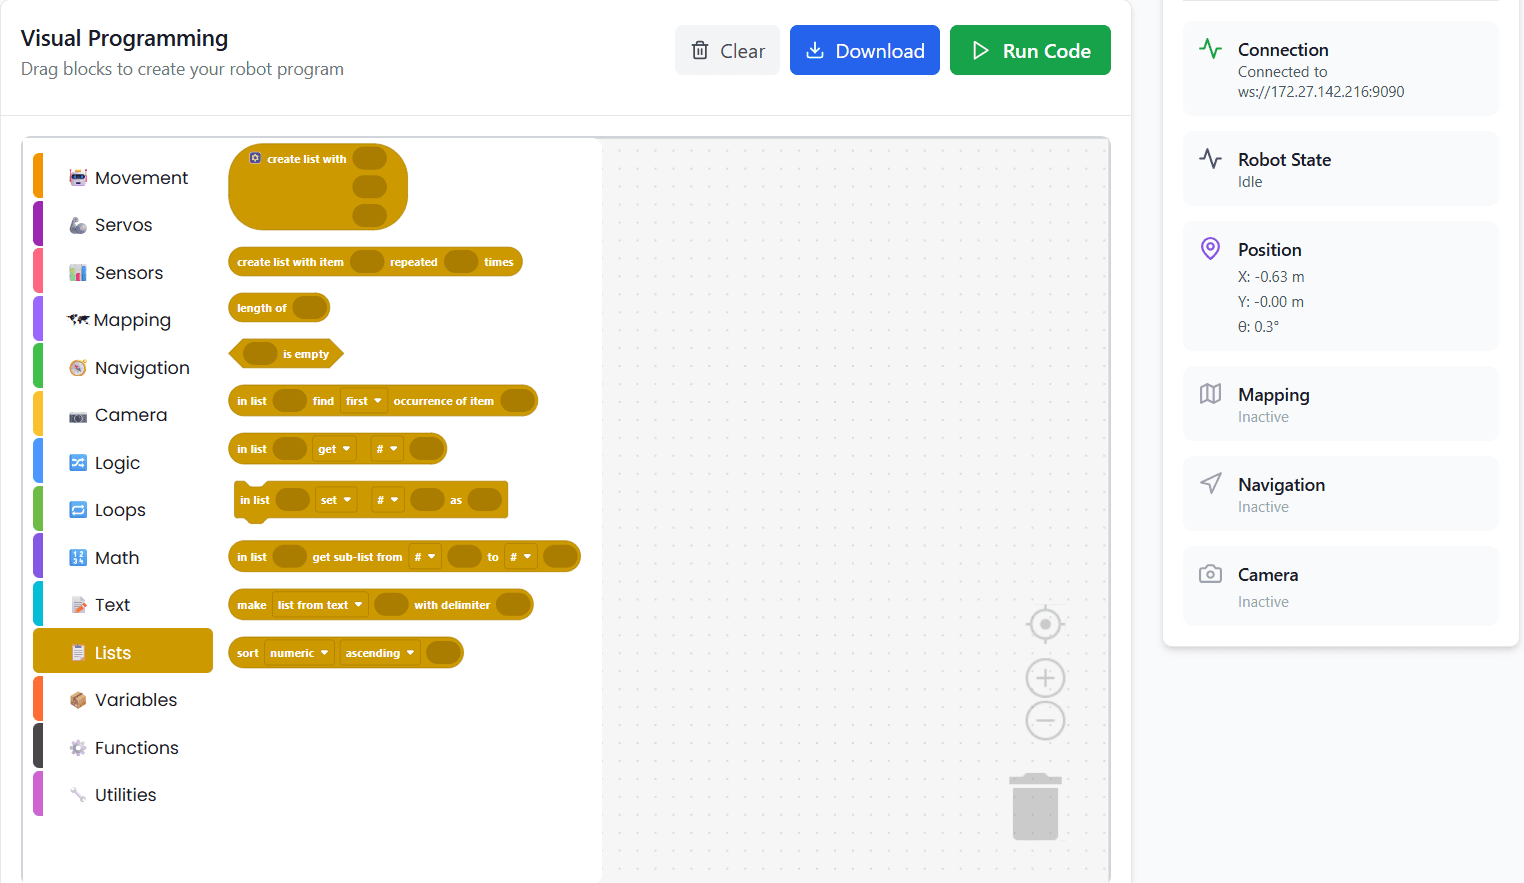
Lists Blocks
Purpose
Lists blocks store multiple values in a single variable.
What you can do
- Store sensor history
- Manage waypoints
- Process multiple data values
Examples
- Store multiple navigation goals
- Save distance readings
Common List Blocks
- Create list
- Add / remove items
- Get item from list
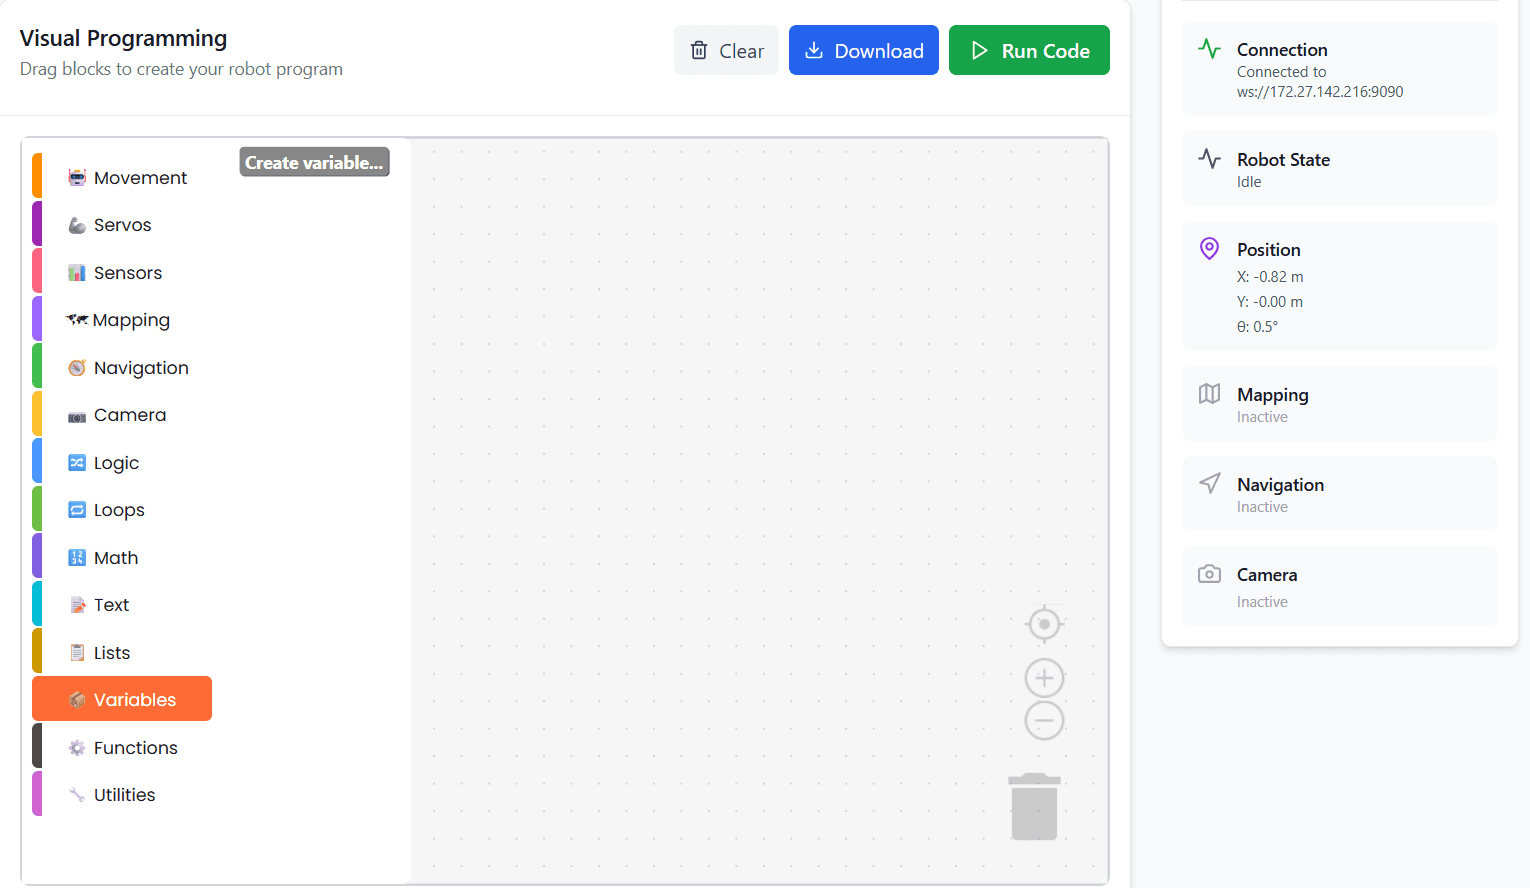
Variables Blocks
Purpose
Variables store data that can change during program execution.
What you can do
- Store sensor values
- Track robot state
- Share data between blocks
Examples
- Save distance value
- Count number of obstacles
Common Variable Blocks
- Set variable
- Change variable
- Get variable
Functions Blocks
Purpose
Functions allow users to create reusable blocks of logic.
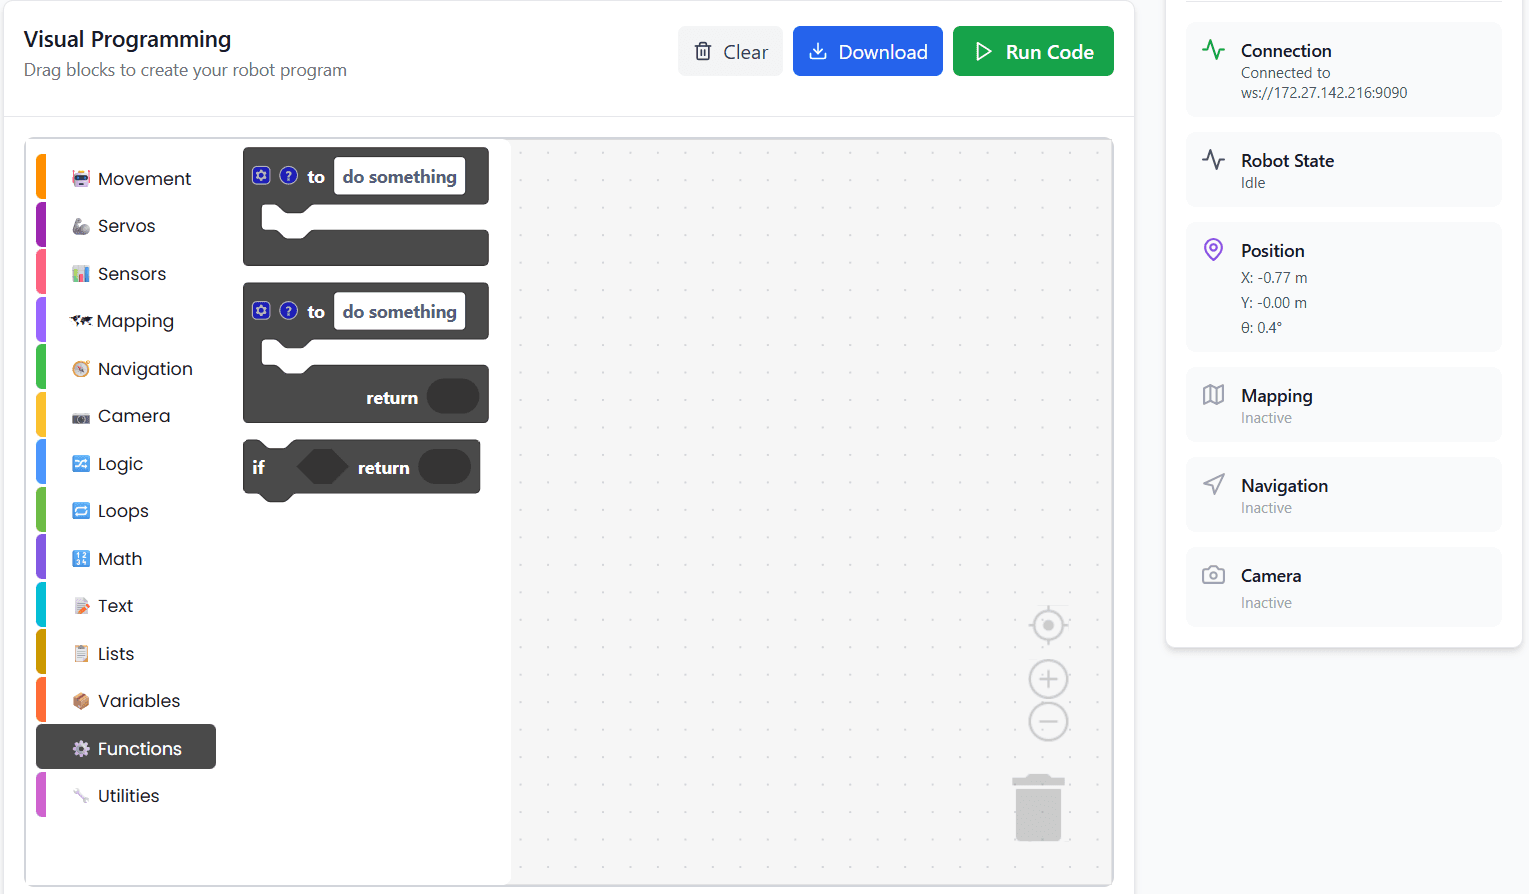
What you can do
- Organize code
- Avoid repetition
- Build modular programs
Examples
- Create a “Turn Robot” function
- Create a “Check Obstacle” function
Benefits
- Cleaner programs
- Easier debugging
- Better learning structure
Utilities Blocks
Purpose
Utilities blocks provide basic helper functions used for timing control and output display.
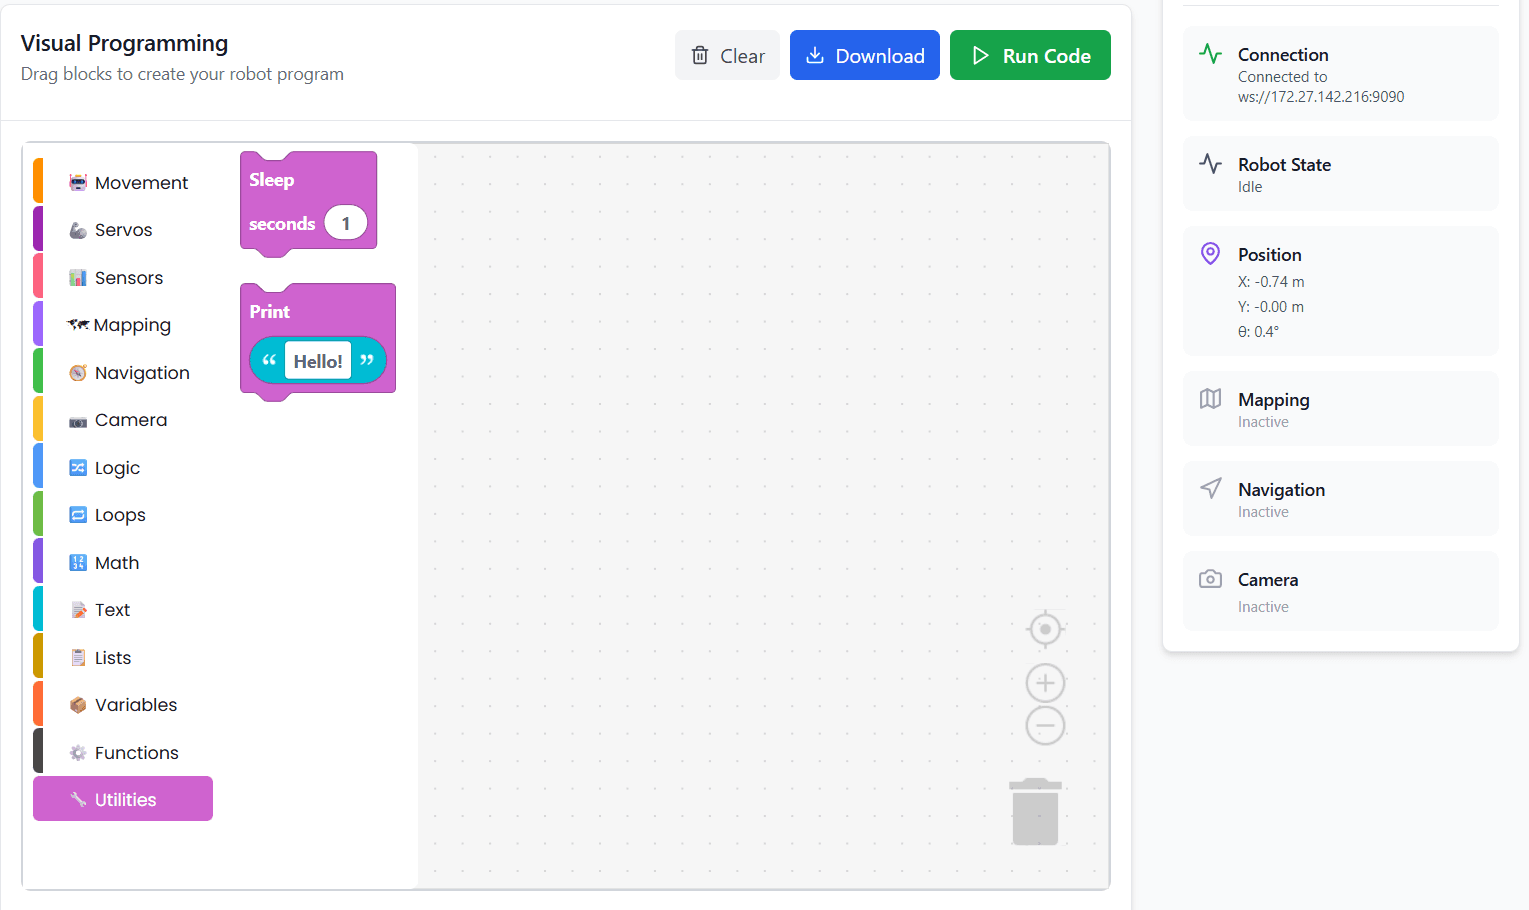
What you can do
- Pause program execution using sleep
- Display messages or values using print
Examples
- Wait for 1 second using sleep
- Print sensor values or status messages during execution