Interface and robot compatibility guide
Learn which software interface to use based on your BonicBot model, your physical location, and the task you want to perform.
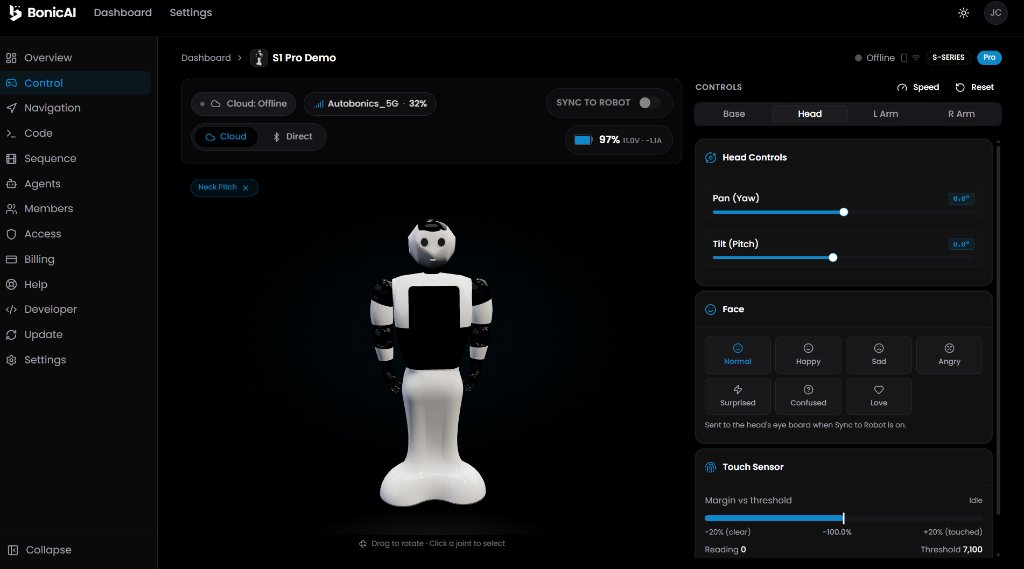
1. BonicAI Dashboard (Web)
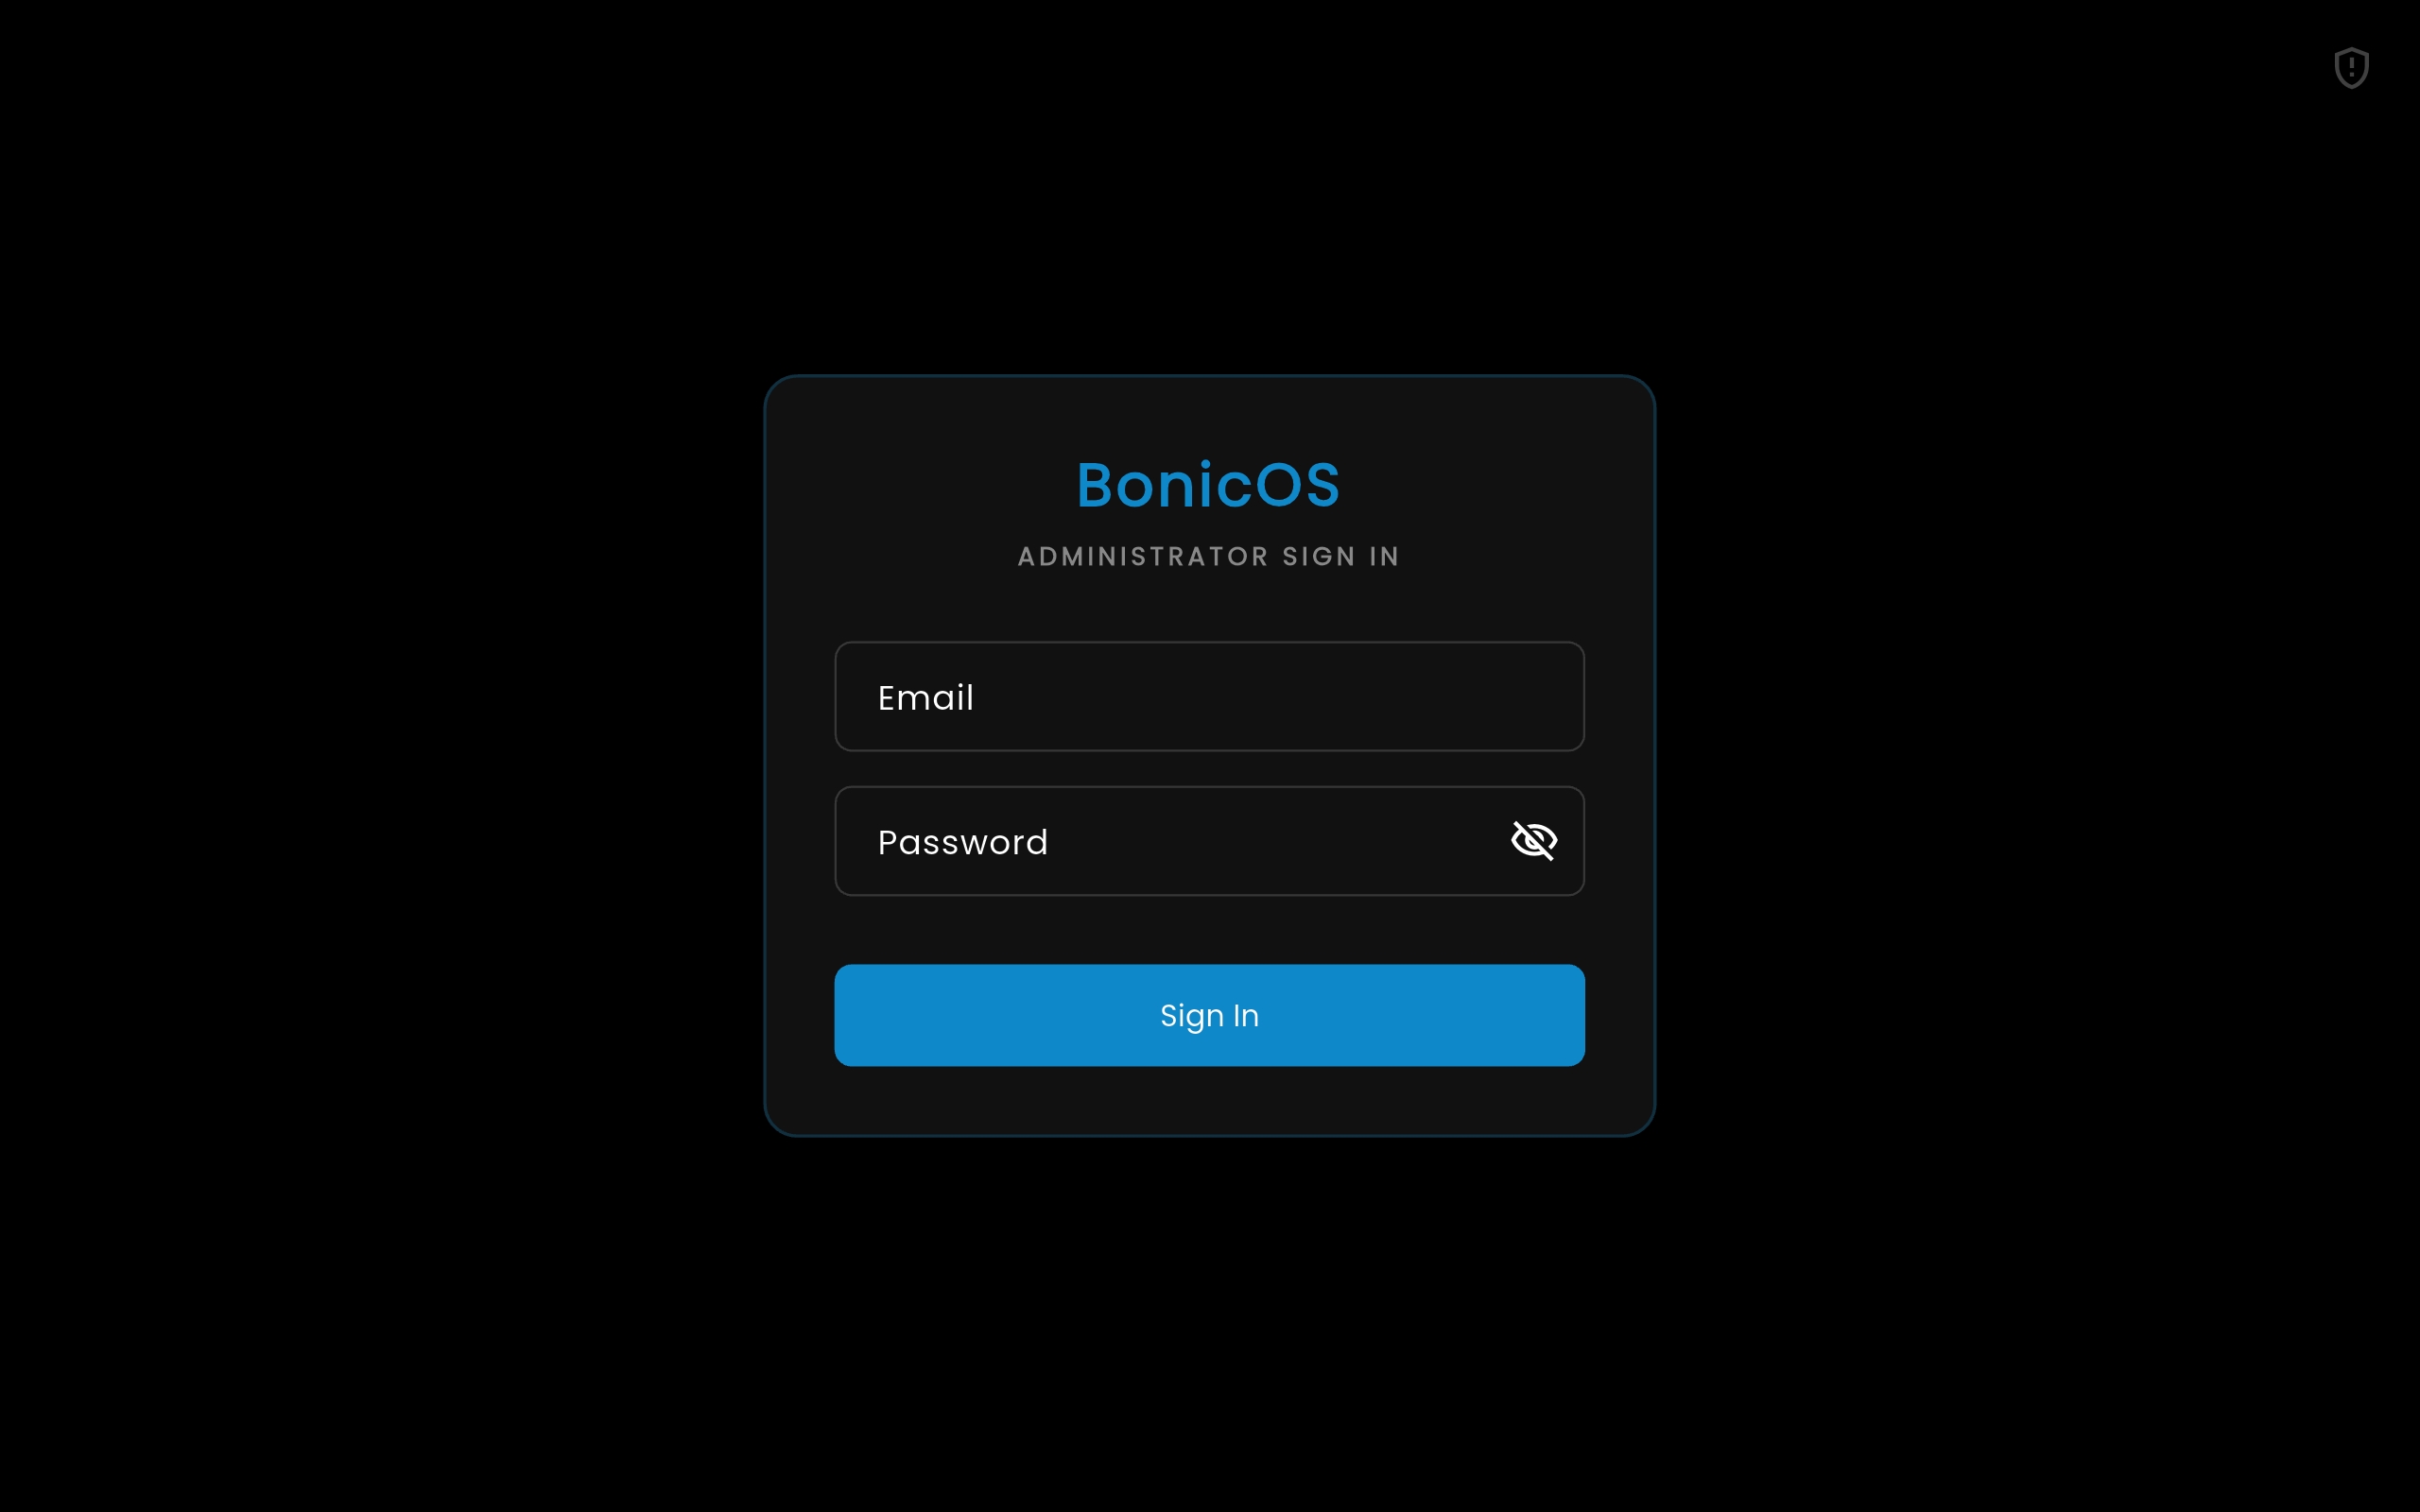
2. BonicOS (Robot Chest Display)
3. Controller App (Android)
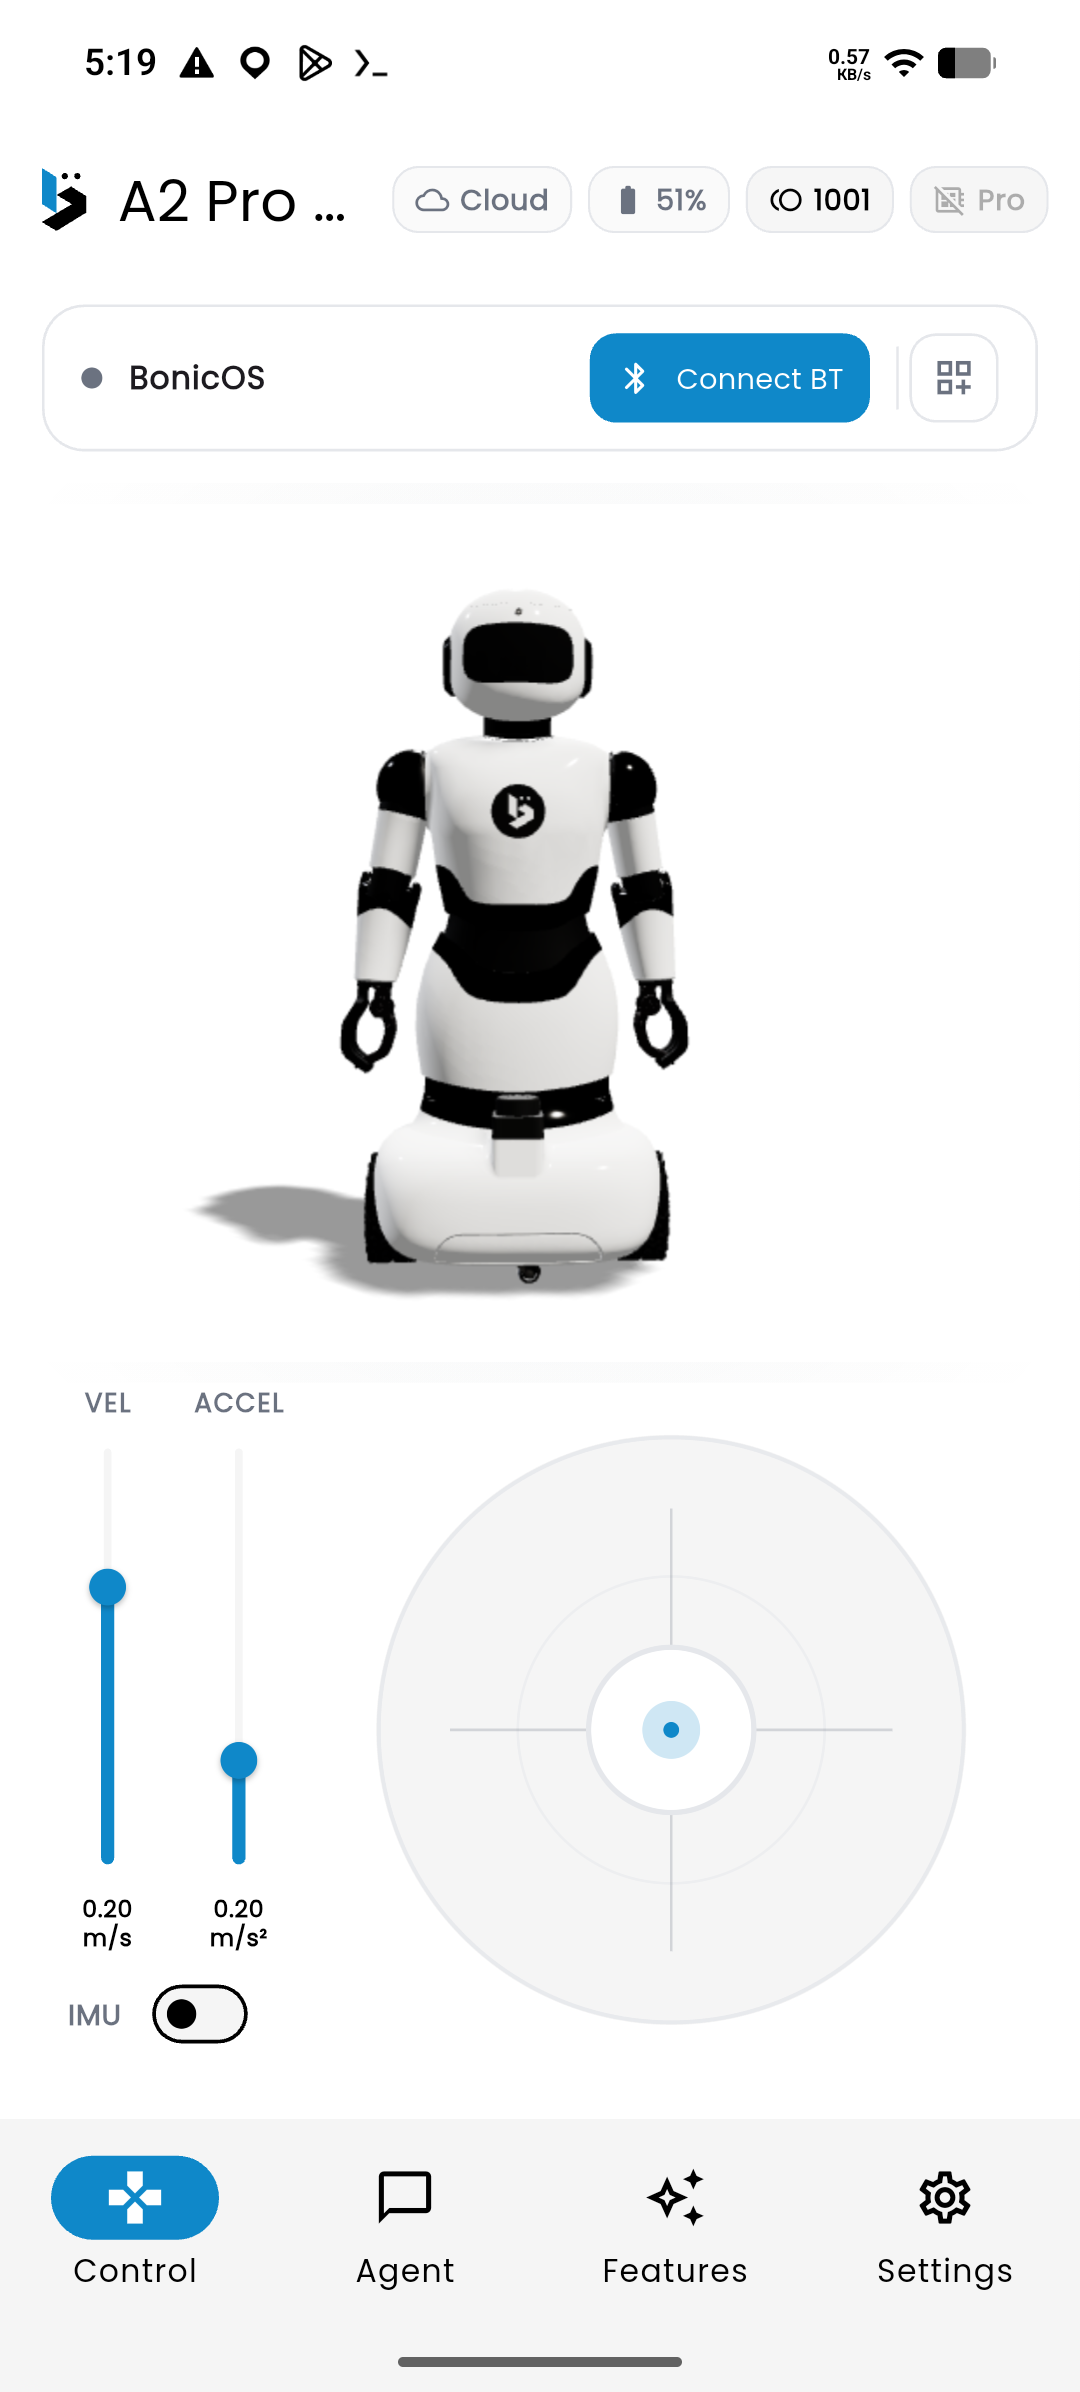
You use Bonic products through three interfaces: the BonicAI Dashboard (web browser), BonicOS (on-robot chest touchscreen), and the BonicBot Controller App (Android app on Google Play Store).
The three interfaces explained
1. BonicAI Dashboard (Web Browser)
Use bonic.ai for the setup your robot needs:
- Creating a department and giving its members robot access
- Creating AI agents and uploading knowledge base documents
- Authoring motion keyframes and saving sequences
- Setting up autonomous navigation maps and destination waypoints
2. BonicOS (On-Robot Chest Touchscreen)
The operating system running directly on the robot’s built-in chest display. BonicOS is designed for in-person, standing interactions:
- Interacting with the robot while standing directly in front of it
- Authenticating users using facial verification or RFID badges
- Performing local Wi-Fi configuration, Bluetooth speaker pairing, and system diagnostics
Locked Screen & On-Screen Settings: For security and public deployment, BonicOS operates in a locked kiosk mode. Operators cannot exit to standard Android operating system menus. All setup tasks—including scanning and connecting to Wi-Fi networks and pairing Bluetooth speakers (both the robot’s internal speaker and external speakers)—are performed directly on-screen through the BonicOS Settings menu.
Hardware availability: BonicOS is built directly into the BonicBot S1 Series (12.1” chest touchscreen) and BonicBot M1 Series (12.1” chest touchscreen). For the BonicBot A2 Series, BonicOS is available as an optional add-on (supported via a mounted display attachment).
3. BonicBot Controller App (Android only)
The Android companion application available exclusively from the Google Play Store (for Android phones and tablets). Currently, iOS and desktop platforms are not supported:
- Download: BonicBot Controller on Google Play (Package ID:
com.autobonics.bonicbot) - Primary interface for standard BonicBot A2 Series: For standalone A2 robots without the BonicOS add-on, the Controller App serves as the primary interface to drive the robot, talk to its agent, and access STEM tools.
- Remote interface for S1 and M1 Series: Allows operators to pilot the robot, adjust speed, and halt movement remotely without standing in front of the chest screen.
- Exclusive A2 tools: Robot Dance, Matrix Drawing, Emotion Detection, Vision, and Speak Out.
Account and access setup in BonicAI
The BonicAI team creates your organisation using your organisation name and makes you, the buyer, its main Owner. If your purchased robot is missing after sign-in, contact BonicAI support at support@autobonics.com.
Before connecting to your robot, ensure your account and access permissions are configured on the web dashboard:
1. Sign in to your organisation
- The BonicAI team creates your organisation and assigns your purchased robots.
- Open bonic.ai in your web browser.
- Sign in using the email address you registered with during your robot purchase.
Important (Why “Your robots” shows 0): An Organisation Owner can own an organisation with robots, but still see 0 under Your robots on the dashboard home screen. To see and operate a robot, your account must be granted specific robot access.
Create a department
Who can do this: Organisation Owners
Create a department for your team before granting department access to a robot. If your department already exists, continue to granting robot access below.
- Open your organisation and select Departments in the sidebar.
- Select New Department.
- Enter a Name, such as
Reception,Engineering, orClass 8. - Optional: enter a Description explaining what the department is for.
- Select Create Department.
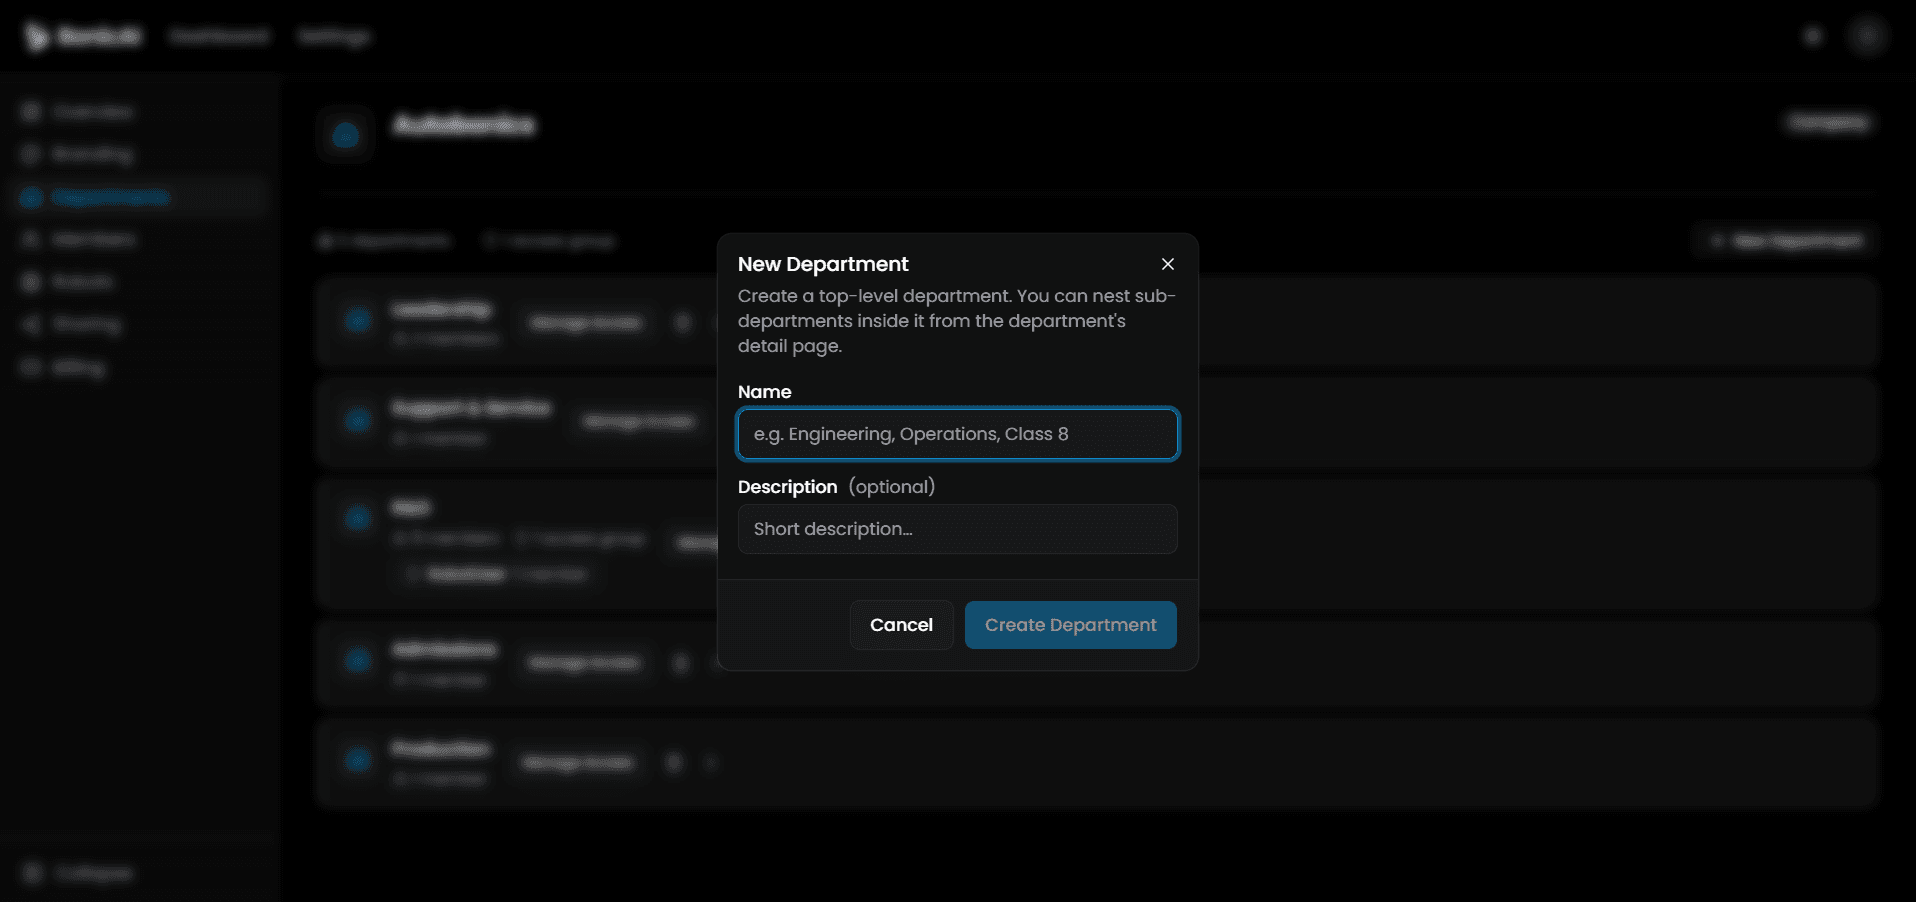
BonicAI web dashboard shown.
You should see: the new department in the list with 0 members.
Note: This creates a top-level department. Creating it does not automatically grant access to a robot. Continue below to configure that access.
Add the people who need department access
Who can do this: Organisation Owners and Department Managers
If you use department access, add the people who will operate the robot. Each person needs an existing BonicAI account. Skip this step if you grant access directly on the robot’s Members page instead.
- Open the department and select Members.
- Under Add Member, enter the person’s name or email and select Search.
- Select + Add beside the person in the search results. They are added immediately, with no further confirmation.
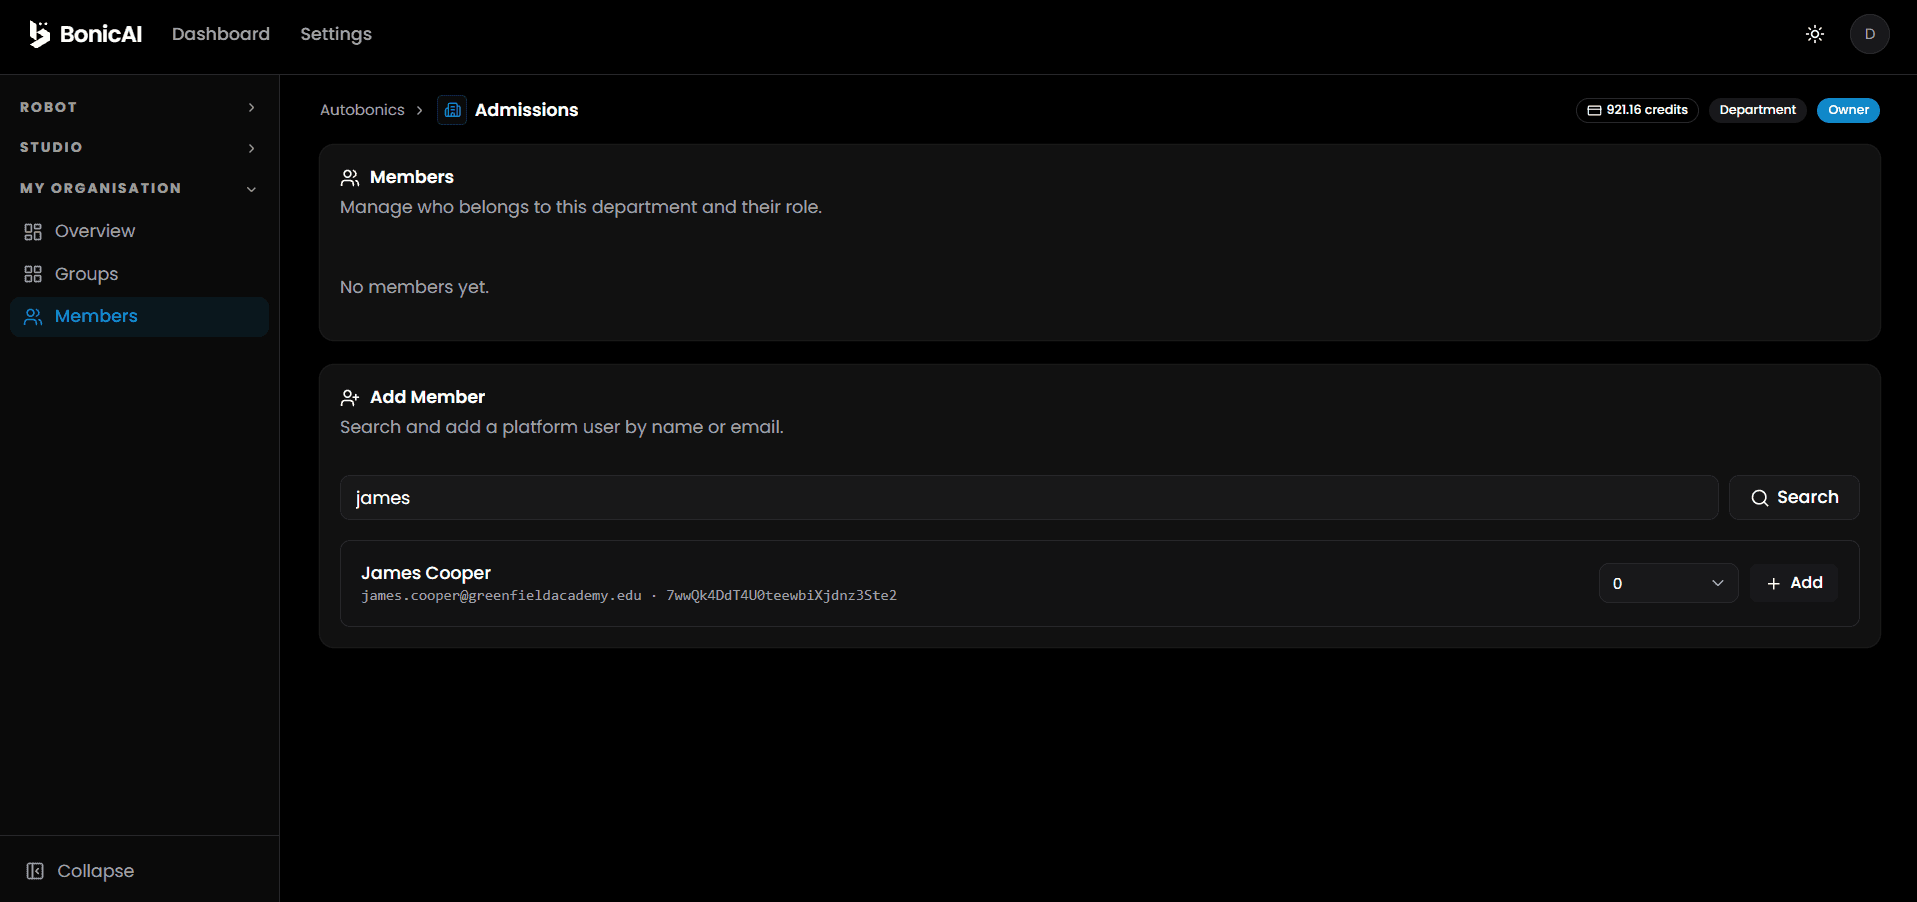
BonicAI web dashboard shown.
You should see: the person in the department’s member list. Continue below to grant the department robot access.
2. Granting robot access
Your organisation role and robot access level are separate:
- Organisation Role: Owner (creates departments and grants department robot access).
- Robot Access Roles: Admin (can configure settings, update software, and create agents) or User (can drive, talk to agents, and run sequences).
Who can do this: Organisation Owners. Managing direct robot members also requires Admin access to that robot.
To give your team or yourself access to a robot:
- Via Department (Recommended): Open Organisation > Departments, select Manage Access next to your department, and set the robot role to User or Admin. All members of that department inherit this access level.
- Direct Member Assignment: Open Dashboard > Your robots > [Your Robot] > Members, select Add Member, search for the person’s registered email, select Search, then select + Add beside the matching result. No extra confirmation is required.
Access ceiling: The BonicAI team assigns an access ceiling to each robot during onboarding. You cannot assign a role higher than the robot’s ceiling. To adjust your ceiling, contact BonicAI support.
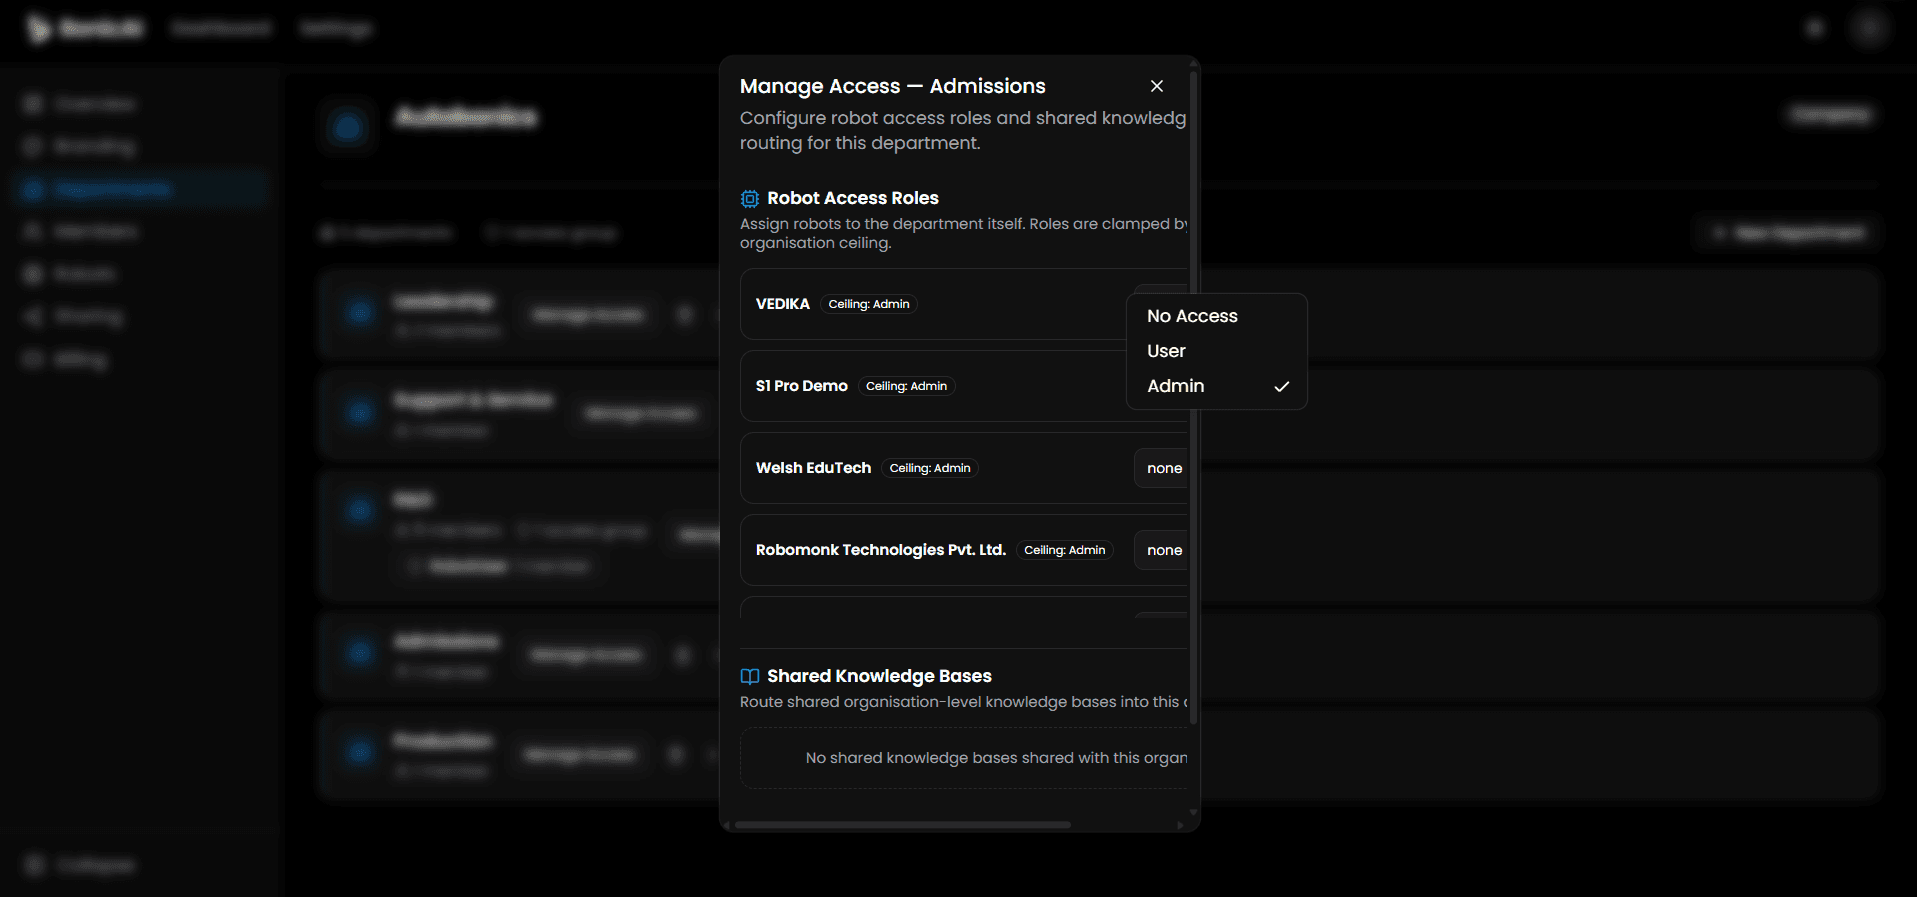
BonicAI web dashboard shown.
3. Setting a password for BonicOS (Google-only accounts)
The Controller App supports Continue with Google, but BonicOS on the robot’s chest touchscreen requires an email and password. If your BonicAI account was created using Google sign-in:
- Sign in to bonic.ai using Google sign-in.
- Navigate to Settings > Security.
- Under Change Password, select Change password.
- Check your registered inbox for a password-reset link and follow it to set your password.
- You can now use your email address and this new password to sign in to BonicOS directly on the robot.
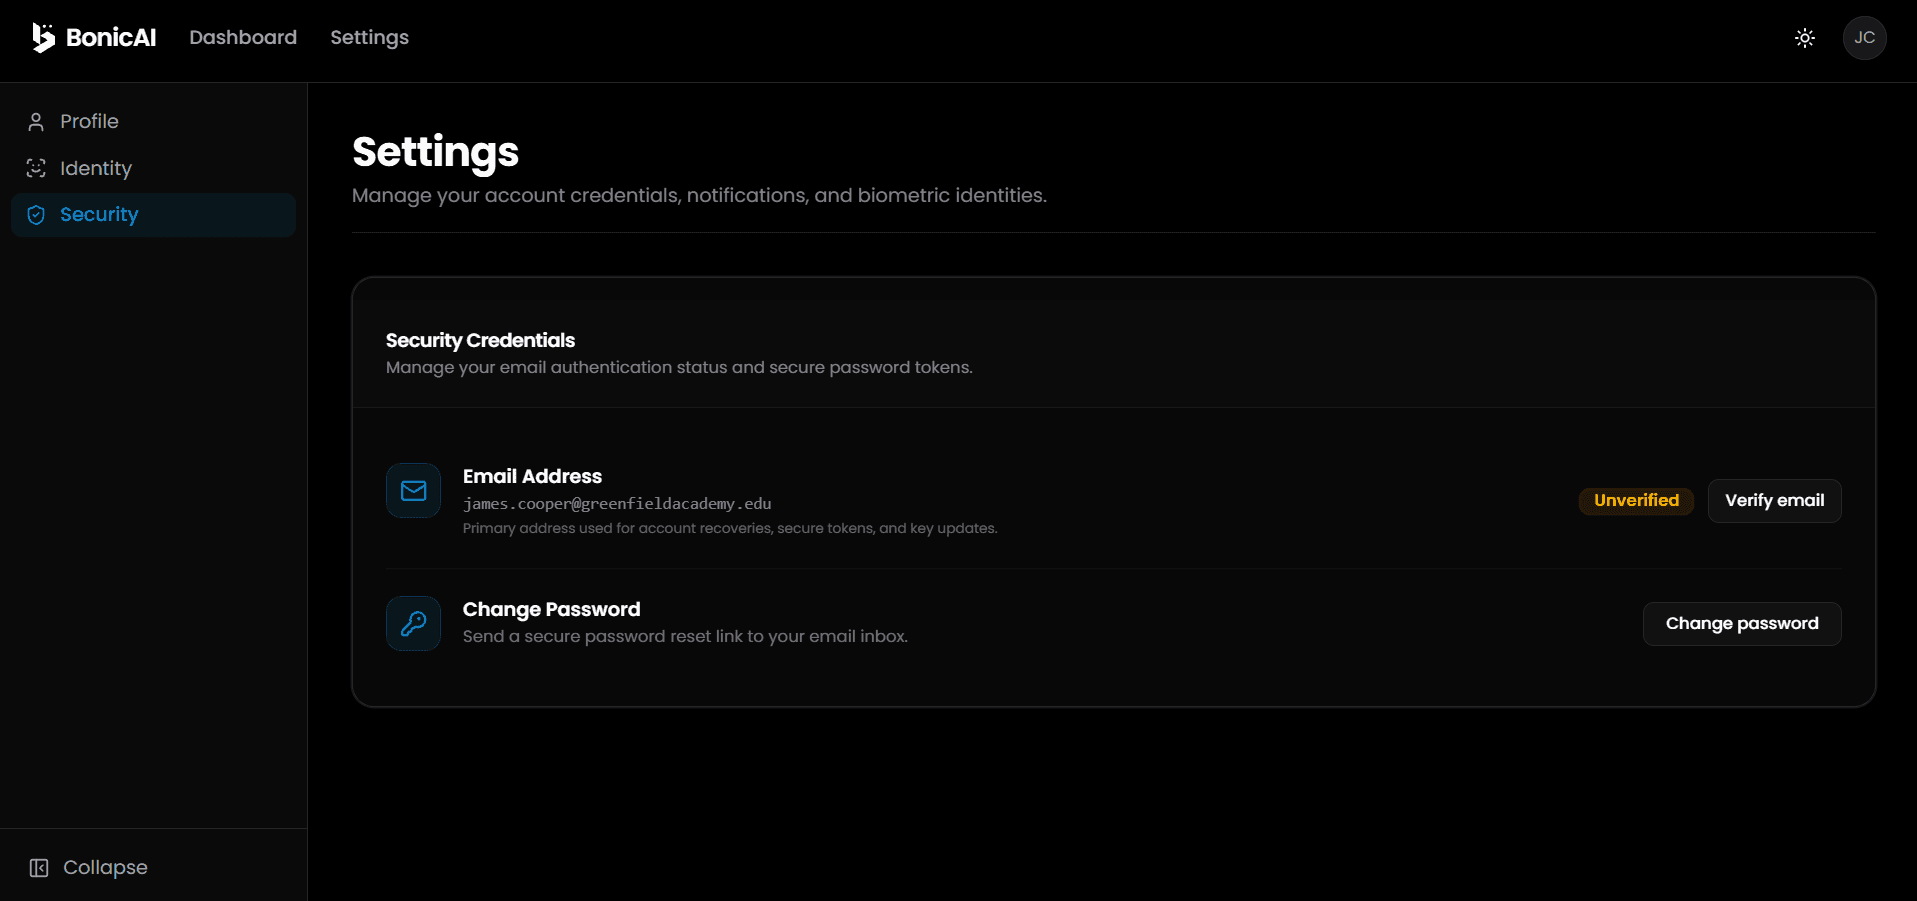
BonicAI web dashboard shown.
Find your way around the robot dashboard
- Sign in to bonic.ai and select your robot under Your robots.
- Check Overview for its identity, connection, battery and credit balance.
- Use the robot’s left sidebar to open the task you need.
You should see: the selected robot’s name in the header and its available menu items. The menu depends on your robot access and model; Update and Settings require robot Admin access.
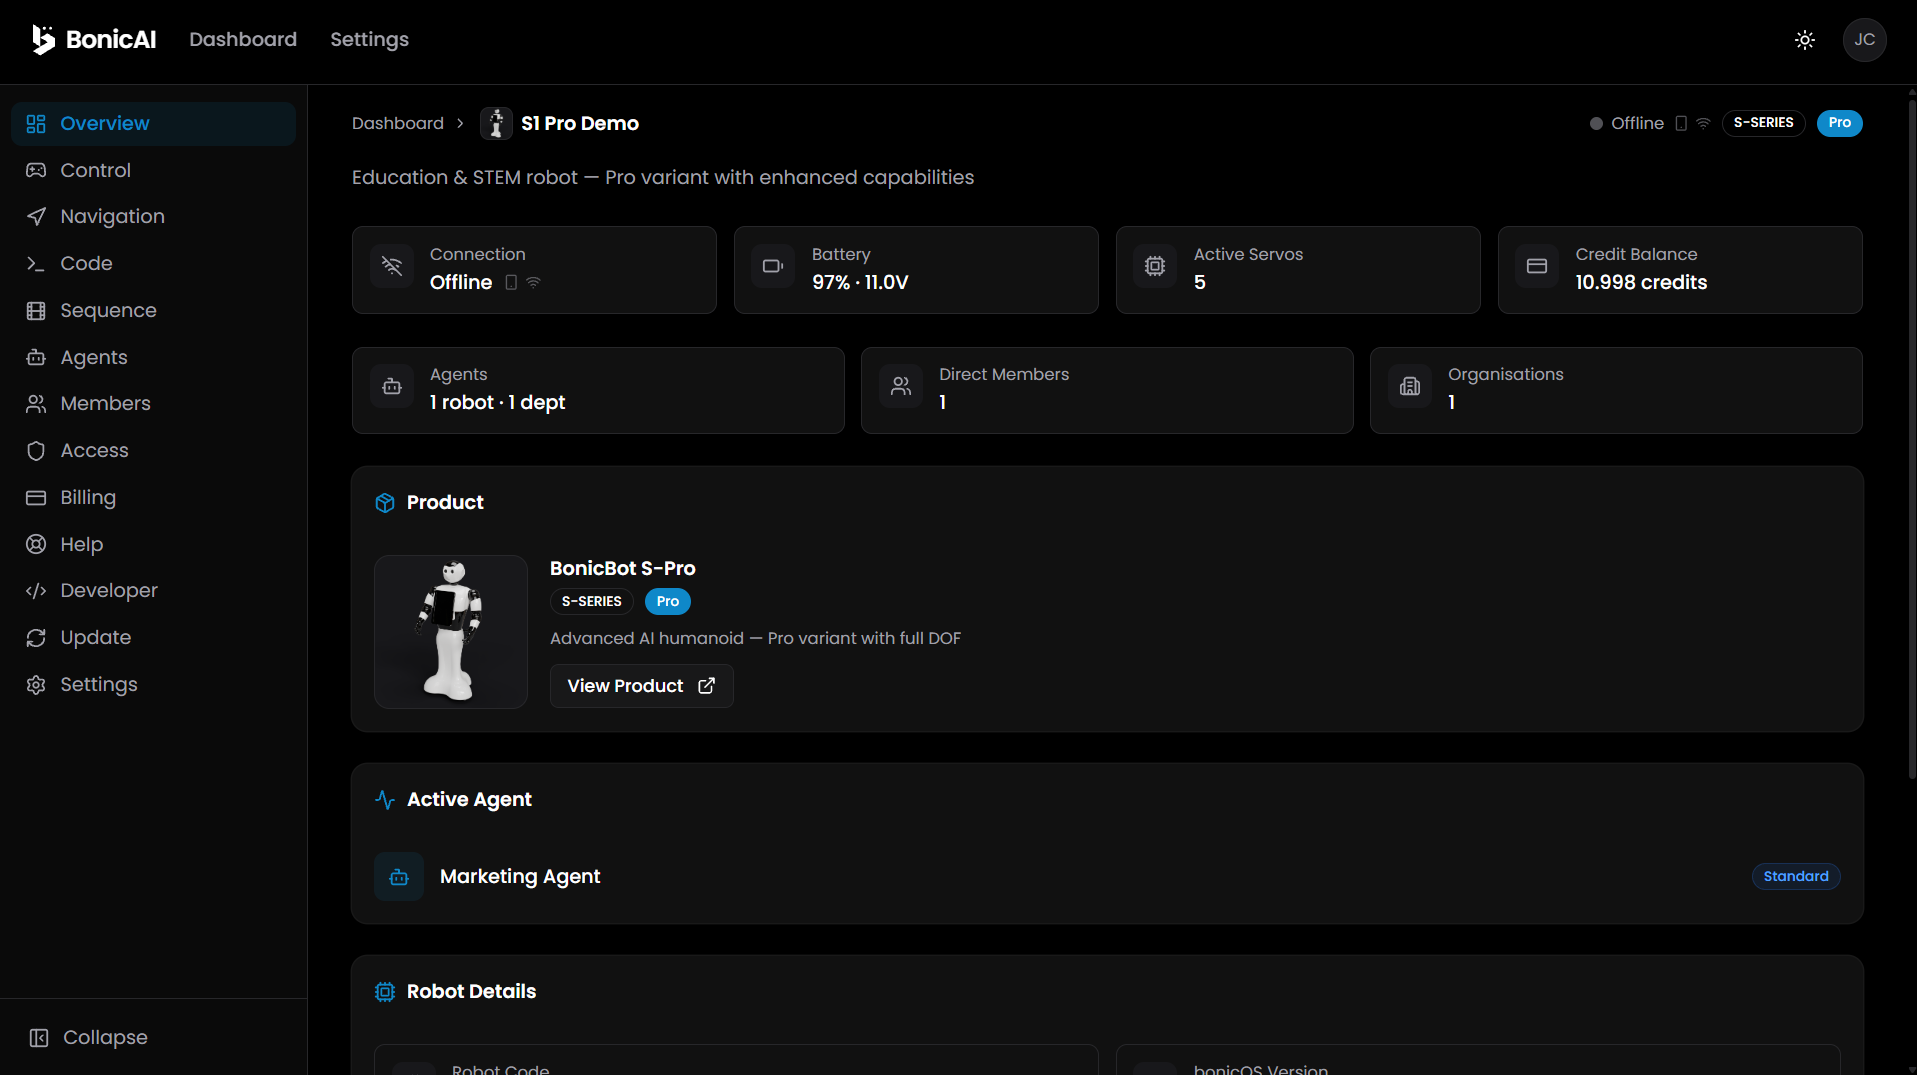
| Menu item | What you use it for |
|---|---|
| Overview | Check connection, battery, robot details and the active agent |
| Control | Drive the base and move the joints |
| Navigation | Use maps, destinations and routes on Pro models |
| Code | Try an example in the simulator and understand physical execution |
| Sequence | Create, download and play saved motions |
| Agents | Choose the active agent or configure an agent you manage |
| Members | View people with direct robot access; robot Admins can add or remove them |
| Access | Review organisation, department and access-group grants; this page is read-only |
| Billing | Check robot credits and request a top-up |
| Help | Use troubleshooting guides or submit a support ticket |
| Update | Check for a robot software release |
| Settings | Change robot details or manage its connections |
Read Overview before operating
- Connection: check whether the robot is Online or Offline. An offline battery reading may be the last reported value.
- Battery: review the reported charge before operation. It is separate from your computer or phone battery.
- Credit Balance: check this robot’s credits for online conversations and supported online features.
- Agents: review the active agent and the robot/department agents available to you.
- Direct Members: counts people added directly to the robot; department access is managed separately.
- Product and Robot Details: check the model, variant and Robot Code. Use the code when contacting support. View Product opens product information.
If the active agent is unavailable, open Agents and ask someone permitted to change it to select Set Active. See Choose the active agent.
Add or remove a direct robot member
Who can do this: People with Admin access to this robot, including organisation Owners who have robot Admin access
- Open Members and select Add Member.
- Search for the person’s existing BonicAI account by name or email.
- Select Search, then select + Add beside the matching person. They are added immediately; there is no further confirmation.
- To remove direct access later, select the bin icon beside their name. Removal is immediate.
You should see: the person appear in or disappear from Direct Members. Removing direct membership does not remove access they still inherit through a department.
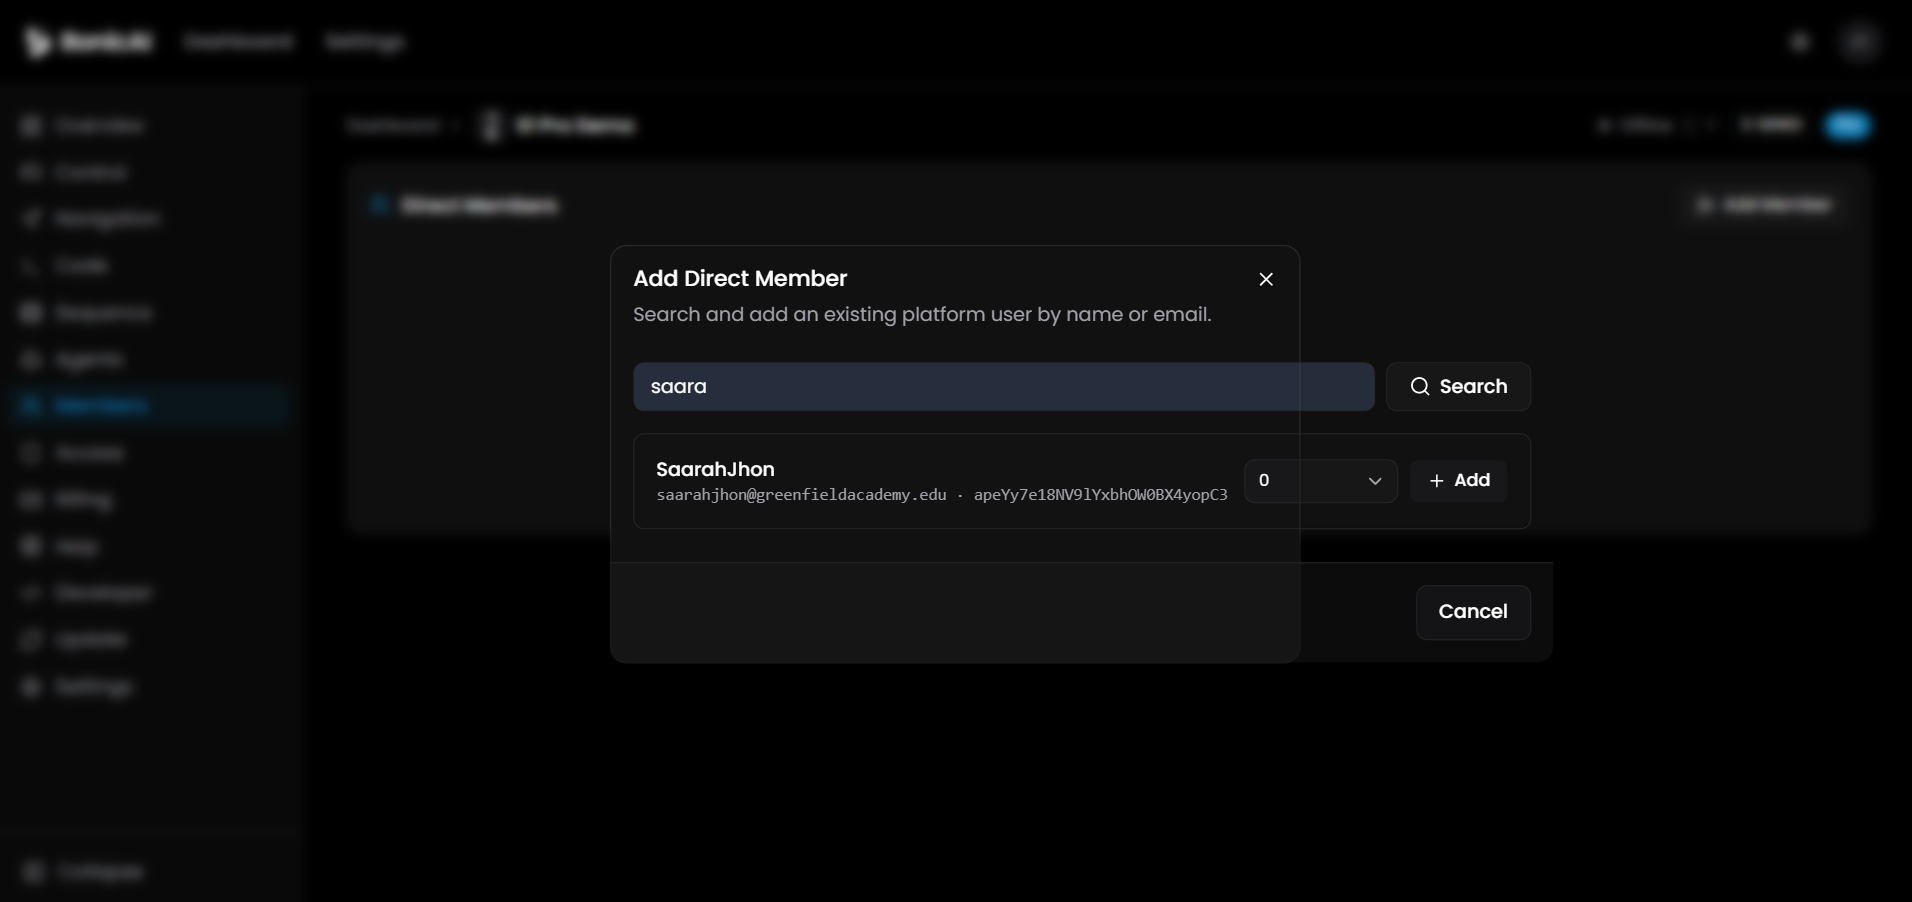
Review inherited robot access
- Open Access in the robot sidebar.
- Review the assigned organisations and their access ceilings.
- Review the department and access-group grants and their access levels.
You should see: the grants that apply to this robot. Access is read-only; use department access setup to grant department access, or Members for direct access.
Detailed organisation and access-group administration is outside these setup guides.
First-time sign-in on BonicOS (S1, M1, and A2 with add-on)
Who can do this: People with User or Admin access to the robot
When an S1, M1, or BonicOS-equipped A2 robot powers on for the first time, its display opens the BonicOS setup wizard. The sign-in screen label does not restrict setup to Admins:
- On the Administrator Sign In screen, enter your BonicAI account Email and Password (using the password created above if you use Google authentication).
- Select Sign In.
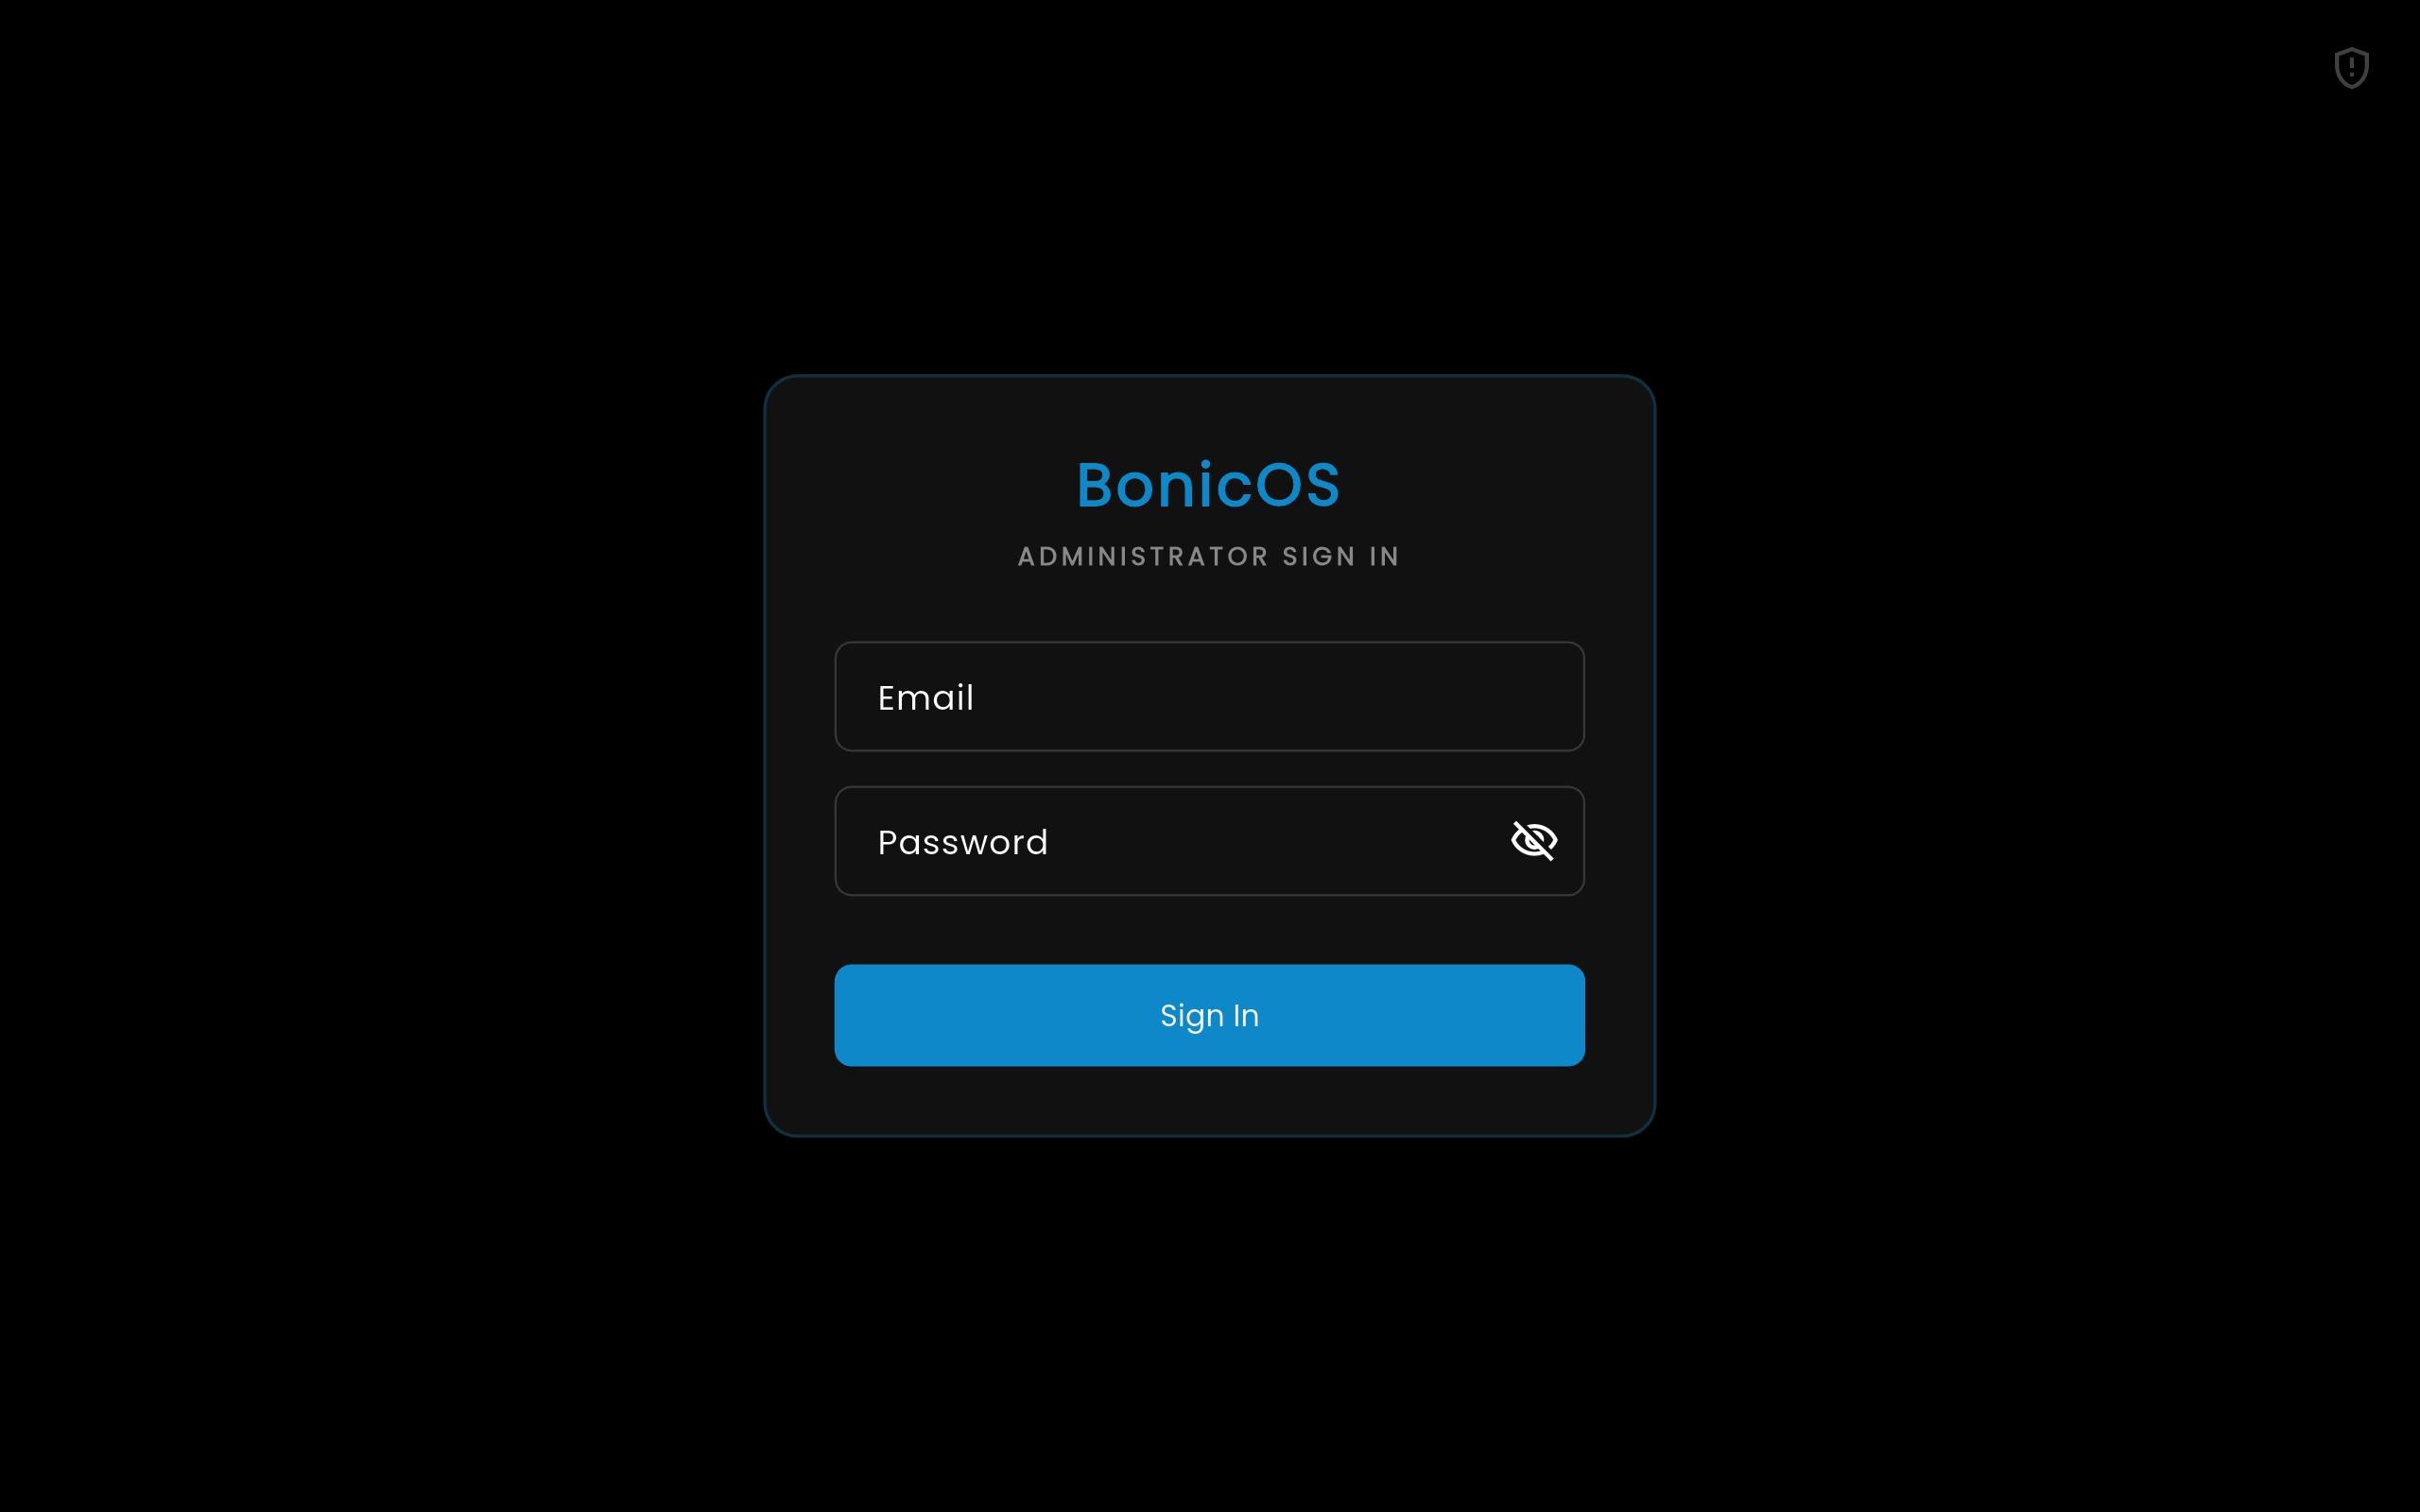
BonicOS shown.
- On the Select Your Robot screen, locate your robot’s card (matching the serial code and model on the robot’s physical label).
- Select the card to link BonicOS to this robot.
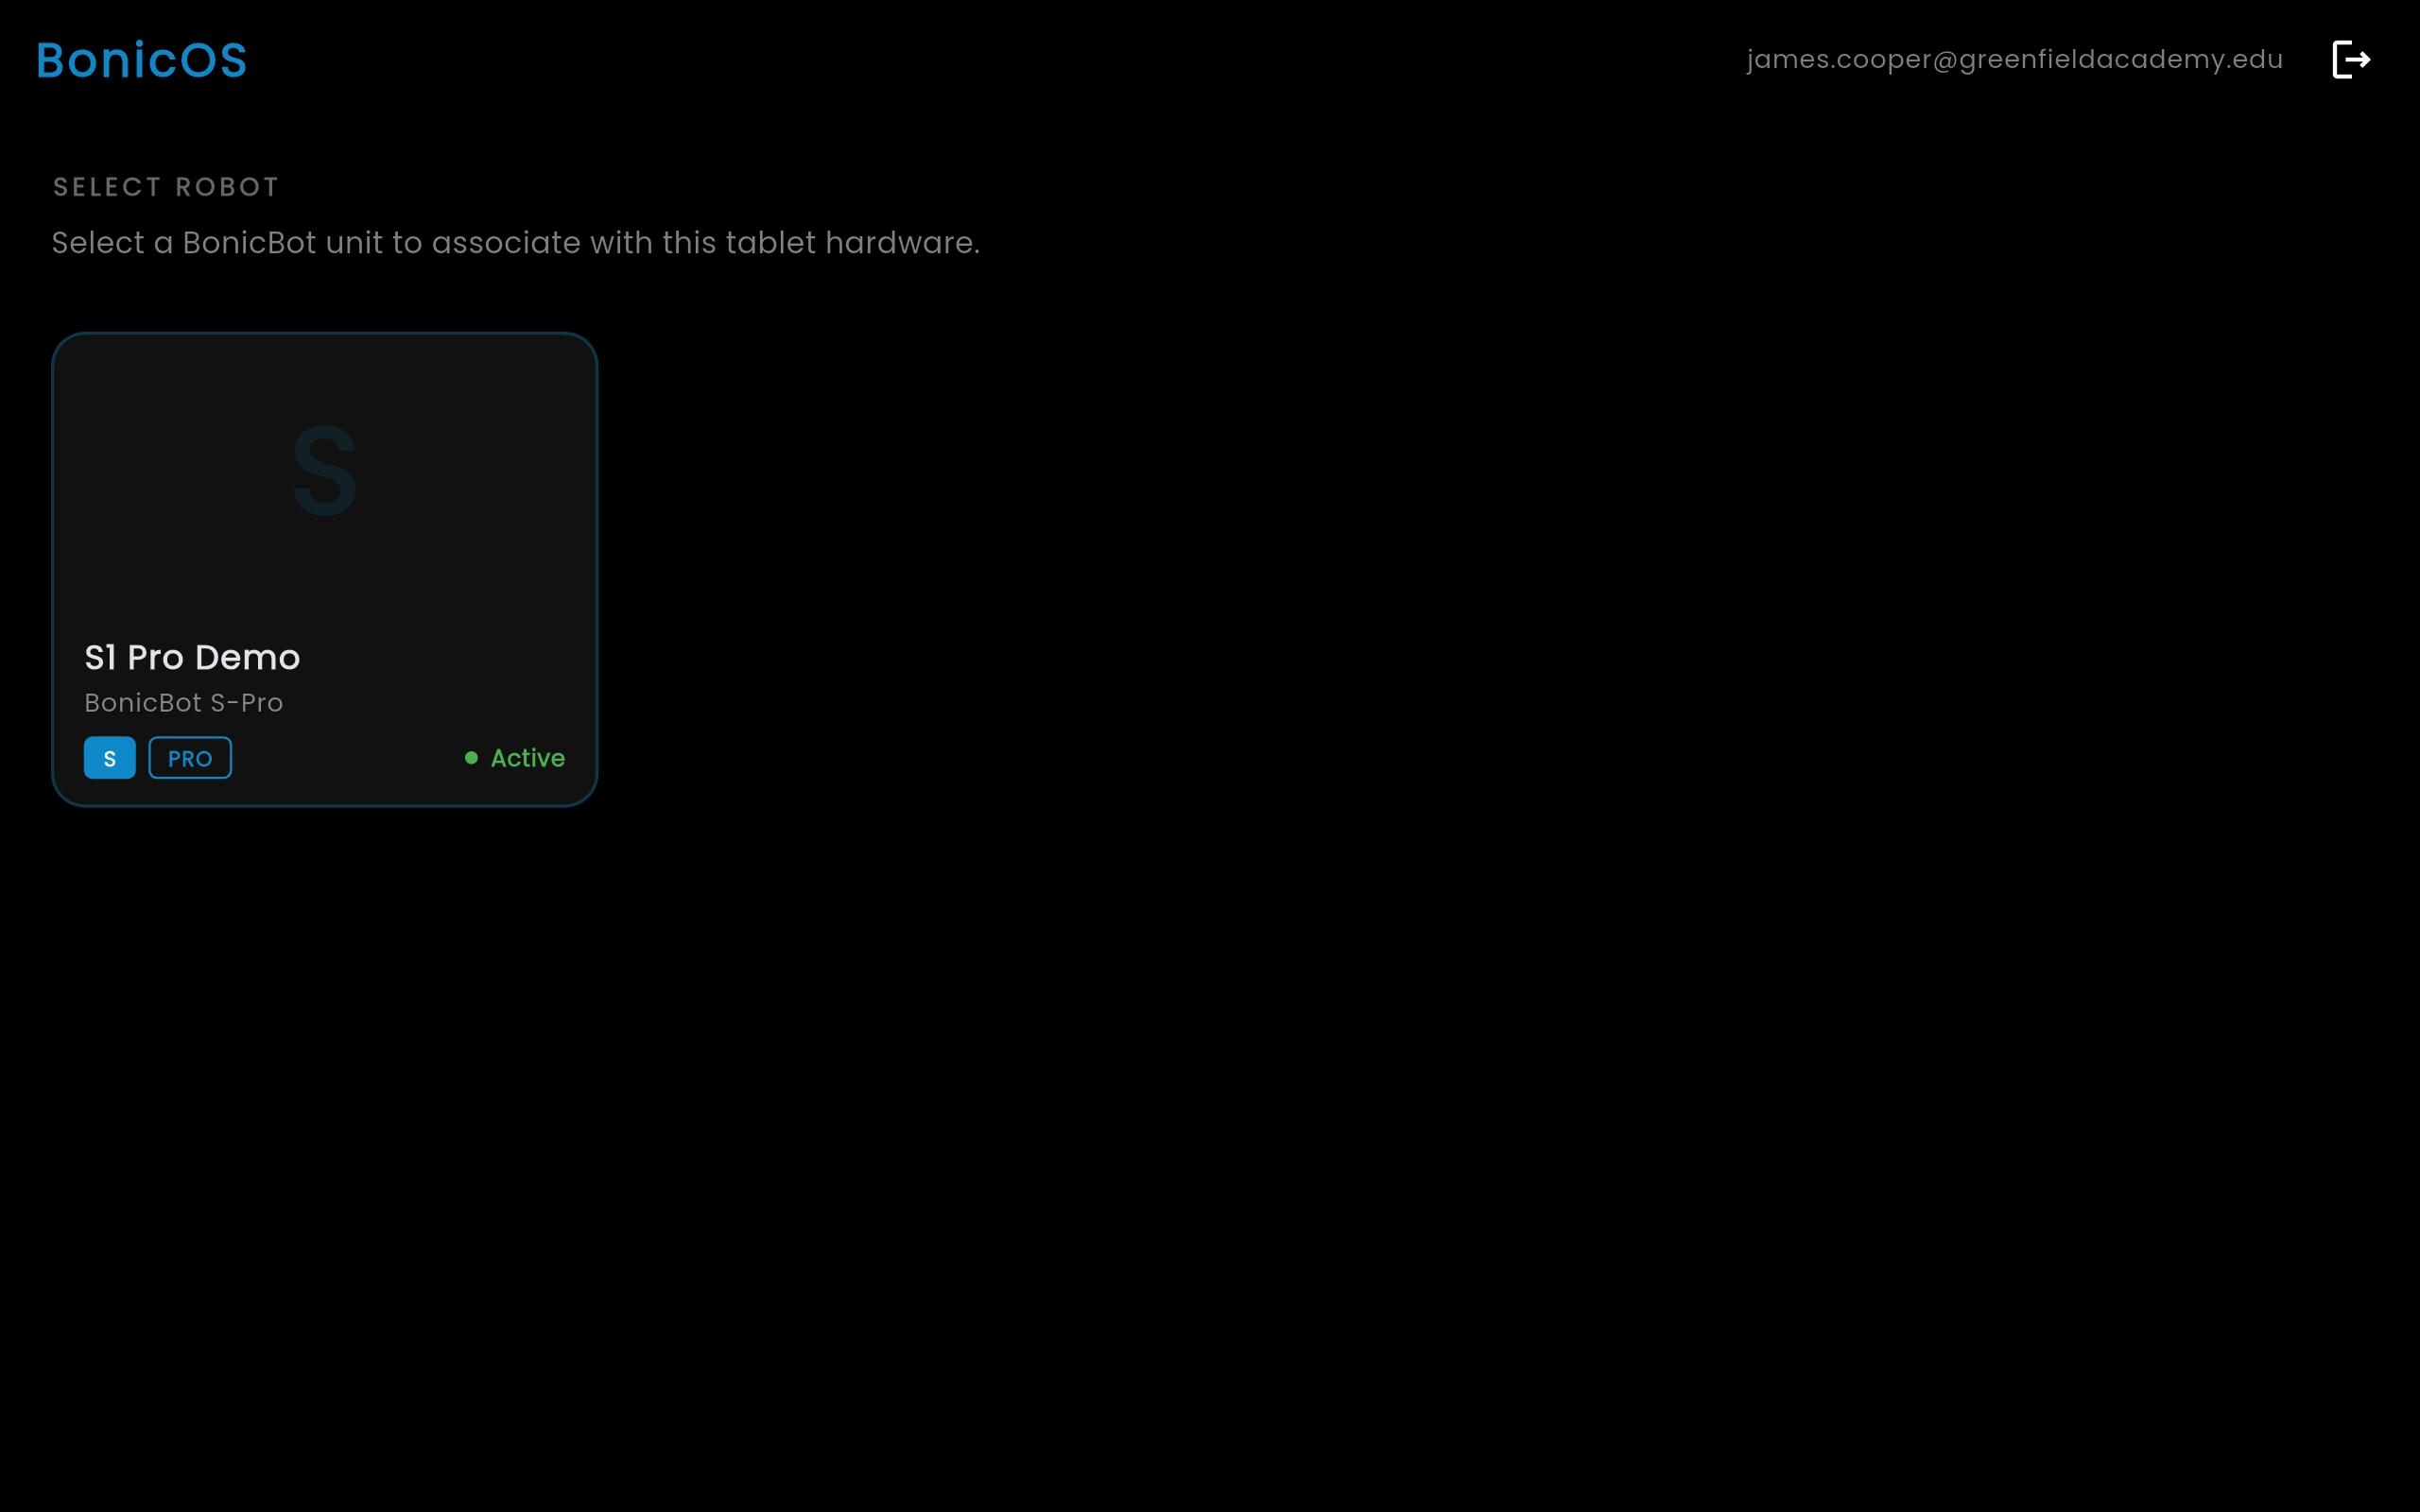
BonicOS shown.
You should see: the BonicOS Home Dashboard load with your robot’s 3D avatar.
One-time sign-in: BonicOS remembers your robot association. On all subsequent reboots, the robot boots straight into the home screen ready for operation—no daily sign-in is required.
Robot compatibility matrix
| Robot Model | Physical Chest Display | Primary In-Person Interface | Remote / Distance Control | Web Management |
|---|---|---|---|---|
| BonicBot A2 Lite | Optional add-on | BonicBot Controller App (or BonicOS with add-on) | BonicBot Controller App | BonicAI Dashboard |
| BonicBot A2 Pro | Optional add-on | BonicBot Controller App (or BonicOS with add-on) | BonicBot Controller App | BonicAI Dashboard |
| BonicBot S1 Lite | 12.1” Touchscreen | BonicOS | BonicBot Controller App | BonicAI Dashboard |
| BonicBot S1 Pro | 12.1” Touchscreen | BonicOS | BonicBot Controller App | BonicAI Dashboard |
| BonicBot M1 Lite | 12.1” Touchscreen | BonicOS | BonicBot Controller App | BonicAI Dashboard |
| BonicBot M1 Pro | 12.1” Touchscreen | BonicOS | BonicBot Controller App | BonicAI Dashboard |
Which interface should I open right now?
- If you want to create an agent, upload documents, or build a sequence, open the BonicAI Dashboard on your computer.
- If you are standing in front of an S1 or M1 robot (or an A2 robot with the BonicOS add-on), wake up BonicOS on the touchscreen.
- If you have a standard A2 robot (without the display add-on), or want to drive an S1 or M1 from across the room, open the BonicBot Controller App on your Android phone or tablet.