Recording and playing motion sequences
Learn how to create custom motion sequences (such as waves, handshakes, bows, or presentation gestures), assign them to automatic actions, and replay them on your robot.
A sequence is a motion you teach your robot once and replay whenever you like without writing any code. BonicAI automatically creates smooth movement between your recorded keyframes.
Who can do this: Robot Admins (creation, editing, and public downloads); Robot Users (viewing and playing)
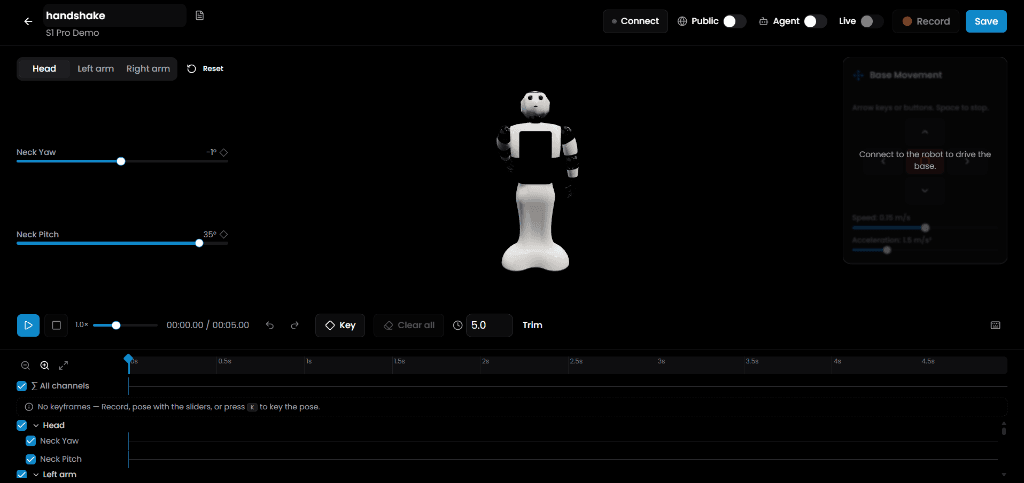
BonicAI web dashboard shown.
Before you begin
- Ensure the robot is placed on a flat, level surface with clear space around both arms, head, and torso.
- Ensure the robot is powered on and motors are active.
Warning: Playing or recording a sequence moves the robot’s physical joints. Keep hands, cables, and people clear of moving arms and head.
Download a public sequence
Use a sequence shared by another robot instead of recording a new one.
Applicable models: All BonicBot series (A2, S1 and M1)
Who can do this: Robot Admins. Robot Users can browse and preview public sequences but cannot download them.
- On the BonicAI Dashboard, select your robot under Your robots.
- Select Sequence in the sidebar.
- Select the Public tab to browse sequences shared by other robots in the same series. A2 shows public sequences from other A2 robots, S1 shows those from other S1 robots, and M1 shows those from other M1 robots. Each card shows the sequence’s name, length, number of keyframes, and last update.
- On the sequence you want, select Download to this robot.
- Open the This robot tab to find the downloaded copy.
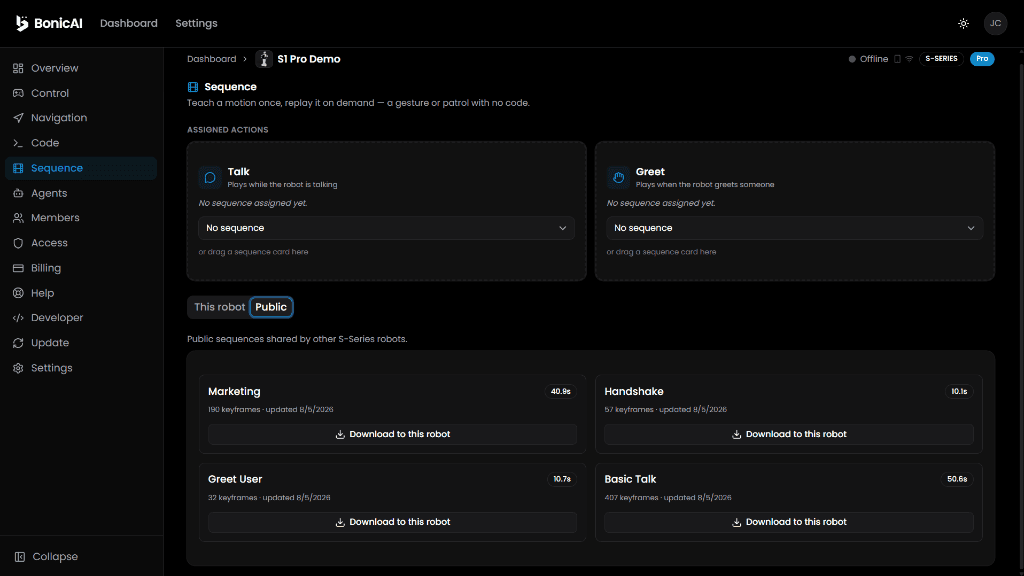
BonicAI web dashboard shown.
You should see: the downloaded sequence in your This robot list. You can play, rename, edit, or assign it to Talk or Greet.
Note: If you have User access, the Download to this robot button is not available. Ask a robot Admin to download the sequence.
Note: Your downloaded copy remains on your robot even if the person who shared the original later makes it private.
To play the downloaded sequence, follow Playing sequences on your robot.
Step 1: Create a new sequence
Sequences are created directly on the robot in the BonicAI Dashboard:
- On the BonicAI Dashboard, find Your robots.
- Select your robot from the list, then select Sequence in the sidebar.
- Select New sequence at the top of the page.
- Enter a Name (for example, Welcome Wave or Handshake), and optionally add a Description.
- Select Create.
You should see: the BonicAI sequence editor open, displaying the interactive 3D robot model, joint slider tabs, and the multi-track timeline below.
Step 2: Pose the robot and record keyframes
A keyframe is a saved snapshot of joint angles at a specific point on the timeline. You can build a sequence in either of two ways:
Method A: Posing with joint sliders (Virtual)
- Set the timeline playhead: Drag the blue vertical line on the timeline to your desired start time (e.g.,
0.0s). - Set the pose:
- Select the Head, Left arm, or Right arm tab on the right side of the screen.
- Adjust the joint angle sliders (or rotate joints directly on the 3D model) to position the robot.
- Save the keyframe: Select the Key button on screen (or press the K key on your keyboard).
- A blue diamond (◇) appears on the timeline tracks at that timestamp.
- Add subsequent poses: Drag the playhead forward (e.g., to
1.5sand3.0s), adjust the sliders into the next pose, and press K again.
Method B: Moving the robot by hand (Live kinesthetic teaching)
You can teach motions by physically moving the real robot’s arms and head with your own hands:
- In the editor top bar, select Connect to pair your computer to the robot over Bluetooth.
- Turn the Live switch to ON.
- Select Record. A confirmation dialog appears: Start recording?.
- Select Release and record. (Support the robot’s arms so they do not drop suddenly).
- Move the robot’s arms and head smoothly with your hands. The robot’s position sensors stream the exact poses back to the timeline in real time.
- When your motion is complete, select Stop. The servos lock back into position automatically.
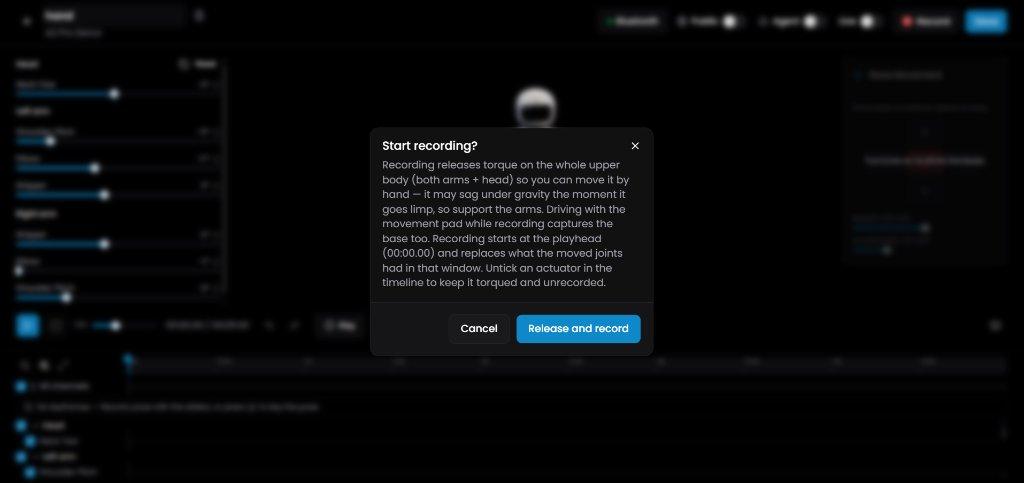
BonicAI web dashboard shown.
Step 3: Preview, trim, and save
- Select Play (or press Space) in the editor to preview the animated motion on the 3D model.
- Adjust playback speed (e.g.,
1.0×,0.5×, or1.5×) to verify motion pacing. - Select Trim beside the timeline clock to automatically cut trailing empty space back to your final keyframe.
- Select Save in the top bar to save the sequence to the robot.
You should see: your saved sequence appear as a card in the robot’s This robot sequence library.
Edit an existing sequence
Who can do this: Robot Admins. BonicOS and Controller play saved sequences; use BonicAI for editing.
- In BonicAI, open Dashboard > Your robots > [Your Robot] > Sequence.
- Select This robot and locate the sequence.
- Select Edit on its card.
- Adjust its poses, keyframes or timing using Pose the robot and record keyframes.
- Preview the motion and select Save before leaving the editor.
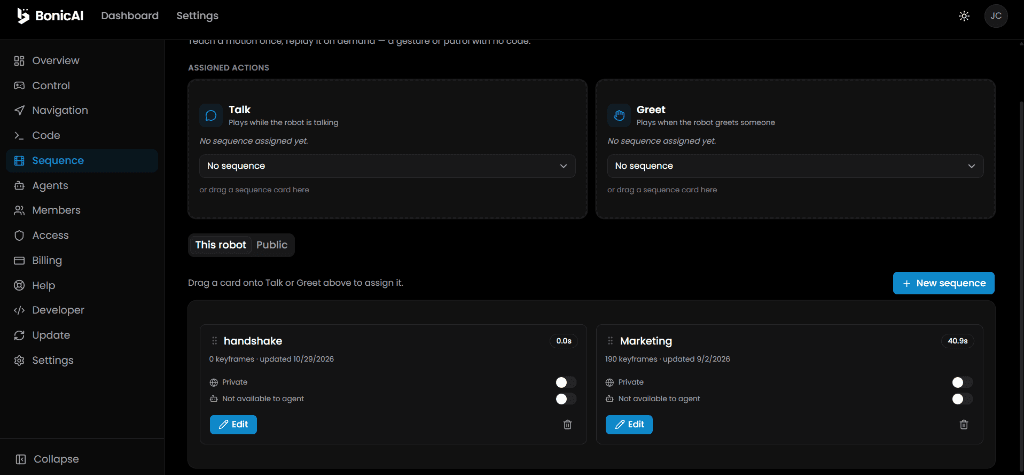
BonicAI web dashboard shown.
You should see: the saved changes when you reopen the sequence. Leaving with unsaved changes displays a warning; save any changes you want to keep.
Rename a sequence
- Open the sequence with Edit.
- Select its name in the editor’s top bar and enter the new name.
- Select Save.
You should see: the updated name on the sequence’s card in This robot.
To update its description, select the notes icon beside the name, edit Description, then select Save.
Delete a sequence
- In Sequence > This robot, find the sequence you want to remove.
- Select its bin icon.
- Review the confirmation dialog and select Delete to confirm, or Cancel to keep it.
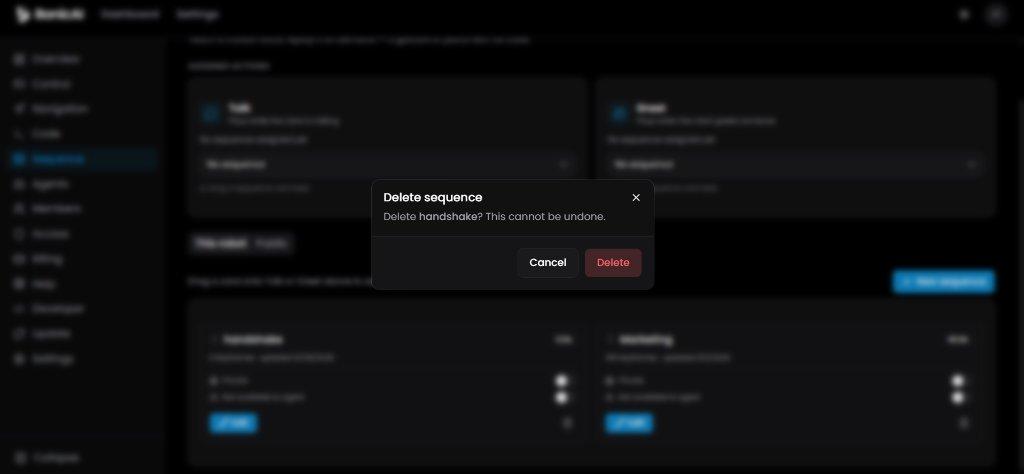
BonicAI web dashboard shown.
You should see: the sequence disappear from the library. If it was assigned to Talk or Greet, that slot shows No sequence assigned yet.
Step 4: Assign sequences to Talk or Greet (Optional)
You can configure the robot to perform motions automatically during conversation:
- On the robot’s Sequence page, locate the Assigned Actions panel at the top.
- Under Talk, select a sequence from the dropdown (or drag a sequence card onto the slot) to have the robot perform that motion while speaking.
- Under Greet, select a sequence to play whenever someone approaches or says hello.
- Let an AI Agent trigger sequences: On the sequence card, toggle the Agent switch to ON. (Ensure the agent has the Sequence Play capability enabled under its configuration).
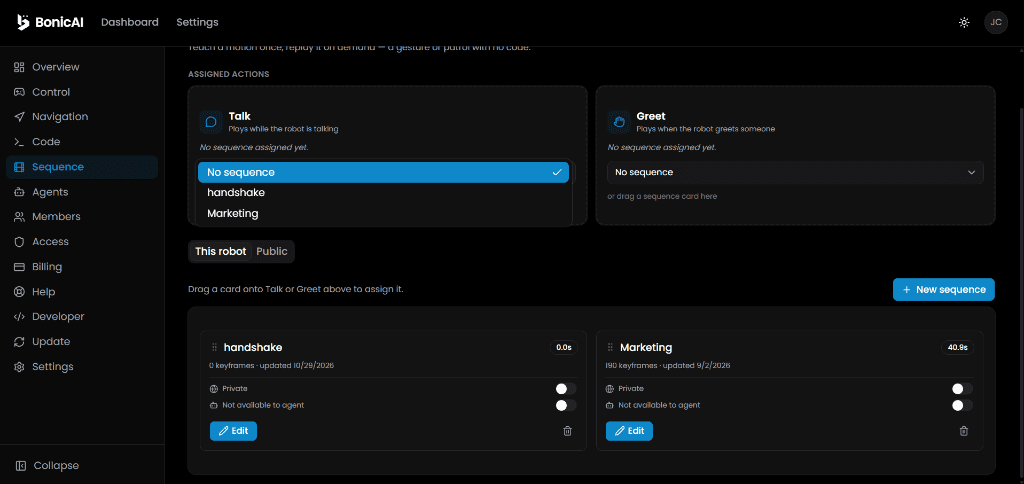
BonicAI web dashboard shown.
Playing sequences on your robot
Once saved, you can replay sequences on demand through either interface:
On BonicOS (S1, M1, or A2 with add-on)
- On the robot’s chest touchscreen, select the Settings icon (gear) in the top-right corner.
- Under the System Diagnostics section, select Sequences.
- Browse the sequence list and select your sequence card.
- Select Play.
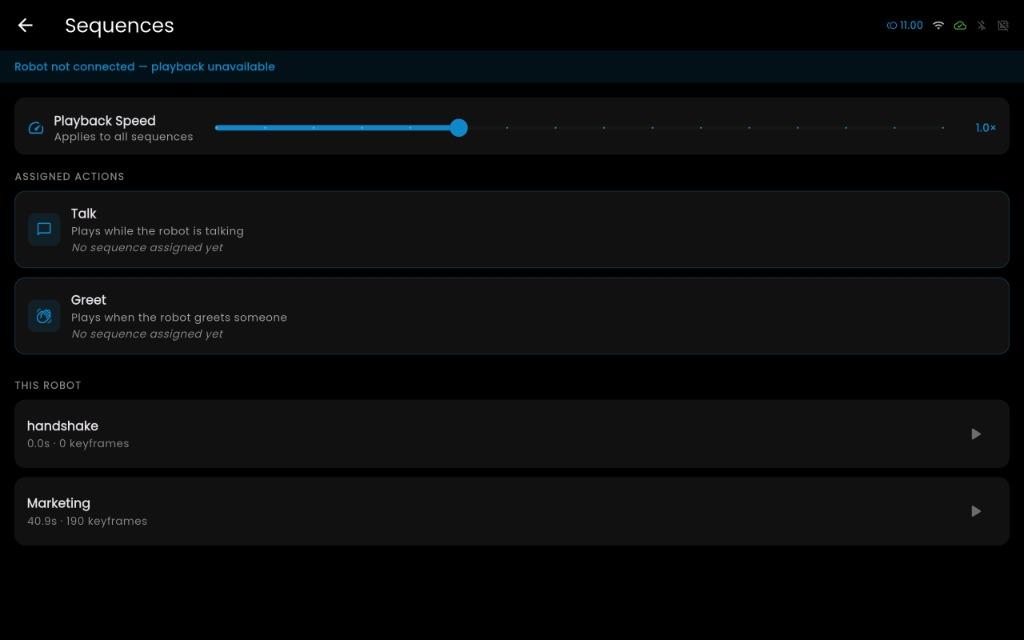
BonicOS shown.
Pause or stop a sequence in BonicOS
- While a sequence is playing, select the Pause icon on its card or in the playback bar to pause it.
- Select Play to resume from the paused position.
- To finish playback, select the square Stop icon in the playback bar.
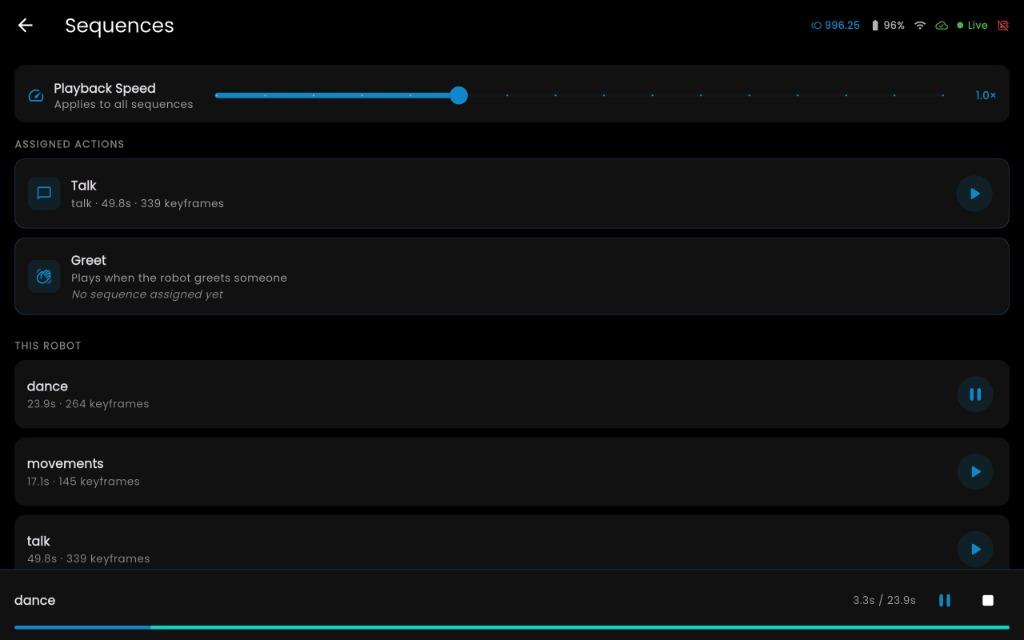
BonicOS shown.
You should see: playback pause or stop. Stop resets playback progress to the beginning; it does not itself return the joints to their home pose.
Before leaving the Sequences screen, keep the area around the robot’s joints clear. Leaving stops playback and commands the fitted joints back to their default pose when the robot connection and control are available.
Note: If the connection is lost, do not assume the robot has stopped or returned to its default pose. Check its physical state before approaching or restarting playback.
On the BonicBot Controller App (Android)
In the Controller App, sequences are located inside the Features section (available on BonicBot A2 Series robots):
- Open the Controller App and ensure your robot is in Direct Mode (Bluetooth), as sequence playback runs directly over a local Bluetooth connection.
- Select the Features tab from the bottom navigation bar.
- Select the Sequence Library card (Explore your saved sequences).
- Select any sequence card to transmit and play the motion immediately.
- Tap the sequence again or select Stop if you need to cancel playback midway.
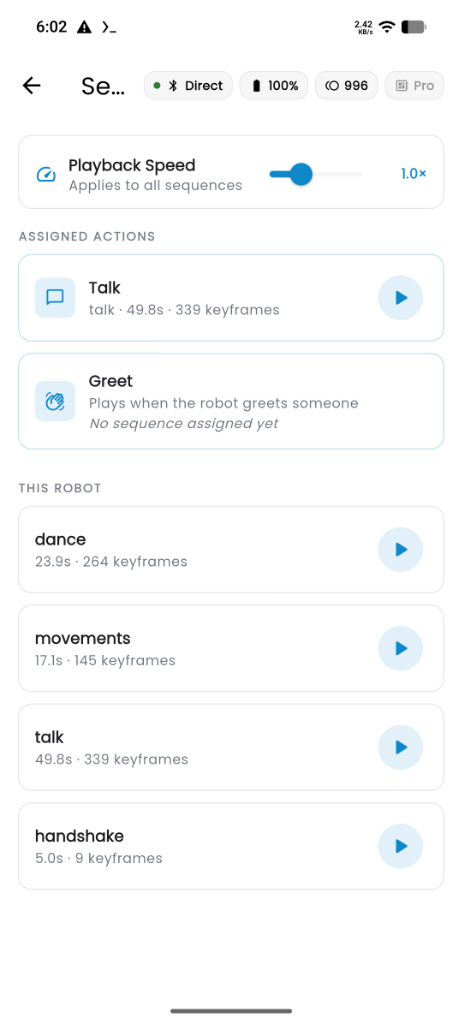
Controller App shown.
You should see: the robot smoothly articulate through all programmed keyframes.