BonicAI Training Studio — User Guide
This guide covers using the Training Studio on the BonicAI platform — generating multi-stage Training Programmes (pre-assessments, presentation slide decks, and post-assessments) with AI, attaching department Knowledge Groups, setting target durations and image generation, and managing/deploying live Training Sessions across your BonicBot robot fleet.
Overview of Training Mode
Training Mode equips BonicBot to function as an interactive AI trainer, corporate instructor, or technical safety evaluator. Deployed in training rooms, manufacturing floors, orientation halls, or workshops, the robot automatically:
- Delivers structured, multi-phase training modules with synchronized BonicOS slides, spoken voice narration, and physical robot motion sequences.
- Conducts automated Pre-Assessment diagnostic checks and Post-Assessment skill evaluation quizzes directly on BonicOS or connected participant devices.
- Grounds explanations dynamically using attached department Knowledge Bases (RAG) for accurate compliance and SOP adherence.
- Enables trainees to join via web/mobile link or QR code sync, tracking attendance, quiz submissions, and session analytics in real time.
All training programmes are authored in the BonicAI Web Studio and deployed directly to one or more robots connected to your department.
Navigating to Training Studio
- Log in to the BonicAI Web Platform .
- Select your organisation and navigate to your target Department (e.g. Autobonics → R&D or Human Resources).
- In the left sidebar, locate the STUDIO section and expand Training.
- You will see two core sub-sections:
- Program — AI training programme generator & multi-phase authoring workspace
- Sessions — launch deployments, share participant QR codes, monitor active sessions, and review run history
Program — AI Training Programme Generator
The Program section allows you to instantly generate complete, production-ready training modules using AI prompts backed by your department’s knowledge bases.
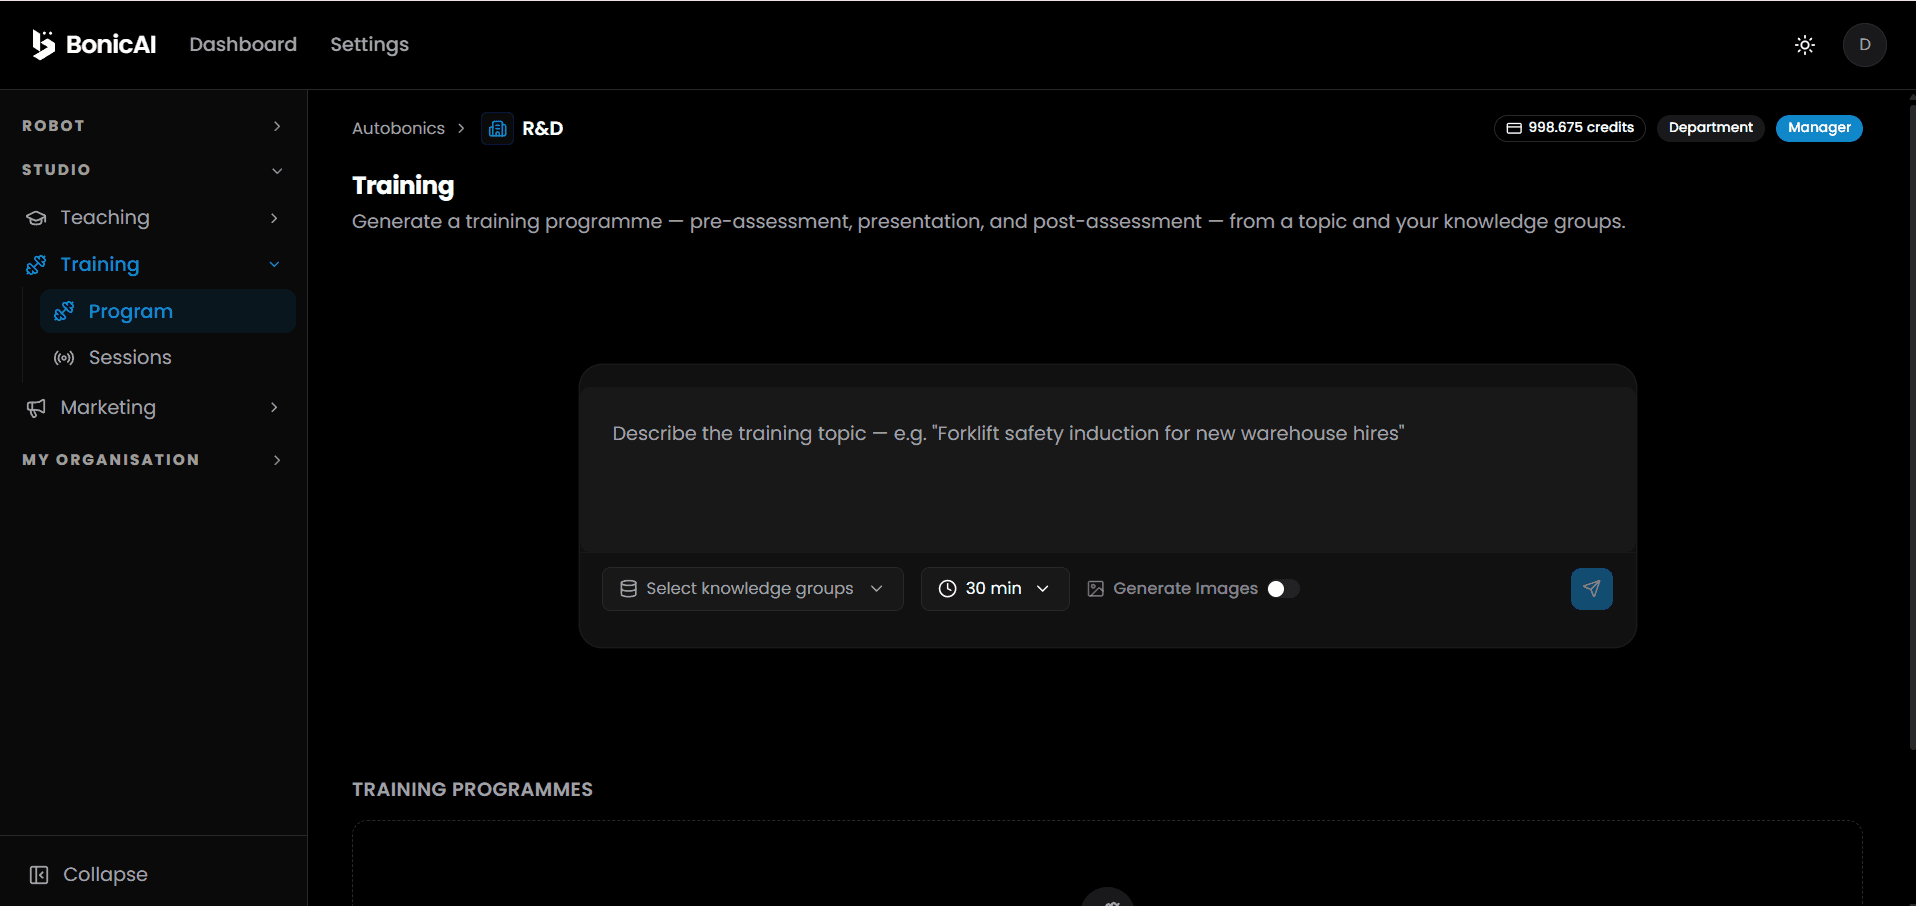
Generating a Training Programme
- Click Program under the Training sidebar menu.
- In the main prompt text box (“Describe the training topic — e.g. ‘Forklift safety induction for new warehouse hires’”), enter your training objective or instructions.
- Configure generation settings inside the prompt box:
- Select Knowledge Groups: Open the dropdown to attach specific department Knowledge Bases (RAG) so the AI generates questions and content aligned with your official SOPs and documentation.
- Target Duration Selector: Click the duration dropdown (e.g.
30 min,15 min,45 min,60 min) to set the expected length of the training session. - Generate Images Toggle: Enable the Generate Images toggle switch to automatically create AI visual diagrams and slide illustrations for the presentation deck.
- Click the Send / Generate button (blue paper plane icon).
- The AI processes your topic prompt and constructs a full 3-phase training programme.
Training Programme Editor — 3-Phase Module Builder
Once generated, the Training Programme Editor provides a unified workspace with top-bar mode toggles (Content vs. AI Assistant) and three structured tabs: Pre-Assessment, Slides, and Post-Assessment.
1. AI Training Assistant & Topic Objectives
When starting a new module, the Training Assistant chat panel analyzes the topic prompt, extracts target audience metrics, and defines clear learning objectives:
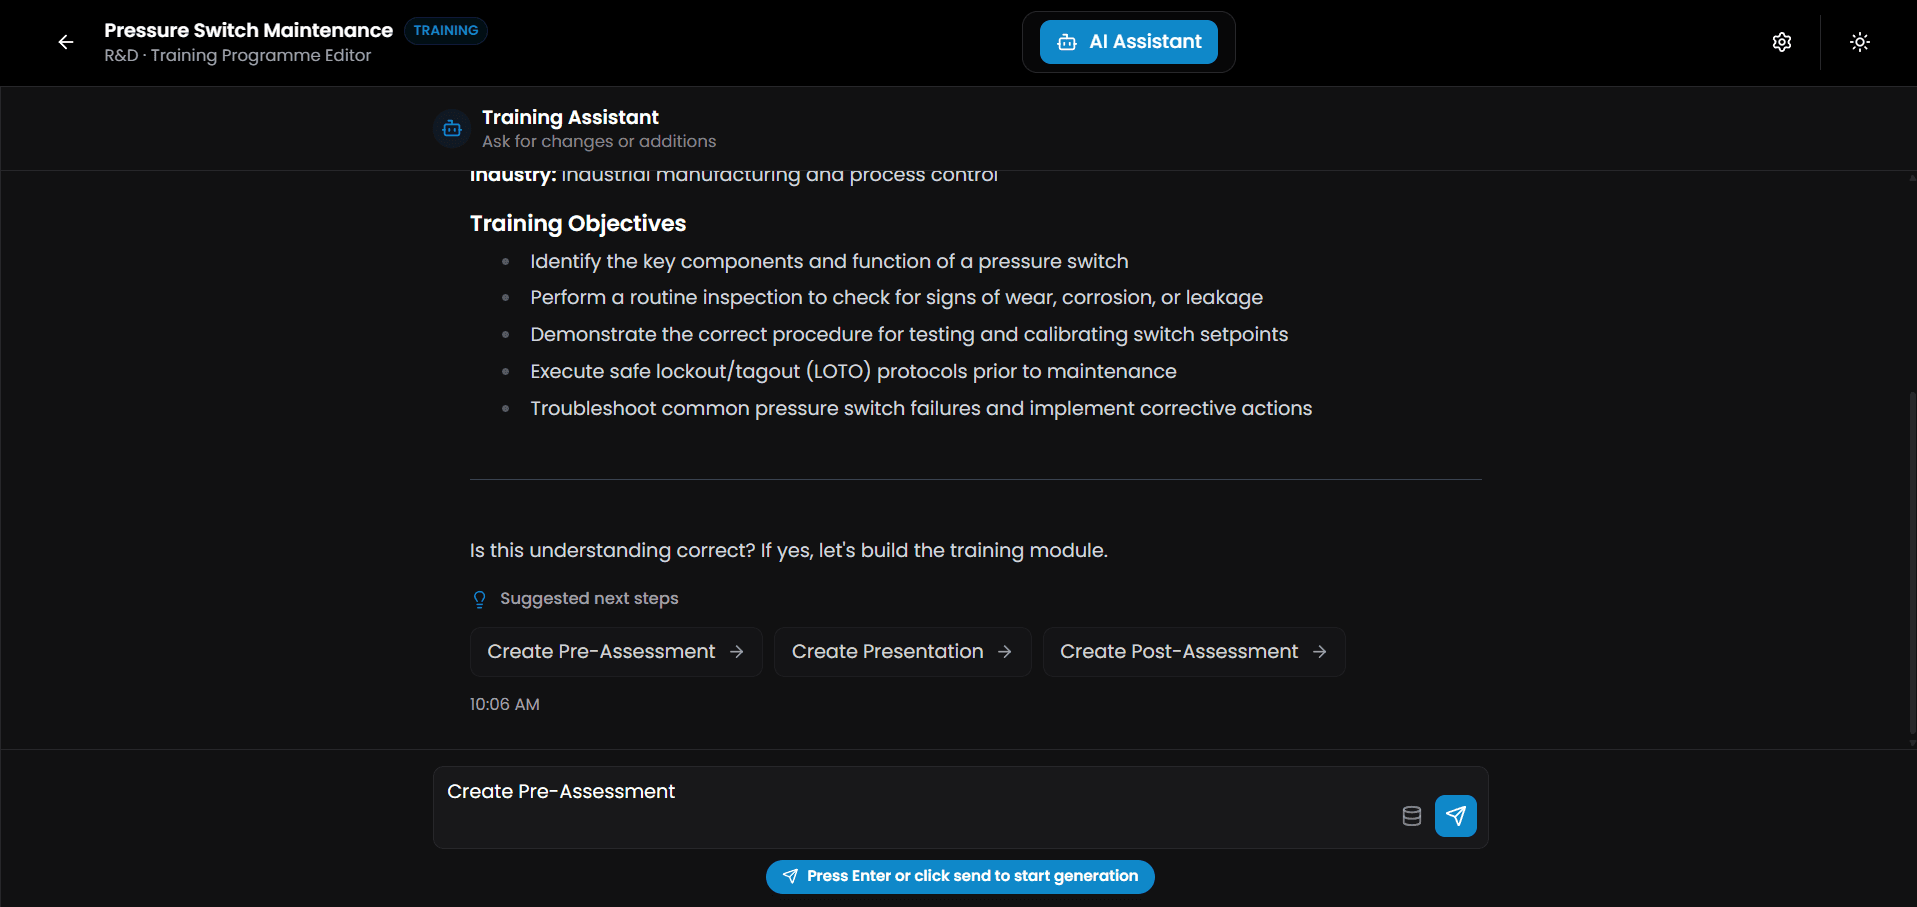
- Topic & Target Audience: Summarizes the domain (e.g. “Pressure Switch Maintenance”) and target participants (e.g. “Maintenance technicians and plant operators”).
- Training Objectives: Generates key learning milestones (e.g., identifying components, lockout/tagout protocols, testing setpoints, troubleshooting failures).
- Suggested Next Steps: Quick action chips allow one-click generation:
Create Pre-Assessment →Create Presentation →Create Post-Assessment →
2. Pre-Assessment Module
Click the Pre-Assessment tab to review and edit diagnostic pre-test questions:
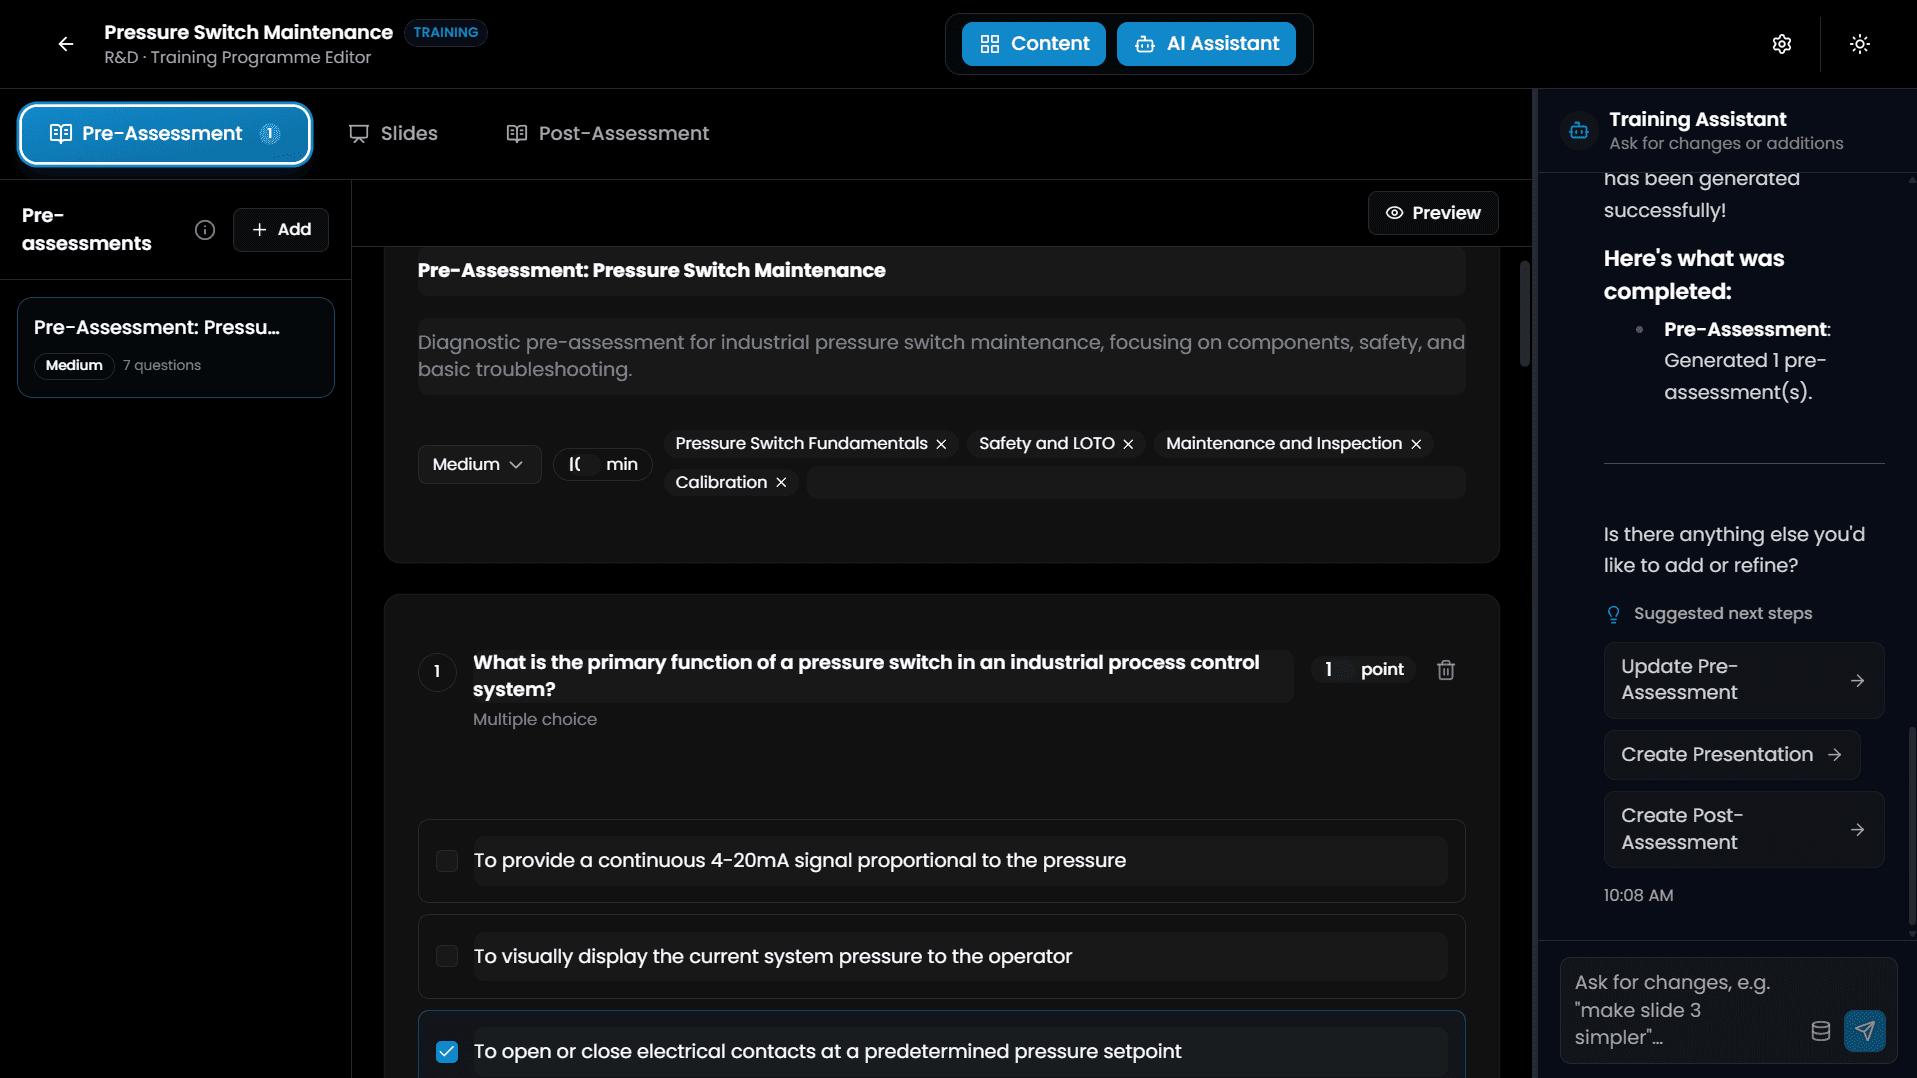
- Module Header: Configure Pre-Assessment Title, Description, Difficulty badge (
Beginner,Medium,Advanced), Target Time (10 min), and Topic Tags (Pressure Switch Fundamentals,Safety and LOTO,Calibration). - Question Editor:
- Question Text: Spoken/displayed diagnostic question (e.g. “What is the primary function of a pressure switch in an industrial process control system?”).
- Input Type & Points: Supports Multiple Choice and True/False with custom point weightings (e.g.
1 point). - Option Selection: Mark the correct answer option (checked in blue for reference; hidden from trainees during test).
- Post-Grading Explanation: Add explanation notes displayed after student submission.
- + Add Question: Click to insert additional diagnostic questions manually.
3. Presentation Slides & Visual Deck Editor
Click the Slides tab to open the full visual presentation deck editor:
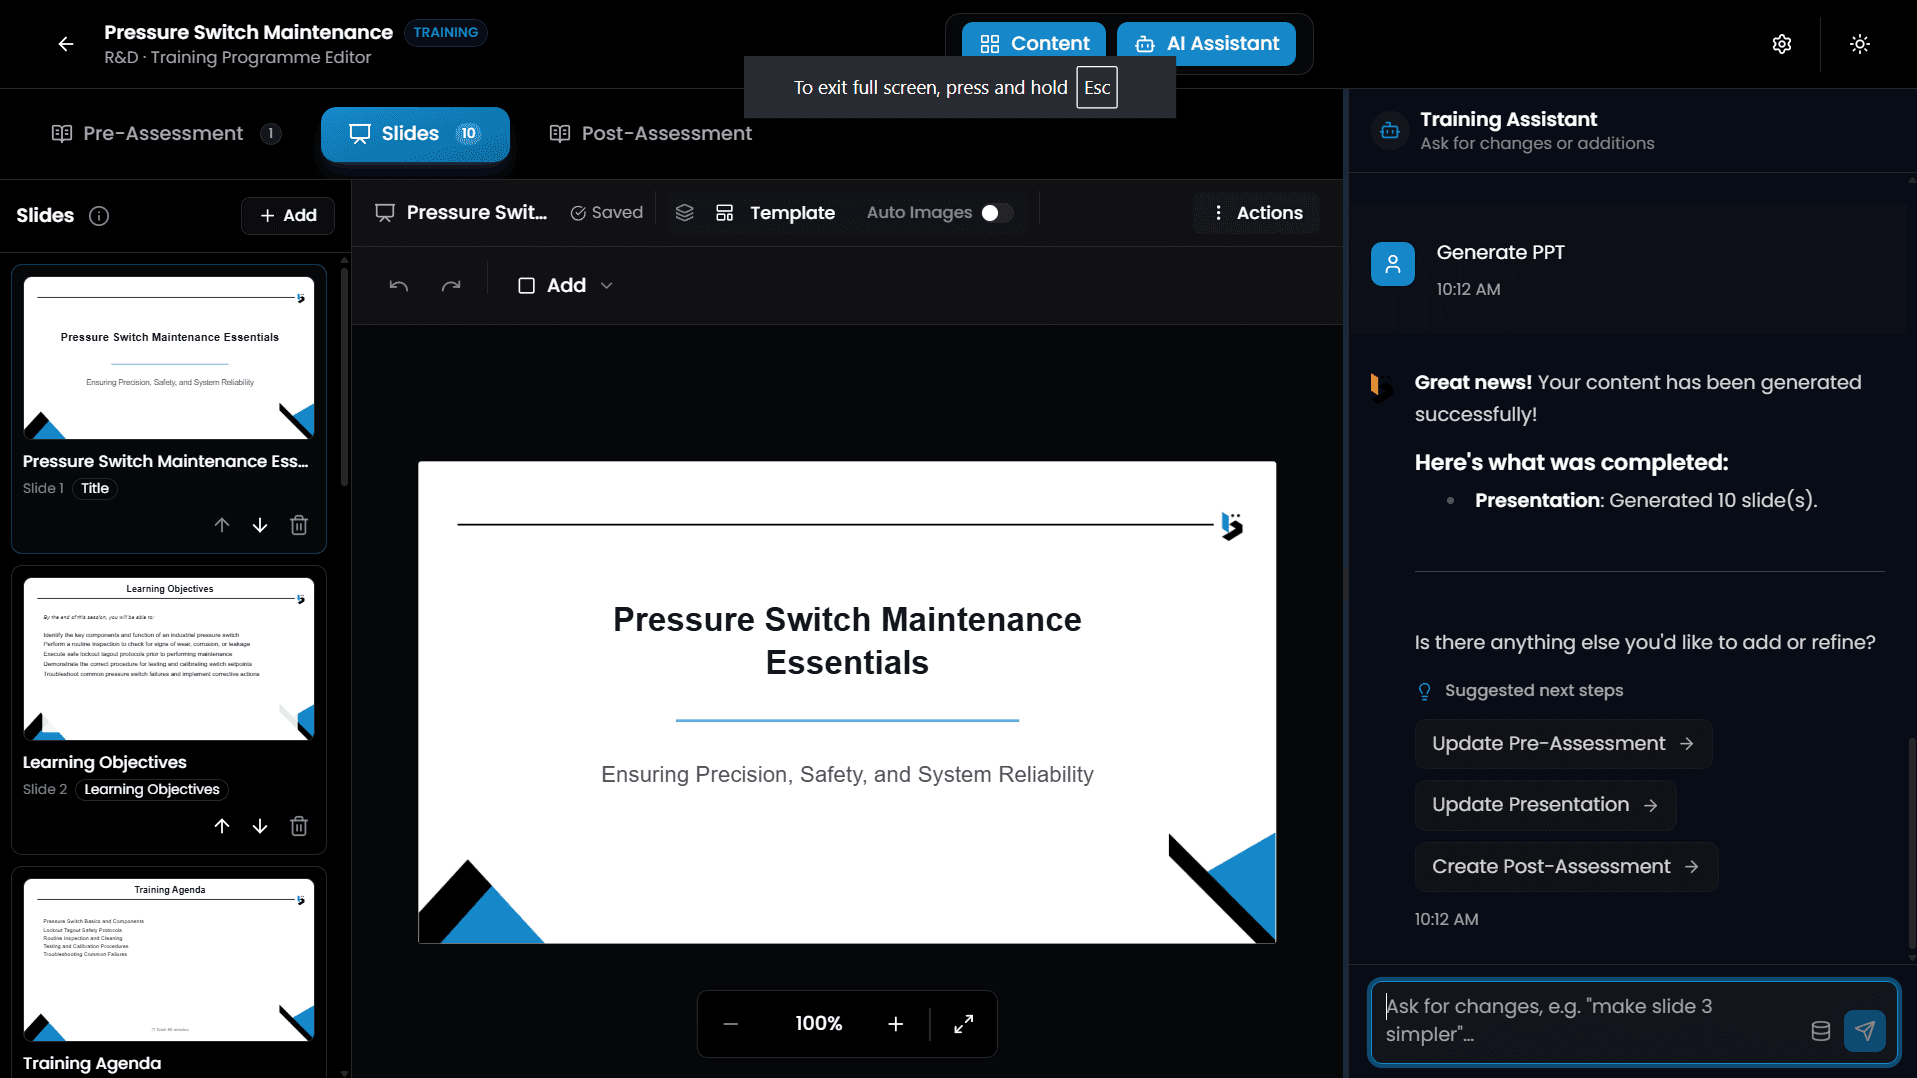
- Left Slide Thumbnails: Vertical carousel showing all generated slides (e.g. Slide 1 Title, Slide 2 Learning Objectives, Slide 3 Training Agenda). Reorder or delete slides using arrow and trash icons.
- Center Canvas Viewport: Full interactive preview of the slide rendering in BonicOS. Includes canvas zoom controls (
100%) and Fullscreen toggle. - Toolbar Controls: Quick actions for Template selection, Auto Images generation toggle, + Add Slide dropdown, and Actions menu.
- AI Slide Generation: Use the Training Assistant chat panel on the right (e.g. typing “make slide 3 simpler”) to adjust layout, narration scripts, or visual elements dynamically.
4. Post-Assessment Module
Click the Post-Assessment tab to construct the final evaluation quiz:
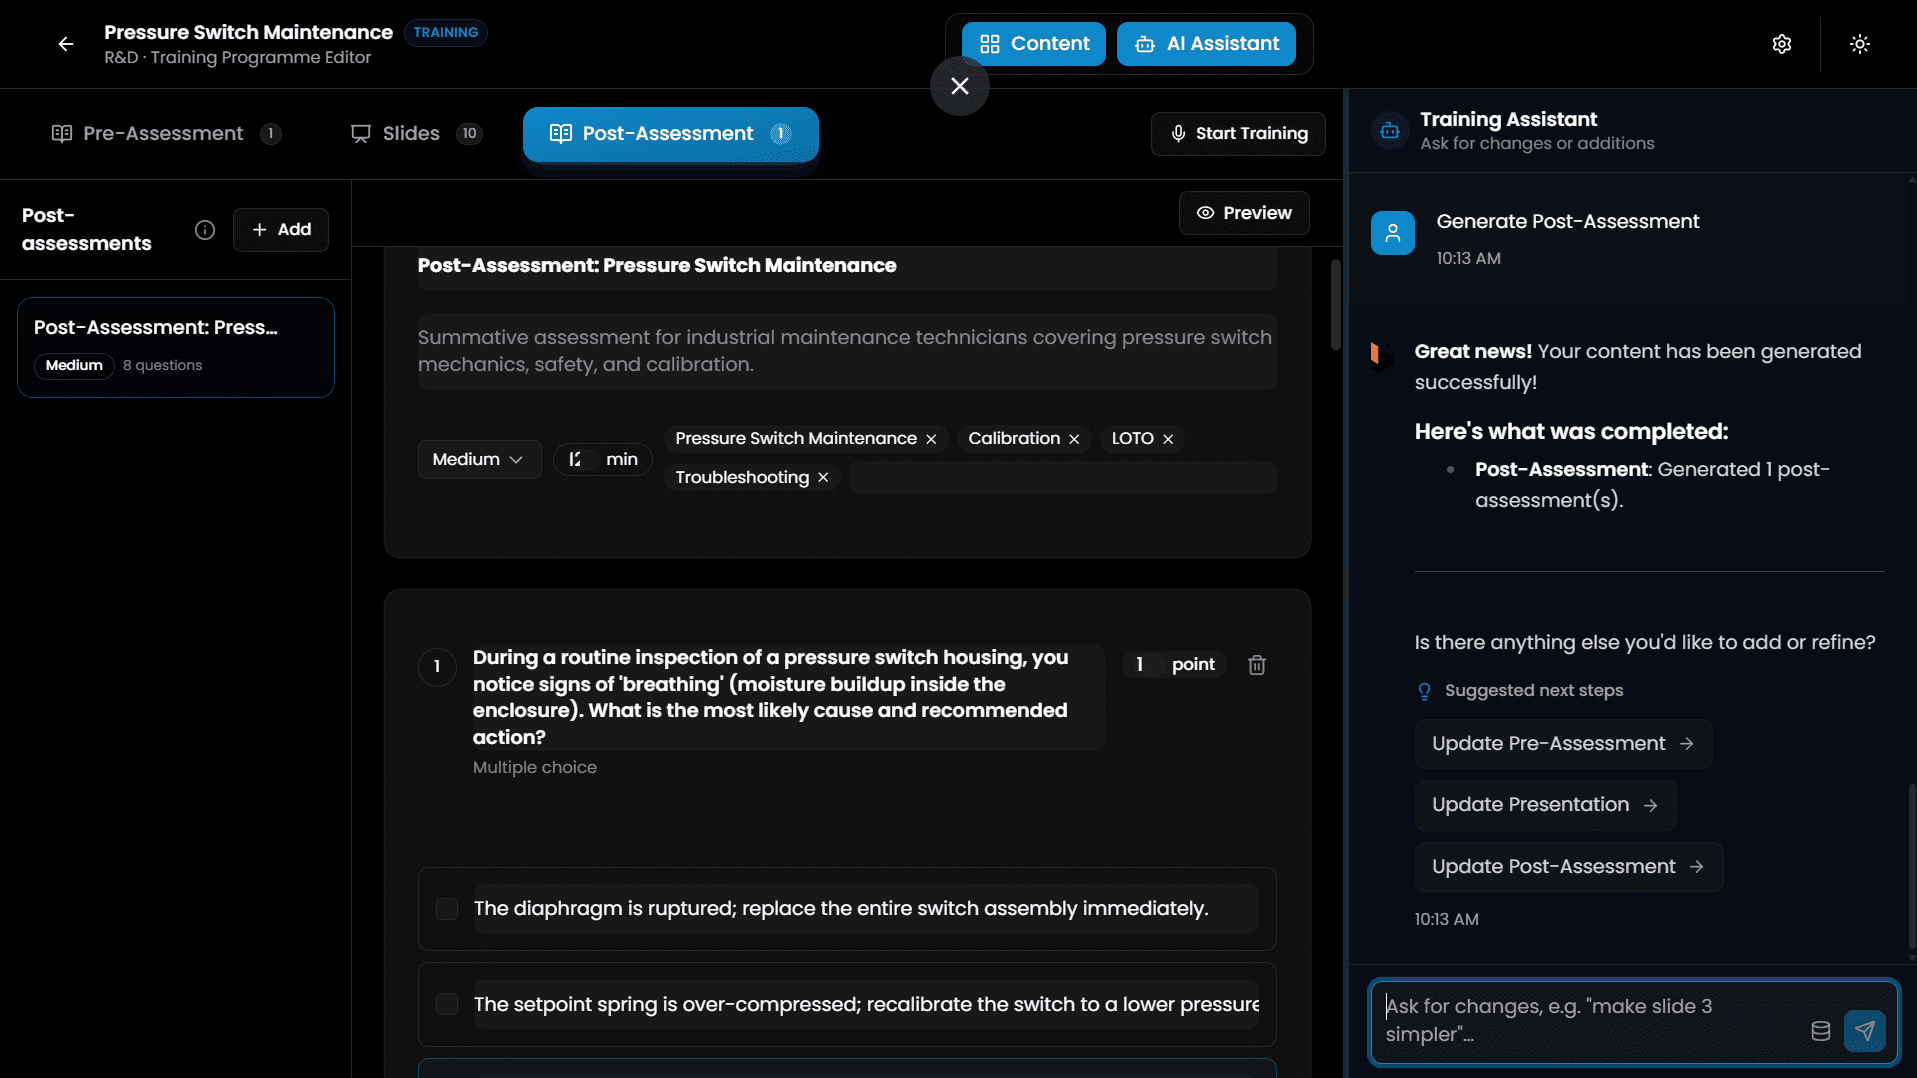
- Summative Evaluation: Configures post-training questions to verify content mastery after presentation completion.
- Question Customization: Edit scenario-based questions (e.g. “During a routine inspection of a pressure switch housing, you notice signs of ‘breathing’… What is the most likely cause?”).
- Direct Session Deployment: Click 🎙️ Start Training in the top header bar to proceed directly to live robot deployment.
Sessions — Deploying Training Sessions
A Training Session deploys a selected training programme to active BonicBot hardware and creates interactive participant join links.
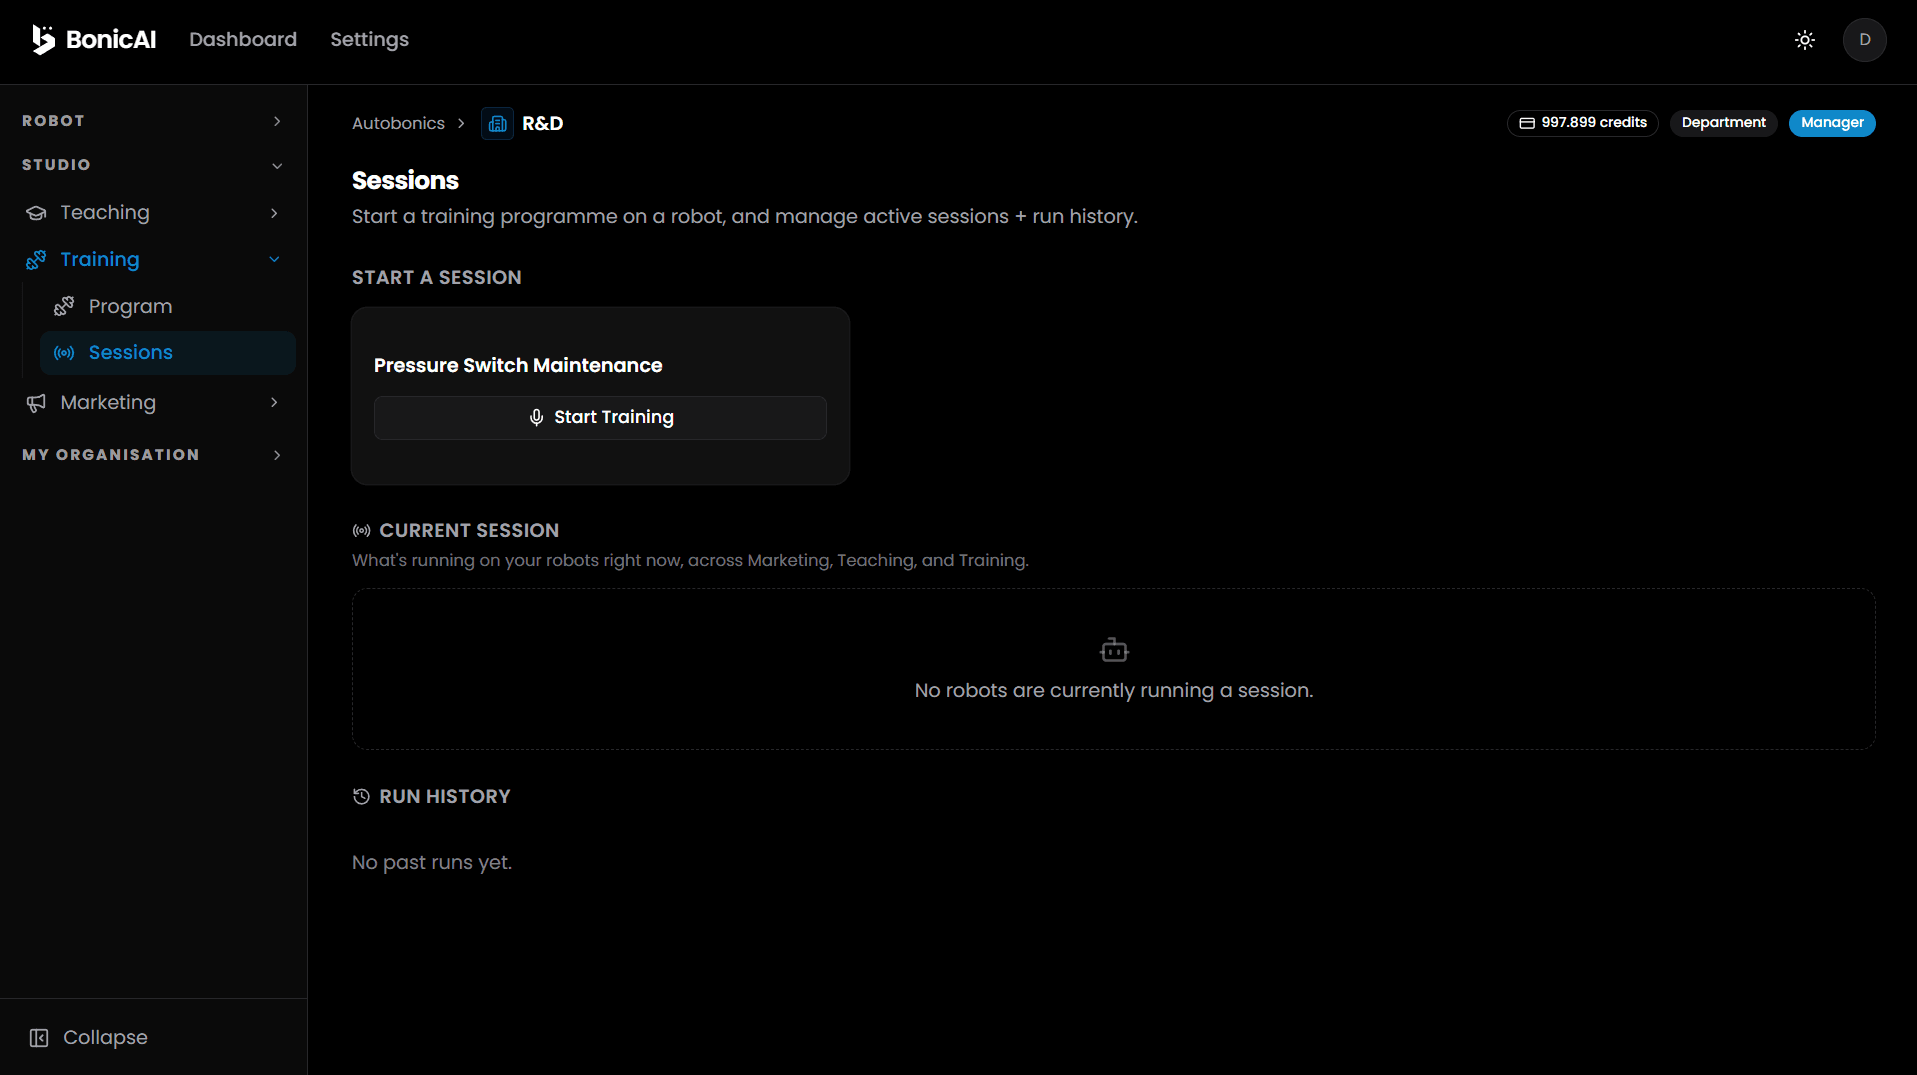
1. Sessions Dashboard Overview
- START A SESSION: Displays authored training programme cards (e.g. Pressure Switch Maintenance) with a prominent 🎙️ Start Training button.
- CURRENT SESSION: Shows real-time telemetry for active training sessions running on your robot fleet.
- RUN HISTORY: Logs past completed session records, participant completion rates, and average quiz scores.
2. Start Training on Robot Dialog
Clicking 🎙️ Start Training opens the Start Training on Robot dialog:
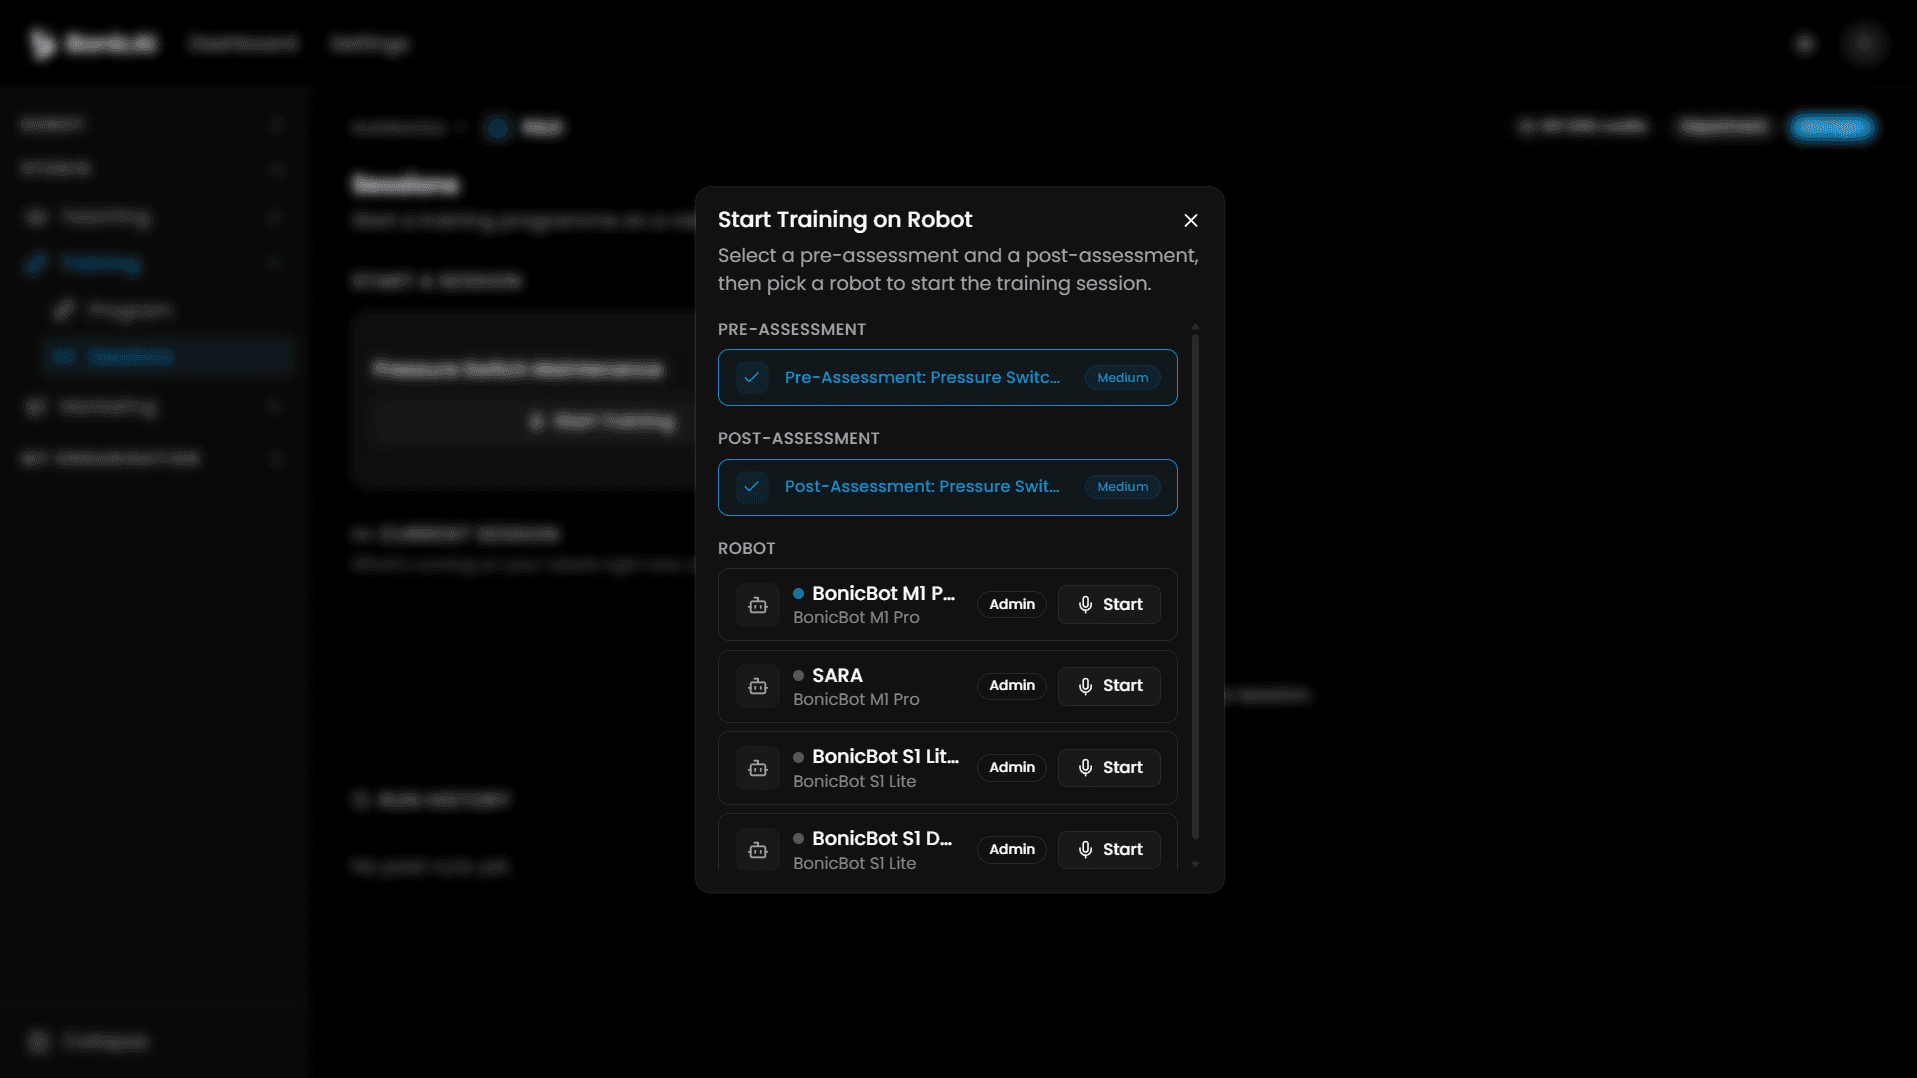
- Select your target PRE-ASSESSMENT module (e.g. Pre-Assessment: Pressure Switch Maintenance).
- Select your target POST-ASSESSMENT module (e.g. Post-Assessment: Pressure Switch Maintenance).
- Select your target ROBOT unit from your department’s fleet (e.g. BonicBot M1 Pro, SARA, BonicBot S1 Lite, or BonicBot S1 Demo) and click 🎙️ Start.
3. Agent & Motion Sequence Selection
After selecting your robot, the Confirm Training Session dialog pops up to attach AI personality and physical gestures:
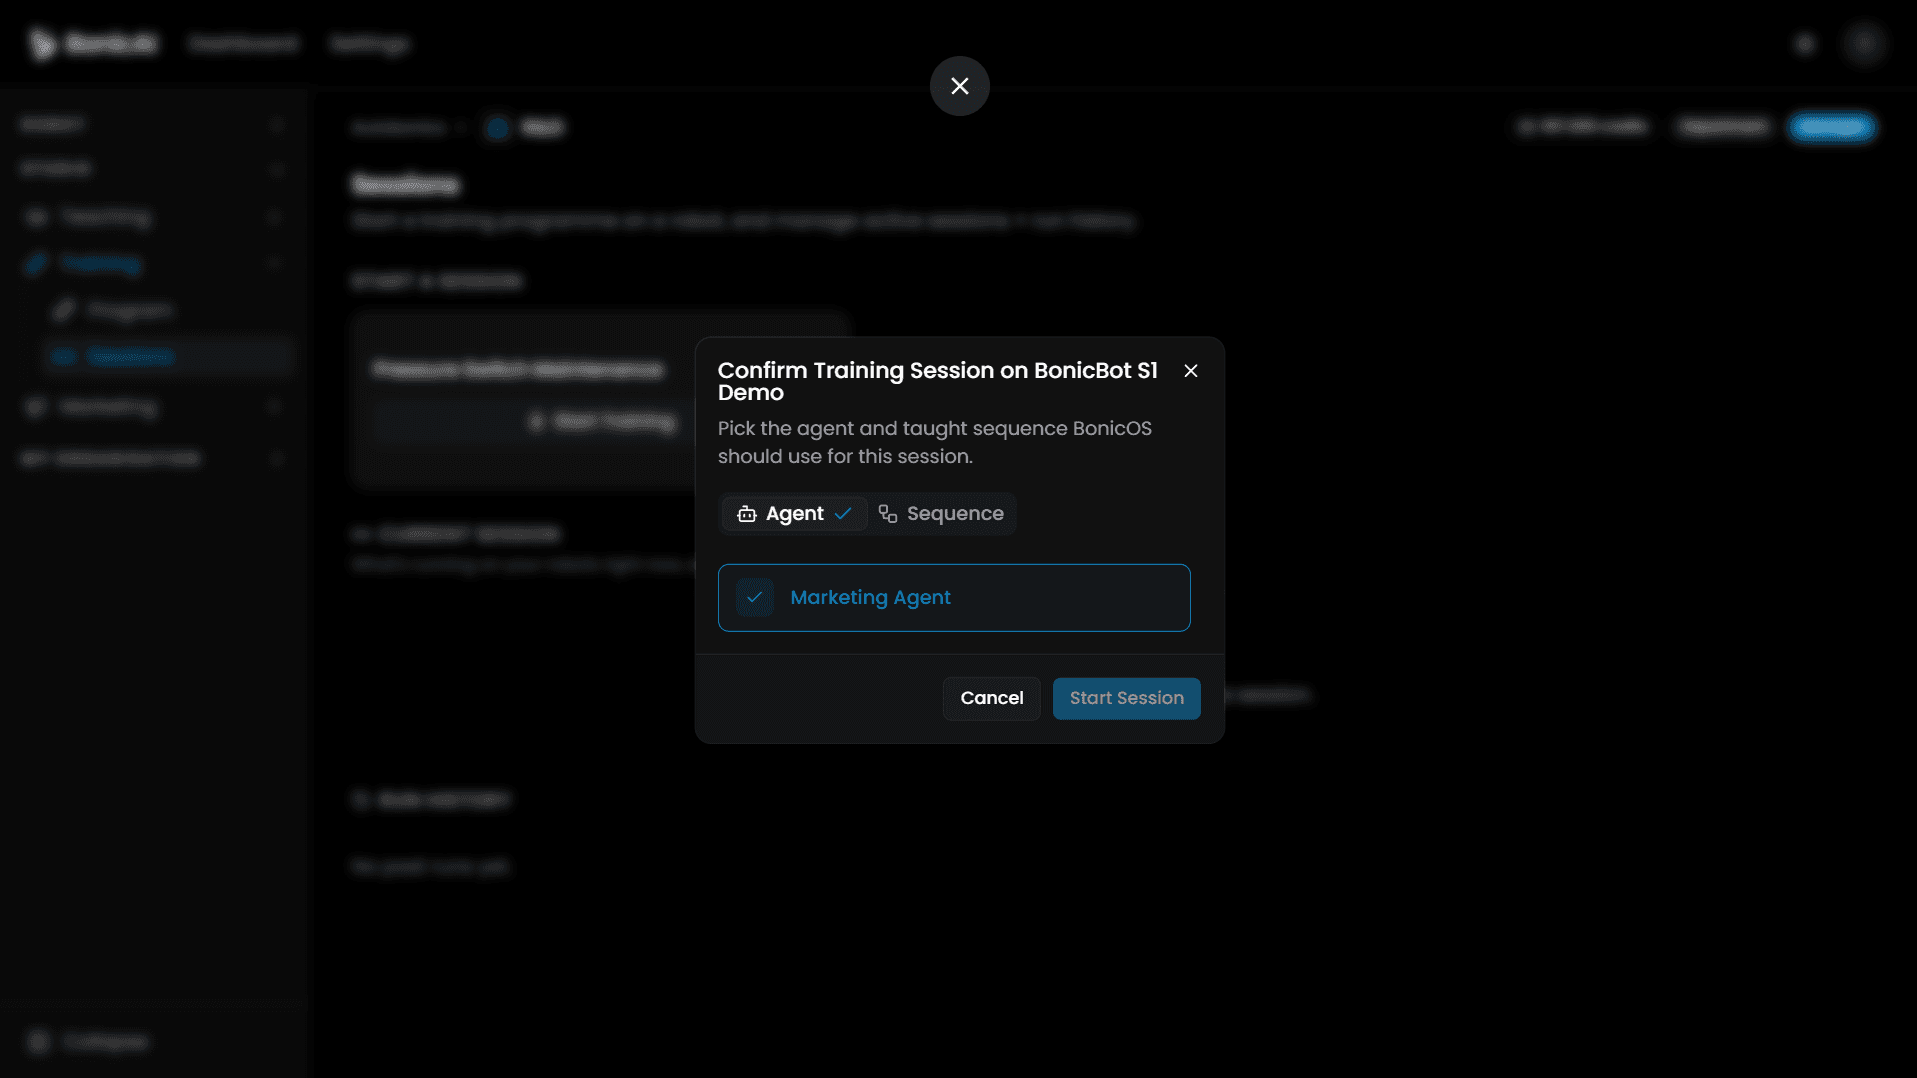
- Agent Tab: Select the Department Agent (e.g. Marketing Agent or Safety Tutor Agent) to handle spoken participant Q&A during presentation phases.
- Sequence Tab: Select a taught motion sequence (e.g. handshake, wave, point) for the robot to execute during key lesson transitions.
- Click Start Session to launch.
4. Sharing & Trainee QR Code Sync
Once started, click Share Session to invite trainees:
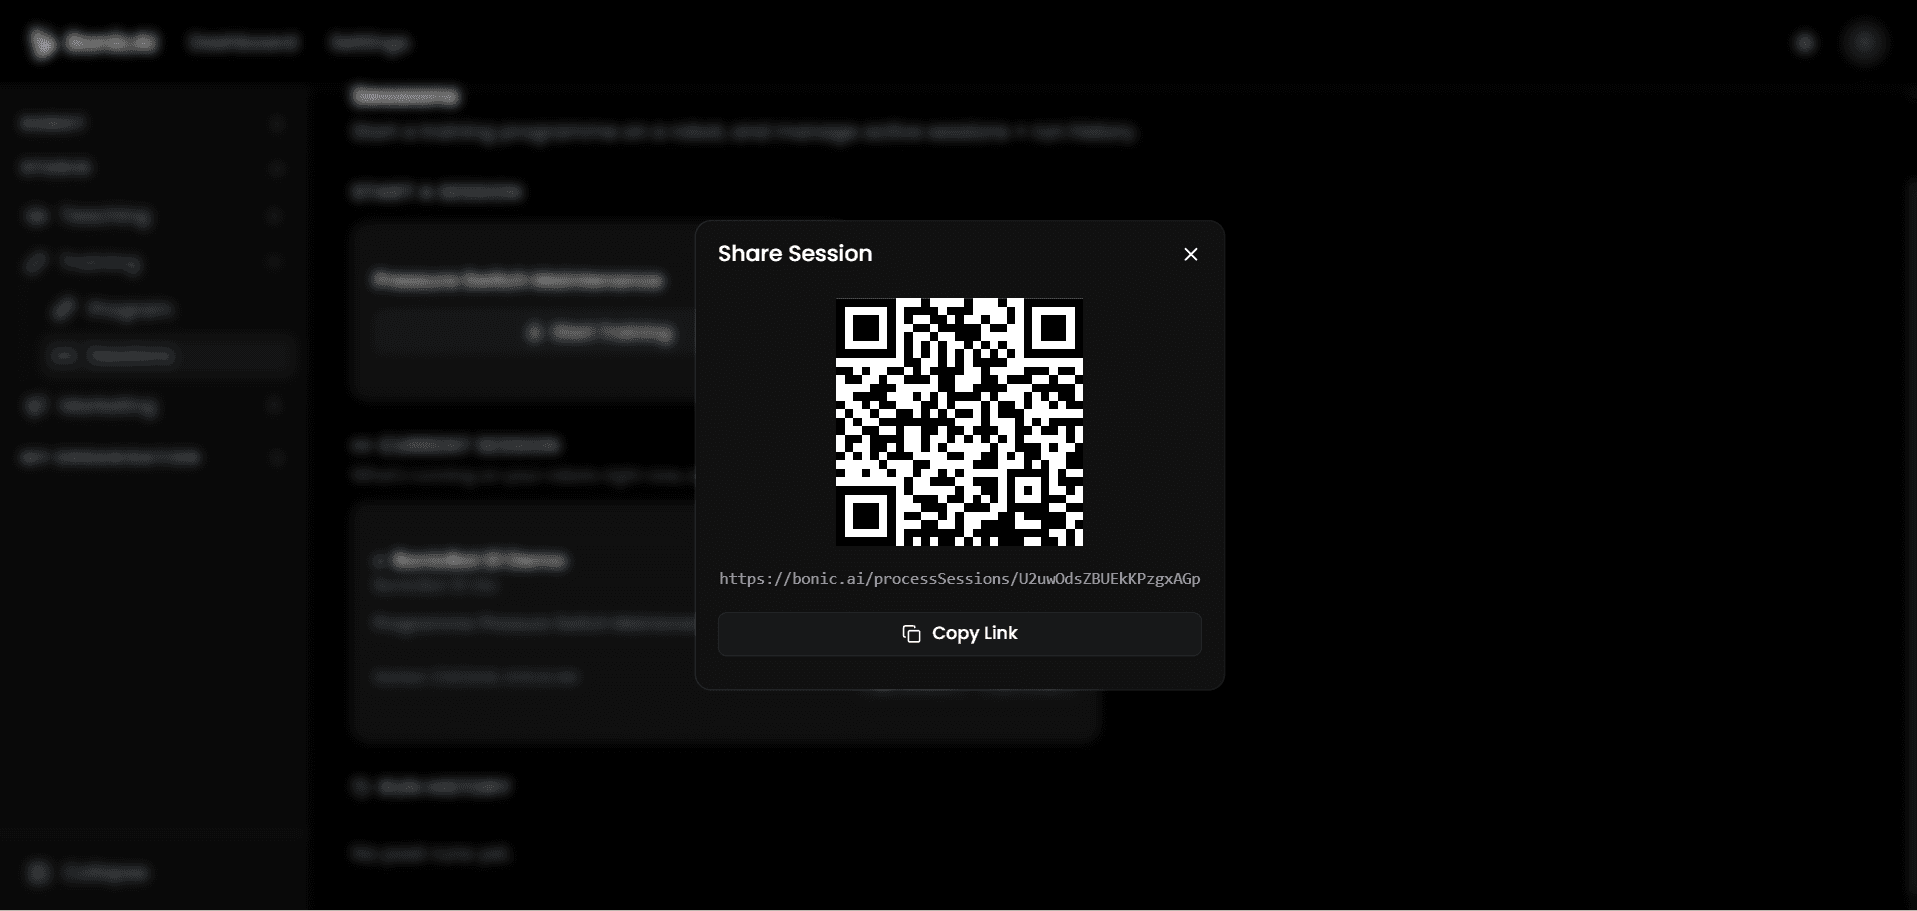
- QR Code: Trainees scan the QR code with a smartphone or tablet to open the live training interface instantly.
- Direct Web Link: Click Copy Link to copy the unique session URL (
https://bonic.ai/processSessions/...) for distribution via email or web chat.
Live Training Session Execution & Progression
When a session is active, the trainer and participants access a synchronized live session viewer with top-bar stage progression controls.
1. Trainee Join & Waiting Lobby
Trainees opening the session link enter the live waiting lobby:
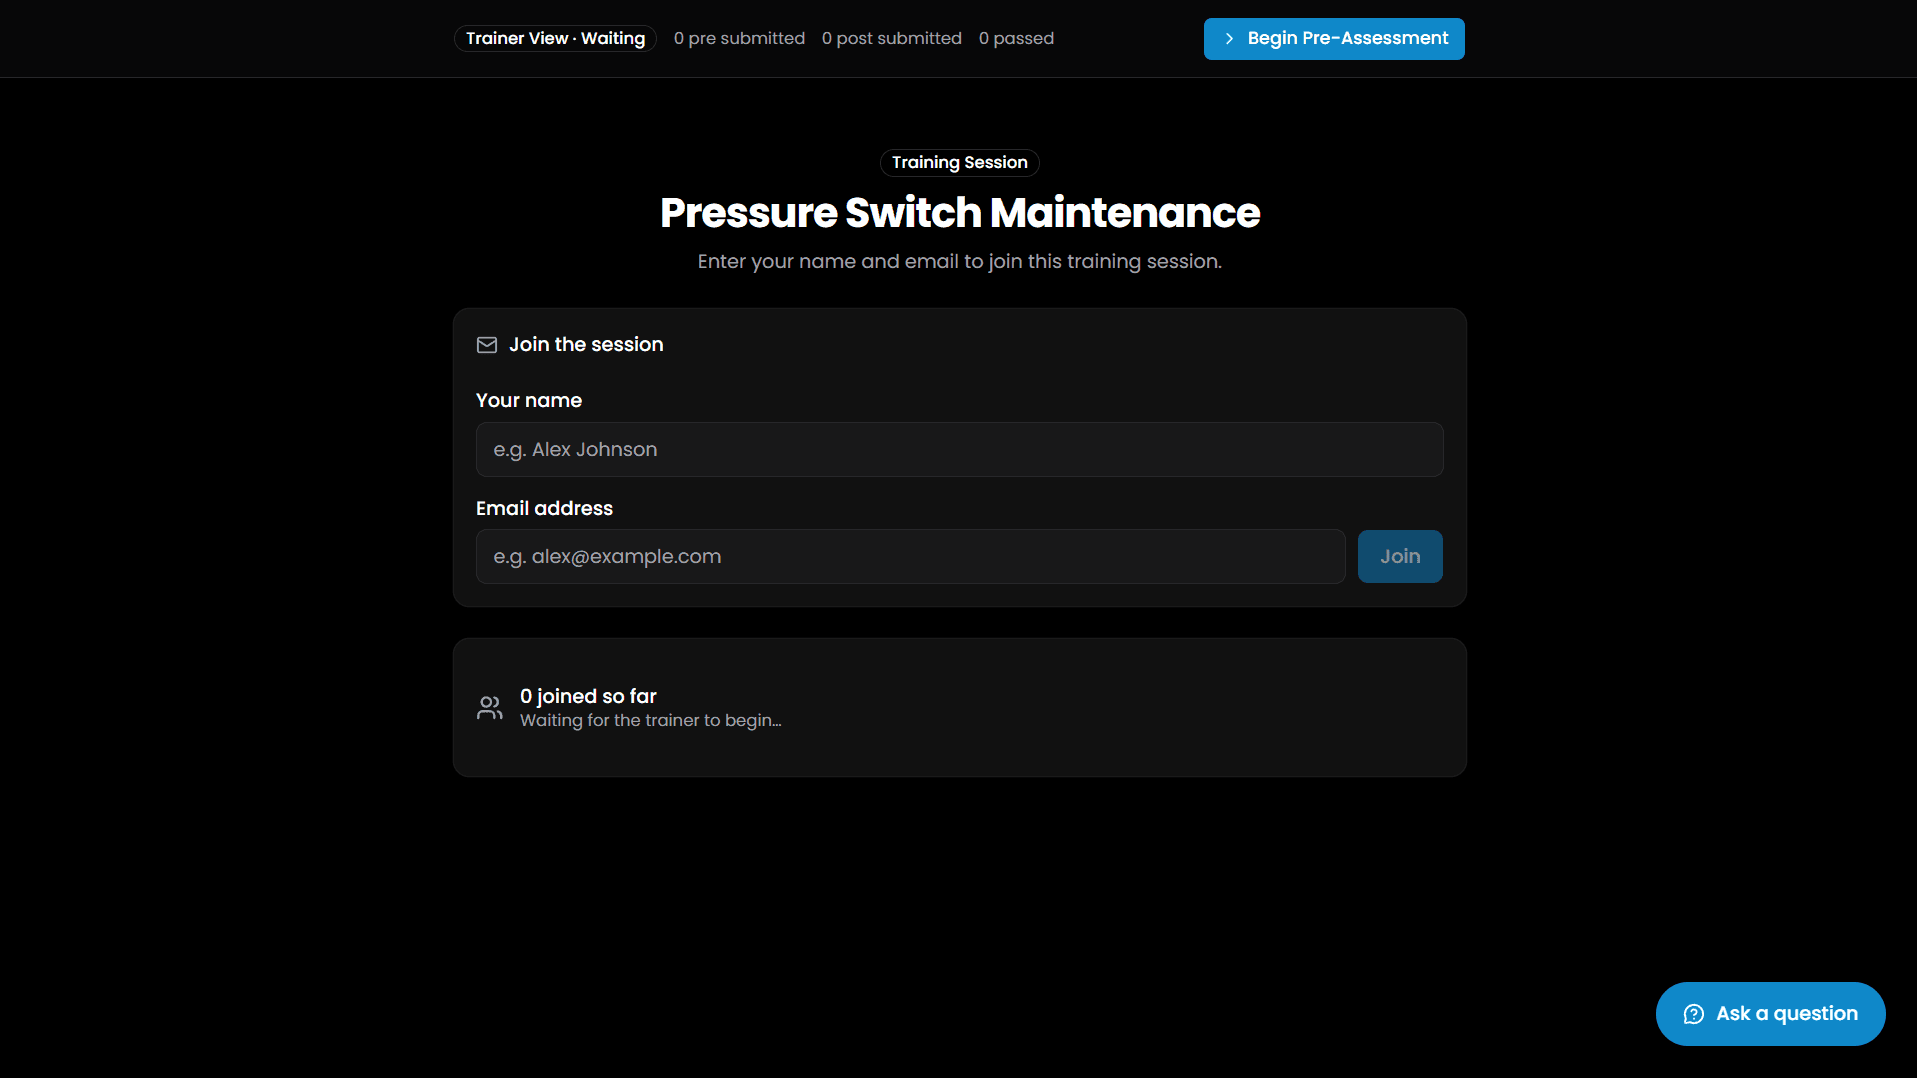
- Participant Registration: Trainees enter their Name (e.g. Alex Johnson) and Email address (alex@example.com) and click Join.
- Real-Time Participant Tracker: Displays active joined count (e.g.
0 joined so far/Waiting for the trainer to begin...). - Interactive Q&A: Trainees can click the floating 💬 Ask a question button at any point to submit questions to the BonicBot AI Agent.
- Trainer View Control Bar: Top bar displays live telemetry (
0 pre submitted,0 post submitted,0 passed) and the stage progression button:> Begin Pre-Assessment.
2. Pre-Assessment & Slide Presentation Stage
Clicking > Begin Pre-Assessment opens diagnostic testing for all joined participants. Once complete, click > Start Lecture to advance to the presentation deck:
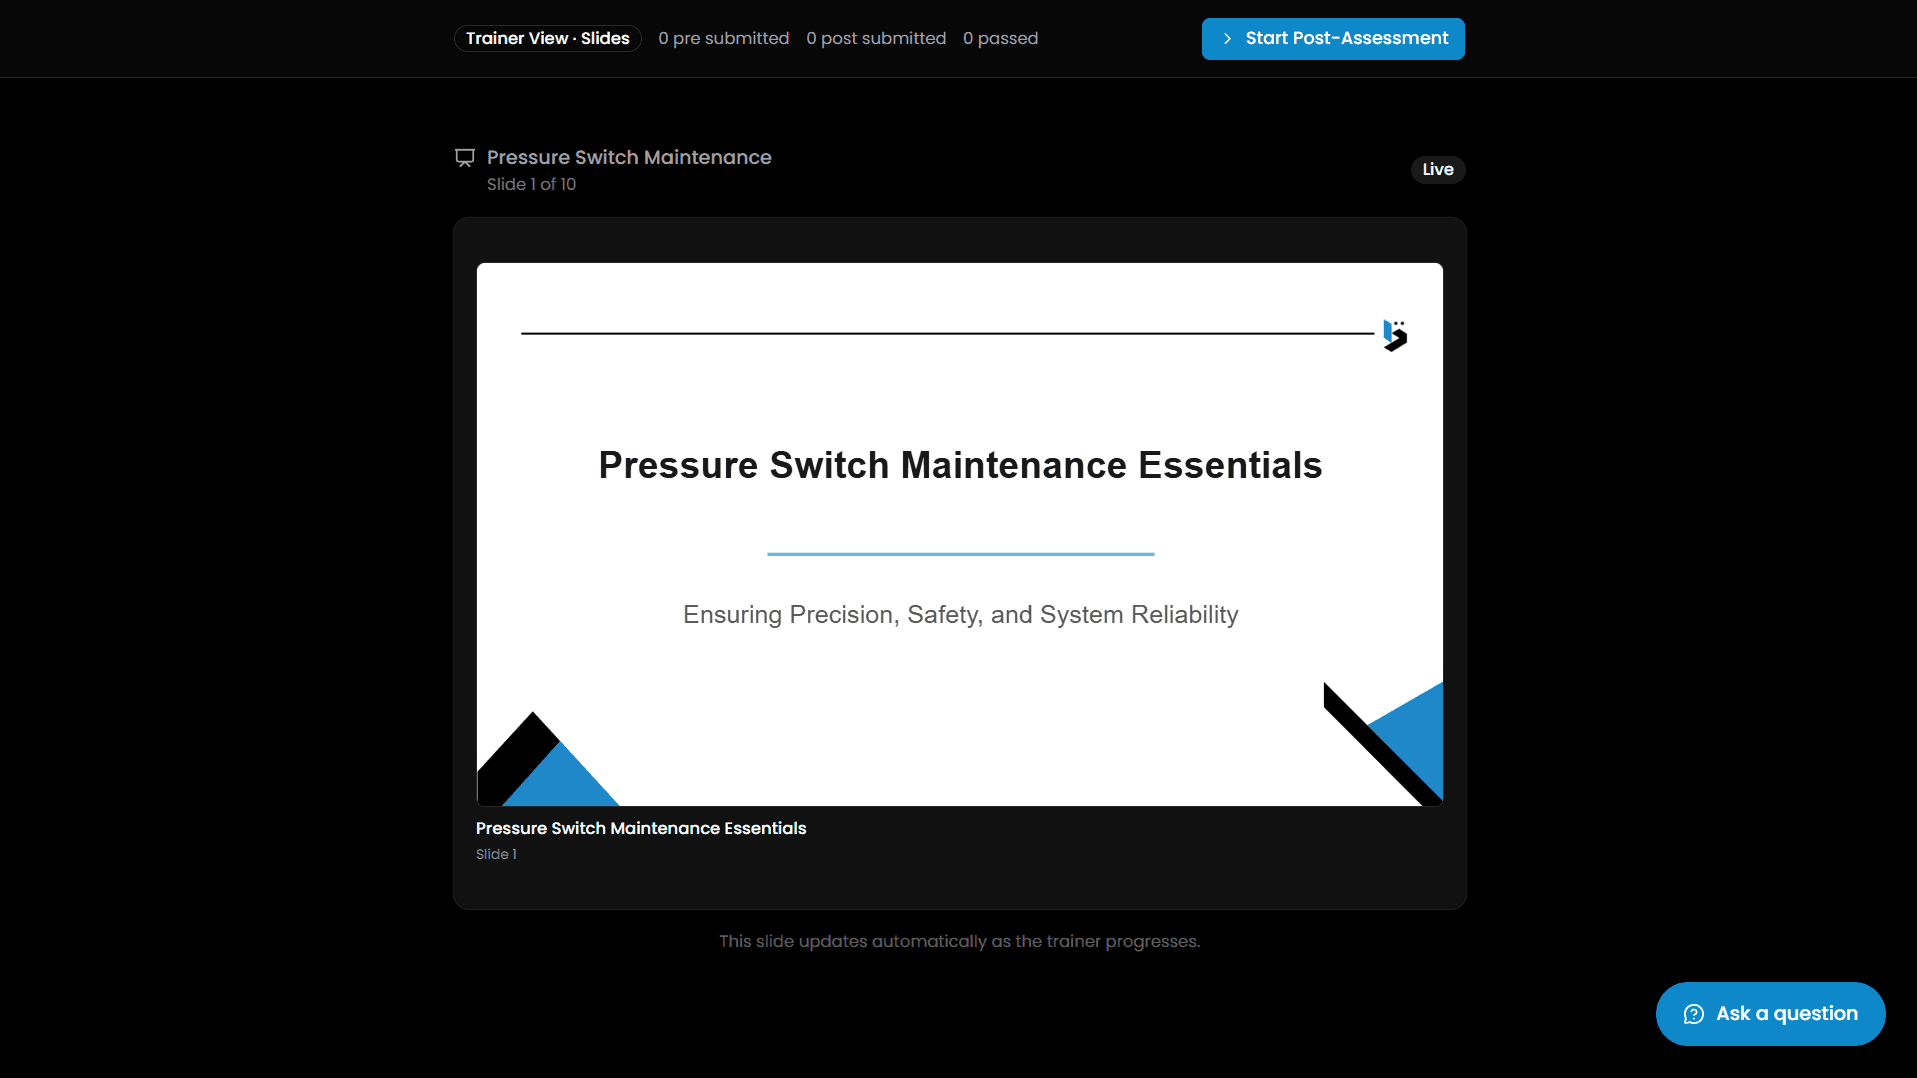
- Synchronized Slide Progression: Displays active slide (
Slide 1 of 10) with a green Live badge. Slides update automatically on all participant screens as the trainer or BonicBot advances. - Trainer Stage Trigger: Click
> Start Post-Assessmentin the top bar when the presentation finishes to transition trainees into final evaluation.
3. Post-Assessment & Session Completion Stage
Trainees complete their post-training evaluation questions. Click > Finish Session to close the session:
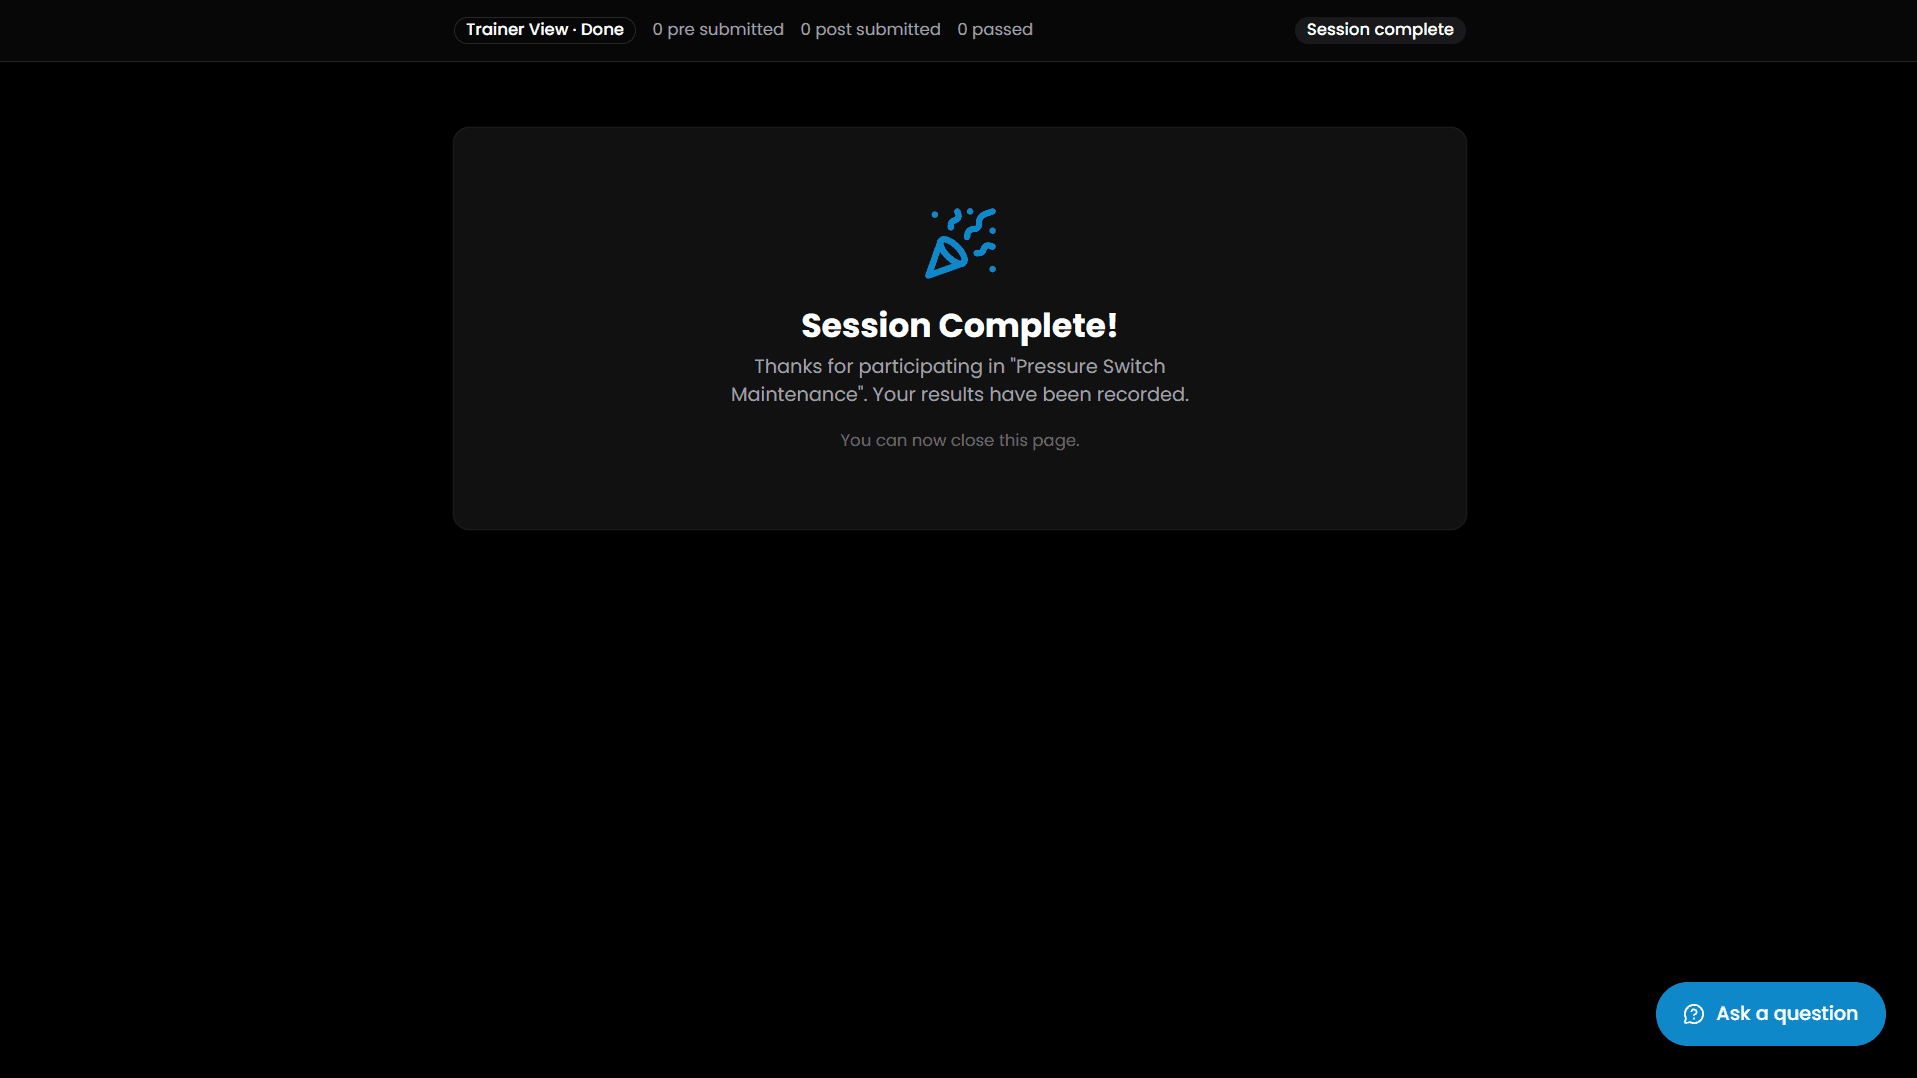
- Session Summary: Confirms submission recording (“Session Complete! Thanks for participating in ‘Pressure Switch Maintenance’. Your results have been recorded.”).
- Score Logging: Final scores, completion rates, and pre-vs-post improvement metrics are automatically logged into the Sessions Run History for export.
Best Practices for Training Deployments
- Ground Content with Knowledge Groups: Always attach official SOPs, engineering manuals, or safety PDFs during generation to ensure generated questions and explanations strictly reflect company policies.
- Enable Image Generation: Turn on the Generate Images toggle during creation to produce clear visual diagrams and slide illustrations in BonicOS.
- Pair with Motion Sequences: Link taught physical gestures (e.g., pointing to screen or gesturing during key slides) to keep live training interactive and memorable.
- Utilize Trainee QR Sync: Display the Share Session QR code on a projector or room screen so attendees can join and complete quizzes from their own mobile devices while following along with BonicBot.
- Verify Hardware & Battery: Check robot connection status and battery levels from the Robot Dashboard before starting live training sessions.